1. Product Overview
This manual provides detailed instructions for the installation, operation, and maintenance of your MXT SuperLive Plus 5MP 16CH Hybrid Digital Video Recorder (DVR). This DVR supports up to 16 channels of 5MP Lite 1080p HD-TVI/CVI/AHD analog video input and up to 8 channels of IP video input, featuring H.265 compression and a pre-installed 2TB HDD. It is NDAA compliant and offers free remote surveillance via the SuperLive Plus mobile application.

Image 1.1: Front and rear view of the MXT 16CH Hybrid DVR, alongside a 2TB hard disk drive.

Image 1.2: Front view of the MXT 16CH Hybrid DVR, highlighting its NDAA compliance.
2. Package Contents
Please verify that all items listed below are included in your package. If any items are missing or damaged, please contact customer support.
- 1x MXT SuperLive Plus 16CH Hybrid DVR (with pre-installed 2TB HDD)
3. Key Features
- Hybrid Video Input: Supports 16 channels of 5MP Lite 1080p HD Analog (TVI/AHD/CVI) video input and up to 8 channels of IP video input.
- Storage: Equipped with a 2TB HDD, expandable with 2x SATA ports (up to 10TB each) and 1x E-SATA port.
- Video Output: Multiple display options including 1x HDMI, 1x VGA, and 1x BNC output.
- Compression: Utilizes H.265 video compression for efficient storage and bandwidth usage.
- Remote Surveillance: Free remote monitoring via the SuperLive Plus mobile application for iOS and Android devices.
- Compliance: NDAA Compliant.
- Audio Support: Supports Audio-Over-Coax for built-in mic cameras (HD-TVI format only) and RCA audio input/output.

Image 3.1: Visual representation of detailed features, dimensions, and rear panel layout.
4. Setup Guide
4.1 Connecting the DVR
- Power Connection: Connect the provided power adapter to the DVR's DC 12V input and then to a power outlet.
- Video Input: Connect your analog HD-TVI/CVI/AHD cameras to the BNC video input ports (1-16) on the rear panel.
- IP Camera Connection (Optional): For IP cameras, connect them to a separate PoE switch (not included). Then, connect the PoE switch to the DVR's LAN port using an Ethernet cable. The DVR does not have built-in PoE ports.
- Video Output: Connect a monitor to the HDMI or VGA output port for local viewing.
- Network Connection: Connect an Ethernet cable from the DVR's LAN port to your router or network switch for remote access.
- Audio Input/Output: Connect audio devices to the RCA audio input/output ports as needed.
- USB Devices: Connect a USB mouse (included) to a USB port for local control. USB flash drives can be connected for backup.

Image 4.1: Detailed view of the rear panel connections on the MXT 16CH Hybrid DVR.
4.2 Initial Setup and Configuration
Upon first power-on, the DVR will guide you through an initial setup wizard. Follow the on-screen prompts to set up basic parameters such as date/time, network settings, and user accounts. It is highly recommended to change the default password for security purposes.
4.3 Activating Audio-Over-Coax
If using HD-TVI cameras with built-in microphones, the Audio-Over-Coax function requires manual activation within the DVR's interface. Navigate to the camera settings and enable the audio input for the respective channels.
5. Operating Instructions
5.1 Local Operation
Use the connected USB mouse to navigate the DVR's Graphical User Interface (GUI). The main menu provides access to live view, playback, recording settings, network configuration, and system management.
- Live View: Displays real-time video feeds from connected cameras.
- Playback: Access recorded footage. You can search by time, event, or tag.
- Recording: Configure recording schedules, motion detection, and alarm recording.
- PTZ Control: If PTZ cameras are connected, control their pan, tilt, and zoom functions from the interface.
5.2 Remote Surveillance with SuperLive Plus APP
The SuperLive Plus mobile application allows you to remotely monitor your surveillance system from iOS and Android smartphones and tablets. This app enables live preview, playback of recorded footage, backup, PTZ control, and configuration adjustments.
- Download the App: Search for "SuperLive Plus" in your device's app store and install it.
- Add Device: Open the app and follow the instructions to add your DVR. This typically involves scanning a QR code displayed on the DVR's monitor or manually entering the DVR's network details.
- Access Features: Once connected, you can view live feeds, play back recordings, and manage your system remotely.
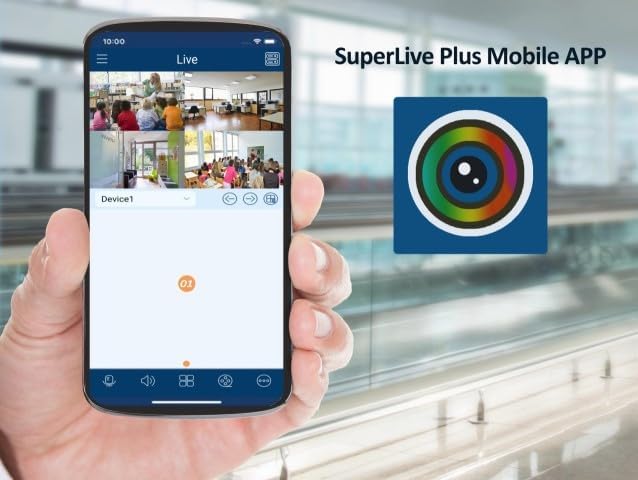
Image 5.1: SuperLive Plus Mobile App displaying multiple live camera feeds.

Image 5.2: The splash screen for the SuperLive Plus Mobile App.
6. Maintenance
Regular maintenance ensures the longevity and optimal performance of your DVR system.
- Cleaning: Periodically clean the exterior of the DVR with a soft, dry cloth. Do not use liquid cleaners or aerosols. Ensure ventilation openings are free from dust and obstructions.
- Ventilation: Ensure the DVR is placed in a well-ventilated area to prevent overheating. Do not block the ventilation holes.
- Firmware Updates: Check the manufacturer's website periodically for firmware updates. Keeping the firmware updated can improve performance, add features, and address security vulnerabilities.
- Hard Drive Health: The DVR's hard drive is crucial for recording. Monitor its health through the DVR's system settings. Consider replacing the HDD if errors or warnings appear.
- Data Backup: Regularly back up important footage to an external USB drive or network storage.
7. Troubleshooting
This section addresses common issues you might encounter with your DVR system.
- No Video Output:
- Check power connections to the DVR and monitor.
- Verify HDMI/VGA cable connections.
- Ensure the correct input source is selected on your monitor.
- No Camera Display:
- Check BNC cable connections for analog cameras.
- Ensure cameras are powered on.
- For IP cameras, verify network connection and PoE switch functionality.
- Confirm camera compatibility and resolution settings in the DVR.
- Remote Access Failure:
- Ensure the DVR is connected to the internet.
- Check network settings (DHCP, DNS, port forwarding if applicable).
- Verify the SuperLive Plus app is updated and the device is correctly added.
- No Recording:
- Check hard drive status in DVR settings.
- Verify recording schedule and motion detection settings.
- Ensure sufficient disk space is available.
8. Specifications
Detailed technical specifications for the MXT SuperLive Plus 16CH Hybrid DVR.
| Category | Specification |
|---|---|
| System OS | Embedded Linux |
| Analog Video Input | 16 BNC (1.0Vp-p, 75Ω) |
| Analog Video Resolution | 5MP/4MP/1080P/720P/WD1 (live) |
| IP Video Input | Up to 8 channels, up to 5MP |
| Total Input Channels | 24 (16 Analog + 8 IP) |
| Video Output | 1x HDMI (1920x1080), 1x VGA (1920x1080), 1x BNC (CVBS) |
| Video Compression | H.265, H.264 |
| Audio Input | 8x RCA |
| Audio Output | 1x RCA |
| Record Resolution | 5MP Lite/4MP Lite/1080p/1080p Lite/720p/WD1/D1 |
| Incoming Bandwidth | 32Mbps |
| Outgoing Bandwidth | 96Mbps |
| HDD Capacity | 2x SATA (up to 10TB each), 1x E-SATA |
| Alarm Input | 16CH |
| Alarm Output | 4CH |
| Network Interface | RJ45 1000Mbps |
| USB Interface | USB 2.0 x1, USB 3.0 x1 |
| Power Supply | DC12V/4A |
| Dimensions (W×D×H) | 380 × 268 × 45 mm |
| Operating Temperature | -10°C to 50°C (14°F to 122°F) |
| Operating Humidity | 10% to 90% (non-condensing) |
9. Warranty and Support
This product comes with a warranty provided exclusively by the seller. For any technical assistance, troubleshooting, or warranty claims, please contact the US-based Professional & Experienced Tech Support provided by the seller. Refer to your purchase documentation for specific warranty terms and contact information.


