1. Introduction
This manual provides detailed instructions for the assembly, operation, and maintenance of your Patiowell 8x12 FT Outdoor Storage Shed. Designed for durability and functionality, this plastic and resin shed offers a secure and spacious solution for organizing your outdoor belongings.
Key features include a sturdy plastic floor base, ample storage capacity, recyclable construction, and a four-window design for natural light. The innovative "Kick-it" installation process simplifies assembly by reducing the number of screws required.
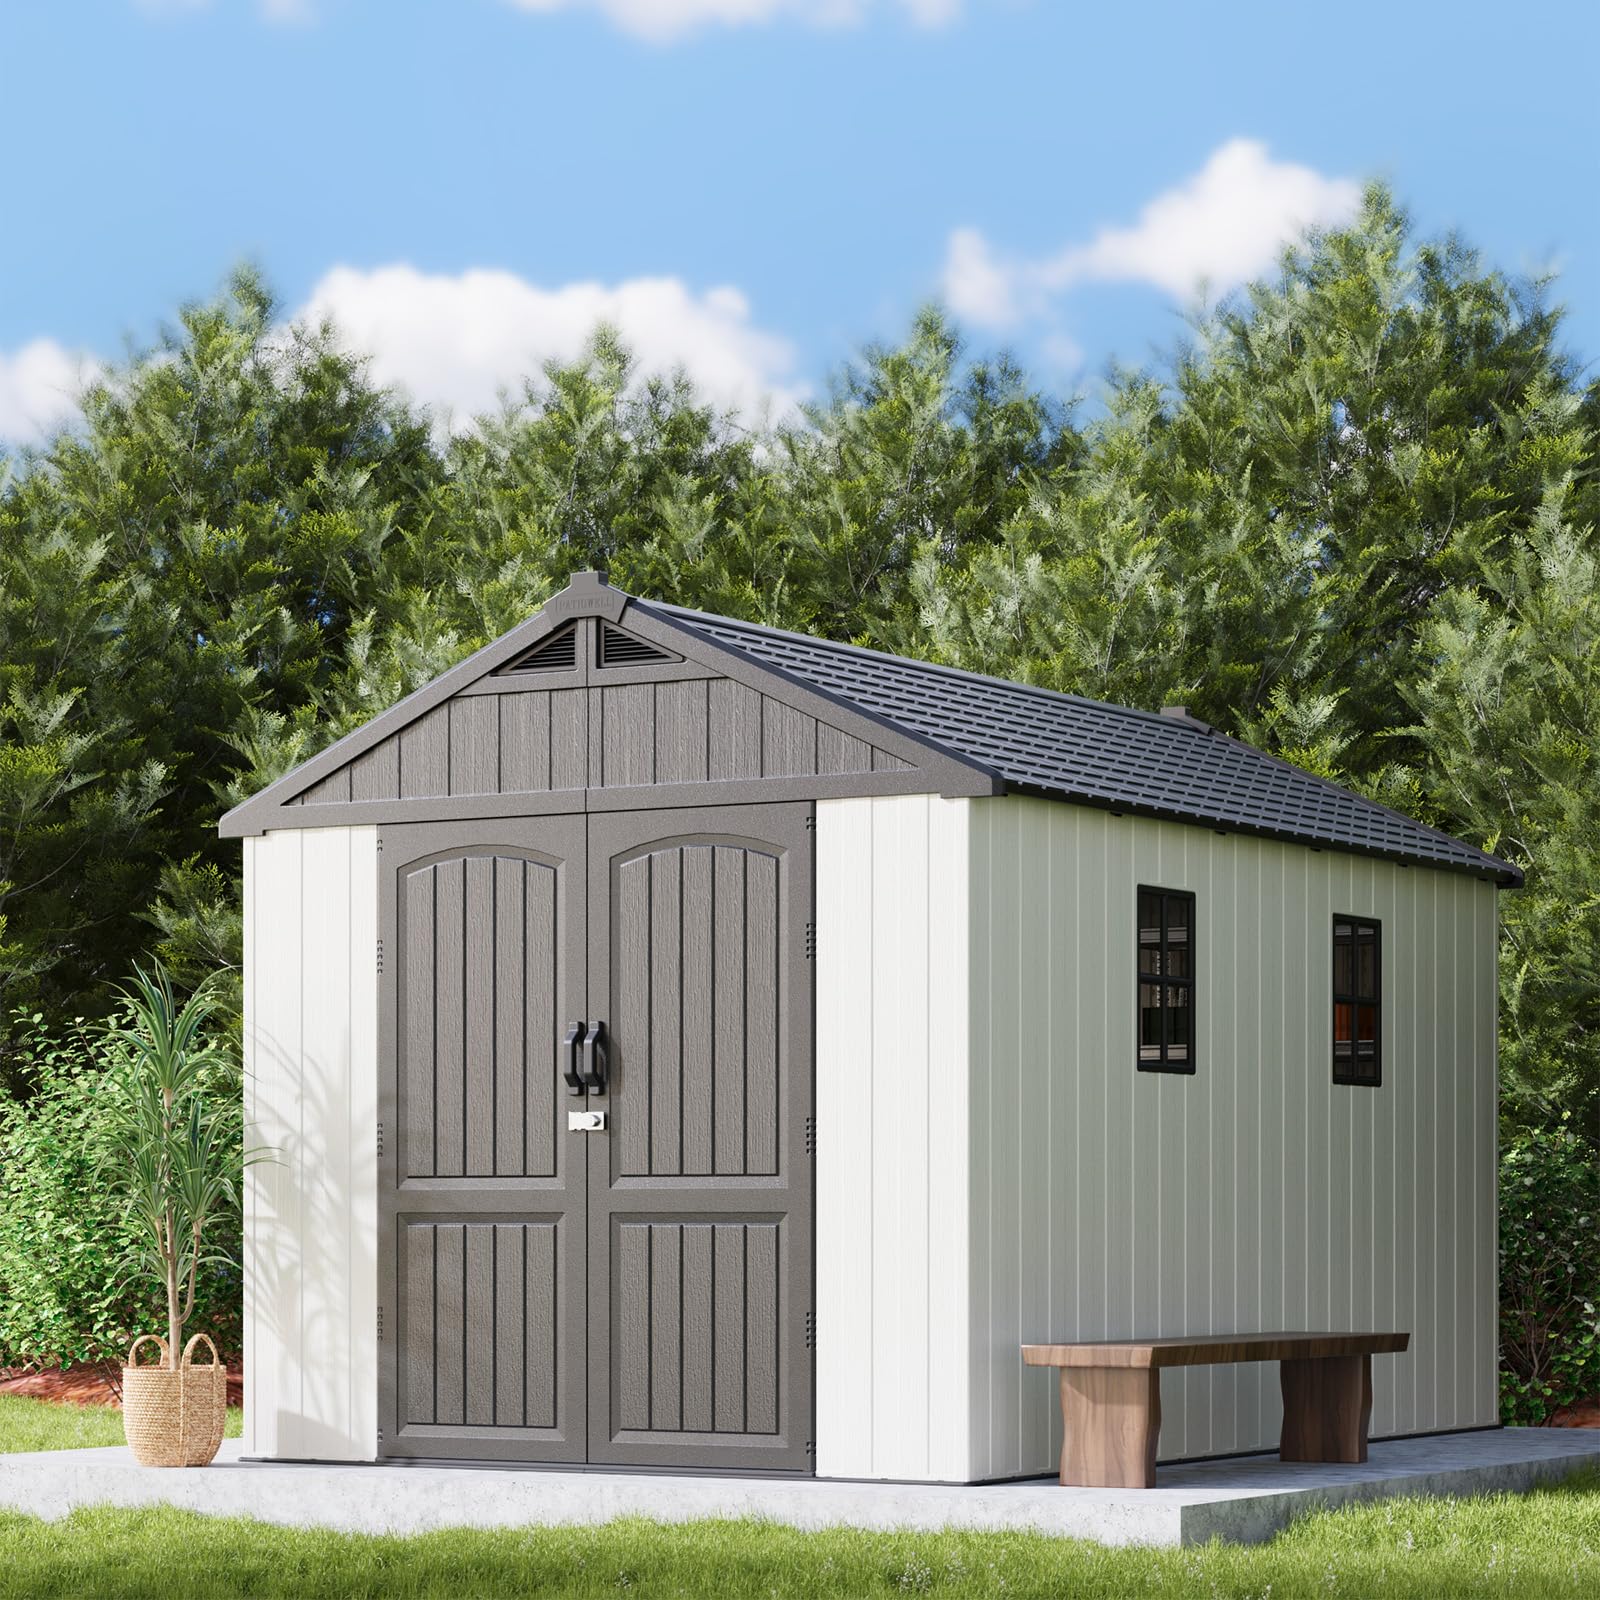
This image displays the Patiowell 8x12 FT Outdoor Storage Shed with its double doors fully open, revealing the spacious interior. The shed features a beige and gray color scheme, with a dark gray roof and light beige walls. Inside, shelving units are visible, demonstrating the shed's capacity for organizing various items. The shed is situated on a paved surface in a backyard setting with green foliage in the background.
2. Safety Information
- Local Regulations: Before beginning installation, verify compliance with your local Homeowners Association (HOA) policies and any relevant building codes.
- Assembly Instructions: Always follow the provided assembly instructions carefully. Deviations may compromise the structural integrity of the shed.
- Package Inspection: Upon receipt, inspect all packages and components for damage or missing parts before starting assembly. Contact customer support immediately if any issues are found.
- Heavy Components: Exercise caution when handling heavy or bulky components. It is recommended to have at least two people for lifting and positioning large parts.
- "Kick-it" Installation: During the "Kick-it" installation process for wall panels, ensure firm downward pressure is applied to fully insert the panel bottoms into the ground slots. Refer to the assembly video for visual guidance.
- Tools: Use appropriate tools for assembly as specified in the instructions.
- Anchoring: Ensure the shed is properly anchored to prevent movement due to wind or other environmental factors.
3. Package Contents
Your Patiowell 8x12 FT Outdoor Storage Shed will be delivered in multiple packages, typically 7 in total. These packages may arrive at different times. Please ensure all packages have been received before beginning assembly. A detailed list of hardware and components is included in the product instruction manual provided in the box.
- 1 x Storage Shed (components distributed across multiple packages)
- 1 x Pair of Tool Gloves
- Product Instruction Manual & Hardware Set

This image shows a Patiowell shed with several stacked cardboard boxes next to it, indicating that the shed arrives in multiple packages. Text overlays state "7 PACKAGES May arrive at different time Please be patient" and icons indicate "2 PERSON LIFT IS REQUIRED", "7 BOX", and "530 lbs PACKAGING WEIGHT". This visually confirms the multi-package delivery and the need for assistance during handling.
4. Setup & Assembly
Assembly of the Patiowell storage shed is designed to be straightforward, utilizing an innovative "Kick-it" installation process that reduces the number of screws needed by approximately 30%. This makes assembly quicker and easier with minimal tools.
4.1 Pre-Assembly Steps
- Site Preparation: Choose a level and stable surface for your shed. Ensure the area is clear of debris and provides adequate drainage.
- Unpack and Identify Parts: Carefully unpack all components and lay them out. Refer to the parts list in your instruction manual to identify each piece.
- Team Assembly: While designed for ease, assembly is significantly smoother with two people, especially for lifting and aligning larger panels.
4.2 "Kick-it" Installation Process
The unique "Kick-it" method is crucial for securing the wall panels to the floor base. This process involves firmly pressing the wall panels into designated ground slots.
- When installing wall panels, align the bottom edge of the panel with the ground slot on the floor base.
- Apply firm, downward pressure, using a "kicking" motion if necessary, to ensure the wall panel fully inserts into the ground slot. A wooden mallet can also be used for gentle persuasion.
- Confirm that the panel is securely seated before proceeding to the next section.

This image illustrates the "Kick-it" installation process, showing a person using their foot to firmly press a wall panel into the shed's floor base. The image highlights the ease of assembly and the reduction in screws required, emphasizing the innovative design.
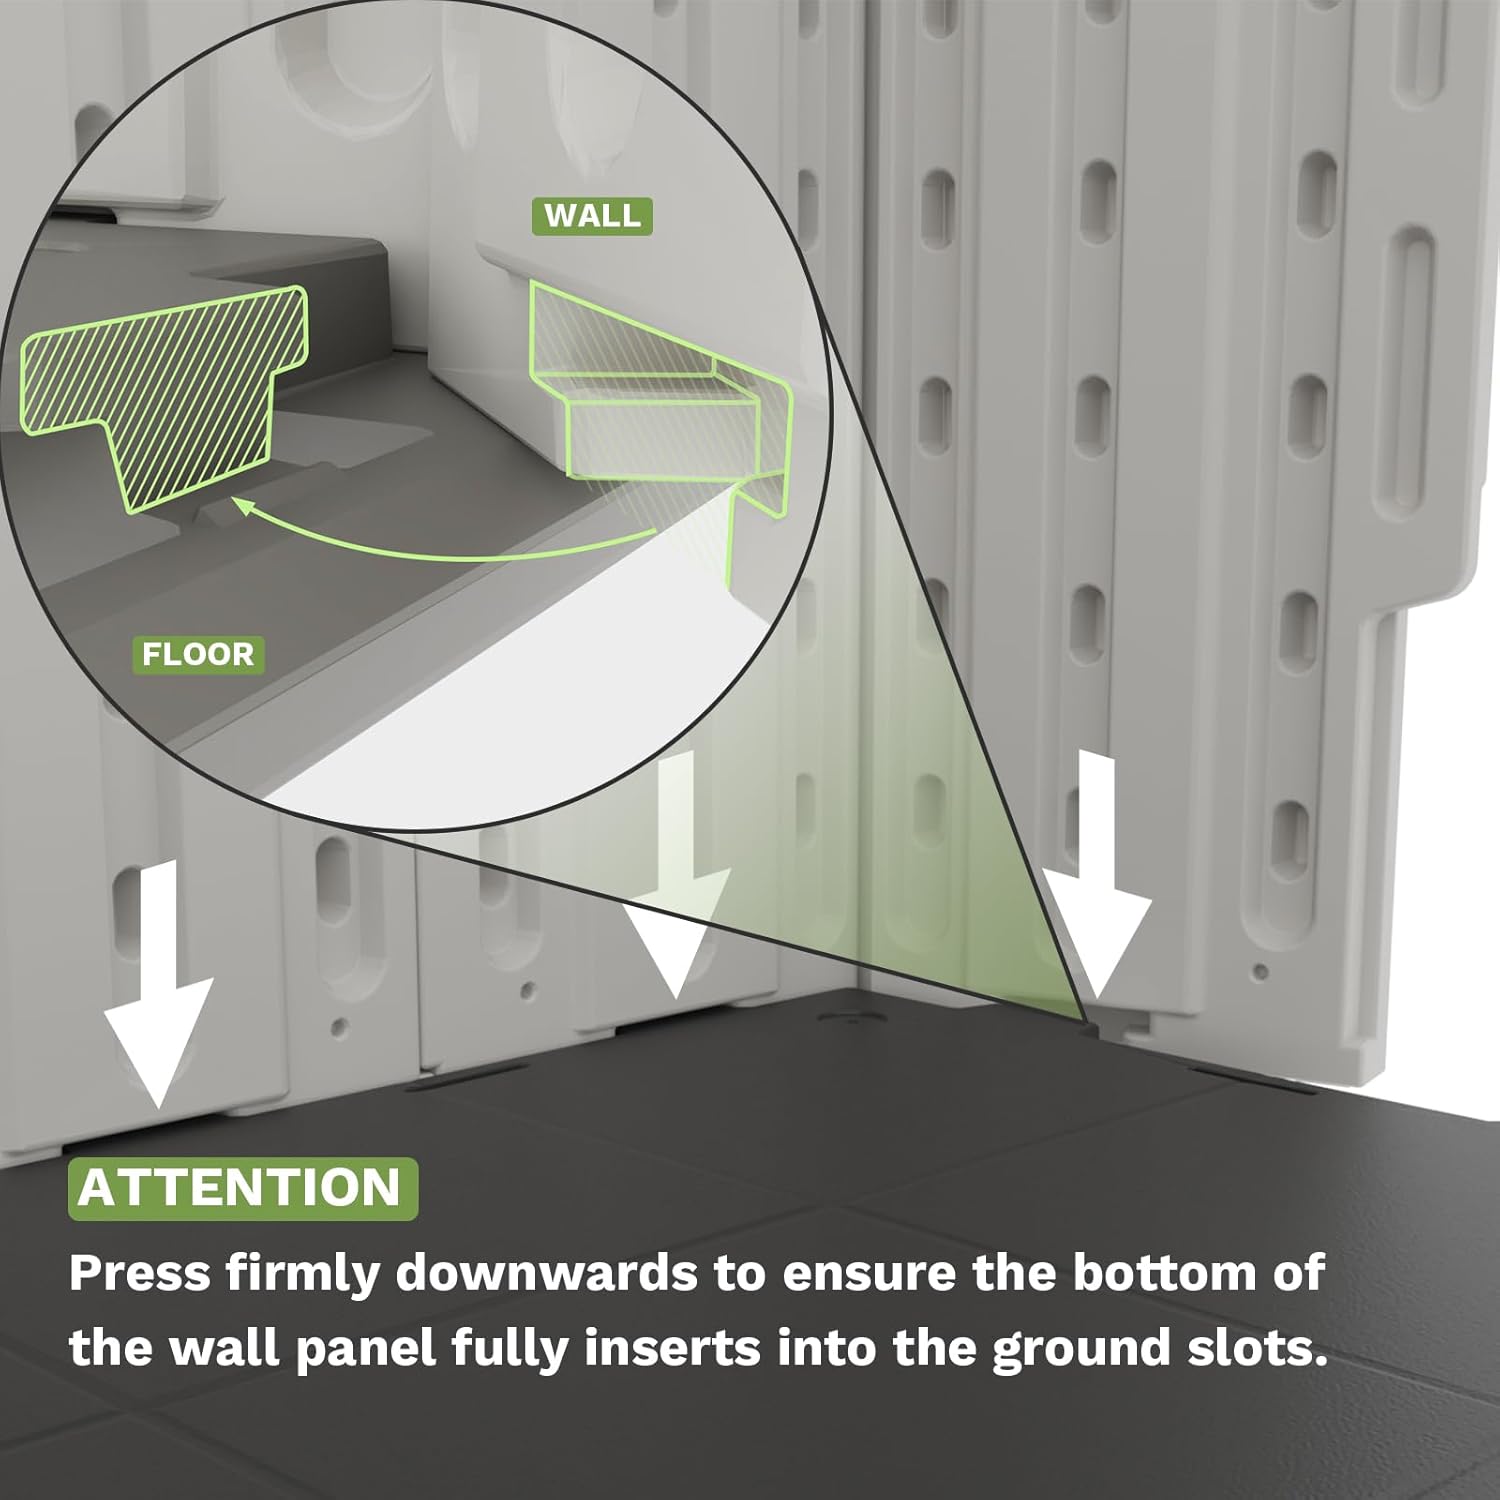
A detailed diagram showing how the wall panel connects to the floor. Arrows indicate the downward force required to fully insert the wall into the floor slots, ensuring a secure and stable connection during assembly.
4.3 General Assembly Tips
- Follow the step-by-step diagrams in your printed manual.
- Do not overtighten screws unless specified, as this can damage plastic components.
- Ensure all panels are correctly oriented before securing them.
- For roof assembly, ensure all cross-members and panels are aligned before fastening.
4.4 Assembly Video
For a visual guide on the assembly process, including the "Kick-it" installation, please refer to the official product video below.
This video provides a step-by-step visual demonstration of how to assemble the Patiowell 8x12 FT Plastic Shed, including detailed instructions for the "Kick-it" wall panel installation and overall construction.
5. Operating Instructions
5.1 Doors
- The shed features double hinged, lockable doors for easy access and security.
- To open, unlatch the locking mechanism and pull the doors outwards.
- To close, push the doors firmly together and engage the latch. Ensure the doors are fully closed and latched to maintain weather resistance and security.
- A padlock (not included) can be used with the integrated lockable mechanism for enhanced security.
5.2 Windows
- The shed is equipped with four windows to allow natural light into the interior.
- The position of the windows can be adjusted according to your needs during the wall panel installation.
- These windows are fixed and do not open for ventilation.

This image provides an interior view of the Patiowell shed, highlighting the two windows that allow natural light to enter. Shelving units are visible along the back wall, demonstrating potential storage configurations within the shed.
6. Maintenance
Your Patiowell storage shed is constructed from durable, recyclable plastic and resin materials designed for low maintenance and long-lasting performance.
- Cleaning: Clean the shed periodically with mild soap and water. Avoid abrasive cleaners or harsh chemicals, which can damage the plastic surface.
- Inspection: Regularly inspect the shed for any signs of wear, damage, or loose fasteners. Tighten any loose screws as needed.
- Drainage: Ensure the area around the shed remains clear to allow for proper drainage and prevent water accumulation around the base.
- Snow Load: While the roof has a high weight capacity, it is advisable to remove excessive snow accumulation to prevent undue stress on the structure.
- Ventilation: The shed includes ventilation areas near the top, front, and back to help reduce condensation and maintain air circulation. Ensure these vents remain unobstructed.
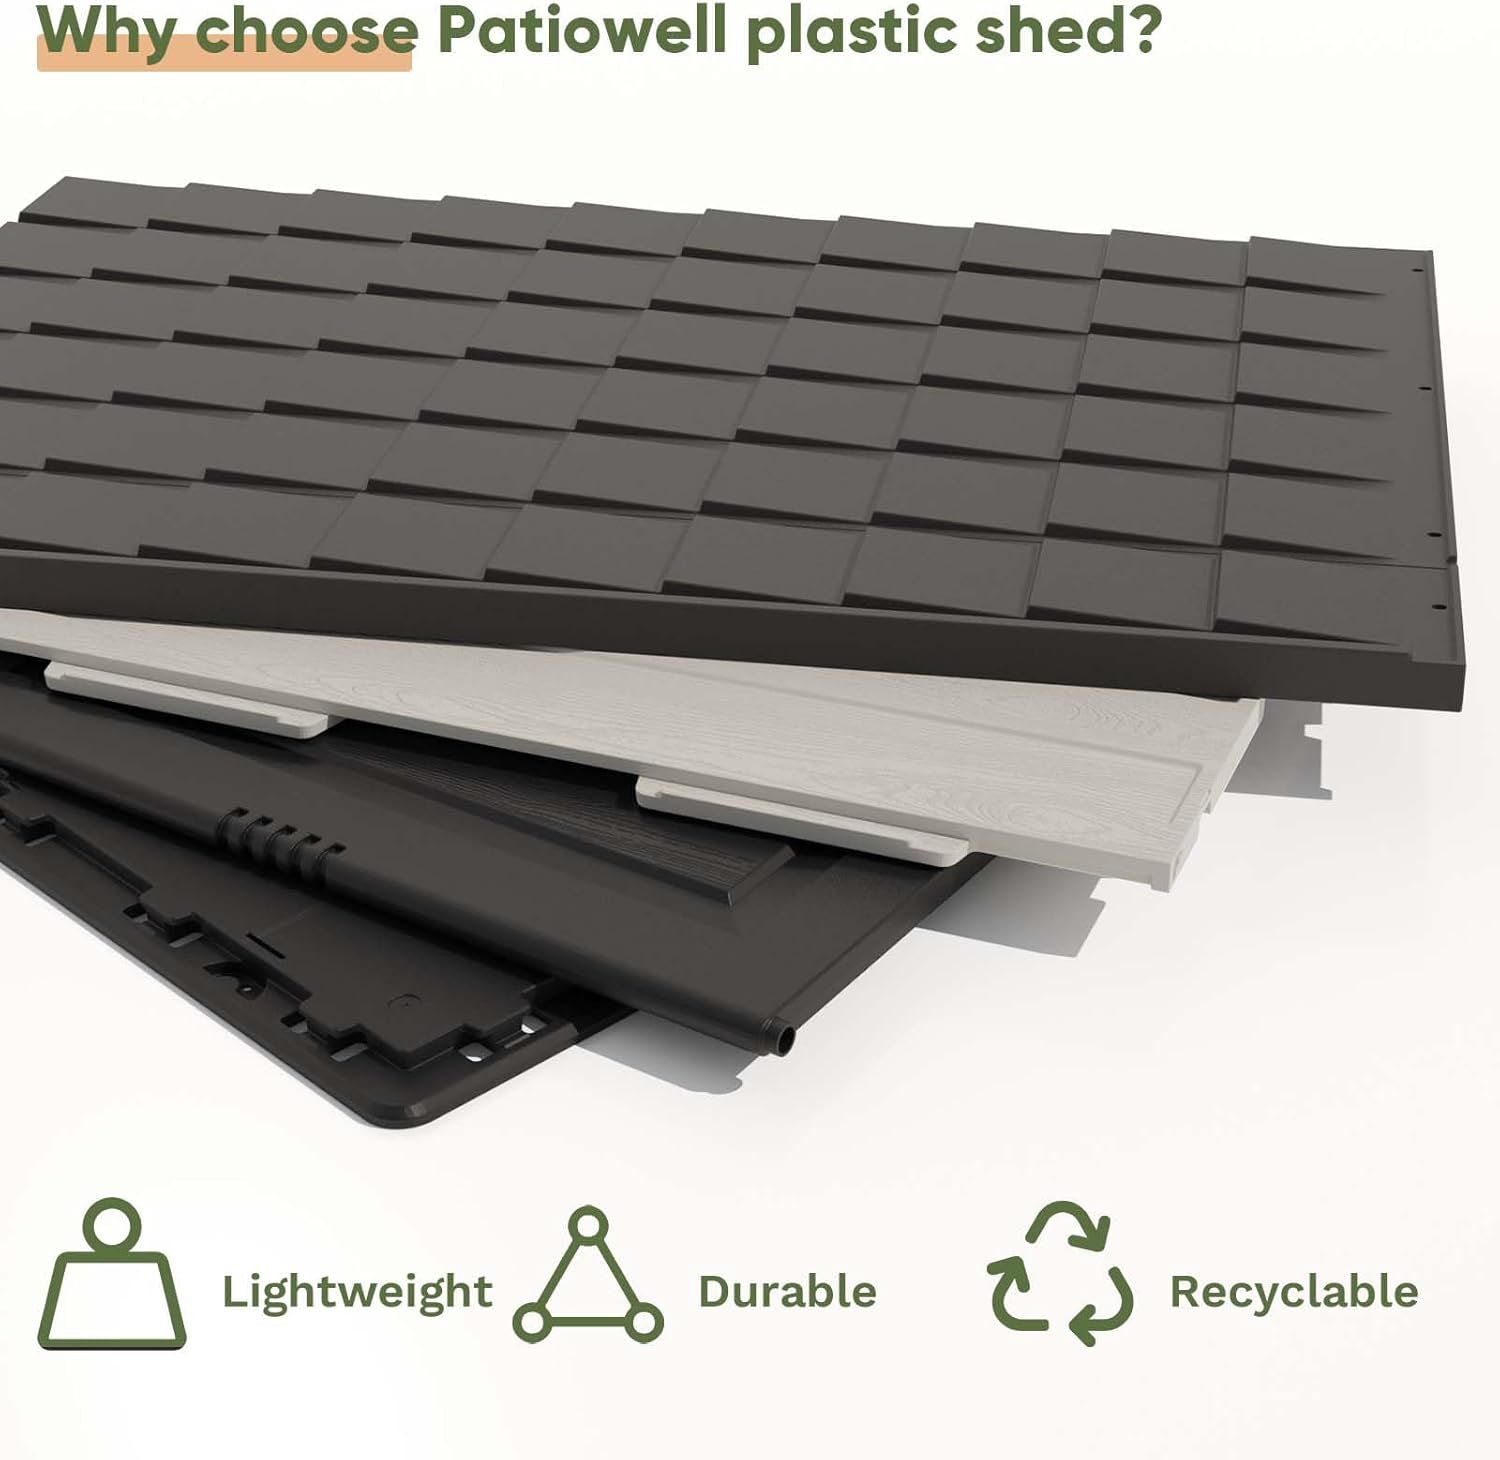
This image highlights the key material properties of the Patiowell plastic shed: lightweight, durable, and recyclable. It shows layers of the plastic material, emphasizing its robust construction.
7. Troubleshooting
| Problem | Possible Cause | Solution |
|---|---|---|
| Missing or Damaged Parts | Shipping damage or packaging error. | Inspect all packages upon arrival. If parts are missing or damaged, contact Patiowell customer support with your model number and a description of the issue. |
| Difficulty Assembling Wall Panels | Panels not fully inserted into ground slots; incorrect alignment. | Ensure the "Kick-it" method is applied with firm downward pressure. Verify panel orientation and alignment with the floor base. Refer to the assembly video for visual guidance. |
| Doors are Hard to Close or Don't Align | Shed not perfectly level; door hinges or frame not properly installed. | Verify that the shed is installed on a completely level surface. Check door hinges and frame for correct installation and alignment. Adjust as necessary. |
| Water Leakage | Improper assembly; gaps in panels or roof; inadequate sealing. | Ensure all panels, especially roof panels, are securely fastened and sealed according to instructions. Check for proper drainage around the shed base. Consider applying external sealant if persistent leaks occur in specific areas. |
7.1 Additional Support Video
For further assistance with assembly and understanding product features, you may find this additional video helpful.
This video provides an overview of the Patiowell Resin Outdoor Storage Shed, showcasing its features and benefits, which can be useful for understanding its construction and functionality.
8. Specifications
| Feature | Detail |
|---|---|
| Model Number | 404-812-C1 |
| Product Dimensions (D x W x H) | 144.3"D x 91.3"W x 94.5"H |
| Material | Plastic, Resin |
| Color | Beige |
| Item Weight | 492.8 Pounds |
| Floor Area | 91.2 Square Feet |
| Door Width | 55.1 Inches |
| Door Height | 70.9 Inches |
| Door Style | Double Hinged, Lockable |
| Water Resistance Level | Water Resistant |
| Weight Capacity Maximum (Roof) | 1300 Pounds |
| UV Protection | Yes |
| Assembly Required | Yes |

This diagram provides key measurements for the 8x12 FT Resin Shed, including overall height, width, depth, door dimensions, and window dimensions. It also states the storage capacity (630 cu.ft) and roof weight capacity (1,300 lbs).
9. Warranty & Support
9.1 Return Policy
This product is eligible for a 30-day easy return policy, offering a refund or replacement. Please refer to the retailer's specific return guidelines for full details.
9.2 Customer Support
All Patiowell products are inspected for quality before shipment. If you encounter any quality problems, missing parts, or require assistance with assembly or operation, please contact Patiowell customer support. Provide your model number (404-812-C1) and a detailed description of your issue for prompt assistance.
You can often find contact information for customer support on the packaging, in the included instruction manual, or through the retailer's website where the product was purchased.