1. Product Overview
The SURPASS Digital Outlet Timer Switch is a versatile and programmable device designed to automate the control of your home appliances. It features 7-day and 24-hour weekly/daily programming, along with a random security mode for enhanced home security.
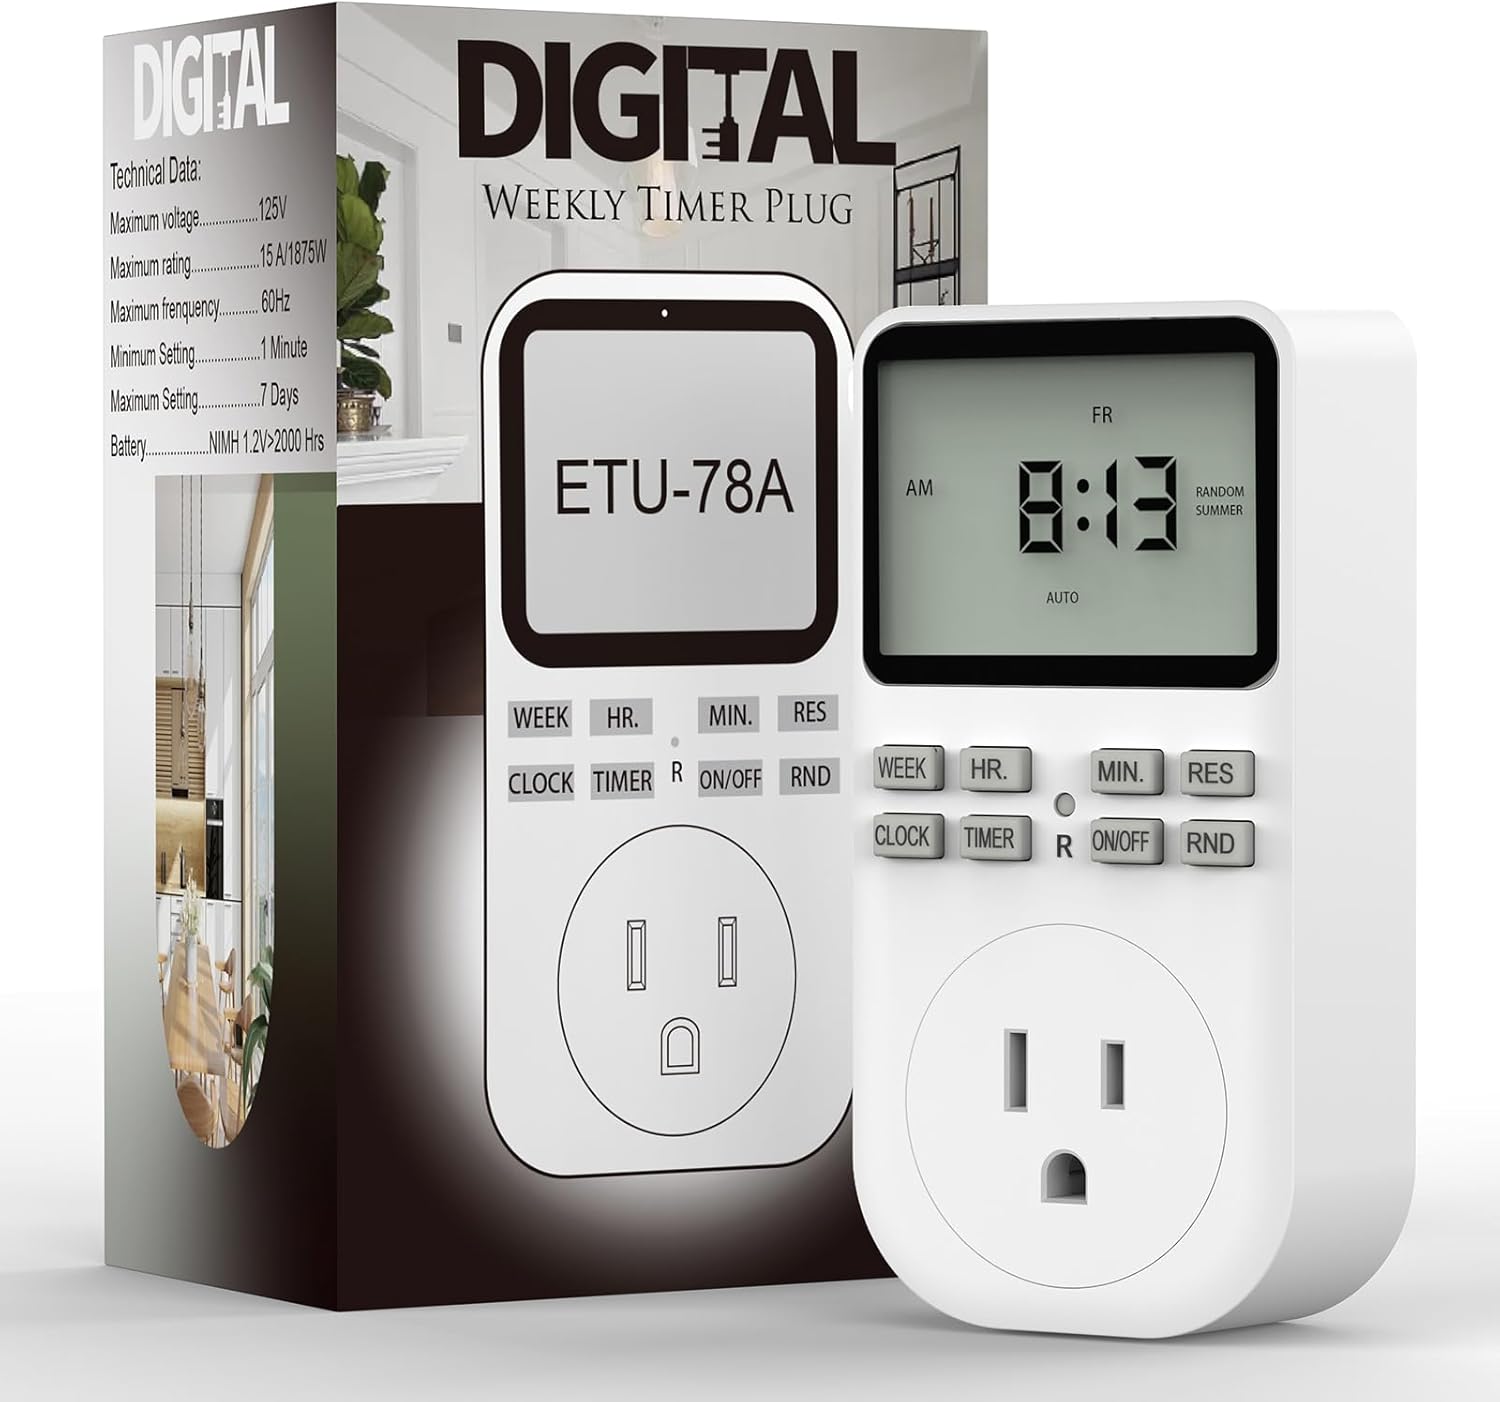
Figure 1: SURPASS Digital Outlet Timer Switch and its packaging.
Key Features:
- Energy and Money Saving: Automatically turns on and off lights, fans, and other home appliances as needed to conserve electricity and save on your energy bills.
- Flexible Scheduling: Comes with up to 10 groups of automatic on-off timer programs, each 24-hour and weekly programmable.
- Anti-theft (Random Mode): Features a random mode for lights to go on and off at varying times, making your house look occupied while you're away.
- User Friendly: Large screen for a clearer view of digits; built-in battery to memorize your programs during power outages; completely silent for home use.
- Durable Design: Made from plastic, designed for indoor use.

Figure 2: Overview of the timer's main features and capabilities.
2. Compatibility Test
Before using the timer, please test your appliance to ensure compatibility. Follow these steps:
- Plug your appliance directly into a live outlet.
- Turn on your appliance by pressing its ON/OFF switch.
- Leaving the ON/OFF switch of your device always on, remove its plug from the outlet.
- Re-plug the appliance into the live outlet to see if it automatically turns on.
If the appliance automatically turns on, it is compatible with the timer. Otherwise, it is not.
3. Initial Setup
3.1. Resetting to Factory Mode
Before starting, it is recommended to reset the timer to its factory default settings. Use a pointed object (like a pen tip) to press the R (Reset) button located on the front panel.
Video 1: Demonstrates how to reset the timer to factory settings by pressing the 'R' button.
3.2. Setting Time Format (12/24 Hour)
To switch between 12-hour (AM/PM) and 24-hour modes, press and hold the CLOCK button, then press the TIMER button.

Figure 3: Example of 24-hour time format on the display.
3.3. Setting Daylight Saving Time (Summer/Standard)
To adjust for Daylight Saving Time, press and hold the CLOCK button, then press the ON/OFF button. This will toggle between Summer Time and Standard Time.

Figure 4: Visual representation of Summer Time and Standard Time adjustments.
3.4. Setting Current Day and Time
To set the current day and time:
- Press and hold the CLOCK button.
- While holding CLOCK, press WEEK to select the current day (MO, TU, WE, TH, FR, SA, SU).
- While holding CLOCK, press HR. to set the current hour.
- While holding CLOCK, press MIN. to set the current minute.
- Release the CLOCK button when finished.

Figure 5: Adjusting the hour on the timer display.

Figure 6: Adjusting the minute on the timer display.
4. Operating the Timer
4.1. Setting ON/OFF Programs
The timer allows for up to 10 ON/OFF programs. To set a program:
- Press the TIMER button to enter programming mode. The display will show "ON" and a program number (e.g., "1 ON").
- Press WEEK to select the desired day combination (e.g., Monday-Friday, daily, weekends).
- Press HR. to set the ON hour.
- Press MIN. to set the ON minute.
- Press TIMER again. The display will show "OFF" and the same program number (e.g., "1 OFF").
- Repeat steps 2-4 to set the OFF time for the current program.
- To set additional programs (up to 10), press TIMER again and repeat the process.

Figure 7: The timer supports up to 10 ON-OFF programs with various 7-day scheduling options.
Note: You can leave programs blank if not needed. After setting, press the CLOCK button to return to normal time display.
4.2. Manual Override (ON/OFF Button)
The ON/OFF button allows you to manually control the timer's state, overriding programmed settings temporarily.
- Pressing ON/OFF repeatedly cycles through: ON (always on), AUTO (follows programmed settings), and OFF (always off).
- If the timer is plugged in and the current time falls within a programmed ON period, but the timer is OFF, pressing ON/OFF once will turn it ON. Pressing it again will return it to AUTO mode, where it will then follow the programmed OFF time.
4.3. Random Mode (RND Button)
The Random mode is ideal for home security when you are away. It randomly turns connected lights or appliances ON and OFF within a 2 to 30-minute variation of your programmed times, simulating occupancy.
- Press the RND button to activate Random mode. "RANDOM" will appear on the screen.
- To deactivate, press the RND button again.

Figure 8: Random mode helps deter intruders by simulating presence.
5. Product Use Cases
The SURPASS Digital Outlet Timer Switch is versatile and can be used for various applications to automate your home and save energy.

Figure 9: Automate daily routines, such as controlling aquarium lights or coffee makers.

Figure 10: Utilize the timer's random mode for vacation security.

Figure 11: The timer can control various indoor appliances like lamps, fans, humidifiers, and routers to save energy.
6. Troubleshooting
If you encounter issues with your timer, consider the following:
- Timer not turning ON/OFF as programmed: Ensure the current time and day are set correctly. Verify that the timer is in AUTO mode. Check that the ON/OFF programs are correctly entered and enabled.
- Display is blank or dim: The built-in battery might be low. Plug the timer into a live outlet for several hours to charge the internal battery.
- Appliance not responding: Confirm the appliance is compatible (refer to Section 2). Ensure the appliance's own power switch is set to ON if it has one.
- Resetting issues: If the reset button does not clear settings, ensure you are pressing it firmly with a non-conductive pointed object.
7. Specifications
| Feature | Detail |
|---|---|
| Brand | SURPASS |
| Model Number | ETU-78A |
| Color | White |
| Material | Plastic |
| Product Dimensions (D x W x H) | 1.18" x 2.32" x 4.72" |
| Number of Settings | 10 (ON/OFF programs) |
| Screen Size | 4.72 Inches (diagonal) |
| Item Weight | 5.9 ounces |
| Country of Origin | China |
8. Maintenance
To ensure the longevity and proper functioning of your SURPASS Digital Outlet Timer Switch, follow these simple maintenance guidelines:
- Cleaning: Wipe the exterior of the timer with a soft, dry cloth. Do not use abrasive cleaners or solvents, as they may damage the surface or internal components.
- Storage: If storing the timer for an extended period, ensure it is kept in a cool, dry place away from direct sunlight and extreme temperatures.
- Battery: The timer has a built-in battery to retain settings during power outages. This battery is designed for long-term use and typically does not require replacement. If the display frequently goes blank or loses settings, ensure the timer is regularly plugged into a live outlet to allow the internal battery to charge.
- Avoid Overloading: Do not connect appliances that exceed the timer's maximum wattage (1875W) or amperage (15A) ratings to prevent damage to the timer and connected devices.
9. Warranty and Support
Your SURPASS Digital Outlet Timer Switch is backed by a 2-year limited warranty, ensuring peace of mind regarding its quality and performance.
For any questions, technical assistance, or warranty claims, please contact our friendly customer service team. We are committed to providing lifetime support for your product.
Please refer to your purchase documentation or the manufacturer's website for specific contact details and the full terms of the warranty.