GKU 4K-D200
GKU D200 4K Dash Cam User Manual
Model: 4K-D200 | Brand: GKU
1. Introduction
The GKU D200 4K Dash Cam is designed to provide high-quality video recording for your vehicle, enhancing road safety and providing crucial evidence in case of incidents. Featuring 4K Ultra HD resolution, a wide 170° viewing angle, and advanced functionalities like Wi-Fi connectivity, G-Sensor, and 24-hour parking monitoring, this compact device offers comprehensive surveillance for your driving and parked vehicle.

Figure 1: GKU D200 4K Dash Cam overview.
2. What's in the Box
Please check the package contents upon unboxing to ensure all items are present:
- GKU D200 Dash Cam
- 64GB SD Card (pre-installed or separate)
- Car Charger (9.84ft / 3m USB-C cable)
- 3M Adhesive Mount (x1)
- Electrostatic Film (x2)
- User Manual
- Crowbar Tool (for cable routing)

Figure 2: Package contents of the GKU D200 Dash Cam.
3. Setup and Installation
3.1 SD Card Insertion and Formatting
The GKU D200 Dash Cam supports micro SD cards up to 256GB. A 64GB SD card is included. For optimal performance, use a Class 10 or higher microSD card from reliable brands like Samsung or SanDisk.
- Insert the micro SD card into the designated slot on the dash cam.
- Before first use, it is crucial to format the SD card within the dash cam's settings. This ensures compatibility and proper function. Refer to the "Operating Instructions" section for accessing settings via the app.
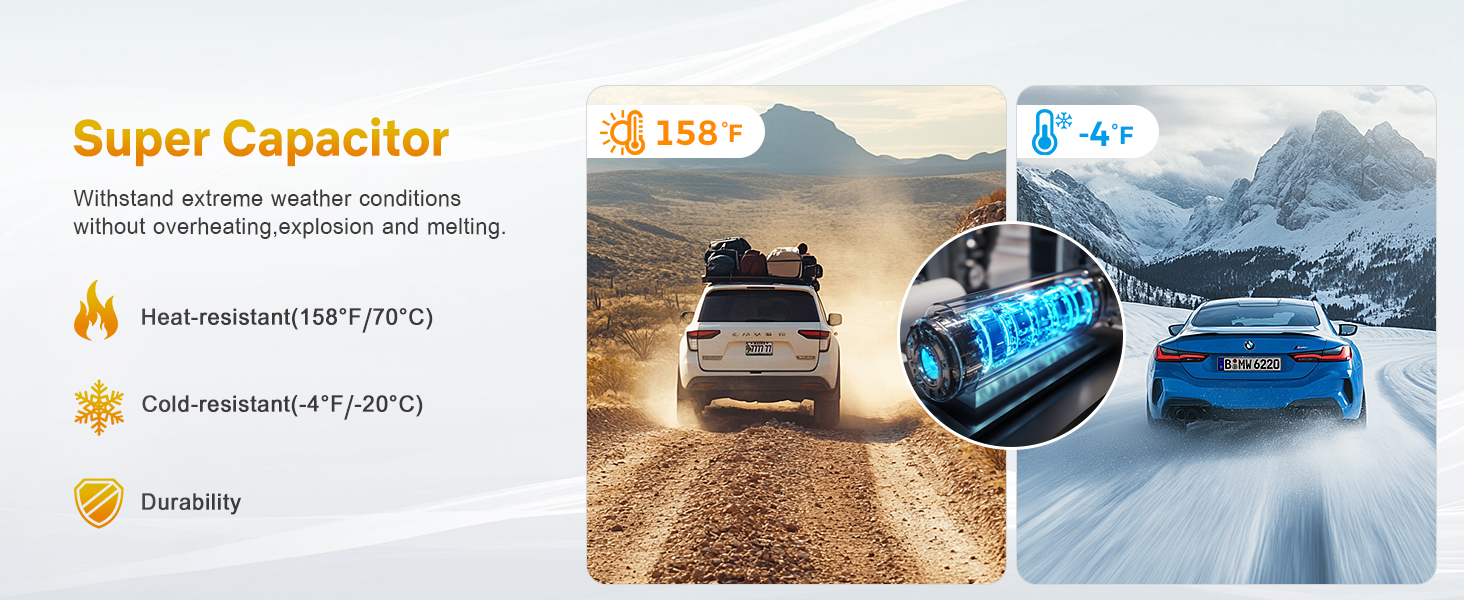
Figure 3: SD card insertion and H.265 encoding benefit.
3.2 Mounting the Dash Cam
The compact design and detachable mount allow for easy and unobtrusive installation.
- Clean the windshield area where you intend to mount the dash cam.
- Apply the electrostatic film to the chosen area on the windshield. This helps in easy removal and prevents residue.
- Attach the 3M adhesive mount to the electrostatic film.
- Slide the dash cam onto the mount. The mount allows for 140° rotation to achieve the ideal recording angle.
- Route the power cable using the provided crowbar tool to tuck it neatly along the windshield and dashboard edges, leading to the car's power outlet.
- Connect the car charger to the dash cam's Type-C interface and plug it into your vehicle's cigarette lighter socket.
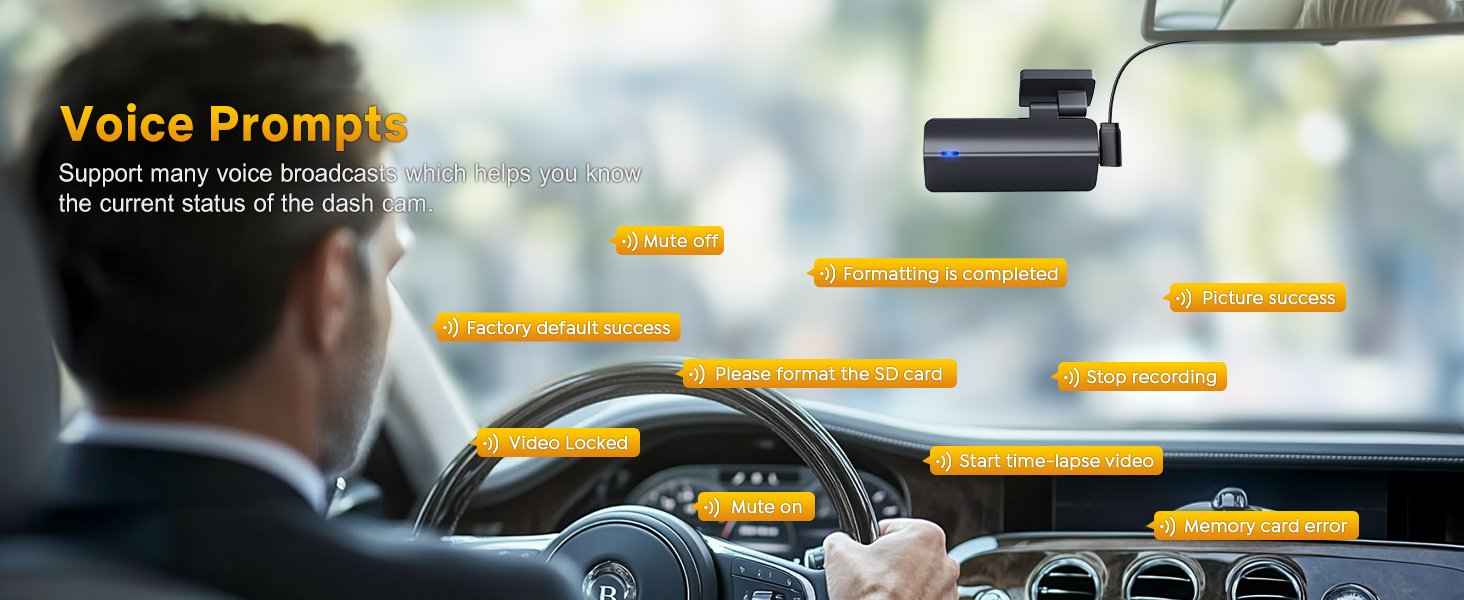
Figure 4: Dash Cam installation process.

Figure 5: Adjustable bracket and detachable design.
4. Operating Instructions
4.1 Power On/Off and Basic Recording
The dash cam will automatically power on and begin recording when connected to power and your vehicle starts. It will power off automatically when the vehicle is turned off.
- Loop Recording: The dash cam continuously records video in 1/3/5 minute segments. When the SD card is full, the oldest unlocked footage will be overwritten automatically.
- G-Sensor (Collision Lock): The built-in G-sensor detects sudden impacts or vibrations. In such an event, the current video segment is automatically locked to prevent it from being overwritten, securing critical footage.
- Manual Video Lock: Press the function button on the dash cam to manually lock the current recording, protecting it from being overwritten by loop recording.

Figure 6: Seamless Loop Recording explanation.

Figure 7: Manual video lock button.

Figure 8: G-Sensor Collision Lock in action.
4.2 Wi-Fi Connectivity and App Control
The GKU D200 features integrated Wi-Fi for seamless connection to your smartphone via the GKU GO app (available for iOS and Android). This allows you to view, download, and share recordings directly from your phone.
- Download the "GKU GO" app from your device's app store.
- Turn on the dash cam.
- On your smartphone, go to Wi-Fi settings and connect to the dash cam's Wi-Fi network (SSID usually starts with "GKU-D200" followed by numbers/letters). The default password is typically "12345678".
- Open the GKU GO app. You can now view live footage, access recorded videos, change settings, and download files.
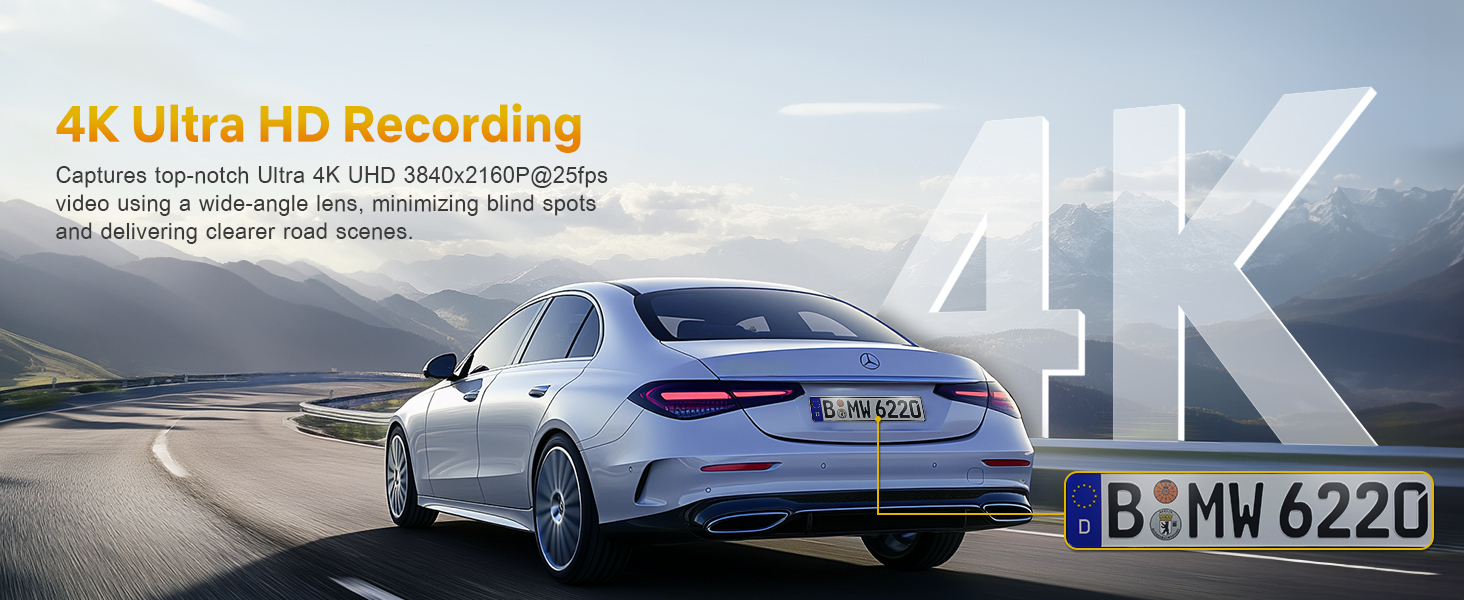
Figure 9: GKU GO App interface for Wi-Fi control.
4.3 24-Hour Parking Monitor
When parked, the dash cam can provide continuous surveillance. This feature requires a Hardwire Kit (not included, but can be requested from GKU support).
- G-Sensor Mode: If an impact is detected while parked, the dash cam will automatically record and lock the footage.
- Time-Lapse Mode: Records at a low frame rate (e.g., 1/2/5fps) to conserve power while continuously monitoring your vehicle. This provides a condensed overview of events during parking.
Note: A Hardwire Kit is required for the 24-hour parking monitor function to operate continuously without draining your car battery. Please contact GKU support for details on obtaining one.

Figure 10: 24-Hour Parking Monitor modes.
4.4 Voice Prompts
The dash cam provides various voice prompts to inform you of its current status, such as "Started recording," "Stopped recording," "Video Locked," "Memory card error," and "Please format the SD card." Pay attention to these prompts for optimal operation.

Figure 11: Examples of voice prompts.
5. Features Overview
- 4K Ultra HD Recording: Captures stunning 3840x2160P video at 25fps with a 170° wide-angle lens, minimizing blind spots and capturing clear details like road signs and license plates.
- Super Night Vision: Equipped with an F1.8 aperture and 6-glass lens, along with WDR (Wide Dynamic Range) technology, the dash cam captures clear details even in low-light conditions.

Figure 12: Super Night Vision capability.
- Super Capacitor: Utilizes a super capacitor instead of a traditional battery, providing enhanced durability and resistance to extreme temperatures (heat-resistant up to 158°F/70°C, cold-resistant down to -4°F/-20°C). This ensures reliable operation in various climates.
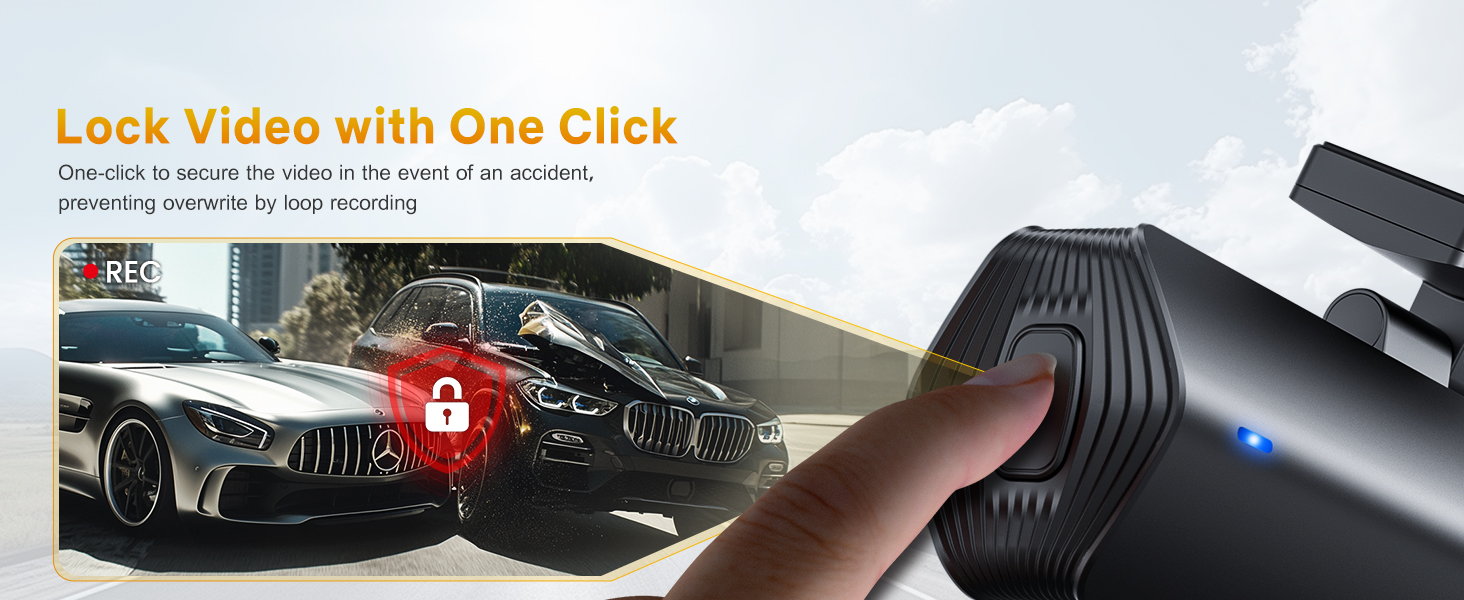
Figure 13: Super Capacitor benefits.
- Low Voltage Protection & USB Charging: Features built-in low voltage protection to automatically disconnect the dash cam if it detects low battery levels in your vehicle. It also includes a USB charging port for convenience.

Figure 14: Low Voltage Protection and USB Charging.
6. Maintenance
- Cleaning: Use a soft, dry cloth to clean the dash cam lens and body. Avoid using abrasive cleaners or solvents.
- SD Card Maintenance: Regularly format the SD card (at least once a month) to prevent data corruption and ensure smooth recording. Back up any important footage before formatting.
- Firmware Updates: Check the GKU website or app periodically for firmware updates. Keeping your dash cam's firmware updated can improve performance and add new features.
- Temperature: While the super capacitor offers wide temperature tolerance, avoid leaving the dash cam in direct sunlight for extended periods in extremely hot climates when not in use, if possible.
7. Troubleshooting
| Problem | Possible Cause | Solution |
|---|---|---|
| Dash cam not powering on. | No power supply; faulty cable/charger; loose connection. | Check car charger connection and vehicle's power outlet. Try a different USB cable or car charger if available. Ensure vehicle's ignition is on. |
| "Stopped recording" / "Started recording" repeatedly. | SD card error; unstable power; firmware issue. | Format the SD card. Try a different, high-quality SD card (Class 10 or higher). Ensure stable power connection. Update firmware if available. |
| Wi-Fi connection unstable or app not loading. | Interference; app glitch; dash cam Wi-Fi module issue. | Ensure you are close to the dash cam. Restart both the dash cam and your phone. Reinstall the GKU GO app. Check for app updates. |
| Footage not clear or blurry. | Dirty lens; protective film still on lens; poor lighting. | Clean the lens with a soft cloth. Remove any protective film. Ensure adequate lighting conditions for optimal recording. |
| G-Sensor triggers too often. | Sensitivity set too high. | Adjust the G-Sensor sensitivity setting via the GKU GO app to a lower level. |
| Dash cam overheating. | Prolonged exposure to direct sunlight; continuous Wi-Fi use. | Ensure proper ventilation. Limit continuous Wi-Fi connection if not actively using the app. The super capacitor design helps mitigate this. |
8. Specifications
| Feature | Detail |
|---|---|
| Model | 4K-D200 |
| Brand | GKU |
| Video Resolution | 4K (3840x2160P) @ 25fps |
| Viewing Angle | 170° Wide Angle |
| Aperture | F1.8 |
| Lens | 6-Glass Lens |
| Storage | Supports up to 256GB Micro SD Card (64GB included) |
| Connectivity | Built-in Wi-Fi, Type-C USB |
| Special Features | Loop Recording, G-Sensor, 24H Parking Monitor (Hardwire Kit required), Super Night Vision, App Control, Voice Prompts, Super Capacitor, Low Voltage Protection |
| Product Dimensions | 1.2 x 7.8 x 2 cm (approx. 3x1.2x1.6 inches) |
| Item Weight | 350 Grams |
9. Warranty and Support
GKU is committed to providing excellent customer service and support for your D200 Dash Cam.
- Warranty: The GKU D200 camera includes a 12-month warranty. This warranty can be extended to 24 months if the product is registered within 7 days of purchase.
- Technical Support: Lifetime technical support is provided for the GKU D200 Dash Cam.
- Contact: For any issues or inquiries, please reach out to GKU support through Amazon or the official GKU support channels. They aim to provide a satisfactory solution within 24 hours.
Ask a question about this manual
Ask about setup, troubleshooting, compatibility, parts, safety, or missing instructions. Manuals+ will review the question and use this page’s manual context to help answer it.