1. Introduction
This manual provides essential instructions for the safe and efficient operation of your CHARGEWARE Level 2 240V/40A Fast EV Charger. This versatile charging station is designed for both wall-mounted and portable use, offering fast and reliable charging for your electric vehicle. It is compatible with all SAE J1772 electric vehicles and can be adapted for NACS standard vehicles (adapter sold separately).
The charger features a robust NEMA 4X rated enclosure for indoor and outdoor use, a 24-foot cable for flexible placement, and an LCD screen for real-time charging information. It is ETL, FCC, and Energy Star certified, ensuring high standards of safety and energy efficiency.

Image 1.1: Overview of the CHARGEWARE Level 2 EV Charger and its accessories.
2. Safety Information
Please read all safety instructions carefully before installation and use. Failure to follow these instructions may result in electric shock, fire, or serious injury.
- Electrical Safety: Ensure proper grounding. Do not use if the charging cable or plug is damaged. Avoid touching live electrical parts.
- Installation: Professional installation is recommended if a NEMA 14-50 outlet is not already present. Ensure the electrical circuit can support the charger's maximum current.
- Environment: The charger is rated NEMA 4X for indoor/outdoor use, providing protection against water and dust. However, avoid submerging the unit in water.
- Children and Pets: Keep the charger and cables out of reach of children and pets during operation.
- Certifications: This charger is ETL, FCC, and Energy Star certified, indicating compliance with safety and performance standards. It includes comprehensive protection features such as over/under-voltage, leakage, surge, grounding fault, over-current, over-temperature, and control pilot fault protections, along with a built-in CCID.

Image 2.1: The charger unit highlighting its ETL, FCC, and Energy Star certifications.
3. Package Contents
Verify that all items listed below are included in your package:
- CHARGEWARE Level 2 EV Charger Unit with 24ft Cable
- Carry Bag
- Mounting Bracket
- Holster Dock
- NEMA 14-50R to 5-15P Adapter (for Level 1 charging)
- User Manual
- Warranty Card
- Bracket Anchors
- Bracket Screws
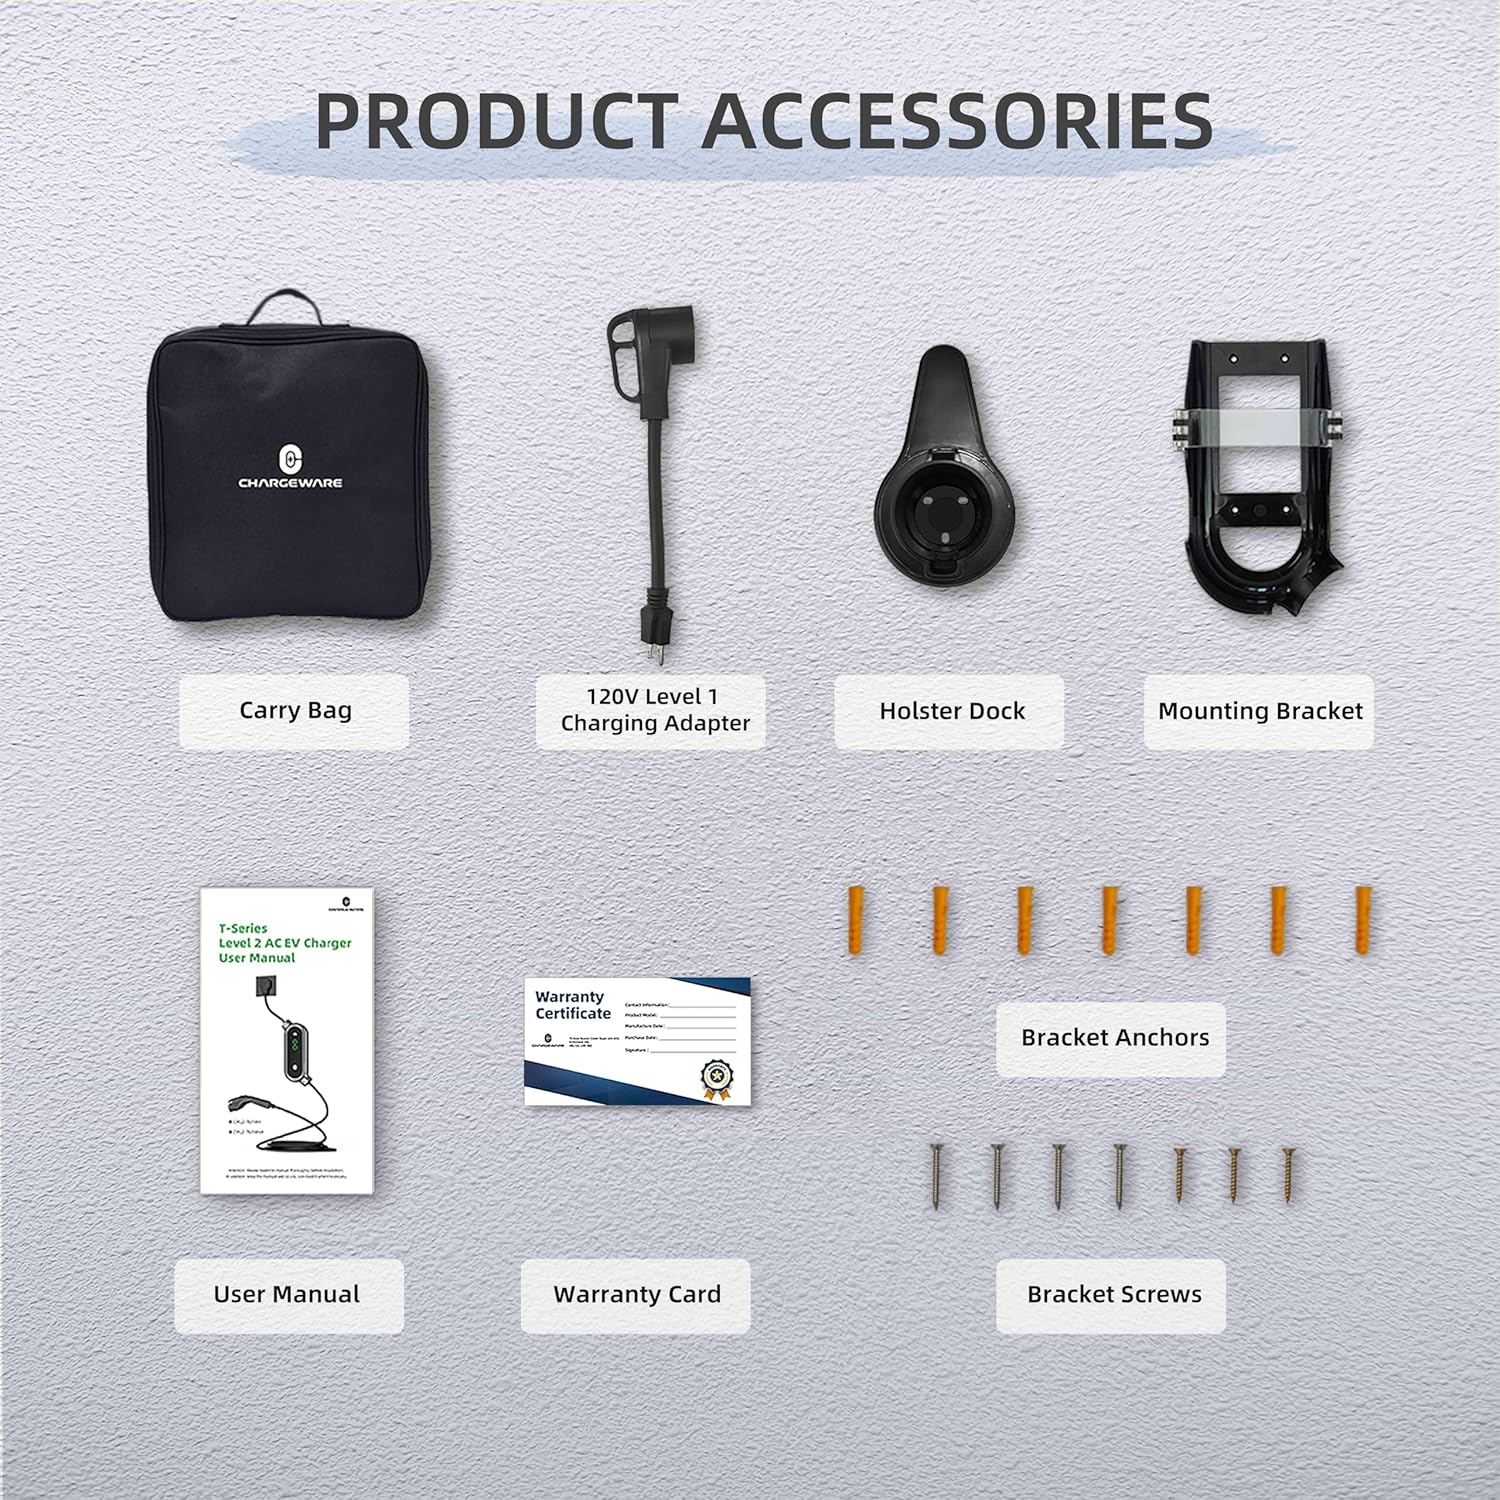
Image 3.1: Complete list of items included in the product package.
4. Setup and Installation
The CHARGEWARE EV Charger offers flexible installation options: wall-mounted for permanent home use or portable for on-the-go charging.
4.1 Wall-Mounted Installation
- Select Location: Choose a suitable indoor or outdoor location near your NEMA 14-50 outlet, ensuring sufficient space for cable management.
- Mounting Bracket: Use the provided mounting bracket as a template to mark drilling points on the wall. Drill holes and insert the bracket anchors. Secure the mounting bracket to the wall using the provided screws.
- Attach Holster Dock: Secure the holster dock for the charging connector near the mounting bracket.
- Mount Charger: Hang the charger unit onto the installed mounting bracket.
4.2 Portable Use
For portable use, simply store the charger and its accessories in the provided carry bag. The lightweight design makes it easy to transport for charging at various locations.

Image 4.1: The charger configured for wall-mounted installation and packed for portable use.
4.3 Power Connection
- Level 2 Charging (240V): Plug the charger's NEMA 14-50 plug directly into a dedicated 240V NEMA 14-50 outlet. This provides up to 40A (9.6kW) charging.
- Level 1 Charging (120V): For situations where a 240V outlet is unavailable, use the included NEMA 14-50R to 5-15P adapter. Connect the charger's NEMA 14-50 plug to the adapter, then plug the adapter into a standard 120V NEMA 5-15 household socket. Note that charging current will be limited to a maximum of 16A for Level 1 charging.

Image 4.2: Connection options for Level 1 and Level 2 charging.
5. Operating Instructions
The CHARGEWARE EV Charger is designed for straightforward operation with an intuitive LCD screen and control buttons.
5.1 Connecting to Your Vehicle
- Ensure the charger is properly connected to a power source (NEMA 14-50 or 5-15P adapter).
- Open your vehicle's charging port.
- Insert the SAE J1772 charging connector firmly into your vehicle's charging port. A click indicates a secure connection.
- The charger will automatically begin charging based on the last selected settings, or you can adjust them.
5.2 Adjusting Charging Current and Delay
The charger features two buttons: a 'SET' button and an 'OK' button, located below the LCD screen.
- Adjust Current: Press the 'SET' button to cycle through available charging current options: 10A, 16A, 24A, 32A, and 40A. Press 'OK' to confirm your selection.
- Delay Charging: Press and hold the 'SET' button to enter delay charging mode. Use the 'SET' button to adjust the delay from 0 to 9 hours. Press 'OK' to confirm the delay. This feature allows you to schedule charging during off-peak electricity hours.
5.3 LCD Screen Display
The LCD screen provides real-time information about the charging process:
- Current Level: Displays the selected charging amperage (e.g., 40A).
- Temperature: Shows the internal operating temperature of the charger.
- Charging Time: Indicates the elapsed charging duration.
- Power: Displays the total energy delivered in kWh.
- Voltage: Shows the current input voltage.
- Current: Displays the actual charging current being drawn by the vehicle.

Image 5.1: Detailed view of the LCD screen and control buttons.
5.4 LED Indicator Light
The LED indicator light on the charger provides visual feedback on its status:
- Solid Green: Ready to charge or fully charged.
- Flashing Green: Charging in progress.
- Solid Red: Error or fault detected. Refer to troubleshooting.
6. Maintenance
Regular maintenance ensures the longevity and optimal performance of your CHARGEWARE EV Charger.
- Cleaning: Wipe the charger unit and cable with a soft, damp cloth. Do not use harsh chemicals or abrasive cleaners. Ensure the unit is unplugged before cleaning.
- Cable Care: Avoid kinking, twisting, or driving over the charging cable. Store the cable neatly using the holster dock when not in use.
- Connector Care: Keep the charging connector clean and free of debris. Ensure the protective cap is in place when not charging.
- Environmental Protection: The NEMA 4X rating provides protection against rain, snow, and dust. However, regularly inspect the unit for any signs of damage or wear, especially if used outdoors in harsh conditions.

Image 6.1: The charger's NEMA 4X rating ensures protection in various outdoor environments.
7. Troubleshooting
If you encounter issues with your CHARGEWARE EV Charger, refer to the following common problems and solutions:
| Problem | Possible Cause | Solution |
|---|---|---|
| Charger not powering on | No power from outlet; faulty cable/plug | Check power outlet; inspect cable for damage; try a different outlet. |
| Charging not starting | Connector not fully inserted; vehicle not ready to charge; fault detected | Ensure connector is firmly seated; check vehicle's charging status; unplug and re-plug the charger. |
| Red LED indicator / Error on LCD | Internal fault; over-temperature; ground fault; over-current | Unplug the charger from the power source and vehicle, wait 5 minutes, then reconnect. If the error persists, contact customer support. |
| Slow charging speed | Current setting too low; Level 1 charging (120V) | Adjust current setting to a higher amperage (up to 40A); ensure you are using a 240V NEMA 14-50 outlet for maximum speed. |
If the problem persists after attempting these solutions, please contact CHARGEWARE customer support for assistance.
8. Specifications
Detailed technical specifications for the CHARGEWARE Level 2 EV Charger (Model CWL2-TU14H):
| Feature | Specification |
|---|---|
| Model | CWL2-TU14H |
| Input Voltage | 120V AC (Level 1) / 240V AC (Level 2) |
| Maximum Output Current | 40 Amps |
| Adjustable Current Settings | 10A, 16A, 24A, 32A, 40A |
| Maximum Power Output | 9.6 kW (at 40A, 240V) |
| Charging Cable Length | 24 feet (7.31 meters) |
| Input Plug Type | NEMA 14-50P (with 5-15P adapter for Level 1) |
| Output Connector Type | SAE J1772 |
| Enclosure Rating | NEMA Type 4X (Watertight) |
| Operating Temperature | Refer to product labeling for specific range |
| Certifications | ETL, FCC, Energy Star |
| Item Weight | 11.23 pounds |
| Product Dimensions | 12 x 5.5 x 2.6 inches |
9. Warranty and Support
The CHARGEWARE Level 2 EV Charger comes with a 2-Year Warranty from the date of purchase. This warranty covers defects in materials and workmanship under normal use.
For warranty claims, technical support, or any questions regarding your product, please refer to the contact information provided on your Warranty Card or visit the official CHARGEWARE website.