1. Introduction
Thank you for purchasing the VBESTLIFE 1080P 16MP Digital Video Camera. This manual provides essential information for the safe and effective operation of your device. Please read it thoroughly before use and retain it for future reference.
2. Safety Information
- Do not expose the camera to water or moisture.
- Avoid extreme temperatures, direct sunlight, or dusty environments.
- Use only the specified battery type and charger.
- Keep out of reach of children.
- Do not attempt to disassemble or modify the camera.
- Clean the camera with a soft, dry cloth. Avoid harsh chemicals.
3. Package Contents
Please check that all items are present in your package:
- VBESTLIFE Digital Video Camera
- USB Cable
- User Manual (this document)
4. Product Overview
Familiarize yourself with the components of your VBESTLIFE Digital Video Camera.
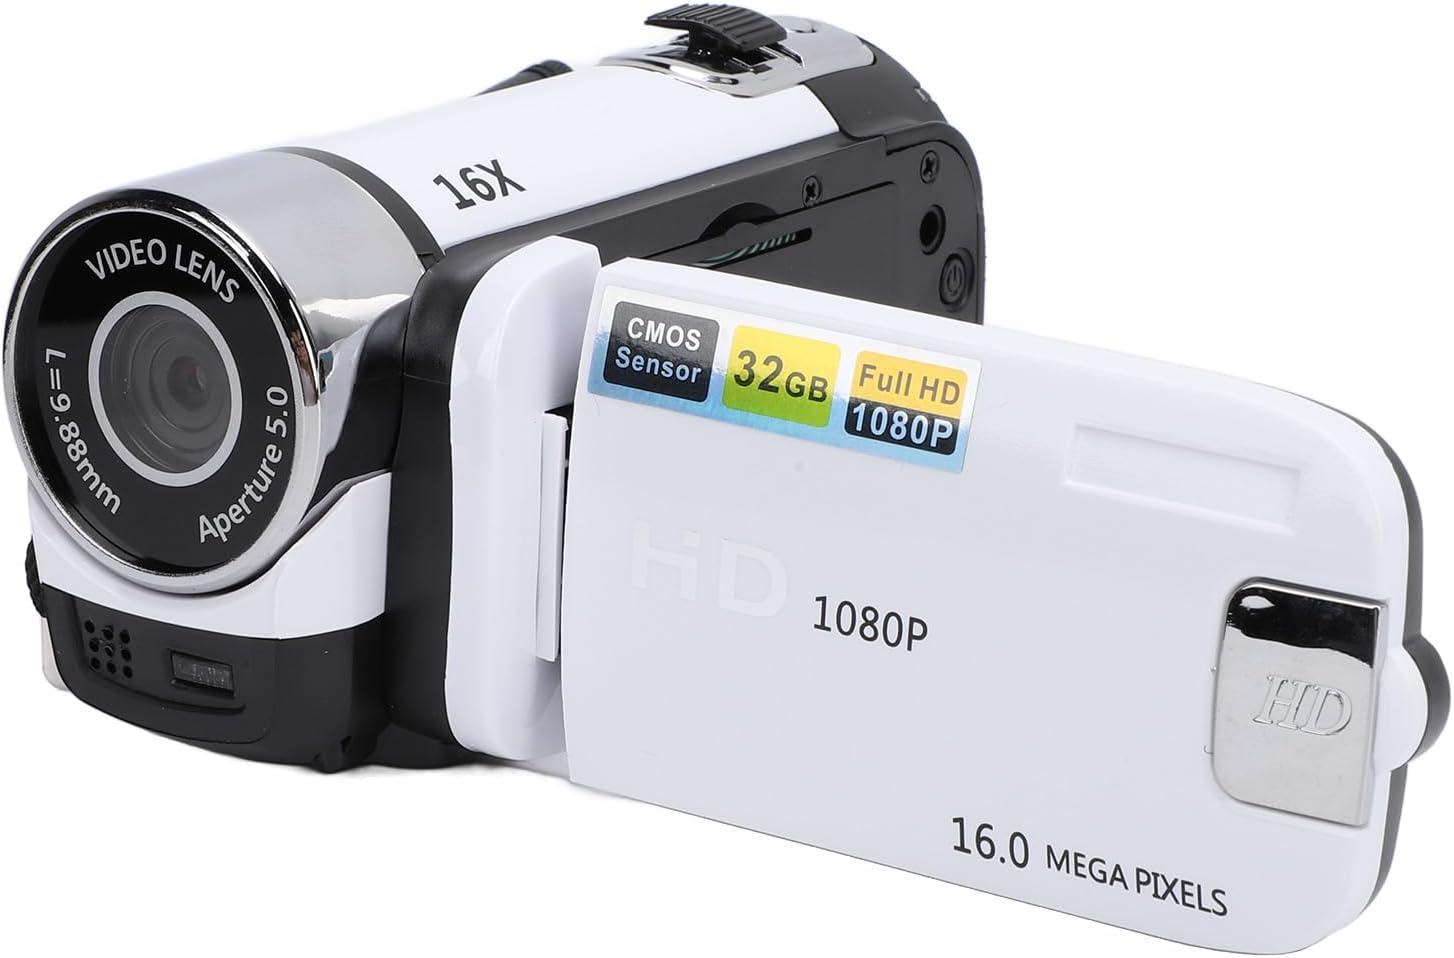
Figure 4.1: Front view of the VBESTLIFE Digital Video Camera with the 2.4-inch screen rotated open. The lens, 16X digital zoom marking, and screen are visible.
4.1. Front and Side Components

Figure 4.2: Close-up view of the camera's video lens, showing 'VIDEO LENS', 'f=7.9-88mm', and 'Aperture 5.0' markings. The integrated fill light is located below the lens.

Figure 4.3: Side view of the camera showing the USB port, Menu button, Mode button, and the Power/Shutter button. The speaker grille is also visible.
- Video Lens: Captures images and video.
- Fill Light: Provides additional illumination in low-light conditions.
- 2.4-inch Screen: Displays live view, menus, and playback.
- Power/Shutter Button: Turns the camera on/off and initiates recording/photo capture.
- Menu Button: Accesses camera settings.
- Mode Button: Switches between video, photo, and playback modes.
- USB Port: For charging and connecting to a computer.
- Memory Card Slot: For inserting an SD card (not included).
- Tripod Mount: 1/4 inch threaded hole for external tripods.
5. Setup
5.1. Installing the Battery
- Locate the battery compartment cover on the camera.
- Open the cover and insert the battery according to the polarity indicators (+/-).
- Close the battery compartment cover securely.
5.2. Inserting a Memory Card
A memory card (SD card, up to 32GB, not included) is required to save photos and videos.
- Locate the memory card slot, usually near the battery compartment or on the side.
- Insert the memory card with the metal contacts facing the correct direction until it clicks into place.
- To remove, gently push the card until it springs out.
5.3. Charging the Camera

Figure 5.1: The VBESTLIFE camera shown alongside its included USB cable, used for charging and data transfer.
Connect the camera to a power source (e.g., computer USB port or USB wall adapter) using the provided USB cable. The charging indicator light will illuminate. Charging is complete when the light turns off or changes color.
5.4. Initial Power On and Basic Settings
- Press and hold the Power/Shutter button to turn on the camera.
- If prompted, set the date and time using the navigation buttons and confirm with the Power/Shutter button. This ensures accurate time stamps on your recordings.
6. Operating the Camera
6.1. Recording Video
- Turn on the camera.
- Press the Mode button until the camera is in video recording mode (indicated by an icon on the screen).
- Press the Power/Shutter button to start recording. Press it again to stop recording.
6.2. Taking Photos
- Turn on the camera.
- Press the Mode button until the camera is in photo mode (indicated by an icon on the screen).
- Frame your shot and press the Power/Shutter button to take a photo.
6.3. Digital Zoom
Use the zoom controls (often integrated with navigation buttons) to zoom in or out digitally. The camera supports 16X digital zoom.
6.4. Fill Light
The camera features an integrated fill light for improved visibility in dark environments. Locate the fill light button (refer to Figure 4.2 for its position) and press it to activate or deactivate the light.
6.5. Anti-Shake Function
The electronic anti-shake feature helps stabilize your footage. This function is typically enabled or disabled via the camera's menu settings. Refer to the menu section for detailed instructions.
6.6. Loop Recording
Loop recording allows the camera to continuously record, overwriting the oldest files when the memory card is full. This feature can be enabled or disabled in the camera's settings menu.
6.7. Selfie Mode
The rotatable screen allows for easy selfie capture. Rotate the screen towards you to frame yourself. The camera may automatically switch to a selfie-optimized mode or you can adjust settings manually.
6.8. Video Pause Function
During video recording, you can pause and resume recording without creating a new file. This function is typically activated by a short press of the Power/Shutter button or a dedicated pause button during recording.
6.9. Playback
- Press the Mode button to enter playback mode.
- Use the navigation buttons to browse through your recorded videos and photos.
- Press the Power/Shutter button to play a video or view a photo in full screen.
7. Connecting to a Computer
To transfer files to your computer:
- Ensure the camera is powered off.
- Connect the camera to your computer using the provided USB cable.
- Power on the camera. It should appear as a removable disk drive on your computer.
- Open the drive to access and copy your photos and videos.
- Safely eject the removable disk from your computer before disconnecting the USB cable.
8. Maintenance
8.1. Cleaning
- Use a soft, lint-free cloth to clean the camera body.
- For the lens, use a specialized lens cleaning cloth and solution. Avoid touching the lens surface with your fingers.
- Do not use abrasive cleaners or solvents.
8.2. Storage
When not in use for extended periods, remove the battery and store the camera in a cool, dry place away from direct sunlight and dust.
9. Troubleshooting
| Problem | Possible Cause | Solution |
|---|---|---|
| Camera does not power on. | Battery is dead or incorrectly inserted. | Charge the battery or re-insert it correctly. |
| Cannot record video/take photos. | No memory card, card full, or card error. | Insert a memory card, delete files, or format the card (this will erase all data). |
| Images/videos are blurry. | Lens is dirty, insufficient light, or camera shake. | Clean the lens, use the fill light, or enable anti-shake. |
| Camera not recognized by computer. | Loose USB connection, camera not in correct mode. | Ensure cable is secure, try a different USB port, or restart camera/computer. |
10. Specifications
| Feature | Detail |
|---|---|
| Model | VBESTLIFEgznr0gpfco-13 |
| Screen | 2.4 Inch Color Screen |
| Video Resolution | 1080P |
| Photo Resolution | 16 Megapixels (MP) |
| Digital Zoom | 16X |
| Special Features | Electronic Anti-Shake, Loop Recording, Selfie, Fill Light, Video Pause Function, Time Watermark |
| Storage | Supports SD Card up to 32GB (not included) |
| Connectivity | USB |
| Weight | Approximately 8 ounces |
| Dimensions | Approximately 5.12 x 4.33 x 2.76 inches |
11. Warranty and Support
For warranty information and technical support, please refer to the documentation provided at the time of purchase or contact your retailer. Keep your proof of purchase for any warranty claims.


