Product Overview
The Vikaqi Wall Mounted Clothes Drying Rack is designed to provide an efficient and space-saving solution for air-drying laundry. This foldable rack helps conserve energy and contributes to a healthier environment by allowing clothes to dry naturally. Its robust construction ensures durability and stability for various garments.
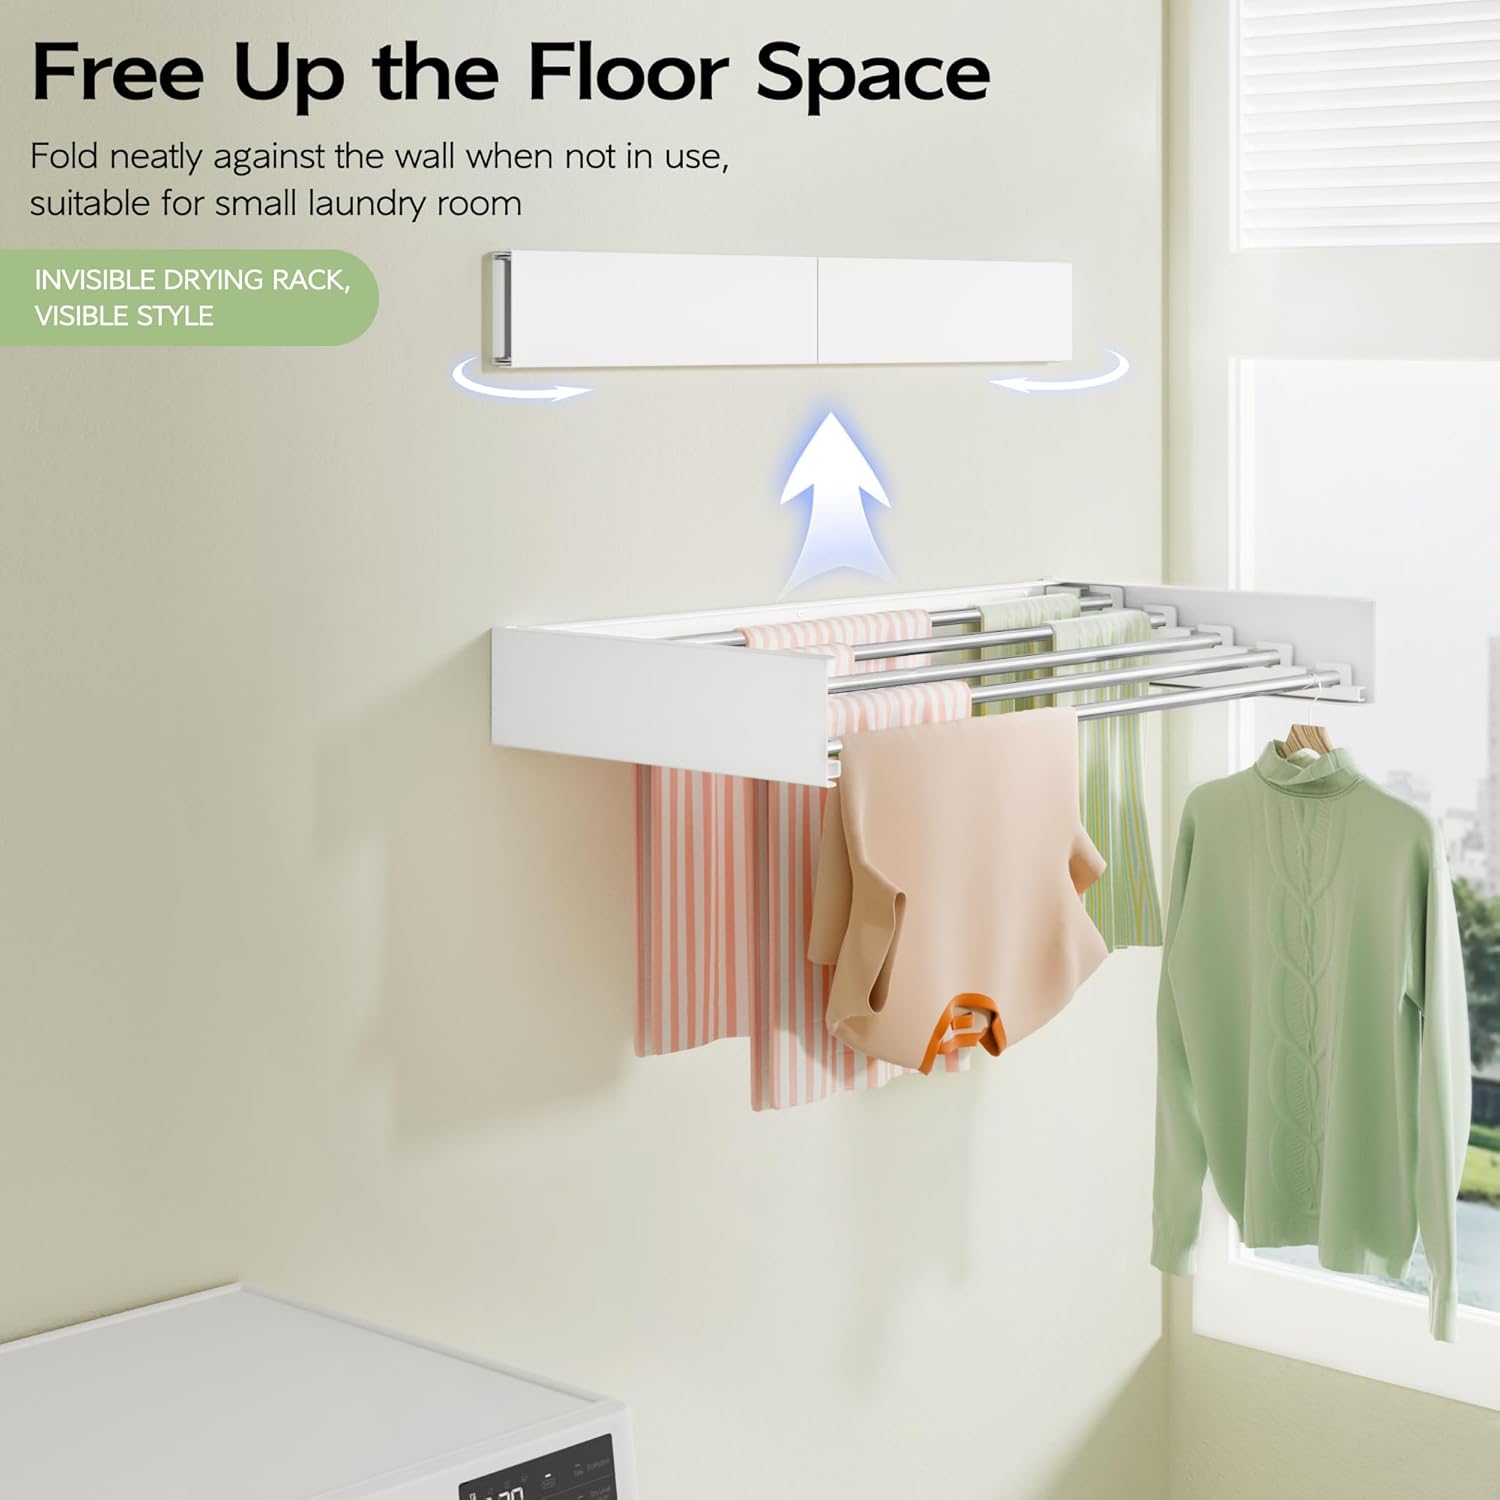
Figure 1: The Vikaqi Wall Mounted Clothes Drying Rack folded against the wall and extended with clothes. This image illustrates how the rack saves space by folding neatly when not in use and extends to provide ample drying rods for laundry.

Figure 2: A comparison highlighting the durability of Vikaqi's thick stainless steel rods against thinner, less robust rods from other brands. The Vikaqi rack features 5 thick stainless steel drying rods, built for heavy-duty use and capable of supporting up to 40 lbs without bending or warping.
Setup and Installation
The Vikaqi Wall Mounted Clothes Drying Rack comes pre-assembled, requiring only wall mounting for use. A cardboard template is included to simplify the installation process.
Tools Required
- Drill
- Screwdriver
- Level
- Pencil
- Measuring Tape
Installation Steps
- Position the Template: Place the provided cardboard template on the desired wall location. Use a level to ensure it is straight.
- Mark Drilling Spots: Use a pencil to mark the drilling spots indicated on the template.
- Pre-drill Holes: Using an appropriate drill bit size (refer to template or instructions for specific size), pre-drill holes at the marked spots.
- Insert Wall Anchors: If drilling into drywall and not directly into studs, insert the provided wall anchors into the pre-drilled holes for extra stability.
- Mount the Rack: Align the rack with the drilled holes and securely fasten it to the wall using the provided screws and a screwdriver.
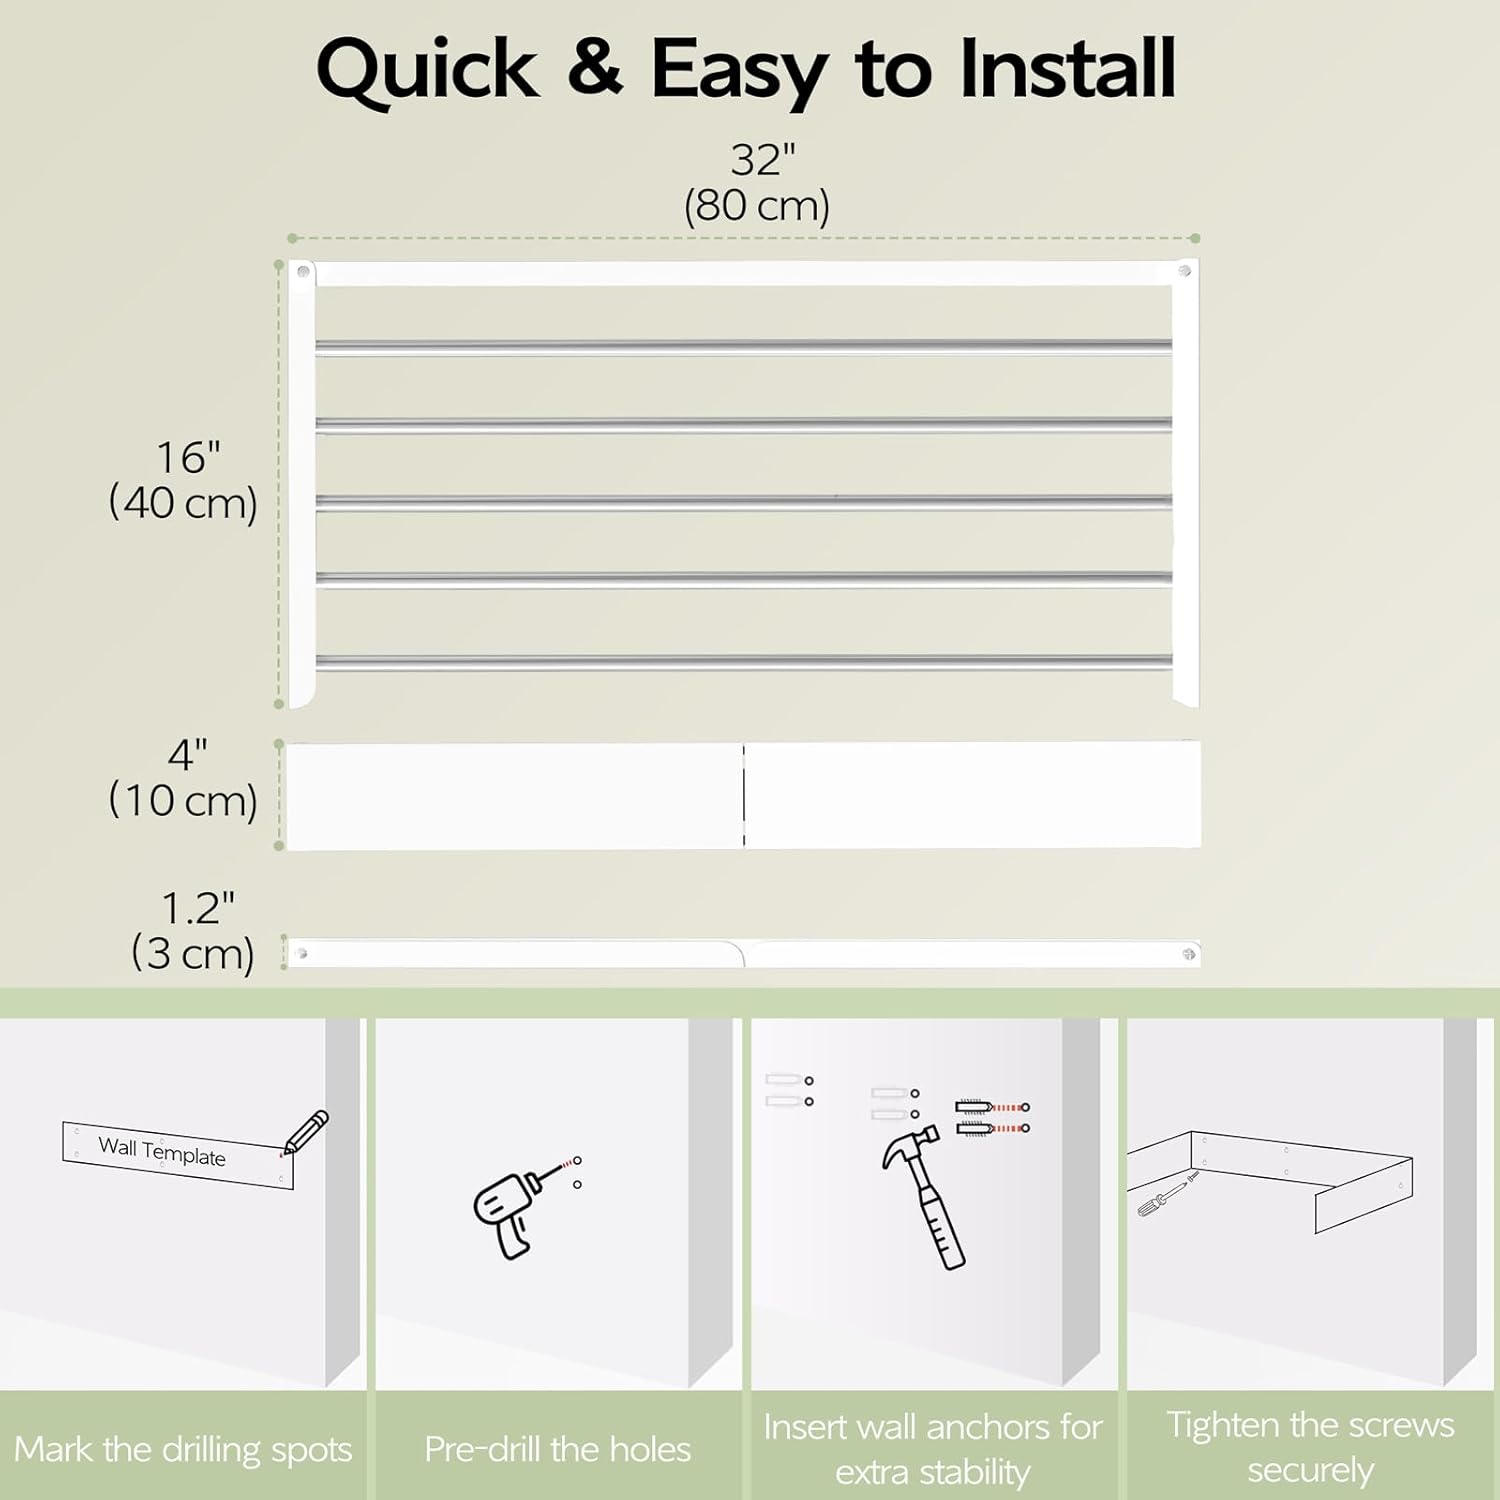
Figure 3: A visual guide to the installation process, detailing how to mark drilling spots, pre-drill holes, insert wall anchors, and securely tighten the rack to the wall. The included cardboard template simplifies this process.
Video 1: Official Vikaqi video demonstrating the installation process and functionality of the Wall Mounted Clothes Drying Rack. This video provides a visual walkthrough of how to set up and use the product.
Operating Instructions
Extending the Rack
- Gently pull the front panel of the rack outwards from the wall.
- Continue to extend the drying rods until they are fully pulled out and lock into their open position.
Retracting the Rack
- Push the drying rods back into the main unit until they are fully collapsed.
- Close the front panel, ensuring it sits flush against the wall for a compact appearance.
Hanging Clothes
- Flat Drying: Drape items directly over the rods. The staggered design allows for optimal airflow.
- Hanger Drying: For items that require hanging or more air circulation, use hangers on the rods.

Figure 4: This image demonstrates the versatile drying options of the rack, showing a woman air-drying clothes and insets illustrating its use in various settings such as a bathroom, laundry room, and outdoors.
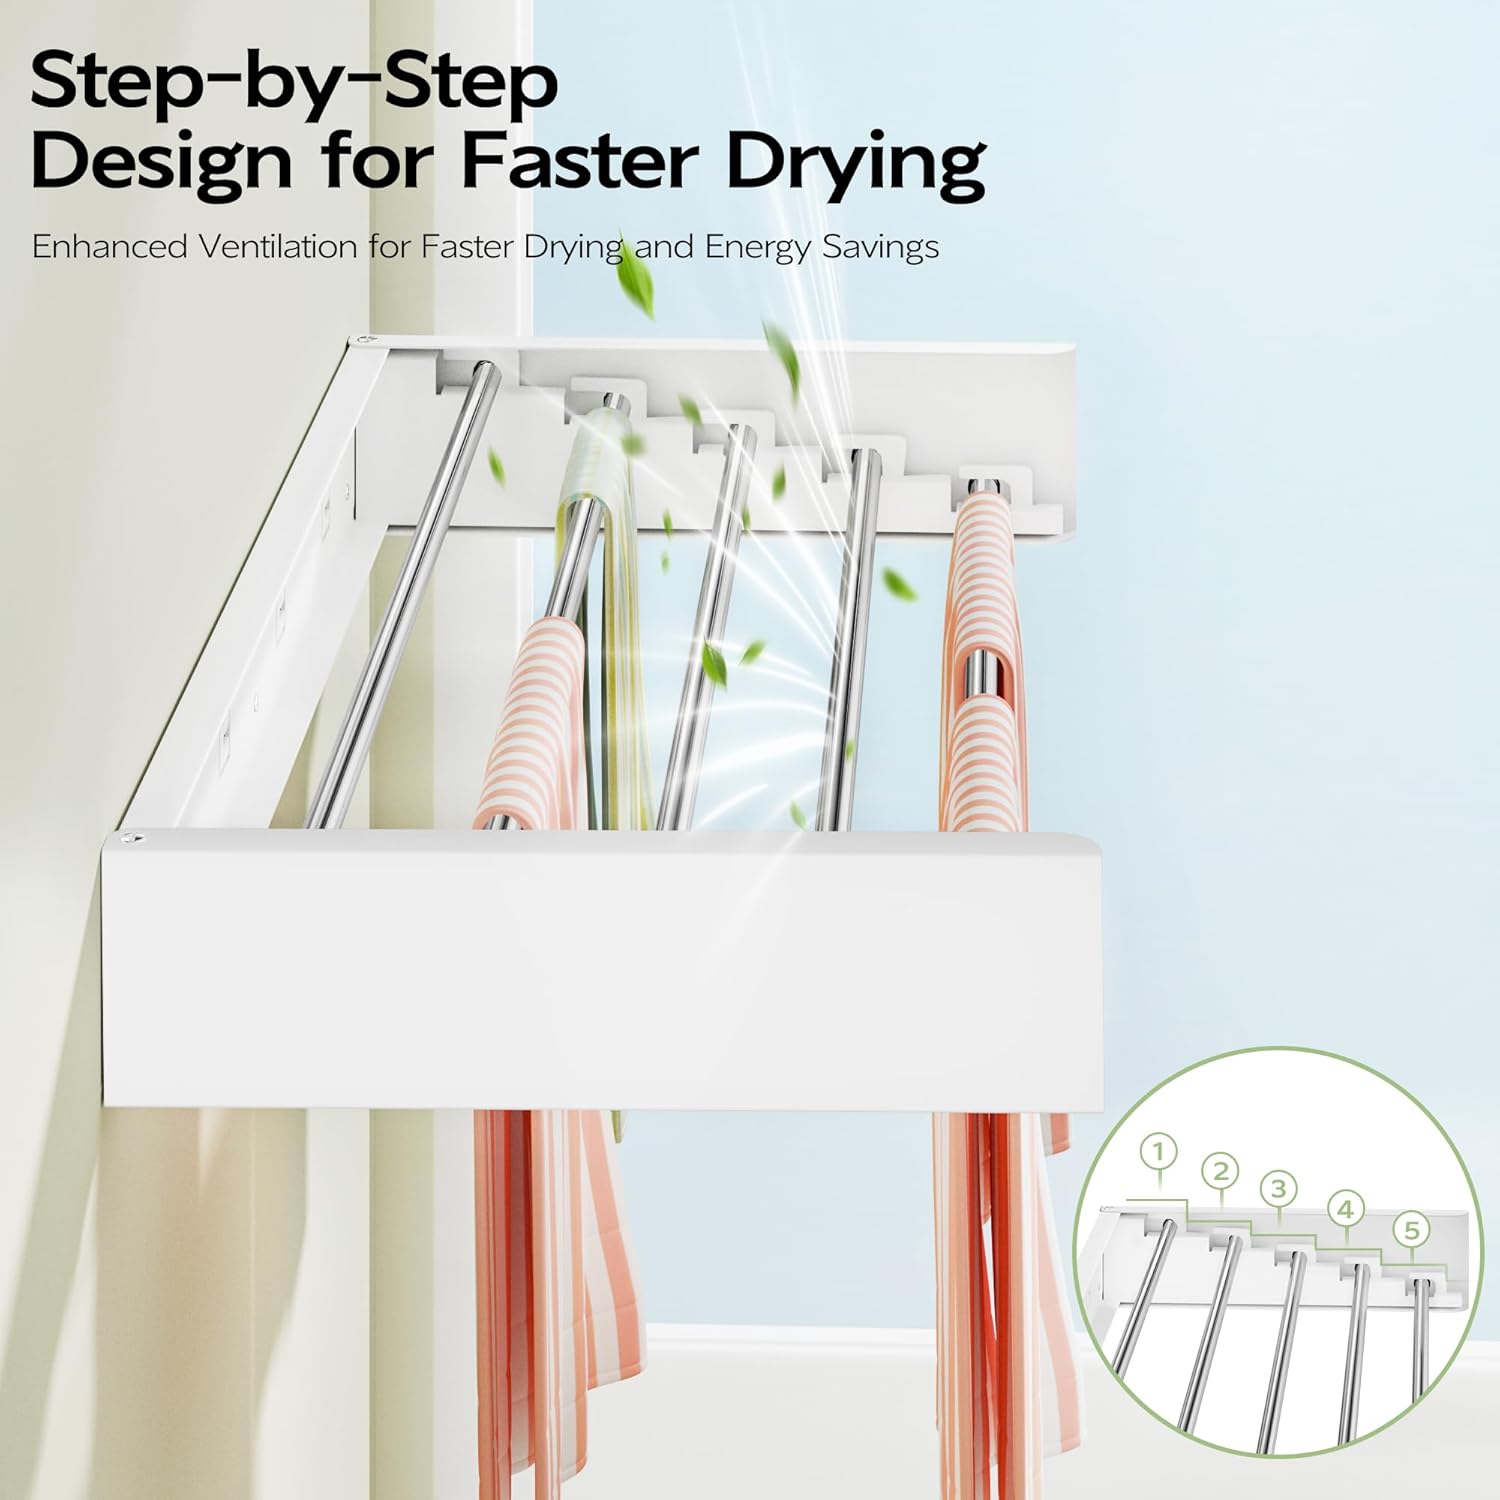
Figure 5: A close-up view of the drying rack, highlighting its step-by-step design with staggered rods. This design enhances ventilation, promoting faster and more efficient drying of garments.
Maintenance
- Cleaning: Regularly wipe down the stainless steel rods and the iron frame with a soft, damp cloth to prevent dust and grime buildup.
- Avoid Harsh Chemicals: Do not use abrasive cleaners, scouring pads, or harsh chemicals, as these can damage the finish and material of the rack.
- Drying: Ensure the rack is completely dry before folding it away to prevent moisture accumulation and potential rust, especially in humid environments.
Troubleshooting
- Rack does not extend/retract smoothly:
Check for any obstructions (e.g., lint, small objects) between the rods or panels. Ensure the mechanism is clean and free of debris. Applying a small amount of silicone lubricant to the sliding parts may help. - Rack feels unstable after installation:
Verify that all mounting screws are securely tightened. Confirm that the rack was installed into wall studs or appropriate heavy-duty anchors designed for your wall type. Re-installation may be necessary if anchors are insufficient. - Clothes are not drying efficiently:
Ensure adequate spacing between garments for proper airflow. Avoid overcrowding the rods. Check for sufficient room ventilation; opening a window or using a fan can improve drying time.
Specifications
- Model Number: YS80-W-HW
- Dimensions (D x W x H): 16"D x 32"W x 4"H
- Material: Iron, Stainless Steel
- Color: White
- Item Weight: 4 Pounds
- Weight Capacity: 40 Pounds
- Number of Rods: 5
- Special Features: Adjustable, Collapsible, Foldable, Rust Resistant, Space Saving
Warranty and Support
This Vikaqi Wall Mounted Clothes Drying Rack comes with a one-year warranty from the date of purchase. This warranty covers manufacturing defects and material flaws under normal use.
For support, troubleshooting assistance, or to make a warranty claim, please contact Vikaqi customer service through the retailer where the product was purchased. Please retain your proof of purchase for warranty validation.