1. Introduction
Thank you for choosing the EZ Tattoo Kit. This manual provides essential information for the safe and effective use of your new wireless tattoo machine and accompanying accessories. Please read this manual thoroughly before operating the device to ensure proper setup, operation, and maintenance.
2. Safety Information
WARNING: This product is intended for professional use by trained individuals. Improper use can lead to injury, infection, or damage to the device. Always follow local regulations and hygiene standards for tattooing.
- Always wear appropriate personal protective equipment (PPE), including gloves, during setup and operation.
- Ensure all components are clean and sterilized before use.
- Do not operate the machine if it is damaged or malfunctioning.
- Keep the device away from water and excessive moisture.
- Store the kit in a cool, dry place when not in use.
- Dispose of used needles and contaminated materials according to local biohazard regulations.
3. Package Contents
Verify that all items listed below are present in your EZ Tattoo Kit package.

Figure 3.1: Overview of the EZ Tattoo Kit contents, including the Lancer tattoo machine, power supply, needles, inks, and various accessories.
- 1 x Lancer Wireless Tattoo Machine with 1500mAh Power Supply
- 20 x Tattoo Needle Cartridges (5x1003RL, 5x1005RL, 5x1005RM, 5x1007RM)
- 10 x Tattoo Ink (7.5ml bottles)
- 100 x Ink Cups
- 200 x Tattoo Machine Covers
- 2 x Transfer Paper
- 1 x Practice Skin
- 1 x Tattoo Grip Bandage
- 1 x Pair of Tattoo Gloves
- 1 x Battery Type-C Charging Cable
- 1 x Carrying Case
4. Product Features
4.1 Lancer Wireless Tattoo Machine
The Lancer Tattoo Gun features a cordless design with a one-piece body for easy cleaning and maintenance. It is engineered for both lining and shading applications.
- Stroke: 3.5 mm
- Switch Frequency: 60 - 160 Hz
- Motor: Direct drive, custom super torque brushless motor
- Speed: 12V 10000Rpm
- Voltage Range: 5-12V
- Design: Lightweight and ergonomic for reduced hand fatigue during long sessions.

Figure 4.1: The Lancer Tattoo Machine highlighting its 3.5mm stroke length.

Figure 4.2: The sleek, classic exterior design of the Lancer Tattoo Machine.

Figure 4.3: Internal view of the Lancer Tattoo Machine showcasing its custom coreless motor.
4.2 Digital Display & Battery
The integrated digital LED screen provides real-time information on the machine's operating status.
- Display: Visual digital LED screen showing operating voltage, frequency, remaining battery level, and hours of operation.
- Battery Capacity: 1500mAh
- Charging: Type-C port
- Working Time: 3-5 hours after a full charge
- Recharging Time: Approximately 2 hours

Figure 4.4: The Lancer Tattoo Machine's efficient charging capabilities and digital display showing battery life and working time.
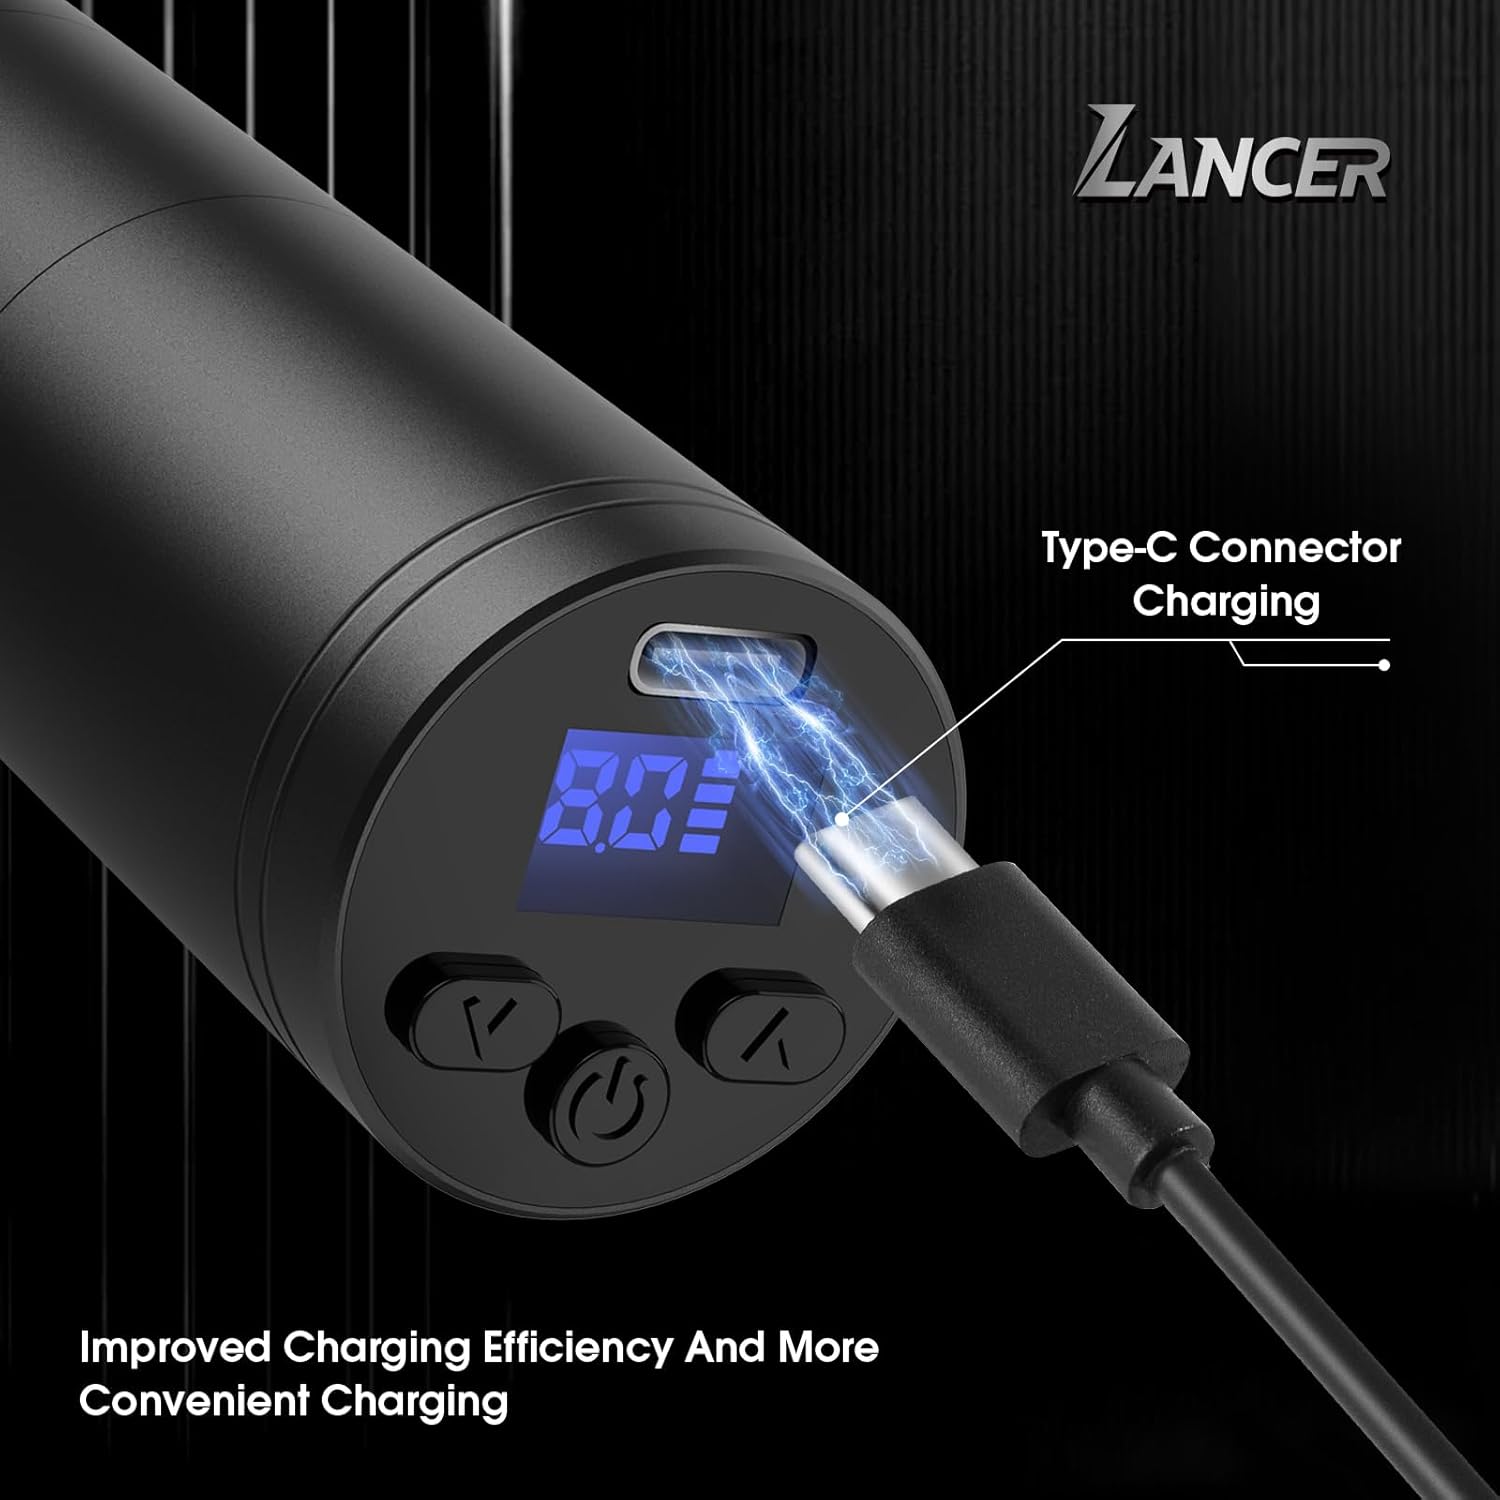
Figure 4.5: Close-up of the Type-C connector for charging the Lancer Tattoo Machine.
4.3 Tattoo Needle Cartridges
The kit includes a variety of cartridge needles suitable for different tattooing techniques.
- Quantity: 20 pieces
- Types:
- 5x 1003RL (Round Liner) - Ideal for fine lines and detailed work.
- 5x 1005RL (Round Liner) - Suitable for general lining.
- 5x 1005RM (Round Magnum) - Used for soft shading and color packing.
- 5x 1007RM (Round Magnum) - For broader shading and larger color areas.
5. Setup Guide
- Charge the Machine: Before first use, fully charge the Lancer tattoo machine using the provided Type-C charging cable. Connect the cable to the machine's Type-C port and a suitable USB power adapter (not included). The digital display will indicate charging status.
- Prepare Your Workspace: Ensure your tattooing area is clean, sterile, and well-lit. Lay out all necessary tools and supplies.
- Wear PPE: Put on the provided tattoo gloves and any other necessary personal protective equipment.
- Install Needle Cartridge:
- Select the appropriate needle cartridge for your task (e.g., 3RL/5RL for lining, 5RM/7RM for shading).
- Carefully remove the needle cartridge from its sterile packaging.
- Insert the cartridge into the front of the Lancer tattoo machine, twisting gently until it clicks securely into place.
- Prepare Ink: Pour a small amount of desired tattoo ink into the provided ink cups. Avoid overfilling.
- Apply Machine Cover: For hygiene, place a tattoo machine cover over the Lancer machine, ensuring it covers the entire body and prevents cross-contamination.
6. Operating Instructions
- Power On/Off: Press and hold the power button on the machine's digital display to turn the device on or off.
- Adjust Voltage: Use the up (^) and down (v) arrow buttons on the display to adjust the operating voltage. The recommended voltage range is 5-12V. Start with a lower voltage and gradually increase as needed for your specific task and needle type.
- Check Display: Monitor the digital display for current voltage, frequency, and remaining battery life during operation.
- Practice on Skin: Before tattooing on a client, practice on the provided practice skin to familiarize yourself with the machine's feel, voltage settings, and needle depth.
- Tattooing:
- Dip the needle cartridge into the ink cup, allowing the needle to draw up ink.
- Begin tattooing, maintaining consistent speed and depth.
- Re-dip the needle as needed to ensure proper ink flow.
- Pause/Resume: A short press of the power button may pause or resume operation, depending on the machine's specific firmware. Refer to the display for indicators.
- After Use: Once finished, power off the machine.
7. Maintenance and Care
- Cleaning:
- After each use, immediately remove and safely dispose of the used needle cartridge.
- Remove the machine cover.
- Wipe down the exterior of the machine with a sterile wipe or disinfectant solution. The one-piece body design facilitates easy cleaning.
- Do not submerge the machine in liquid.
- Storage: Store the Lancer tattoo machine and accessories in the provided carrying case in a clean, dry, and cool environment, away from direct sunlight and extreme temperatures.
- Battery Care:
- Avoid fully discharging the battery frequently.
- Charge the battery regularly, even if not in use, to maintain its lifespan.
- Do not expose the battery to high temperatures.
- Needle Disposal: Always dispose of used needle cartridges in a designated sharps container according to local health and safety regulations.
8. Troubleshooting
| Problem | Possible Cause | Solution |
|---|---|---|
| Machine not turning on. | Battery is depleted. | Charge the machine fully using the Type-C cable. |
| Machine stops during operation. | Low battery; Overload/Stall protection activated. | Recharge the battery. Reduce pressure on the needle or check for obstructions. |
| Needle not moving or moving weakly. | Needle cartridge not installed correctly; Low voltage setting; Damaged needle. | Ensure cartridge is securely clicked in. Increase voltage. Replace with a new needle cartridge. |
| Ink not flowing properly. | Needle clogged; Insufficient ink in cup; Incorrect needle depth. | Clean needle by running it in distilled water. Ensure enough ink. Adjust needle depth. |
| Machine feels hot. | Prolonged continuous use; High voltage setting. | Allow the machine to cool down. Consider reducing voltage if not impacting performance. |
If you encounter issues not listed here or if the problem persists, please contact EZTAT2 customer support.
9. Specifications
| Feature | Detail |
|---|---|
| Product Name | EZ Tattoo Kit - Lancer Black |
| Model | Lancer Black (Wireless Tattoo Machine) |
| ASIN | B0DGC8YY5X |
| Stroke Length | 3.5 mm |
| Switch Frequency | 60 - 160 Hz |
| Motor Speed | 12V 10000Rpm |
| Operating Voltage | 5-12V |
| Battery Capacity | 1500mAh Lithium Ion |
| Charging Port | Type-C |
| Working Time | 3-5 hours (after full charge) |
| Recharging Time | Approx. 2 hours |
| Package Dimensions | 9.21 x 7.13 x 3.98 inches |
| Item Weight | 2.05 Pounds |
| Manufacturer | EZTAT2 |
10. Warranty and Support
EZTAT2 is committed to providing high-quality products and excellent customer service. While specific warranty details are not provided in this manual, we stand behind our products.
If you encounter any problems, have questions, or require assistance with your EZ Tattoo Kit, please do not hesitate to contact EZTAT2 customer support. Our professional technical team is available to help you.
For further information or to contact support, please visit the official EZTAT2 store on Amazon: EZTAT2 Amazon Store.


