1. Product Overview
The YGiTK MM Phono Preamplifier is designed to convert delicate phono signals from a turntable into robust line-level signals. This allows you to connect any turntable to modern audio systems that lack a dedicated phono input. It features ultra-low noise operation for clear sound, a convenient volume control, and multiple output options including RCA and a 3.5mm headphone jack.
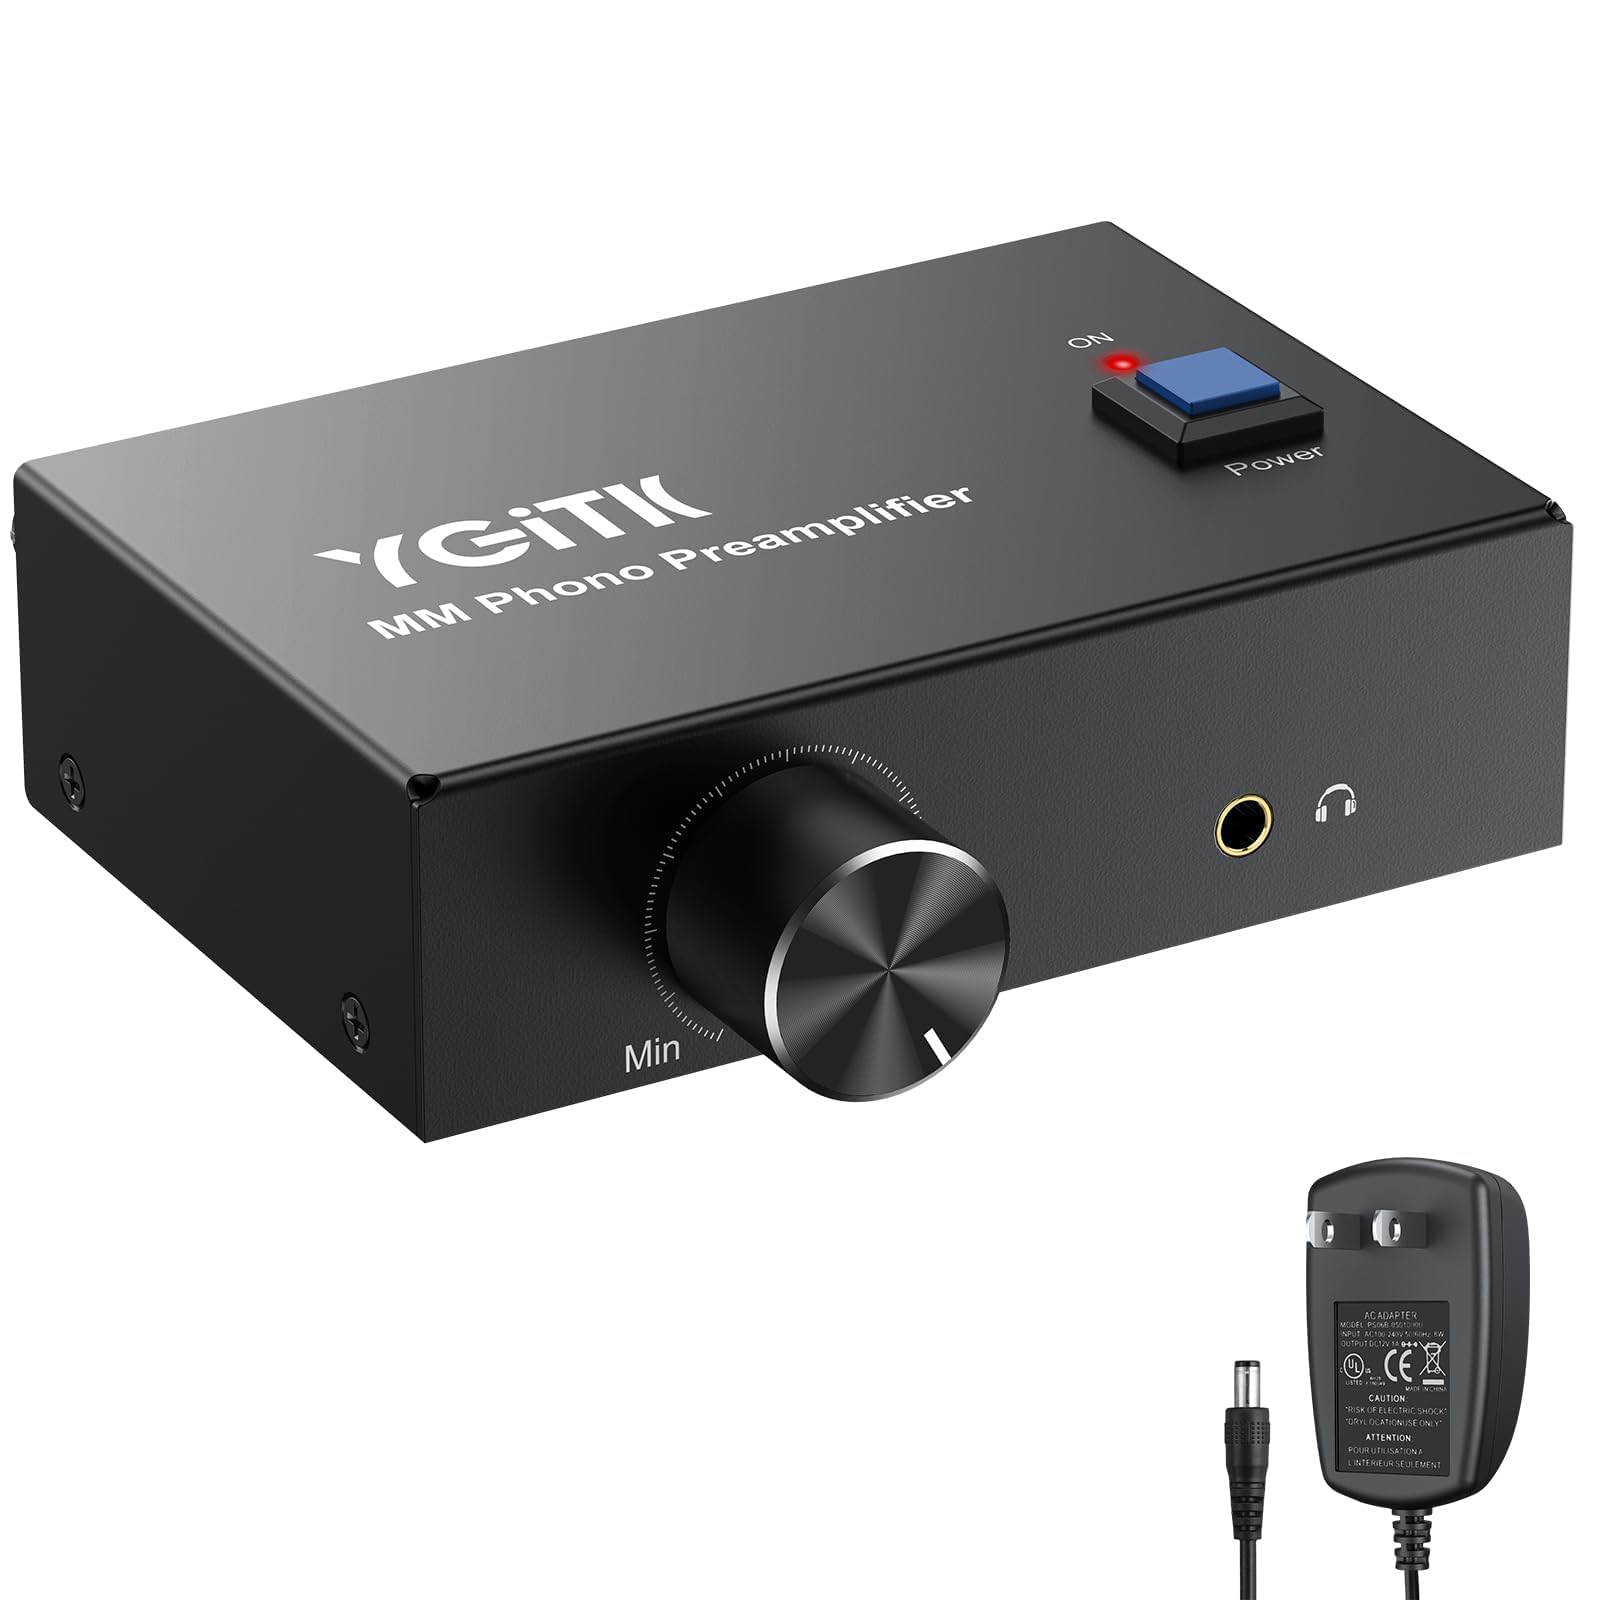
Image 1.1: Front view of the YGiTK MM Phono Preamplifier, showcasing its compact design and controls.
2. Package Contents
Please check the package contents upon unboxing to ensure all items are present:
- 1 x YGiTK MM Phono Preamplifier
- 1 x 12V Power Adapter
- 1 x User Manual (this document)

Image 2.1: The phono preamp, 12V power adapter, and user manual included in the package.
3. Product Features
- Signal Conversion: Converts phono signals to line-level signals for compatibility with modern audio systems.
- Ultra-Low Noise Operation: Engineered with advanced low-noise operational amplifiers for exceptional clarity and minimal interference.
- High Performance: Signal-to-Noise Ratio (SNR) of ≥68dB.
- Grounding Rod: Designed to protect your turntable and eliminate potential buzzing noises.
- Convenient Power Switch: Front-mounted power switch for easy on/off control.
- Volume Control: Intuitive knob to fine-tune audio levels.
- Gold-Plated RCA Inputs/Outputs: Ensures superior signal transfer and corrosion resistance.
- 3.5mm Headphone Output: Built-in jack for direct headphone connection.
- Simultaneous Output: Connect to speakers, amplifiers, or headphones simultaneously.
- Certified 12V Power Adapter: Provides stable, consistent power.
- Durable Construction: Solid metal casing and anti-slip pads for stability.

Image 3.1: Illustration highlighting the volume control, power switch, and gold-plated connectors.
4. Device Layout and Connections
Familiarize yourself with the input and output interfaces of the phono preamplifier.

Image 4.1: Top and rear view of the phono preamplifier, labeling the power button, RCA input, RCA output, ground terminal, 12V DC power socket, volume knob, and 3.5mm headphone jack.
- 12V DC Power Input: Connect the provided 12V power adapter here.
- RCA Output (L/R): Connect to your amplifier, receiver, or active speakers.
- RCA Input (L/R): Connect to the RCA output of your turntable.
- GND (Ground Terminal): Connect the ground wire from your turntable here to reduce hum.
- Power Button: Turns the unit on or off.
- Volume Knob: Adjusts the output volume.
- 3.5mm Headphone Output: Connect headphones for direct listening.
5. Setup Instructions
Follow these steps to connect your YGiTK MM Phono Preamplifier:
- Connect Turntable to Preamplifier:
- Connect the RCA output cables from your turntable to the RCA Input (L/R) ports on the phono preamplifier.
- If your turntable has a ground wire, connect it to the GND (Ground Terminal) on the preamplifier.
- Connect Preamplifier to Audio System:
- Connect RCA cables from the RCA Output (L/R) ports on the phono preamplifier to an available line-level input (e.g., AUX, CD, LINE IN) on your amplifier, receiver, or active speakers.
- Connect Power Adapter:
- Plug the provided 12V power adapter into the 12V DC Power Input on the preamplifier.
- Plug the power adapter into a wall outlet.
- Optional Headphone Connection:
- To listen directly with headphones, plug your 3.5mm headphones into the 3.5mm Headphone Output jack.

Image 5.1: A detailed diagram showing how to connect the turntable, phono preamp, amplifier/speakers, and headphones.
Video 5.1: A demonstration of connecting the YGiTK Phono Preamplifier with volume control to a turntable and audio system.
6. Operating Instructions
- Power On: Press the Power Button on the front of the unit. The "ON" indicator light will illuminate.
- Start Playback: Begin playing a record on your turntable.
- Adjust Volume: Use the Volume Knob on the front panel to adjust the audio output level to your desired listening volume.
- Headphone Use: If using headphones, ensure they are plugged into the 3.5mm jack. The volume knob will control the headphone output as well. Note that the RCA outputs remain active when headphones are connected.
- Power Off: Press the Power Button again to turn off the unit. The "ON" indicator light will turn off.

Image 6.1: Close-up of the front panel showing the volume knob, 3.5mm headphone jack, and power button.
7. Maintenance
- Cleaning: Use a soft, dry cloth to clean the exterior of the unit. Do not use liquid cleaners or solvents.
- Placement: Place the preamplifier on a stable, flat surface. To minimize interference, position it as close to your turntable as possible.
- Ventilation: Ensure adequate ventilation around the unit. Do not block any vents.
- Power: Always use the provided 12V power adapter. Disconnect power when the unit is not in use for extended periods.
8. Troubleshooting
| Problem | Possible Cause | Solution |
|---|---|---|
| No sound output. |
|
|
| Humming or buzzing noise. |
|
|
| Low volume output. |
|
|

Image 8.1: Graphic illustrating the noise reduction capabilities of the phono preamplifier, showing signal improvement.
9. Specifications
| Feature | Detail |
|---|---|
| Model Number | GA001 |
| Input Interface | RCA (L/R) |
| Output Interfaces | RCA (L/R), 3.5mm Headphone Jack |
| Max Output | 2V (PP) at 10K ohms |
| Signal-to-Noise Ratio (SNR) | ≥68dB |
| Power Supply | DC 12V 1A (Adapter included) |
| Dimensions (L x W x H) | Approximately 10.5cm x 7.0cm x 3.0cm (4.13in x 2.76in x 1.18in) |
| Item Weight | 15.2 ounces |
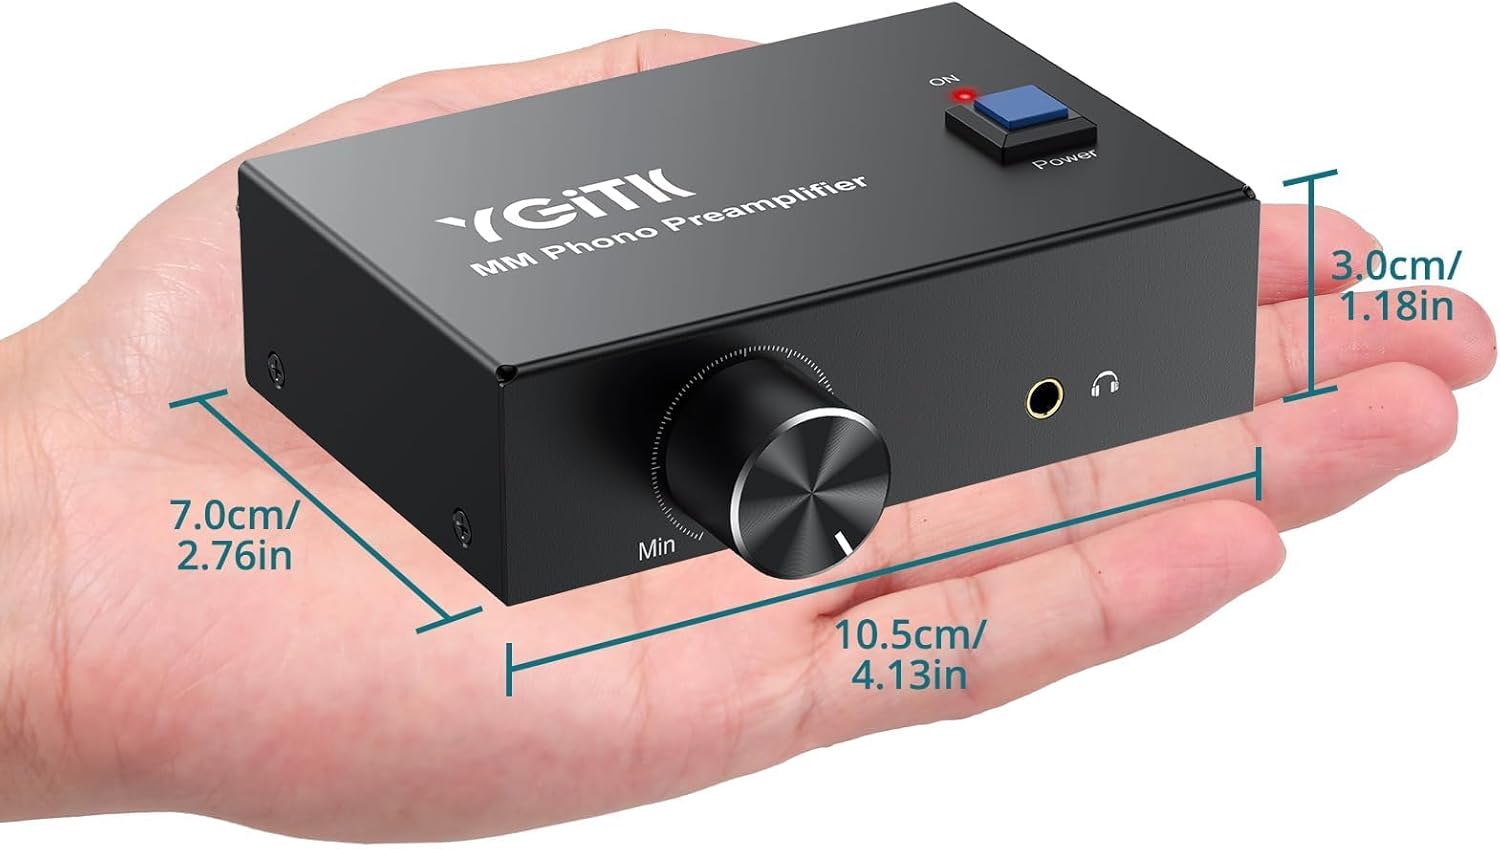
Image 9.1: The phono preamplifier held in a hand, with its dimensions labeled for scale.
10. Warranty and Support
YGiTK products are designed for reliability and performance. For specific warranty information, please refer to the documentation included with your purchase or contact YGiTK customer support.
If you encounter any issues or have questions regarding your YGiTK MM Phono Preamplifier, please contact our customer support team for assistance. Contact details can typically be found on the product packaging or the official YGiTK website.