1. Introduction
Thank you for purchasing the Audizio Milan DAB+ Radio. This portable radio combines modern digital audio broadcasting (DAB+) with traditional FM radio, along with Bluetooth wireless technology for streaming audio from your devices. Featuring a large 2.4-inch color display, integrated battery, and intuitive controls, the Milan radio is designed for ease of use and enjoyment in various settings. This manual provides essential information for setting up, operating, and maintaining your device.
2. Safety Instructions
- Read all instructions carefully before using the product.
- Do not expose the device to rain, moisture, or extreme temperatures.
- Avoid placing the unit near heat sources such as radiators, heat registers, stoves, or other apparatus (including amplifiers) that produce heat.
- Use only attachments/accessories specified by the manufacturer.
- Unplug the device during lightning storms or when unused for long periods.
- Do not open the casing. There are no user-serviceable parts inside. Refer all servicing to qualified service personnel.
- Dispose of batteries responsibly according to local regulations.
3. Package Contents
Please check the package contents upon unpacking:
- Audizio Milan DAB+ Radio
- USB Charging Cable
- User Manual
4. Product Overview
Familiarize yourself with the main components and controls of your Audizio Milan radio.

Figure 4.1: Front Panel Overview
This image displays the front of the Audizio Milan radio, highlighting the large 2.4-inch color display on the right, the speaker grille on the left, and the various control buttons and knobs below the screen. Key controls include Standby, Mode, Scan, Tune/Select, Info/Menu, Sleep, and preset buttons (1, 2, 3).

Figure 4.2: Screen and Navigation Buttons
An angled view of the radio emphasizing the clear 2.4-inch color display and the accessible navigation buttons. This design allows for easy control and monitoring of radio functions and settings.

Figure 4.3: Rear Connections
This image shows the rear panel of the Audizio Milan radio, detailing the input and output ports. Visible connections include the DC 5V power input (for USB charging), a 3.5mm Line Out jack for connecting to external audio systems, and a 3.5mm Headphone jack for private listening. The extendable antenna is also visible.
Controls and Functions:
- Display: 2.4-inch TFT color screen for station information, time, and menu navigation.
- Standby Button: Powers the unit on or off.
- Mode Button: Switches between DAB, FM, and Bluetooth modes.
- Scan Button: Initiates automatic station scanning in radio modes.
- Tune/Select Knob: Rotates to tune frequencies or navigate menus; press to select.
- Info/Menu Button: Displays station information or accesses the main menu.
- Sleep Button: Activates the sleep timer function.
- Preset Buttons (1, 2, 3): Quickly recall saved radio stations.
- Volume Knob: Adjusts the audio output level.
- DC 5V Input: For connecting the USB charging cable.
- Line Out (3.5mm): Connect to external amplifiers or speakers.
- Headphone Jack (3.5mm): For private listening.
5. Setup
5.1 Powering On
- Initial Charge: Before first use, fully charge the integrated battery using the supplied USB cable. Connect the USB cable to the DC 5V input on the back of the radio and the other end to a USB power adapter (not supplied) or a computer USB port. The charging indicator on the screen will show charging status.
- Power On/Off: Press the Standby button to turn the radio on or off.
5.2 Initial Setup (First Use)
Upon first power-on, the radio may guide you through an initial setup process.
- Language Selection: Use the Tune/Select knob to scroll through available languages and press the knob to confirm your selection.
- Time and Date: The radio will typically synchronize time and date automatically via DAB+ signal. If not, you can set it manually through the menu.
6. Operating Instructions
6.1 Mode Selection
Press the Mode button repeatedly to cycle through the available modes: DAB Radio, FM Radio, and Bluetooth.
6.2 Menu Navigation
Press the Info/Menu button to access the main menu. Use the Tune/Select knob to scroll through menu options and press the knob to confirm a selection. Press Info/Menu again to exit the menu.
7. Bluetooth Connectivity
The Audizio Milan radio features Bluetooth for wireless audio streaming from compatible devices.

Figure 7.1: Bluetooth in Use
This image illustrates the convenience of Bluetooth connectivity, showing a user wirelessly streaming audio from a smartphone to the Audizio Milan radio.
- Enter Bluetooth Mode: Press the Mode button until "Bluetooth" is displayed on the screen. The radio will enter pairing mode, indicated by a flashing Bluetooth icon or message.
- Enable Bluetooth on Your Device: On your smartphone, tablet, or computer, go to the Bluetooth settings and ensure Bluetooth is enabled.
- Select "Audizio Milan": From the list of available devices, select "Audizio Milan". Your device should now be paired and connected.
- Play Audio: Once connected, you can play audio from your device, and it will be streamed through the Audizio Milan radio.
8. DAB/FM Radio Operation
8.1 Automatic Scanning (DAB/FM)
- Select Mode: Press the Mode button to select either DAB or FM radio.
- Start Scan: Press the Scan button. The radio will automatically scan for available stations and store them. For DAB, it will list all found stations. For FM, it will stop at the next strong signal.
8.2 Manual Tuning (FM)
In FM mode, rotate the Tune/Select knob to manually adjust the frequency.
8.3 Saving and Recalling Presets
The radio allows you to save up to 20 presets for both DAB and FM stations.
- To Save:
- Tune to the desired station.
- Press and hold one of the Preset Buttons (1, 2, or 3) for a few seconds until "Preset Saved" or similar message appears.
- For other presets (4-20), access the preset menu via Info/Menu, select "Save Preset", choose a number, and press Tune/Select to confirm.
- To Recall:
- Briefly press one of the Preset Buttons (1, 2, or 3) to instantly recall the saved station.
- For other presets, access the preset menu via Info/Menu, select "Recall Preset", choose the desired number, and press Tune/Select to confirm.
9. Clock and Sleep Timer
9.1 Clock Function
The radio displays the current time and date, which is usually synchronized automatically via DAB+ signal. If manual adjustment is needed, navigate to the "Time/Date" settings in the main menu.
9.2 Sleep Timer
The sleep timer allows the radio to automatically turn off after a set period.
- Press the Sleep button repeatedly to cycle through available sleep timer durations (e.g., 15, 30, 45, 60, 90, 120 minutes, or Off).
- The selected duration will be displayed on the screen. The radio will automatically power off after this time.
10. Maintenance
- Cleaning: Use a soft, dry cloth to clean the exterior of the radio. Do not use abrasive cleaners, waxes, or solvents.
- Battery Care: To prolong battery life, avoid fully discharging the battery frequently. If storing the radio for an extended period, charge it to about 50% and recharge every few months.
- Antenna: Extend the telescopic antenna fully for optimal DAB+ and FM reception. Handle with care to avoid damage.
11. Troubleshooting
| Problem | Possible Cause | Solution |
|---|---|---|
| No power / Unit does not turn on. | Battery is depleted. USB cable not connected or faulty. | Charge the battery using the USB cable. Ensure USB cable is securely connected to a working power source. |
| Poor radio reception (DAB/FM). | Antenna not extended. Weak signal area. Interference from other electronic devices. | Fully extend the telescopic antenna. Move the radio to a location with better signal reception. Move the radio away from other electronic devices. |
| Bluetooth pairing fails. | Radio not in Bluetooth pairing mode. Bluetooth on source device is off. Device too far from radio. | Press Mode button to enter Bluetooth mode. Ensure Bluetooth is enabled on your source device. Place the device within 10 meters (30 feet) of the radio. |
| No sound. | Volume is too low. Mute function activated. Incorrect mode selected. | Increase the volume using the volume knob. Check if the radio is muted (if applicable). Ensure the correct mode (DAB, FM, Bluetooth) is selected. |
12. Specifications
| Brand | Audizio |
| Model | Milan |
| Color | Dark Brown/Silver |
| Tuner | DAB, DAB+, FM |
| Display | 2.4-inch TFT Color Screen |
| Bluetooth | Yes, for wireless audio streaming |
| Presets | 20 for DAB, 20 for FM |
| Battery | 2000 mAh integrated battery |
| Battery Playtime | Approx. 10 hours |
| Power Output | 30 W |
| Headphone Connection | 3.5mm Jack |
| Line Output | 3.5mm Jack |
| Power Input | 5V (via USB) |
| Dimensions (L x W x H) | 186 x 120 x 115 mm (7.32 x 4.72 x 4.53 inches) |
| Weight | 0.9 kg (1.98 lbs) |
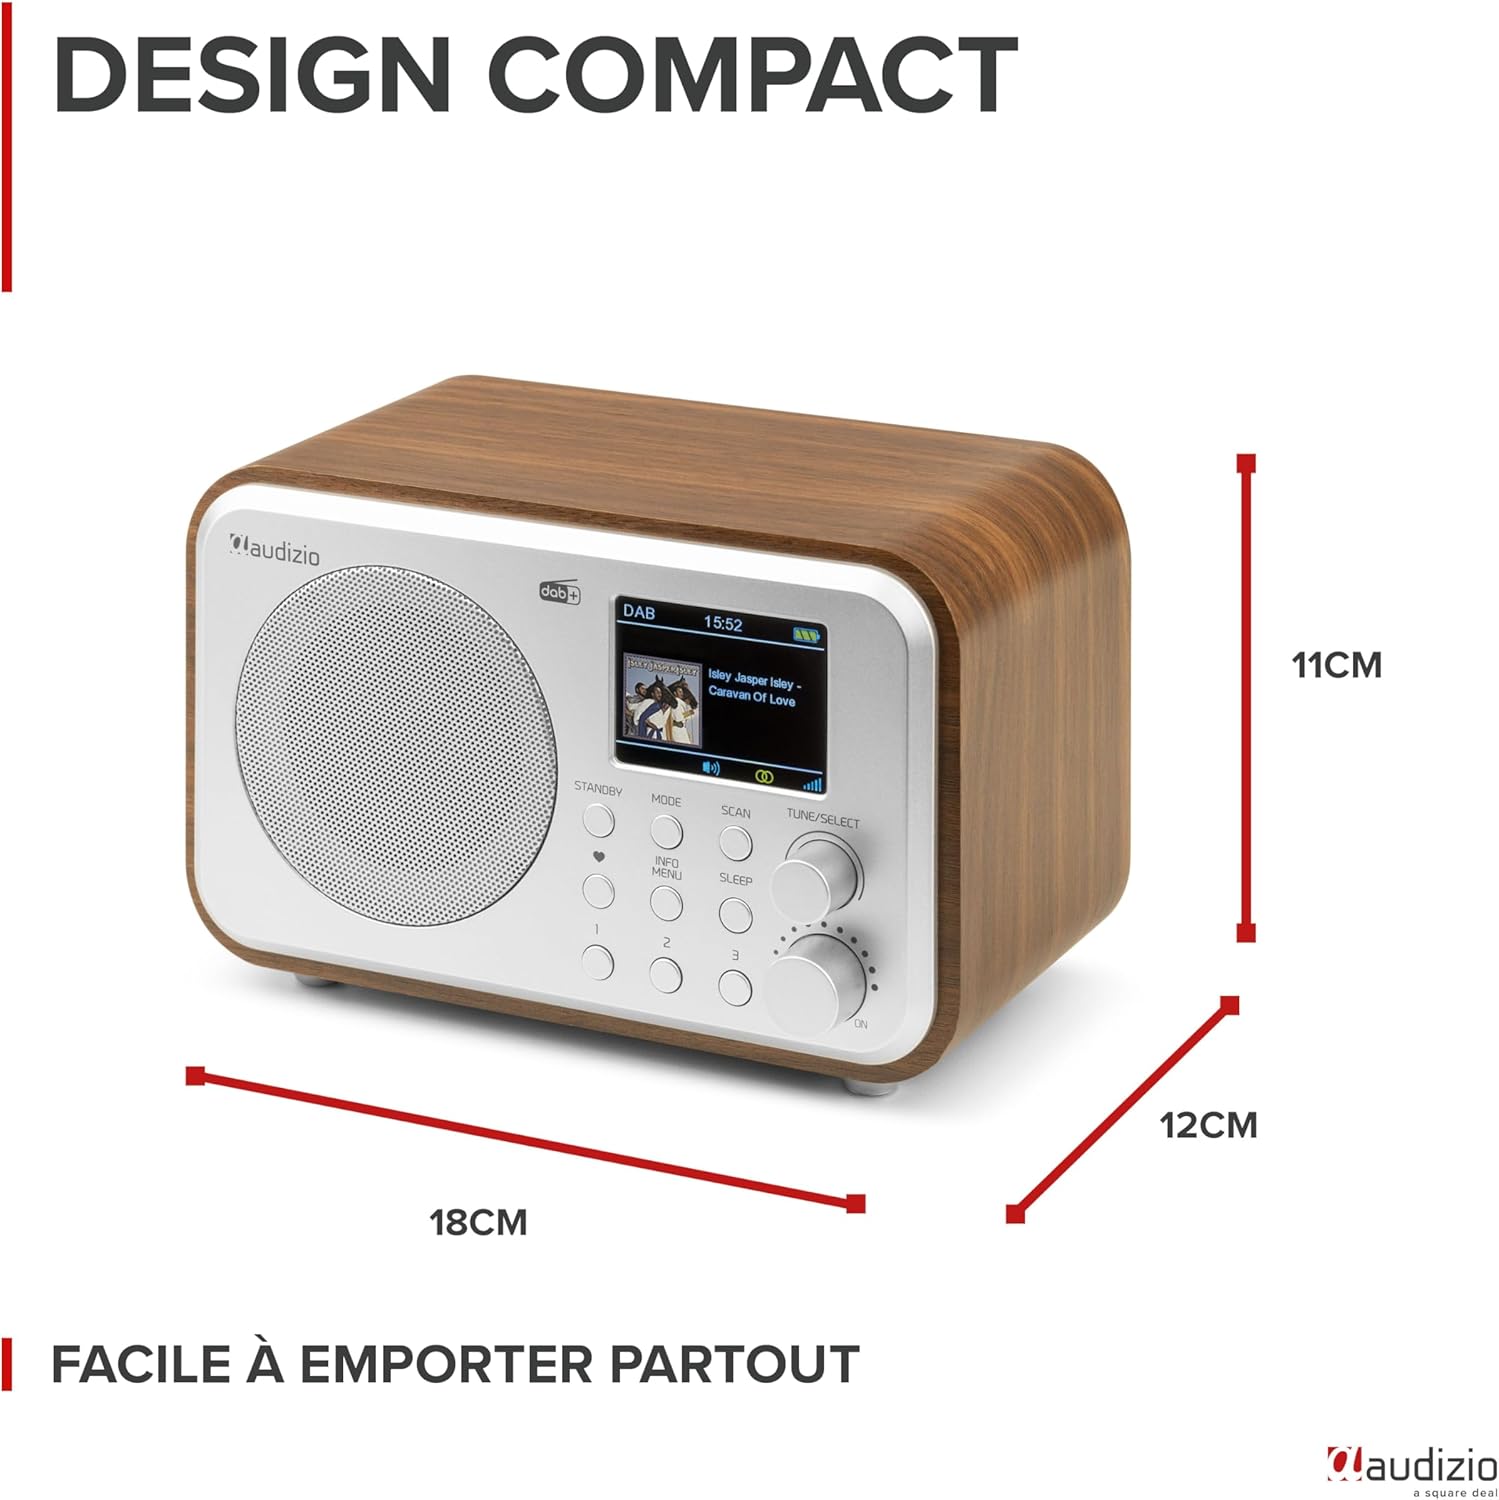
Figure 12.1: Product Dimensions
This image provides a visual representation of the Audizio Milan radio's compact dimensions, showing its length, width, and height for easy reference.
13. Warranty and Support
The Audizio Milan DAB+ Radio comes with a manufacturer's warranty.
- Manufacturer's Warranty: 2 years.
- For technical support, warranty claims, or service inquiries, please contact your retailer or the official Audizio support channels. Refer to the product packaging or the Audizio website for contact information.