vidaXL 853233
vidaXL Wall Shelf Instruction Manual
Model: 853233
1. Introduction
Thank you for purchasing the vidaXL Wall Shelf. This brown oak engineered wood floating shelf is designed to enhance your living space with both style and functionality. Please read this manual carefully before assembly and use to ensure safe operation and optimal performance.
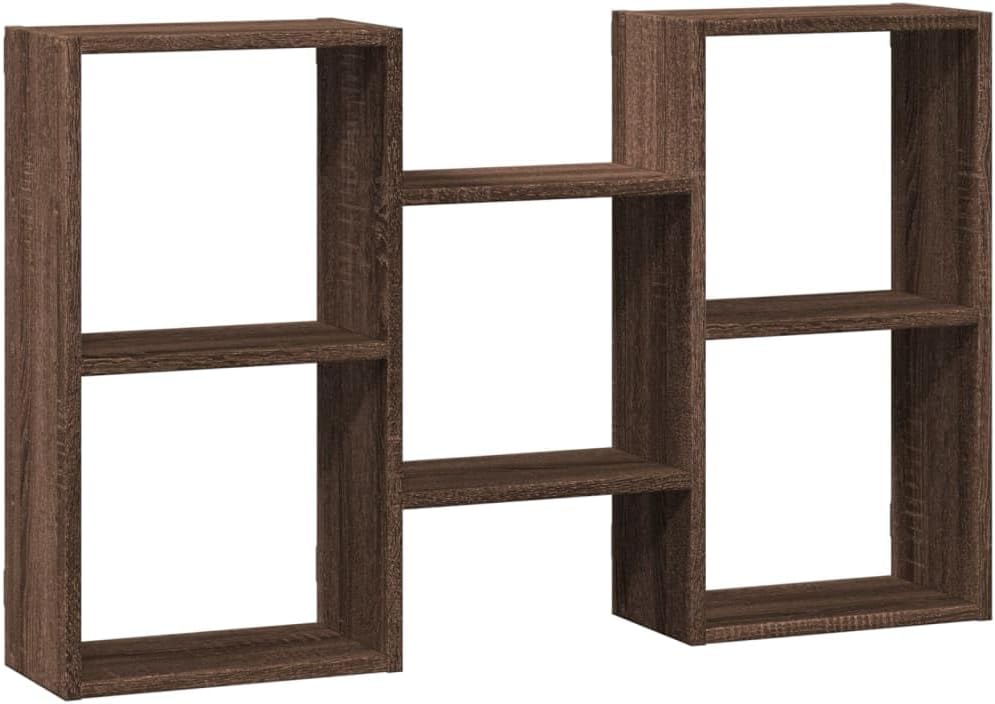
Image 1.1: The vidaXL Wall Shelf, showcasing its brown oak finish and multi-compartment design.
2. Safety Information
Always follow these basic safety precautions to reduce the risk of injury or damage:
- Weight Limit: Do not exceed the maximum weight capacity of 55.1 lb (25 kg) for the entire shelf. Distribute weight evenly.
- Secure Mounting: Ensure the shelf is securely mounted to a sturdy wall structure (e.g., wall studs, concrete) using appropriate hardware for your wall type. Wall / ceiling fixtures are not included and must be purchased separately.
- Child Safety: Keep small parts and packaging materials away from children. Do not allow children to climb on or play with the shelf.
- Stability: Regularly check the mounting hardware for tightness and stability.
- Indoor Use Only: This product is designed for indoor use only. Avoid exposure to moisture or extreme temperatures.
3. Package Contents
Before beginning assembly, please verify that all components are present and undamaged. The package contains the wall shelf components. Mounting hardware (screws, wall plugs) is not included and must be sourced separately based on your wall type.
- Engineered wood panels for shelf assembly
- Assembly fasteners (e.g., dowels, cam locks, screws for shelf assembly)
- Mounting brackets (pre-attached or to be attached to shelf panels)
4. Setup and Assembly
Assembly is required for this product. It is recommended that 1 person assemble this shelf. Please follow these steps carefully:
4.1. Tools Required (Not Included)
- Phillips head screwdriver
- Drill (for wall mounting)
- Level
- Measuring tape
- Pencil
- Appropriate wall anchors and screws for your wall type (e.g., drywall anchors, concrete screws)
4.2. Assembly Steps
- Unpack and Identify Parts: Carefully unpack all components and lay them out on a clean, soft surface to prevent scratches. Identify each panel and fastener according to the assembly diagram (if provided in packaging).
- Assemble Shelf Structure: Follow the specific assembly instructions provided with your product packaging to connect the engineered wood panels using the supplied fasteners. Ensure all connections are tight and secure.
- Attach Mounting Brackets: Ensure the pre-drilled holes for the mounting brackets are aligned. Securely attach any separate mounting brackets to the shelf structure using the provided screws.
- Measure and Mark Wall: Determine the desired height and position for your shelf. Use a measuring tape and pencil to mark the exact locations for the mounting holes on your wall, ensuring they are level. Refer to the product dimensions for accurate spacing.
- Drill Pilot Holes: Using a drill, create pilot holes at the marked locations. The hole diameter is 0.2 inches (approximately 5mm). Ensure the drill bit size matches the recommended size for your chosen wall anchors.
- Insert Wall Anchors: Insert appropriate wall anchors into the drilled holes.
- Mount the Shelf: Align the shelf's mounting brackets with the installed wall anchors/screws. Carefully slide the shelf onto the screws, ensuring it is securely seated and level.
- Final Check: Gently tug on the shelf to confirm it is firmly attached to the wall before placing any items on it.
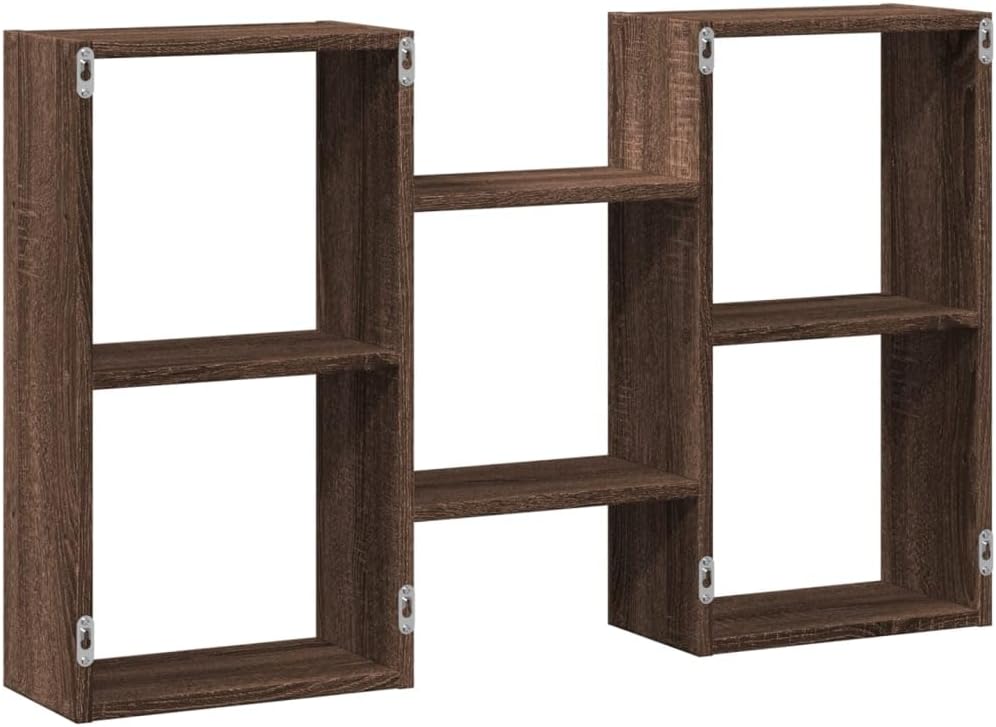
Image 4.2.1: Rear view of the shelf, illustrating the positions of the mounting brackets.
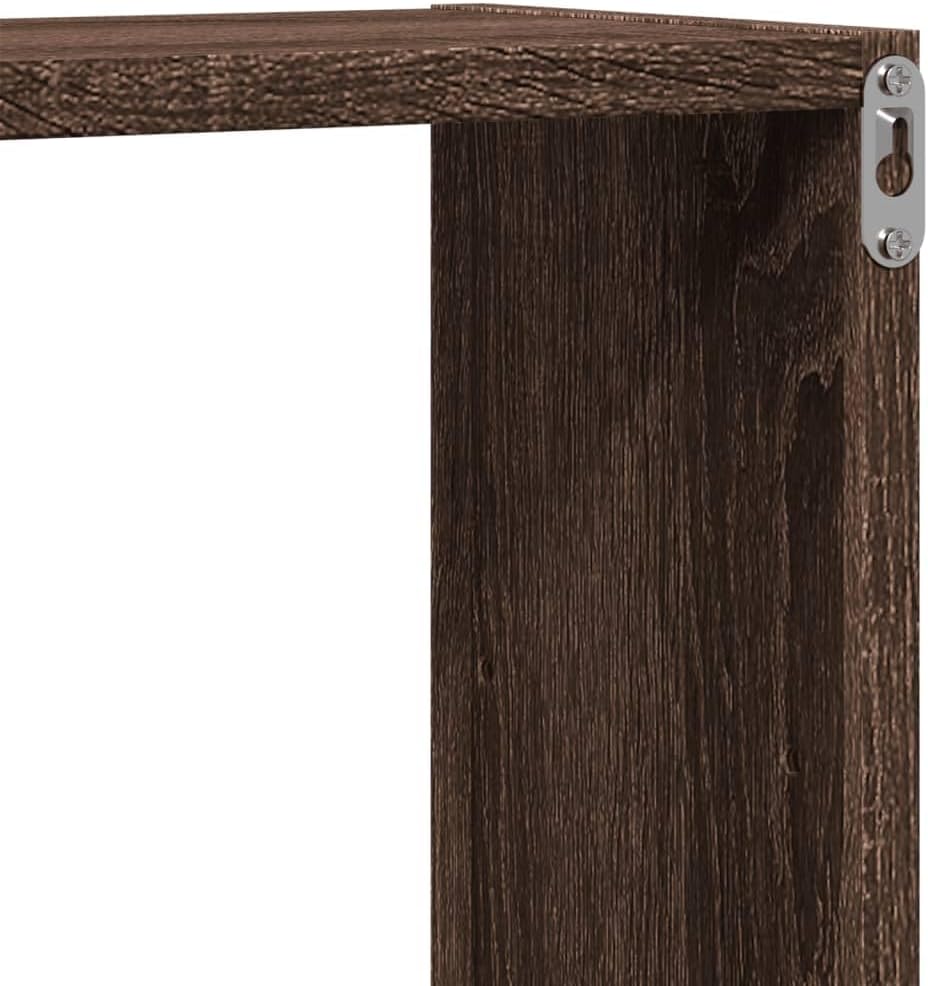
Image 4.2.2: Detailed view of a mounting bracket, showing the keyhole design for wall attachment.

Image 4.2.3: Dimensional drawing of the shelf, indicating overall size and internal compartment measurements.
5. Operating and Usage
The vidaXL Wall Shelf is designed for displaying decorative items, books, and other lightweight objects. Its versatile design allows for various arrangements of items within its compartments.
- Weight Distribution: Always distribute the weight evenly across the shelf's compartments to maintain stability and prevent stress on the mounting points.
- Placement: Consider placing heavier items on the lower sections or closer to the wall for better balance.
- Display: Utilize the multiple compartments to organize and showcase your items effectively.
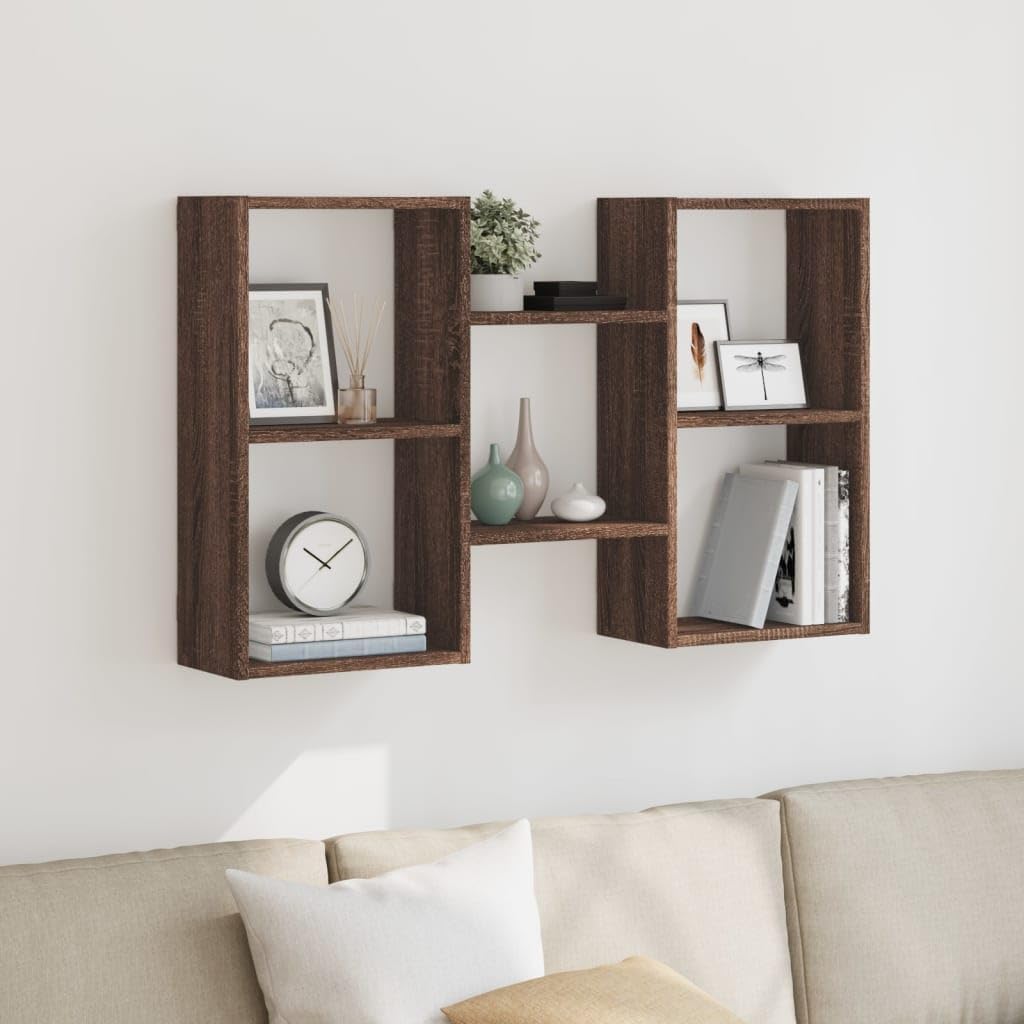
Image 5.1: The wall shelf integrated into a living room setting, demonstrating its aesthetic appeal and practical use for display.
6. Maintenance and Care
To ensure the longevity and appearance of your vidaXL Wall Shelf, follow these simple maintenance guidelines:
- Cleaning: Wipe the surface with a soft, damp cloth. Avoid using harsh chemicals, abrasive cleaners, or excessive moisture, as these can damage the engineered wood finish.
- Dusting: Regularly dust the shelf with a dry, soft cloth to prevent dust buildup.
- Inspection: Periodically check all assembly fasteners and wall mounting hardware for tightness. Tighten any loose screws to maintain stability.
- Avoid Direct Sunlight: Prolonged exposure to direct sunlight can cause fading or discoloration of the finish.
- Protect from Liquids: Immediately wipe up any spills to prevent water damage or staining.
7. Troubleshooting
If you encounter any issues with your wall shelf, refer to the following common problems and solutions:
| Problem | Possible Cause | Solution |
|---|---|---|
| Shelf feels wobbly or unstable | Loose assembly fasteners or inadequate wall mounting. | Ensure all internal assembly screws are tightened. Verify that the wall anchors and screws are appropriate for your wall type and securely installed. Re-tighten wall mounting screws. |
| Shelf is not level | Mounting holes were not marked level, or screws are not inserted evenly. | Remove the shelf, re-measure and re-mark the wall using a level. Adjust wall anchors/screws as needed to ensure a perfectly level installation. |
| Damage to shelf surface | Impact, abrasive cleaning, or liquid exposure. | For minor scratches, touch-up pens for wood furniture may be used. For liquid damage, ensure the surface is dry and clean. Prevent future damage by following maintenance guidelines. |
| Items slide off shelf | Shelf is not level or items are unstable. | Check if the shelf is level (see above). Ensure items placed on the shelf have a stable base and are not top-heavy. |
8. Product Specifications
| Feature | Detail |
|---|---|
| Brand | vidaXL |
| Model Number | 853233 |
| Material | Engineered wood |
| Color | Brown Oak |
| Shape | Rectangular |
| Dimensions (W x L x H) | 7.1 x 37.8 x 23.6 inches (18 x 96 x 60 cm) |
| Surface Height | 0.6 inches (1.5 cm) |
| Hole Diameter (for mounting) | 0.2 inches (approx. 5 mm) |
| Item Weight | 19.8 lb (9 kg) |
| Maximum Weight Capacity | 55.1 lb (25 kg) |
| Room Type | Living Room (suitable for various indoor spaces) |
| Assembly Required | Yes |
| Mounting Included | Wall / ceiling fixtures (e.g., specific screws or wall plugs) are NOT included. |
9. Warranty Information
Specific warranty details for this product are typically provided at the point of purchase or within the product packaging. Please refer to your purchase receipt or the retailer's website for information regarding warranty coverage and terms. If no specific warranty information is provided, standard consumer protection laws in your region may apply.
10. Customer Support
For further assistance, missing parts, or inquiries not covered in this manual, please contact vidaXL customer support through the retailer where you purchased the product. You may also visit the official vidaXL website for contact information and additional resources.
Note on Videos: No official product videos were available for inclusion in this manual.
Ask a question about this manual
Ask about setup, troubleshooting, compatibility, parts, safety, or missing instructions. Manuals+ will review the question and use this page’s manual context to help answer it.