Introduction
Thank you for choosing the SanBouSi Floating Wall Mount Computer Desk. This manual provides essential information for the safe and efficient assembly, operation, and maintenance of your new desk. Please read these instructions carefully before installation and retain them for future reference.
This wall-mounted desk is designed to optimize space in modern home and compact office environments. It features a desktop that fixes to the wall, saving floor space and contributing to an organized area. Constructed from high-quality ecological boards with PVC edge sealing, it offers stability, durability, and a streamlined design.

Image: The SanBouSi Floating Wall Mount Computer Desk mounted on a wall in a home office setting, showcasing its space-saving design and integrated computer setup.
Important Safety Information
- Always install this product on sturdy walls such as cement, brick, or drywall with appropriate anchors. Do not install on weak or unstable surfaces.
- Ensure all mounting hardware is securely fastened before placing items on the desk.
- Do not exceed the maximum load-bearing capacity of 120 lbs (54.43 kg). Overloading can cause damage or injury.
- Keep small parts and packaging materials away from children to prevent choking hazards.
- Exercise caution during assembly to avoid pinching fingers or other injuries.
- Regularly check all connections and fasteners to ensure they remain tight and secure.
Package Contents
Please verify that all components are present before beginning assembly:
- 1x Wall Mounted Desk Unit
- All necessary accessories for installation (screws, anchors, etc.)
If any parts are missing or damaged, please contact customer support for assistance.
Setup and Installation
This desk requires wall mounting. Professional installation is recommended for optimal safety and stability. Ensure you have the correct tools for your wall type (e.g., stud finder, drill, level, screwdriver).
Tools Required (Not Included):
- Pencil
- Measuring Tape
- Level
- Drill
- Screwdriver
- Stud Finder (recommended for drywall installation)
Installation Steps:
- Determine Mounting Location: Choose a sturdy wall (cement, brick, or drywall with studs) and the desired height for your desk. Consider ergonomic factors for comfortable use.
- Mark Drilling Points: Hold the desk unit against the wall at the desired height and use a level to ensure it is straight. Mark the positions for the mounting holes on the wall using a pencil. Refer to the underside image for mounting bracket locations.
- Drill Pilot Holes: Using an appropriate drill bit for your wall type and anchors, drill pilot holes at the marked locations.
- Insert Wall Anchors: If required for your wall type (e.g., drywall without studs), insert the provided wall anchors into the pilot holes.
- Mount the Desk: Align the desk's mounting holes with the drilled holes/anchors. Secure the desk to the wall using the provided screws. Ensure all screws are tightened firmly.
- Verify Stability: Gently test the desk's stability by applying light pressure. Ensure it is securely fastened and does not wobble.

Image: Underside of the desk, highlighting the mounting points for wall installation.
Operating Instructions
Using the Drawers:
The desk features two pull-out drawers for storage. Gently pull the drawer fronts to open them. Push them back in until they are flush with the desk surface to close. The drawers are designed for smooth operation.

Image: A drawer of the desk pulled out, showing its capacity and the keyboard tray.
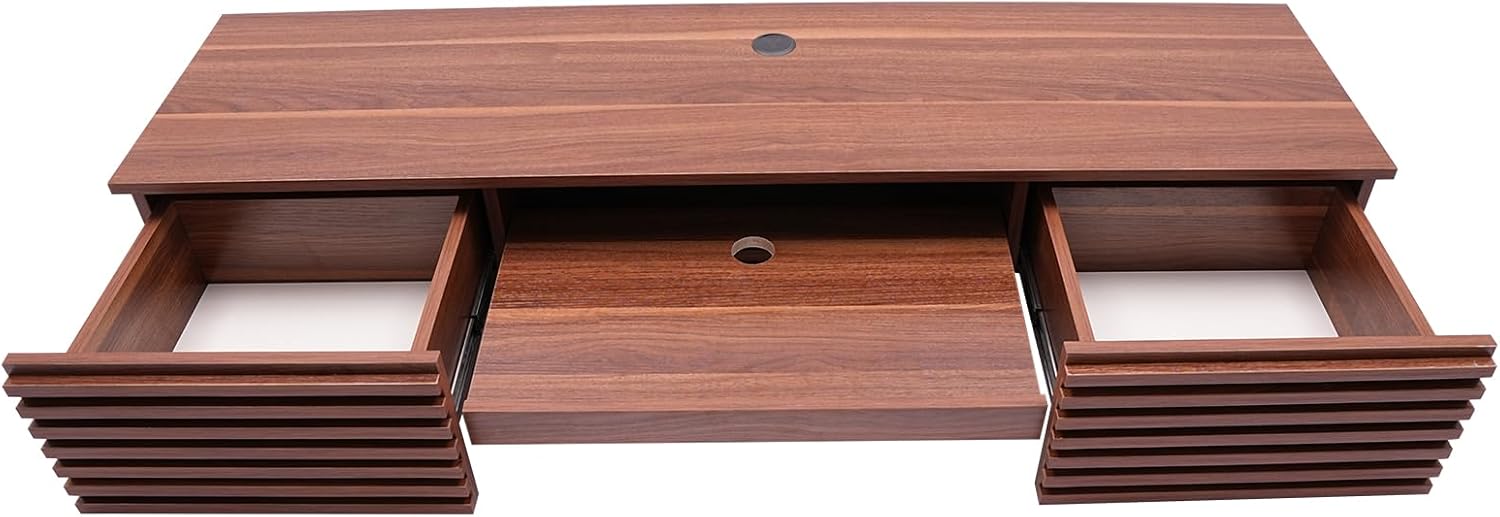
Image: Top view of the desk with both drawers and the keyboard tray extended.
Using the Keyboard Tray:
A central pull-out keyboard tray is integrated into the desk design. To use, gently pull the tray forward. Push it back into the desk when not in use to save space.
Cable Management:
The desk includes a cable hole on the top surface to help organize and route power cords and data cables, keeping your workspace neat and tidy.

Image: The desk with a monitor and accessories, illustrating the cable management hole.
Maintenance
- Cleaning: Wipe the desk surfaces with a dry, soft cloth. Avoid abrasive cleaners or harsh chemicals that may damage the finish.
- Inspection: Periodically check all screws and mounting hardware to ensure they are tight. Re-tighten if necessary.
- Load Capacity: Do not place items heavier than 120 lbs (54.43 kg) on the desk.
- Environmental Conditions: Avoid exposing the desk to extreme temperatures or high humidity, which can affect the material integrity.
Troubleshooting
Desk feels unstable after installation:
- Ensure all mounting screws are fully tightened.
- Verify that the desk was installed on a sturdy wall (cement, brick, or drywall with studs). If installed on drywall without studs, ensure appropriate heavy-duty wall anchors were used.
- Check if the load on the desk exceeds the 120 lbs (54.43 kg) capacity.
Drawers are stiff or do not slide smoothly:
- Check for any obstructions in the drawer slides.
- Ensure the desk is level. An unlevel installation can affect drawer operation.
- Lightly lubricate the drawer slides with a silicone-based lubricant if necessary.
Specifications
| Feature | Detail |
|---|---|
| Brand | SanBouSi |
| Model Name | Wall Mounted Desk |
| Color | Brown |
| Material | Ecological Board with PVC Edge Sealing |
| Product Dimensions (L x W x H) | 60"D x 15.5"W x 9.5"H (152.4 x 39.37 x 24.13 cm) |
| Load-bearing Capacity | 120 lbs (54.43 kg) |
| Assembly Required | Yes |
| Special Features | 2 Drawers, Keyboard Tray, Cable Hole |
| Mount Type | Wall Mount |
| Recommended Room Type | Living Room, Home Office, Bedroom |

Image: Dimensional overview of the SanBouSi Floating Wall Mount Computer Desk.
Warranty and Support
For warranty information or technical support, please refer to the contact details provided with your purchase or visit the official SanBouSi website. Please have your model number and purchase date available when contacting support.
Product Care Instructions: Wipe with Dry Cloth.