Aeitto CB23D
Aeitto Nugget Ice Maker Instruction Manual
Model: CB23D | Brand: Aeitto
Introduction
Thank you for choosing the Aeitto Nugget Ice Maker. This countertop ice machine is designed to provide you with chewable, soft nugget ice quickly and efficiently. With features like rapid ice release, automatic water refill options, and a self-cleaning function, it offers convenience and consistent ice production for your home or office. Please read this manual thoroughly before operation to ensure safe and optimal use of your ice maker.

Figure 1: Aeitto Nugget Ice Maker, front view with ice visible inside.
What's in the Box
Please check the contents of your package to ensure all items are present:
- Nugget Ice Maker (1 unit)
- Ice Scoop (1 unit)
- Ice Tray (1 unit)
- Water Inlet Tube (1 unit)
- Faucet Connector (1 unit)
Setup
- Unpacking: Carefully remove the ice maker and all accessories from the packaging. Retain packaging for future transport or storage.
- Placement: Place the ice maker on a flat, stable surface away from direct sunlight and heat sources. Ensure there is adequate ventilation around the unit.
- Refrigerant Settling: Before plugging in your ice maker, allow it to stand upright for at least 6 hours. This allows the refrigerant fluid to settle, which is crucial for proper operation and to prevent system failures.
- Drainage Pipe: Ensure the drainage pipe is securely connected to prevent leaks that could cause damage.
- Initial Cleaning: Before first use, activate the automatic cleaning mode 1-2 times. Refer to the "Maintenance" section for detailed cleaning instructions.
- Water Refill Options:
- Manual Water Refill: Open the top lid and pour clean, potable water directly into the water reservoir up to the "MAX" fill line.

Figure 2: Illustrates manual water refilling by pouring water into the reservoir.
- Automatic Water Refill: Connect the provided water inlet tube to a water pipe using the faucet connector. Ensure all connections are tight to prevent leaks.
Figure 3: Shows the connection for automatic water refilling using the provided tube and faucet connector.
- Manual Water Refill: Open the top lid and pour clean, potable water directly into the water reservoir up to the "MAX" fill line.
- Power Connection: Plug the ice maker into a grounded electrical outlet.
Operating Instructions
The Aeitto Nugget Ice Maker is designed for user-friendly operation with an intuitive control panel.

Figure 4: Overview of the ice maker's easy-to-use control panel with Power, Soft Ice, and Clean buttons, and indicator lights.
- Power On: Press the POWER button to turn on the ice maker. The "POWER" indicator light will illuminate.
- Ice Production: The machine will automatically begin producing nugget ice. The first batch of ice can be ready in as little as 5 minutes.

Figure 5: Visual representation of rapid ice release, showing ice nuggets falling into the bin.
- Automatic Cycle Ice Production: The ice maker features an automatic cycle. It will stop making ice when the ice level reaches the infrared sensor (indicating the bin is full) and will resume after 30 minutes if the ice level drops below the sensor. This ensures a continuous supply of ice without constant monitoring.

Figure 6: Diagram illustrating the induction infrared sensor that manages automatic ice production cycles.
- Indicator Lights:
- ADD WATER: This light illuminates when the water reservoir is low and needs refilling.
- ICE FULL: This light illuminates when the ice bin is full, and the machine will pause ice production.
- Soft Ice Button: Press the SOFT ICE button to select the desired ice texture.
- Power Off: Press the POWER button again to turn off the ice maker.
Note: The ice maker does not have a refrigeration function for stored ice. It is recommended to transfer ice to a freezer for long-term storage.
Maintenance
Regular cleaning and maintenance will ensure the longevity and optimal performance of your Aeitto Nugget Ice Maker.
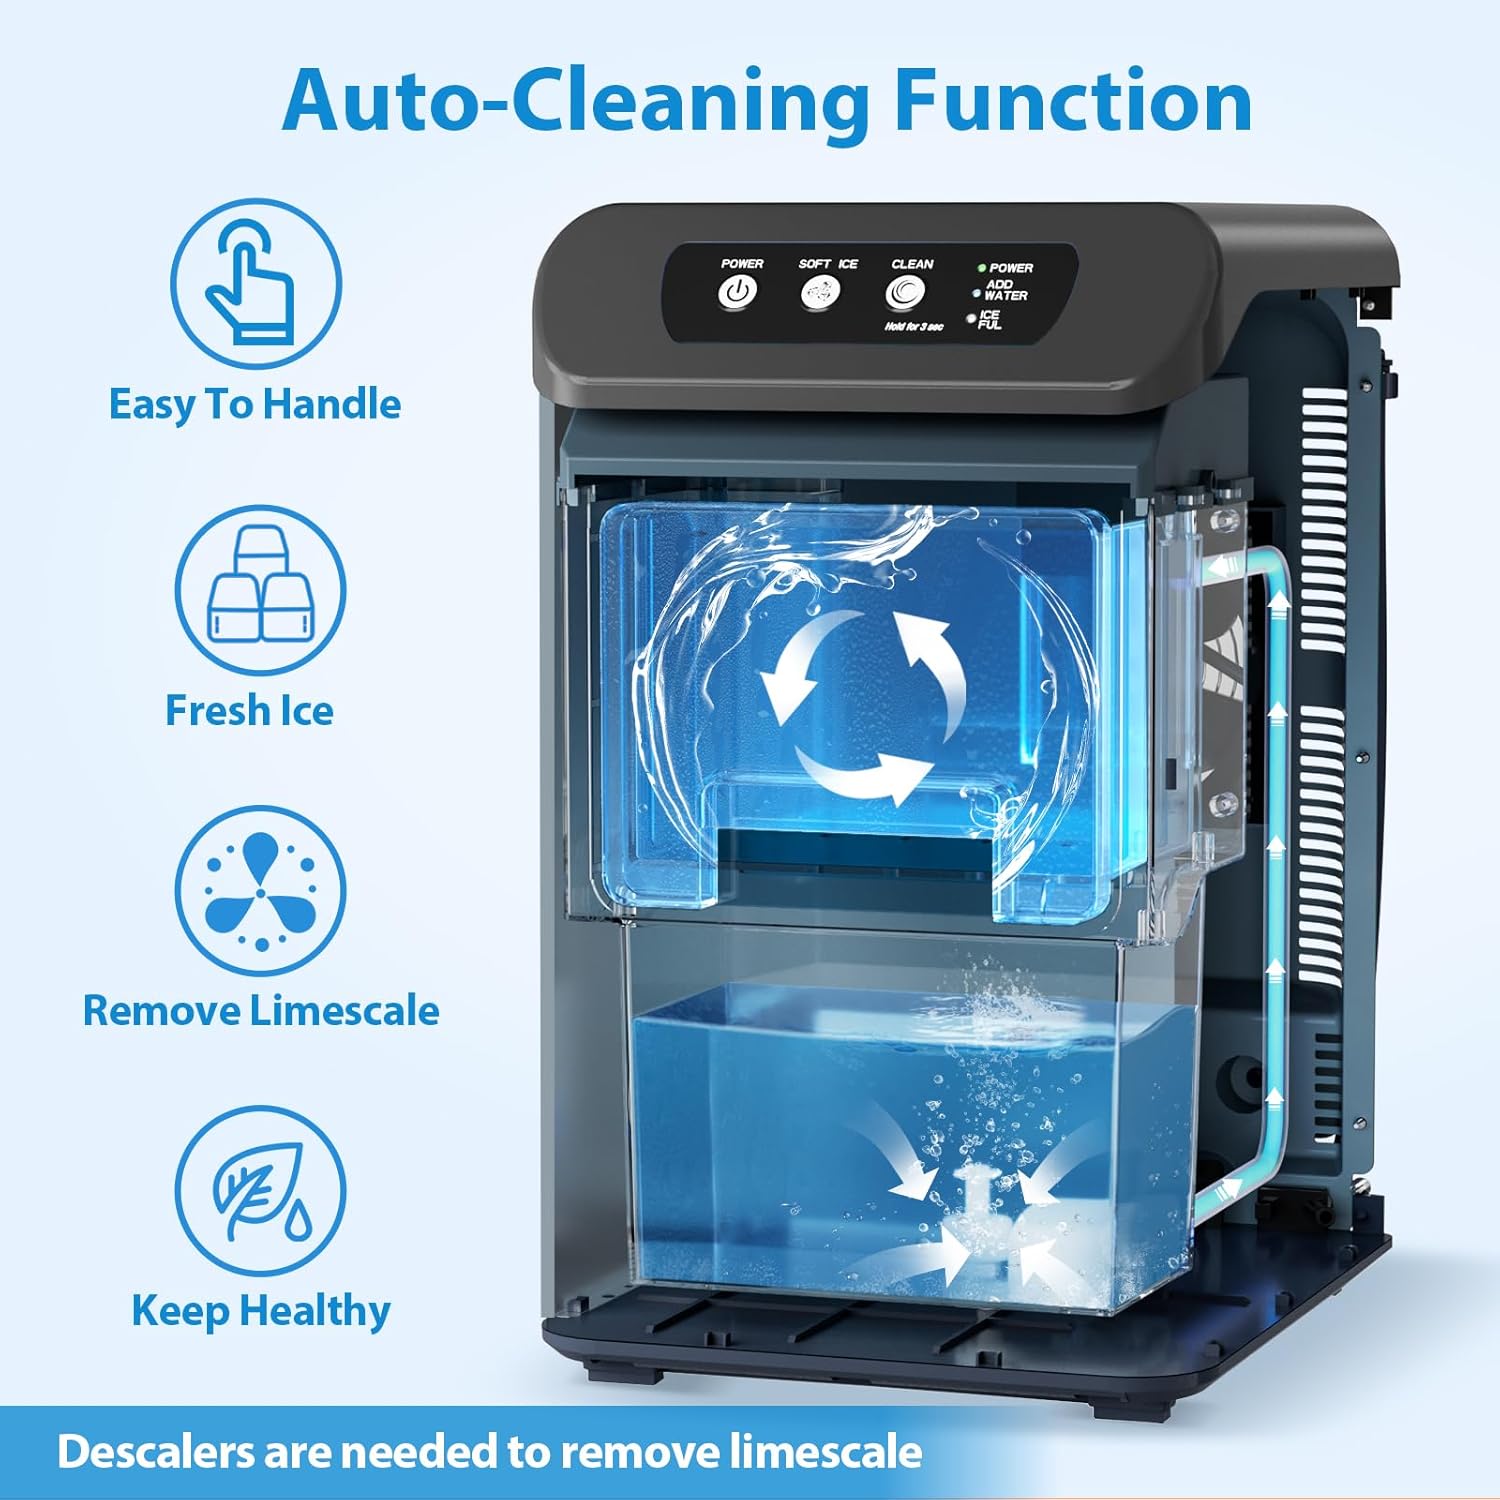
Figure 7: Depicts the internal auto-cleaning process, showing water circulation within the unit.
- Auto-Cleaning Function:
- Ensure the water reservoir is filled.
- Press and hold the CLEAN button for 3 seconds to activate the automatic cleaning cycle.
- The machine will run a cleaning cycle, circulating water to clean internal components.
- After the cycle, drain the water from the unit.
- Regular Cleaning:
- Unplug the ice maker before cleaning.
- Remove the ice bin and wash it with mild soap and warm water. Rinse thoroughly.
- Wipe the exterior of the unit with a soft, damp cloth.
- For internal cleaning beyond the auto-clean function, use a solution of water and vinegar or a dedicated ice maker cleaning solution to remove mineral deposits (limescale). Follow the product instructions for the descaler.
- Ensure all parts are completely dry before reassembling and operating the unit.
- Drainage: Periodically drain any remaining water from the unit using the drainage pipe to prevent stagnant water and maintain hygiene.
Troubleshooting
If you encounter issues with your ice maker, please refer to the following common problems and solutions:
| Problem | Possible Cause | Solution |
|---|---|---|
| Ice maker not producing ice. |
|
|
| Ice is not chewable/soft. |
|
|
| Water leaking from unit. |
|
|
| Unusual noise during operation. |
|
|
If the problem persists after attempting these solutions, please contact Aeitto customer support.
Specifications
| Feature | Detail |
|---|---|
| Brand | Aeitto |
| Model Name | CB23D |
| Product Dimensions | 13.2"D x 9.6"W x 15.8"H |
| Capacity | 55 Pounds (per day) |
| Refrigerant | R290a |
| First Available Date | October 22, 2024 |
Warranty and Support
Aeitto products are manufactured with high-quality standards. For warranty information and customer support, please refer to the warranty card included with your product or visit the official Aeitto website.
For further assistance or inquiries, you may also contact Aeitto customer service through the contact information provided on their official website or the product packaging.
Online Support: Visit the Aeitto Store on Amazon