Drytuns A010080901A010080902
Drytuns Roof Rack Cross Bars User Manual
Model: A010080901A010080902
Introduction
This manual provides essential information for the proper installation, operation, and maintenance of your Drytuns Roof Rack Cross Bars. Designed specifically for Honda CRV models from 2012 to 2016, these cross bars offer a robust solution for transporting various cargo, enhancing your vehicle's utility. Please read this manual thoroughly before installation and use to ensure safety and optimal performance.
Safety Information
- Always ensure all mounting hardware is securely tightened before driving.
- Do not exceed the maximum load capacity of 150 lbs (68 kg).
- Distribute cargo evenly across the cross bars.
- Check the security of the cross bars and cargo frequently during long trips.
- Be aware of increased vehicle height and wind resistance when carrying cargo on the roof.
- Avoid automatic car washes with roof racks installed.
Package Contents
Verify that all components are present before beginning installation.

Image: All components included in the Drytuns Roof Rack Cross Bars package.
- 2 x Roof Rack Cross Bars (Front and Rear specific)
- 4 x Mounting Brackets
- Mounting Hardware (bolts, washers, nuts)
- Installation Tools (Allen wrenches)
- Instruction Manual (this document)
Setup and Installation
Installation is designed to be straightforward, bolting directly onto the preset locations on your Honda CRV's roof rails. It is recommended to have a second person assist during installation.
Step 1: Identify Front and Rear Bars
The cross bars are designed with specific lengths for the front and rear of your vehicle. Identify the front bar (longer) and the rear bar (shorter) by checking the labels or measuring them. The front bar typically measures 104-106.5 cm (40.9-41.9 in) and the rear bar 98.5-101 cm (38.8-39.8 in) between the mounting points.
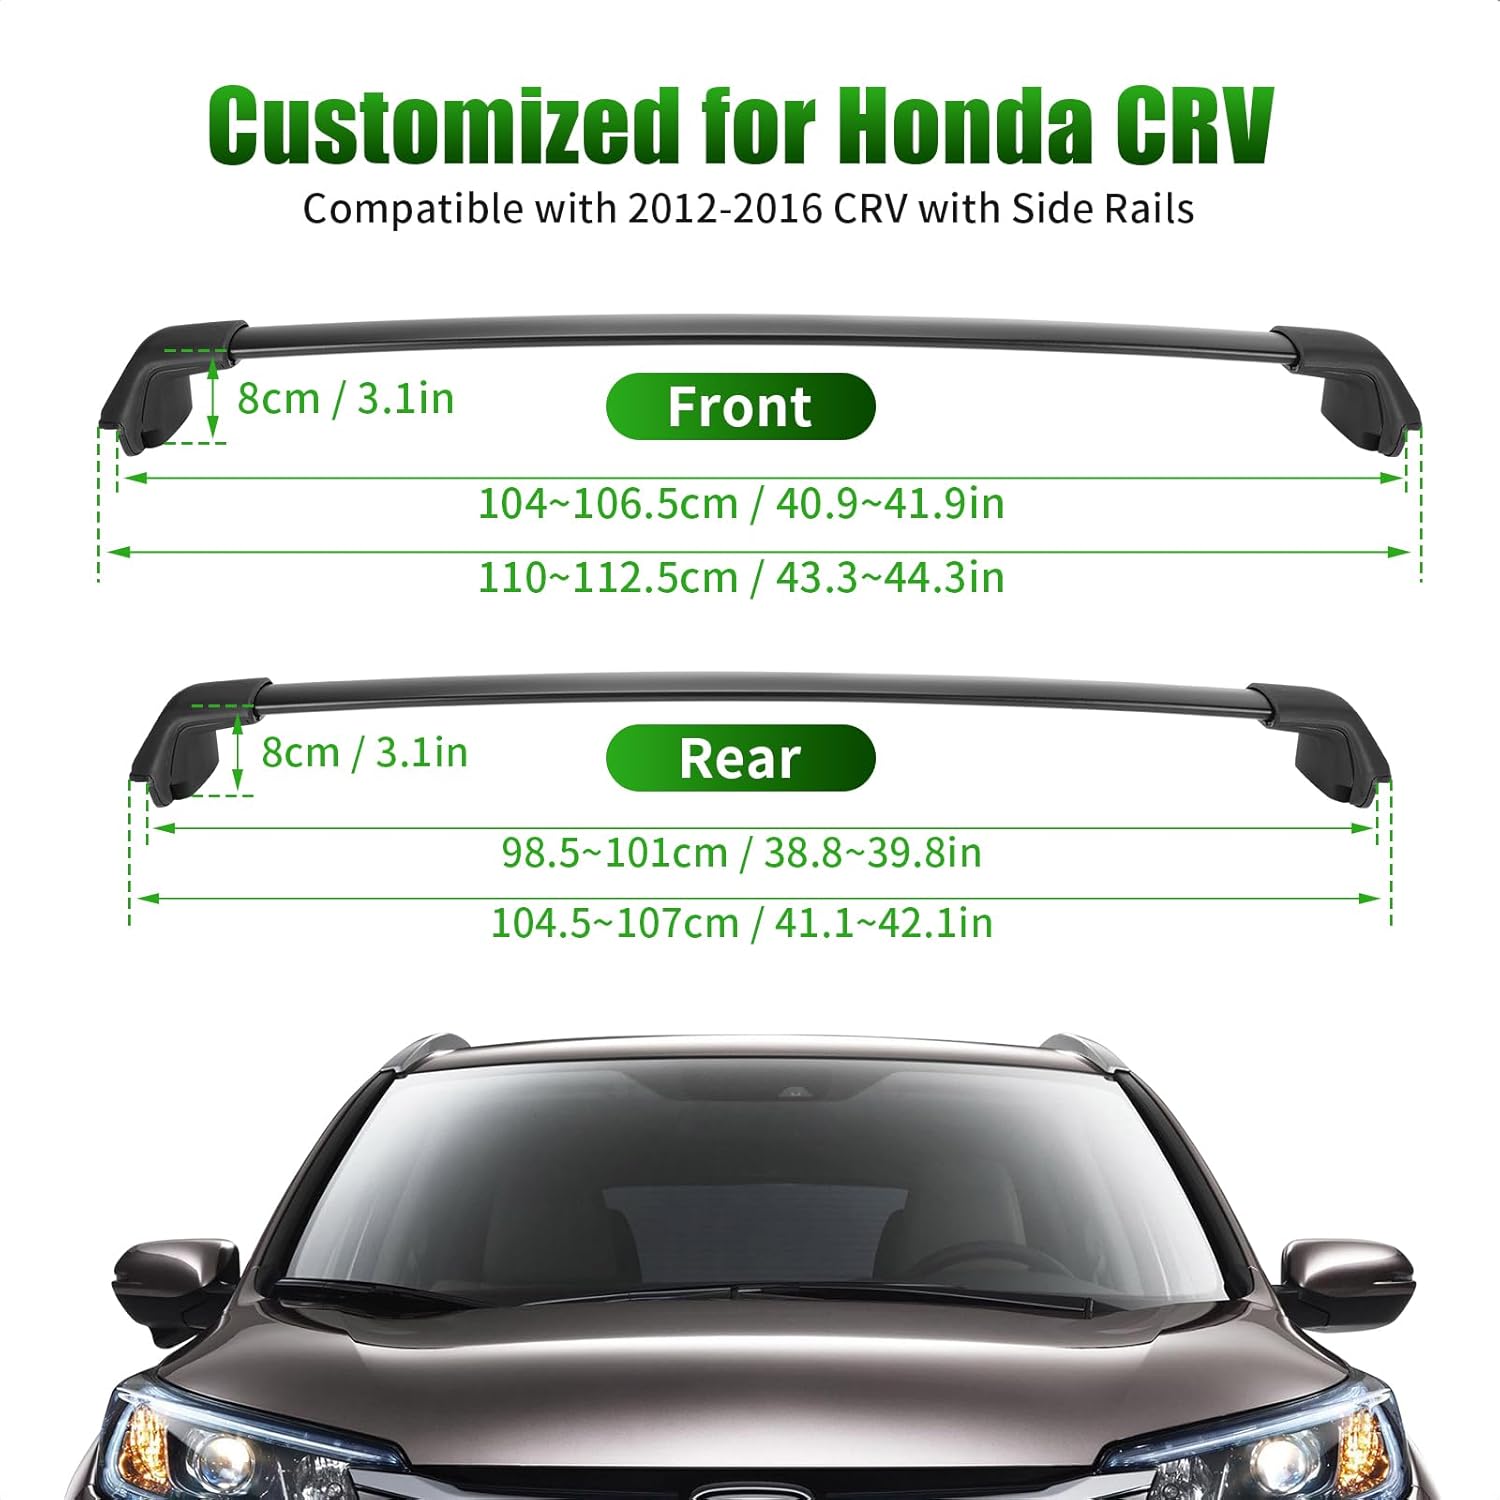
Image: Dimensional diagram indicating front and rear cross bar lengths.

Image: Detail of the cross bar indicating the "Front of Vehicle" marking for correct orientation.
Step 2: Position Cross Bars
Carefully place the identified front cross bar onto the front roof rail mounting points of your Honda CRV. Ensure the aerodynamic profile is oriented correctly (wider side facing forward). Repeat for the rear cross bar.

Image: Various views of the cross bars installed on a Honda CRV, highlighting the fit and appearance.
Step 3: Secure Mounting Brackets
Align the mounting brackets with the pre-drilled holes on your vehicle's roof rails. Insert the provided bolts through the brackets and into the roof rail attachment points. Hand-tighten all bolts initially.

Image: Close-up showing the reinforced construction and mounting points of the cross bar.
Step 4: Final Tightening
Using the provided Allen wrenches, progressively tighten all bolts. Ensure even pressure is applied to each bolt. Do not overtighten, but ensure the cross bars are firmly secured and do not wobble. The premium rubber pads on the mounting points protect your vehicle's paint from damage.
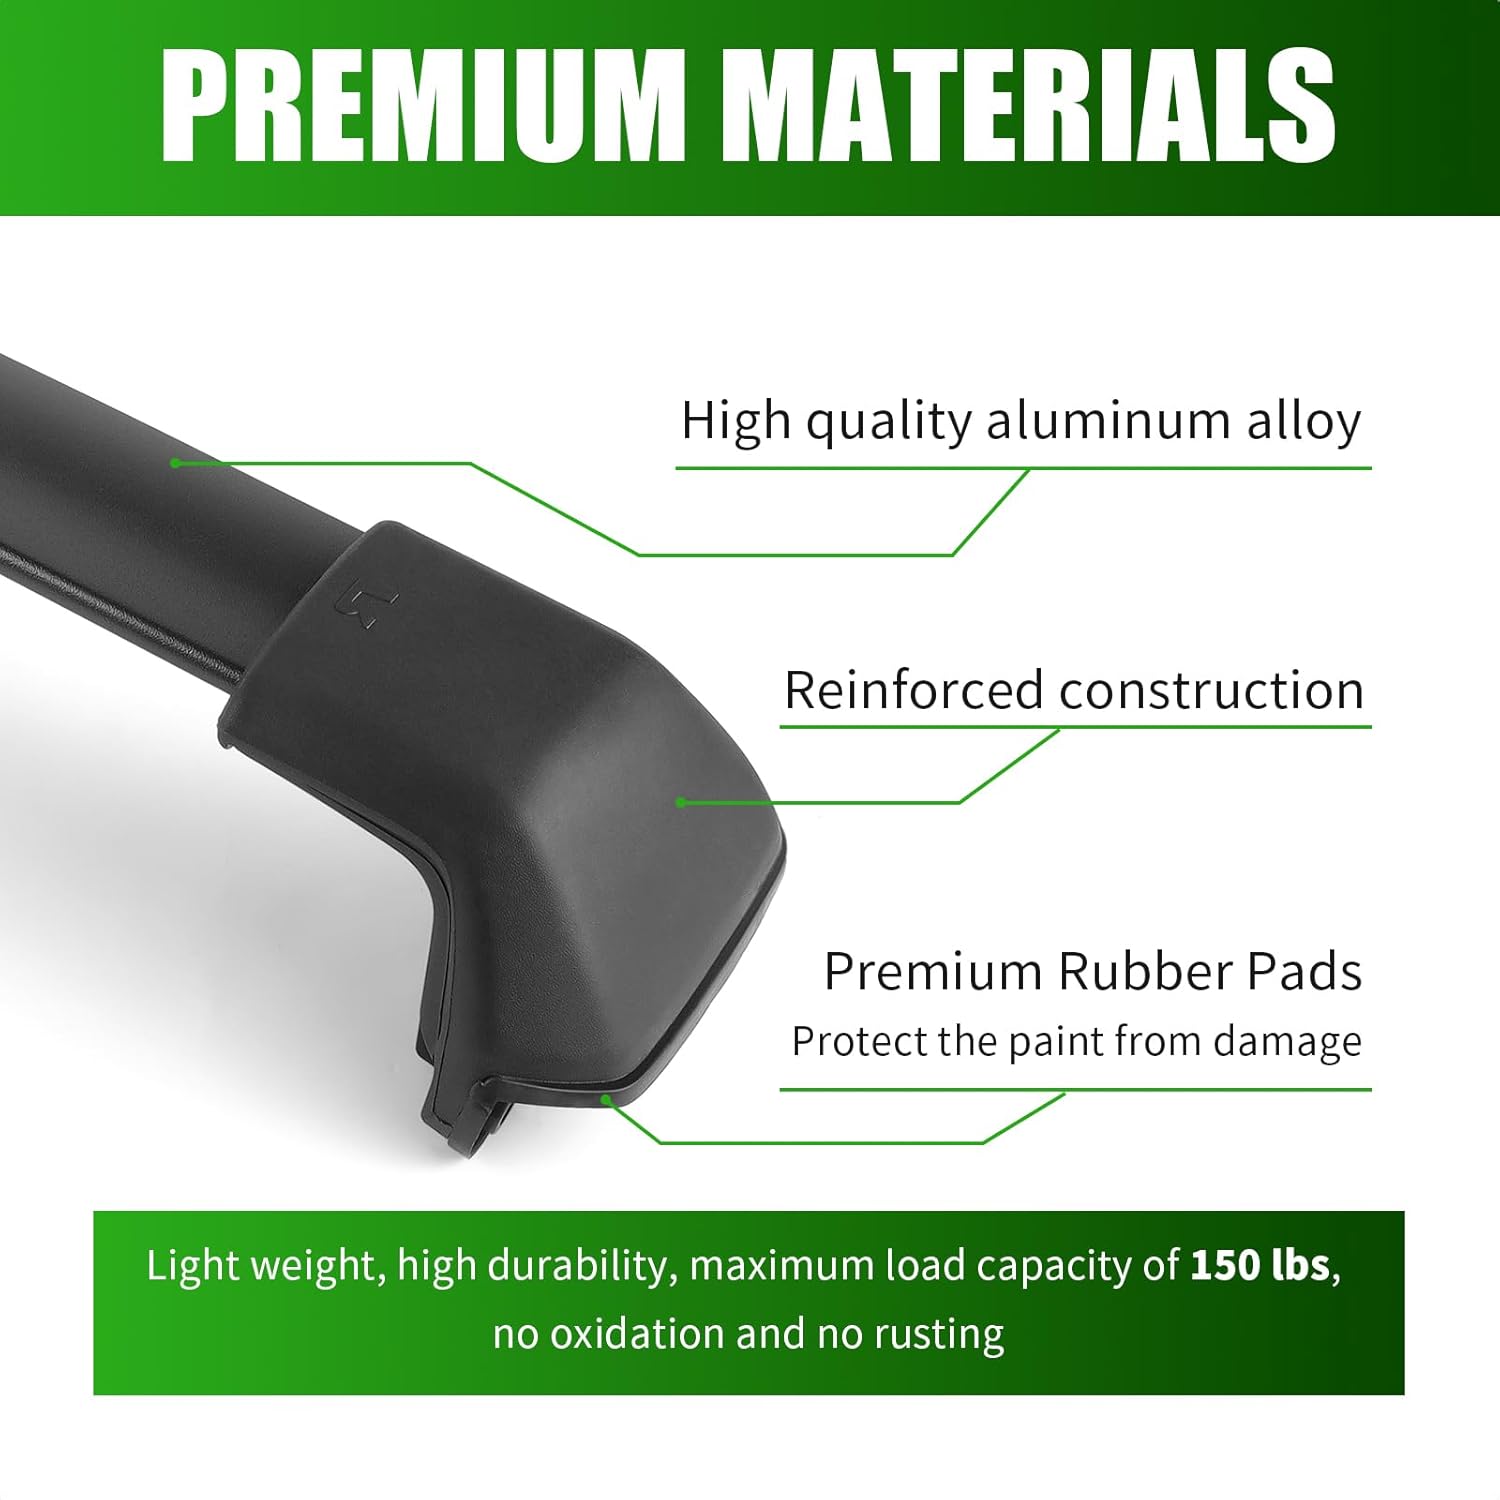
Image: Illustration of the premium materials used, including rubber pads for paint protection.
Operating Instructions
Once installed, your Drytuns Roof Rack Cross Bars are ready for use. They are compatible with a wide range of roof accessories.
Loading Cargo
- Ensure cargo is securely fastened to the cross bars using appropriate straps or tie-downs.
- Distribute weight evenly to maintain vehicle stability.
- Do not exceed the maximum load capacity of 150 lbs (68 kg).
- For oversized items, consider wind resistance and vehicle handling.

Image: Examples of multi-usage scenarios for the roof rack, including carrying bikes, cargo boxes, and water sports equipment.

Image: The roof rack shown with additional kayak accessories, demonstrating compatibility.
Aerodynamic Design
The cross bars feature a low-profile, streamlined design to minimize wind noise and vibration, especially at highway speeds. While designed to reduce noise, some wind noise may still be present depending on vehicle speed and cargo type.

Image: Visual representation of the aerodynamic design minimizing wind noise.
Maintenance
- Regularly inspect all bolts and connections for tightness, especially after the first few uses and before long trips.
- Clean the cross bars with mild soap and water. Avoid abrasive cleaners or solvents.
- Check rubber pads for wear or damage and replace if necessary to protect your vehicle's finish.
- If not in use for extended periods, consider removing the cross bars to reduce wear and tear and improve fuel efficiency.
Troubleshooting
| Problem | Possible Cause | Solution |
|---|---|---|
| Cross bars feel loose after installation. | Bolts not fully tightened. | Re-tighten all mounting bolts securely using the provided tools. |
| Excessive wind noise. | Incorrect orientation of cross bars; cargo not aerodynamic. | Ensure cross bars are installed with the correct front/rear orientation. Adjust cargo placement for better aerodynamics. |
| Difficulty aligning with mounting points. | Incorrect bar (front/rear) or slight manufacturing tolerance. | Double-check that the correct bar is used for the front and rear. Apply gentle, even pressure to align. |
| Scratches on vehicle roof rails. | Rubber pads not properly seated or missing. | Ensure all rubber pads are correctly positioned between the cross bar mounts and the vehicle's roof rails. |
Specifications
- Brand: Drytuns
- Model: A010080901A010080902
- Compatibility: Honda CRV 2012-2016
- Material: Premium Aluminum Alloy
- Color: Black
- Load Capacity: 150 lbs (68 kg)
- Mounting Type: U-Bolt (direct bolt-on to preset locations)
- Item Weight: Approximately 6.49 pounds (2.94 kg)
- Package Dimensions: Approximately 41 x 5.5 x 5 inches (104 x 14 x 12.7 cm)
Warranty and Support
For warranty information or technical support, please refer to the Drytuns official website or contact their customer service directly. Keep your purchase receipt as proof of purchase.
Drytuns Store: Visit Drytuns Store on Amazon
no relevant documents
Ask a question about this manual
Ask about setup, troubleshooting, compatibility, parts, safety, or missing instructions. Manuals+ will review the question and use this page’s manual context to help answer it.