1. Introduction
Thank you for choosing the GarveeTech Smart Toilet Basic Model. This advanced toilet system is designed to enhance your bathroom experience with innovative features such as a heated seat, automatic flushing, foot sensor operation, and integrated night lighting. This manual provides essential information for safe installation, operation, maintenance, and troubleshooting to ensure optimal performance and longevity of your smart toilet.
2. Safety Information
Please read all safety instructions carefully before installation and use. Failure to follow these instructions may result in electric shock, fire, injury, or property damage.
- Ensure the power supply is disconnected before any installation or maintenance.
- This appliance must be properly grounded.
- Do not install in locations where water may freeze, as this can damage the unit.
- Do not spray water directly onto the product or electrical components.
- Keep children and individuals with reduced physical, sensory, or mental capabilities under supervision when operating the toilet.
- Use only authorized replacement parts for repairs.
3. Package Contents
Verify that all components are present and undamaged before proceeding with installation.
- GarveeTech Smart Toilet Unit
- Toilet Seat (pre-installed)
- Installation Hardware (bolts, washers, floor flange)
- User Manual

Image 3.1: GarveeTech Smart Toilet Basic Model. This image shows the complete smart toilet unit from the front, highlighting its sleek, modern design.
4. Setup and Installation
Proper installation is crucial for the functionality and safety of your smart toilet. It is recommended to have a qualified plumber perform the installation.
4.1 Installation Steps Overview
- Prepare the Installation Area: Ensure the water supply is turned off and the old toilet is removed. Clean the floor flange area.
- Install Floor Bolts: Secure the floor bolts into the floor flange.
- Position the Toilet: Carefully align the toilet over the floor bolts and press down firmly to create a seal with the wax ring.
- Secure the Toilet: Tighten the nuts onto the floor bolts, ensuring the toilet is stable. Do not overtighten.
- Connect Water Supply: Connect the water supply line to the toilet's inlet valve.
- Connect Power: Plug the toilet into a grounded electrical outlet.
- Test Functionality: Turn on the water supply and check for leaks. Test all smart features.
4.2 Installation Video Guide
Video 4.1: Smart Toilet Installation Guide. This video provides a visual step-by-step guide for installing the GarveeTech Smart Toilet, demonstrating the process from preparing the floor flange to securing the unit and connecting utilities.
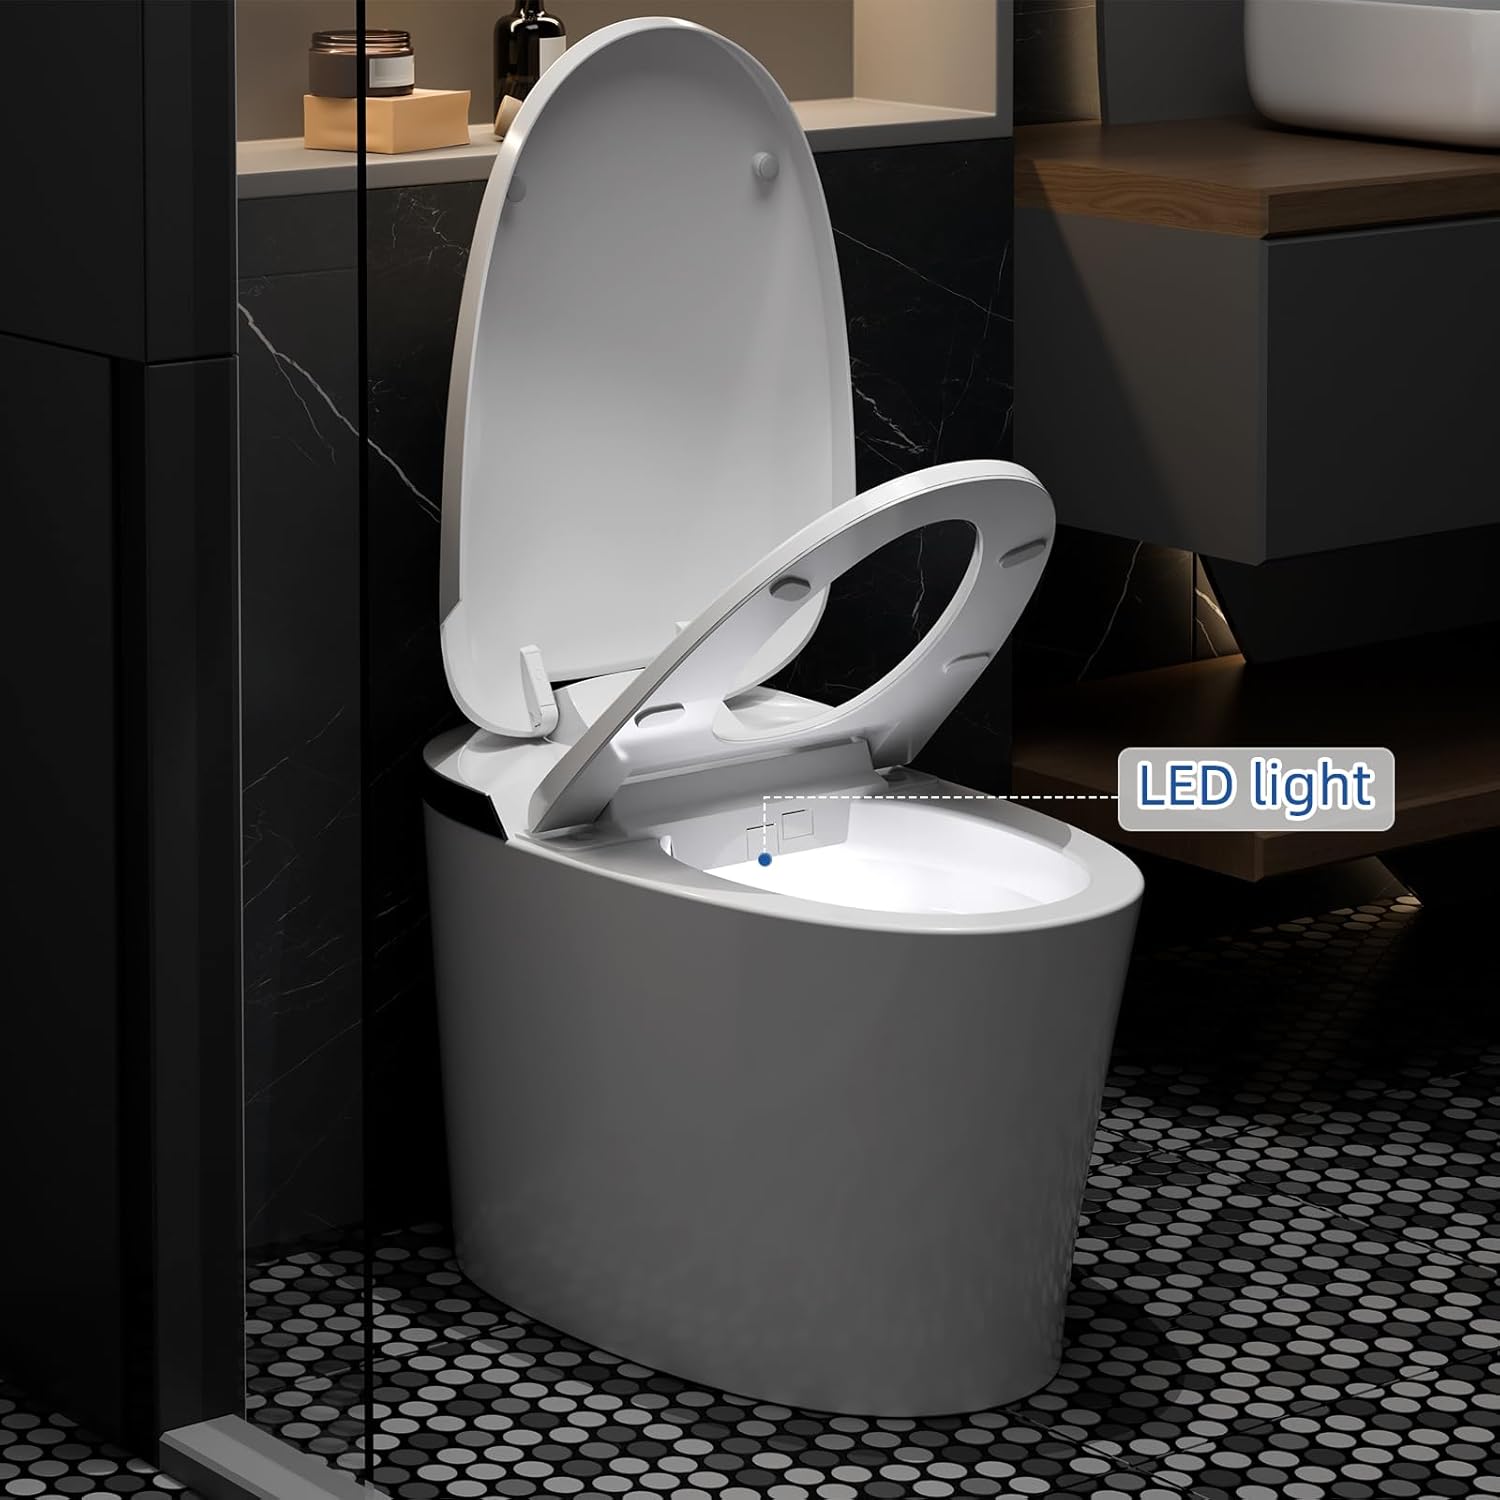
Image 4.2: GarveeTech Smart Toilet Dimensions. This image displays the key measurements of the smart toilet, including depth, width, and height, essential for planning installation space.
5. Operating Instructions
Your GarveeTech Smart Toilet offers several intelligent features for enhanced comfort and hygiene.
5.1 Off-Seat Auto Flush
The toilet automatically flushes after the user stands up and moves away from the seat. This feature ensures hygiene and convenience.
Image 5.1: Off-Seat Auto Flush. This image illustrates the automatic flushing function that activates when a user leaves the toilet seat, ensuring a hands-free operation.
5.2 Foot Sensor Operation
A gentle touch on the foot sensor icon located at the base of the toilet initiates the flushing system. This is particularly convenient for hands-free operation.

Image 5.2: Foot Sensor Flush. This image shows a user activating the foot sensor at the base of the toilet for hands-free flushing.
5.3 Heated Seat
The heated seat provides comfort, especially in colder environments. It features three adjustable temperature settings. Low-temperature burn protection activates if the seat is occupied for over 10 minutes.

Image 5.3: Ergonomic Heated Seat. This image highlights the heated seat feature with its adjustable temperature levels, providing comfort during use.
5.4 Night Light
An integrated LED night light provides a soft glow, guiding you in the dark without the need for bright overhead lights.

Image 5.4: Night Light and LED Digital Display. This image shows the toilet's built-in night light illuminating the bowl and the LED display indicating temperature settings.
5.5 Efficient Flushing System (Superspin)
The Superspin system automatically adjusts flush volume: a half flush (1.08 GPF) for uses under 30 seconds and a full flush (1.45 GPF) for longer uses. A booster pump assists in resolving low water pressure issues.
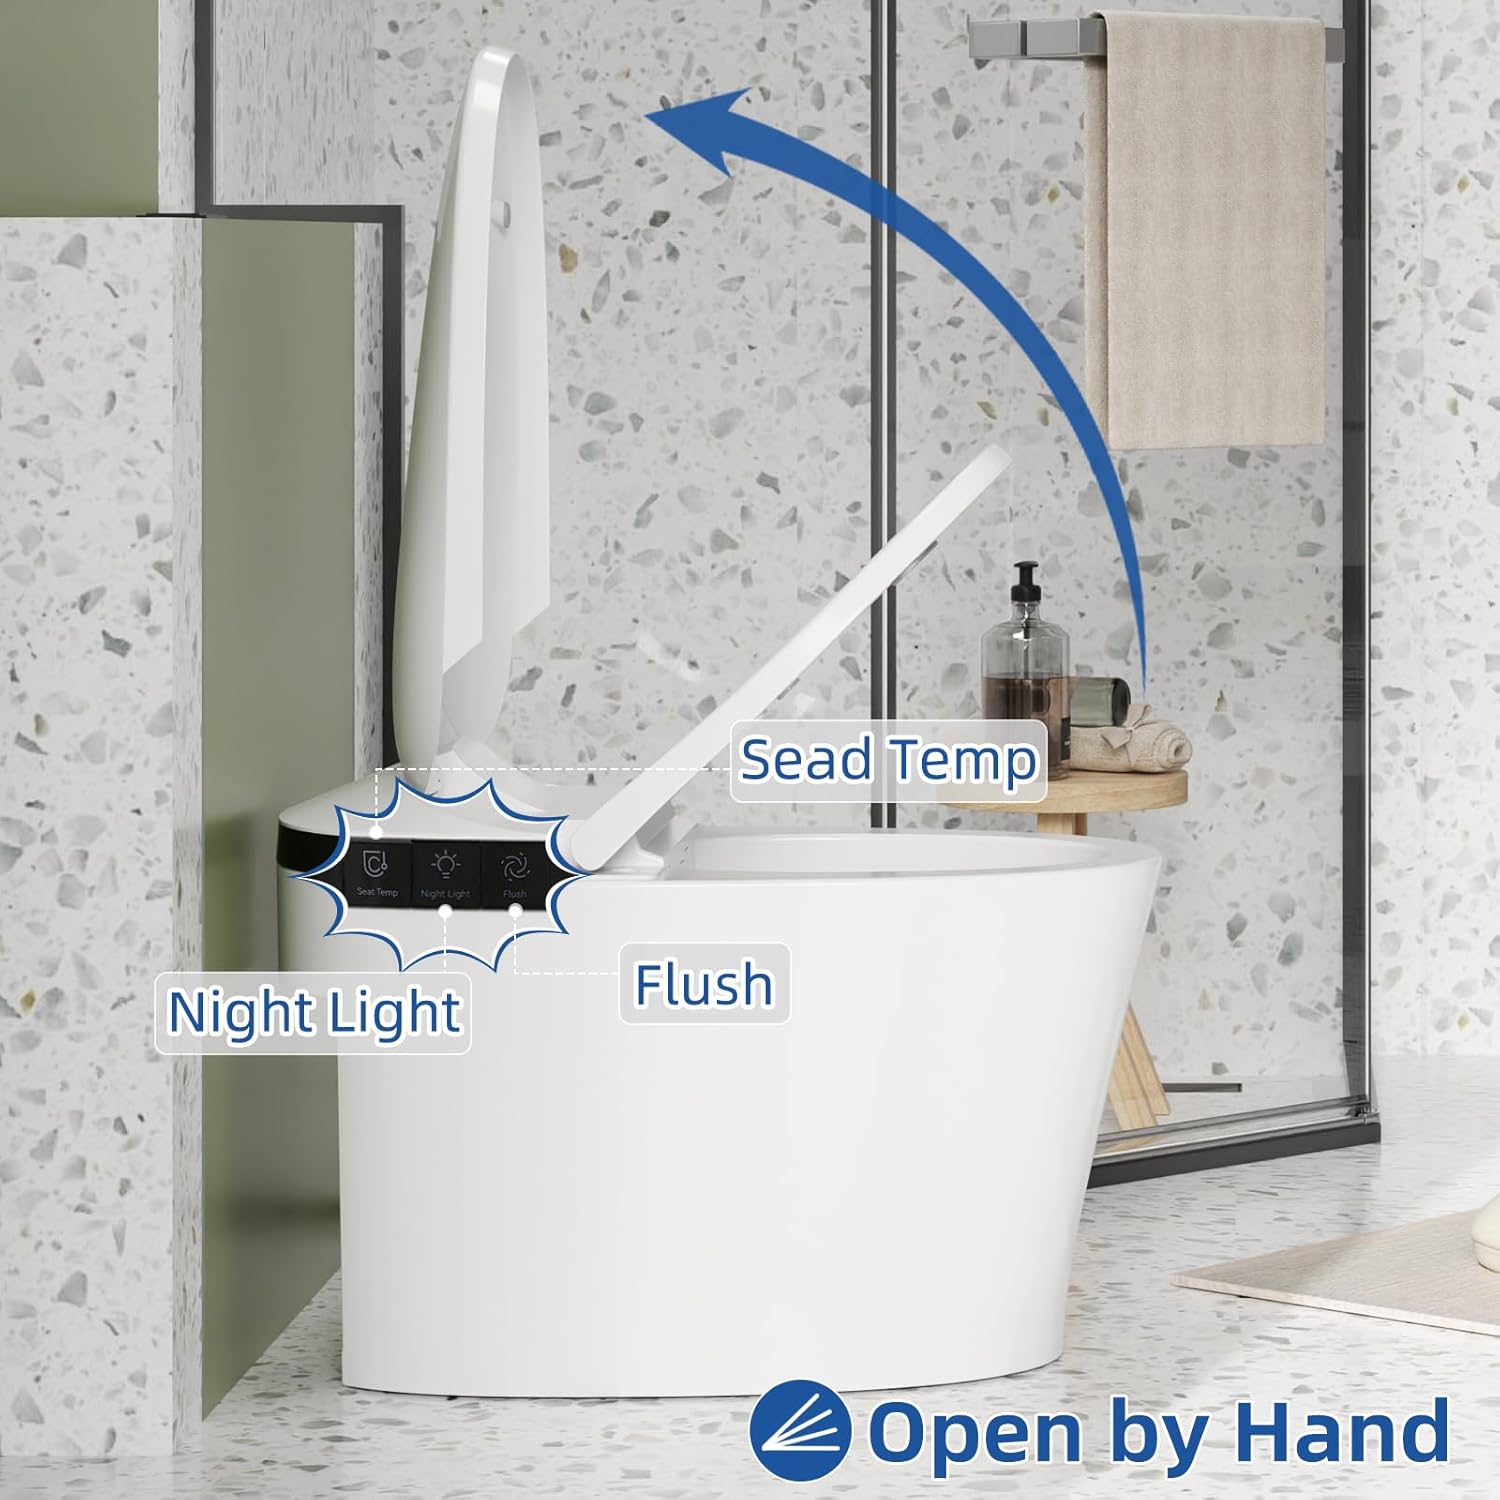
Image 5.5: Dual Siphon Jet Cleaning. This image visually represents the powerful 360-degree flush action of the dual siphon jet system, ensuring thorough cleaning.
5.6 Side Button Control
Manual controls are located on the side of the toilet for functions such as flushing, adjusting seat temperature, and controlling the night light. The lid also features a soft-close mechanism.
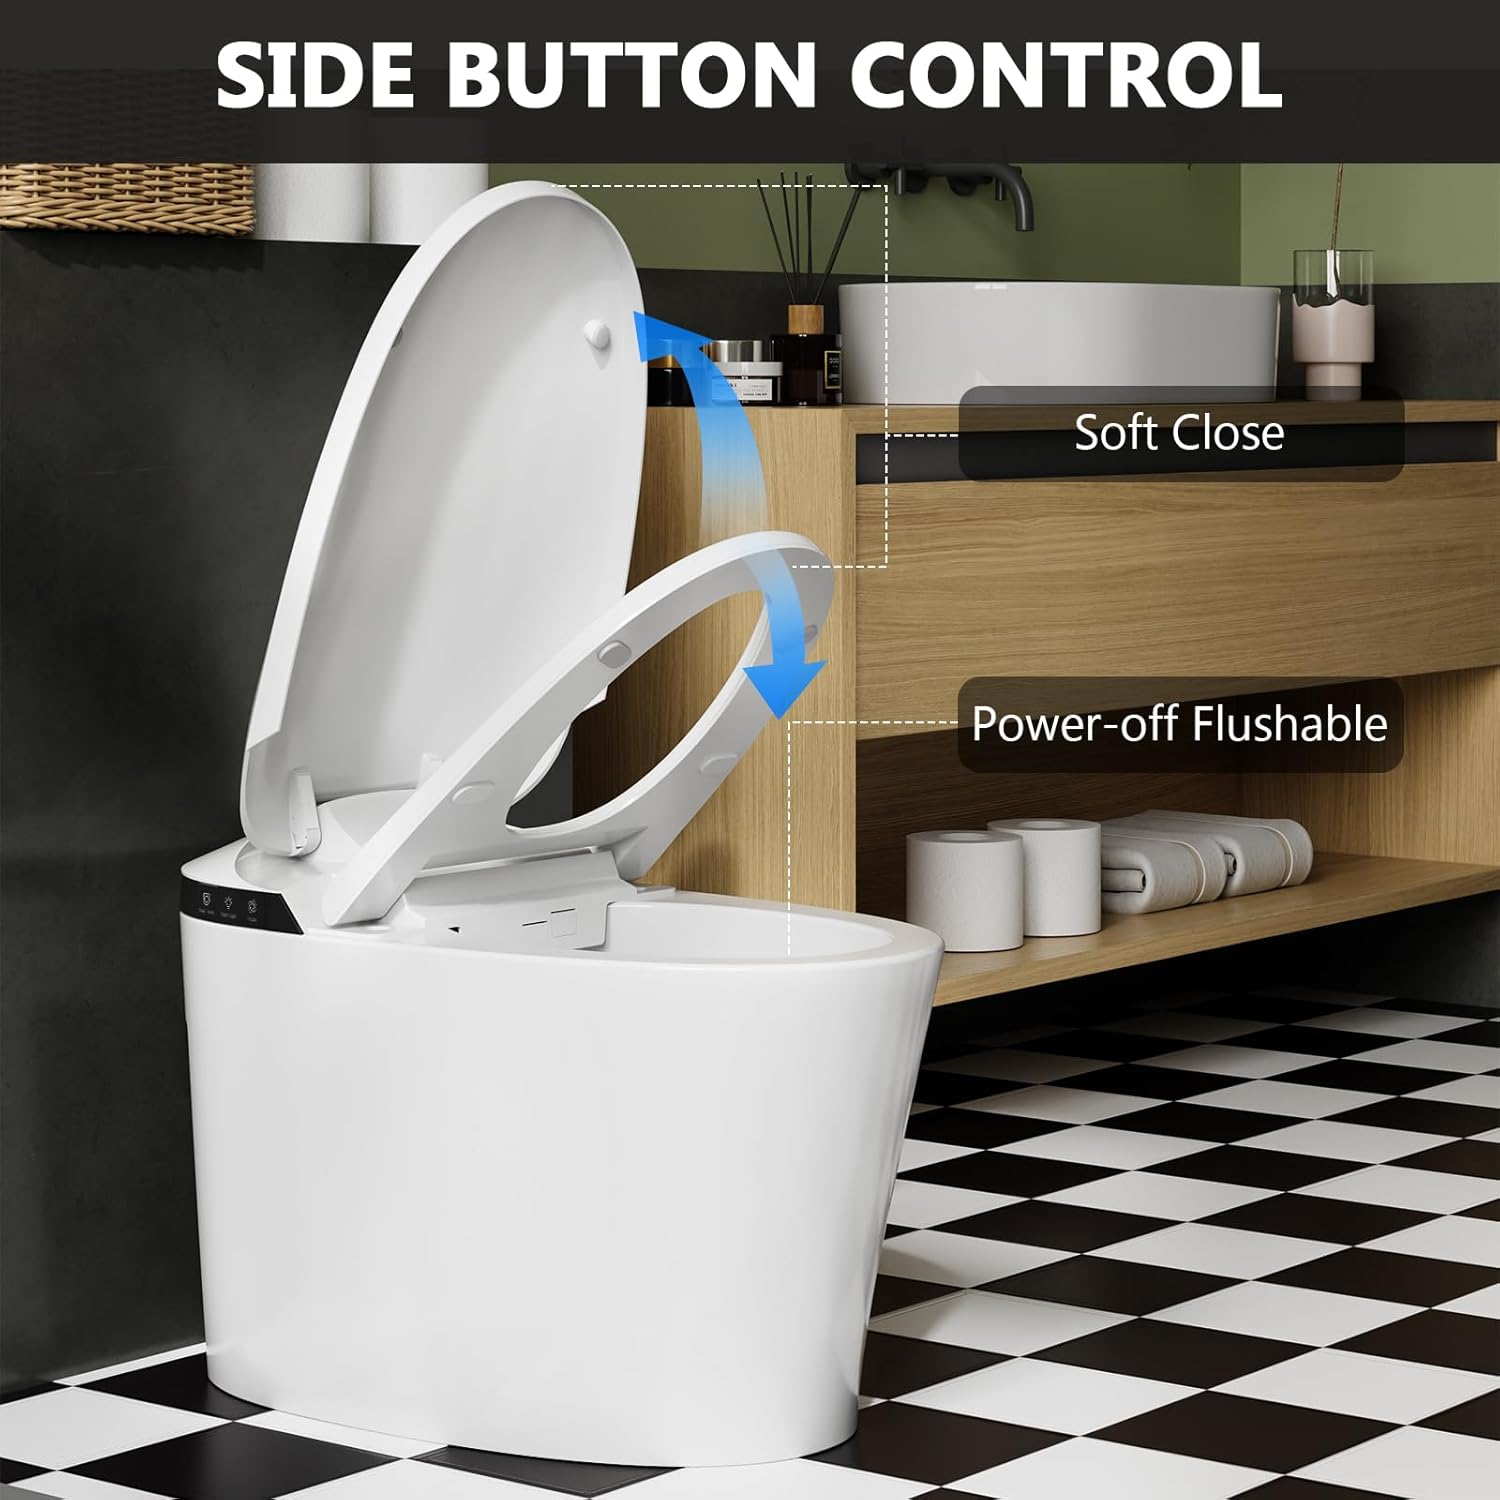
Image 5.6: Side Button Control. This image shows the control panel on the side of the toilet, indicating buttons for flush, seat temperature, and night light, along with the soft-close lid feature.
6. Maintenance
Regular cleaning and maintenance will ensure the longevity and hygienic operation of your smart toilet.
- Exterior Cleaning: Wipe the exterior surfaces with a soft, damp cloth and a mild, non-abrasive cleaner. Avoid harsh chemicals or abrasive pads.
- Seat Cleaning: Clean the toilet seat with a mild soap solution. Do not use strong detergents or disinfectants that may damage the material.
- Nozzle Cleaning: Periodically clean the flush nozzle to prevent mineral buildup. Refer to the detailed cleaning instructions in the full manual (if available) for specific steps.
- Filter Maintenance: Check and clean the water inlet filter periodically to ensure proper water flow.
- Power Outage Flush: In case of a power outage, the toilet is designed to allow for manual flushing.
7. Troubleshooting
If you encounter issues with your GarveeTech Smart Toilet, refer to the following common troubleshooting steps:
| Problem | Possible Cause | Solution |
|---|---|---|
| Toilet does not flush automatically. | Sensor obstructed or dirty; power issue. | Clean the sensor area. Check power connection. |
| Heated seat not working. | Power issue; temperature setting too low. | Check power. Adjust temperature settings using side controls. |
| Weak flush. | Low water pressure; clogged nozzle/filter. | Ensure adequate water pressure. Clean flush nozzle and water inlet filter. |
| Night light not illuminating. | Light sensor obstructed; night light feature turned off. | Ensure light sensor is clear. Activate night light via side controls. |
For issues not listed here or if solutions do not resolve the problem, please contact GarveeTech customer support.
8. Specifications
| Feature | Detail |
|---|---|
| Model Number | WXv_XL9K70ER2WmaCDYTvwdezXl7v |
| Brand | GarveeTech |
| Color | White |
| Product Dimensions (D x W x H) | 28.1" x 16.34" x 19.53" |
| Material | ABS, Ceramic |
| Item Weight | 100.2 Pounds |
| Installation Type | Floor Mounted |
| Shape | Round |
| Seat Material Type | Acrylonitrile Butadiene Styrene (ABS) |
| Flush Volume (Half/Full) | 1.08 GPF / 1.45 GPF |
| Heated Seat | Yes, 3 adjustable temperature settings |
| Night Light | Yes |
| UPC | 198723842257 |
9. Warranty and Support
GarveeTech stands behind the quality of its products. This smart toilet comes with a standard manufacturer's warranty covering defects in materials and workmanship. For specific warranty terms, duration, and to register your product, please refer to the warranty card included in your packaging or visit the official GarveeTech website.
For technical assistance, troubleshooting guidance beyond this manual, or to inquire about replacement parts, please contact GarveeTech customer support. Our dedicated team is available to assist you.
- Customer Support: Refer to your product packaging or the GarveeTech website for contact information.
- Online Resources: Visit the GarveeTech store on Amazon for additional product information and FAQs: GarveeTech Store