MOESAPU BH-H3
MOESAPU BH-H3 2-in-1 Gas and Carbon Monoxide Detector User Manual
Model: BH-H3 | Brand: MOESAPU
1. Introduction
This manual provides essential information for the proper installation, operation, and maintenance of your MOESAPU BH-H3 2-in-1 Gas and Carbon Monoxide Detector. This device is designed to detect both combustible gases (such as natural gas, LPG, propane, methane, and butane) and carbon monoxide (CO) to enhance safety in your home, kitchen, or RV. Please read this manual thoroughly before use and retain it for future reference.
2. Important Safety Information
- This detector is designed for household use and is not intended for industrial or commercial applications.
- Do not paint over the detector. Paint can clog the sensor openings and prevent the unit from functioning correctly.
- Do not block the ventilation openings on the detector.
- Regularly test the detector as instructed in this manual.
- In case of an alarm, follow the instructions provided in the "Alarm Conditions and Actions" section immediately.
- This device requires a continuous 110V AC power supply to operate. It does not have a battery backup.
- The detector should be installed by a competent person in accordance with local electrical codes and regulations.
3. Product Overview
The MOESAPU BH-H3 is a versatile 2-in-1 detector designed to provide reliable protection against both combustible gas leaks and carbon monoxide (CO) poisoning. It is suitable for various residential environments including homes, kitchens, and RVs.
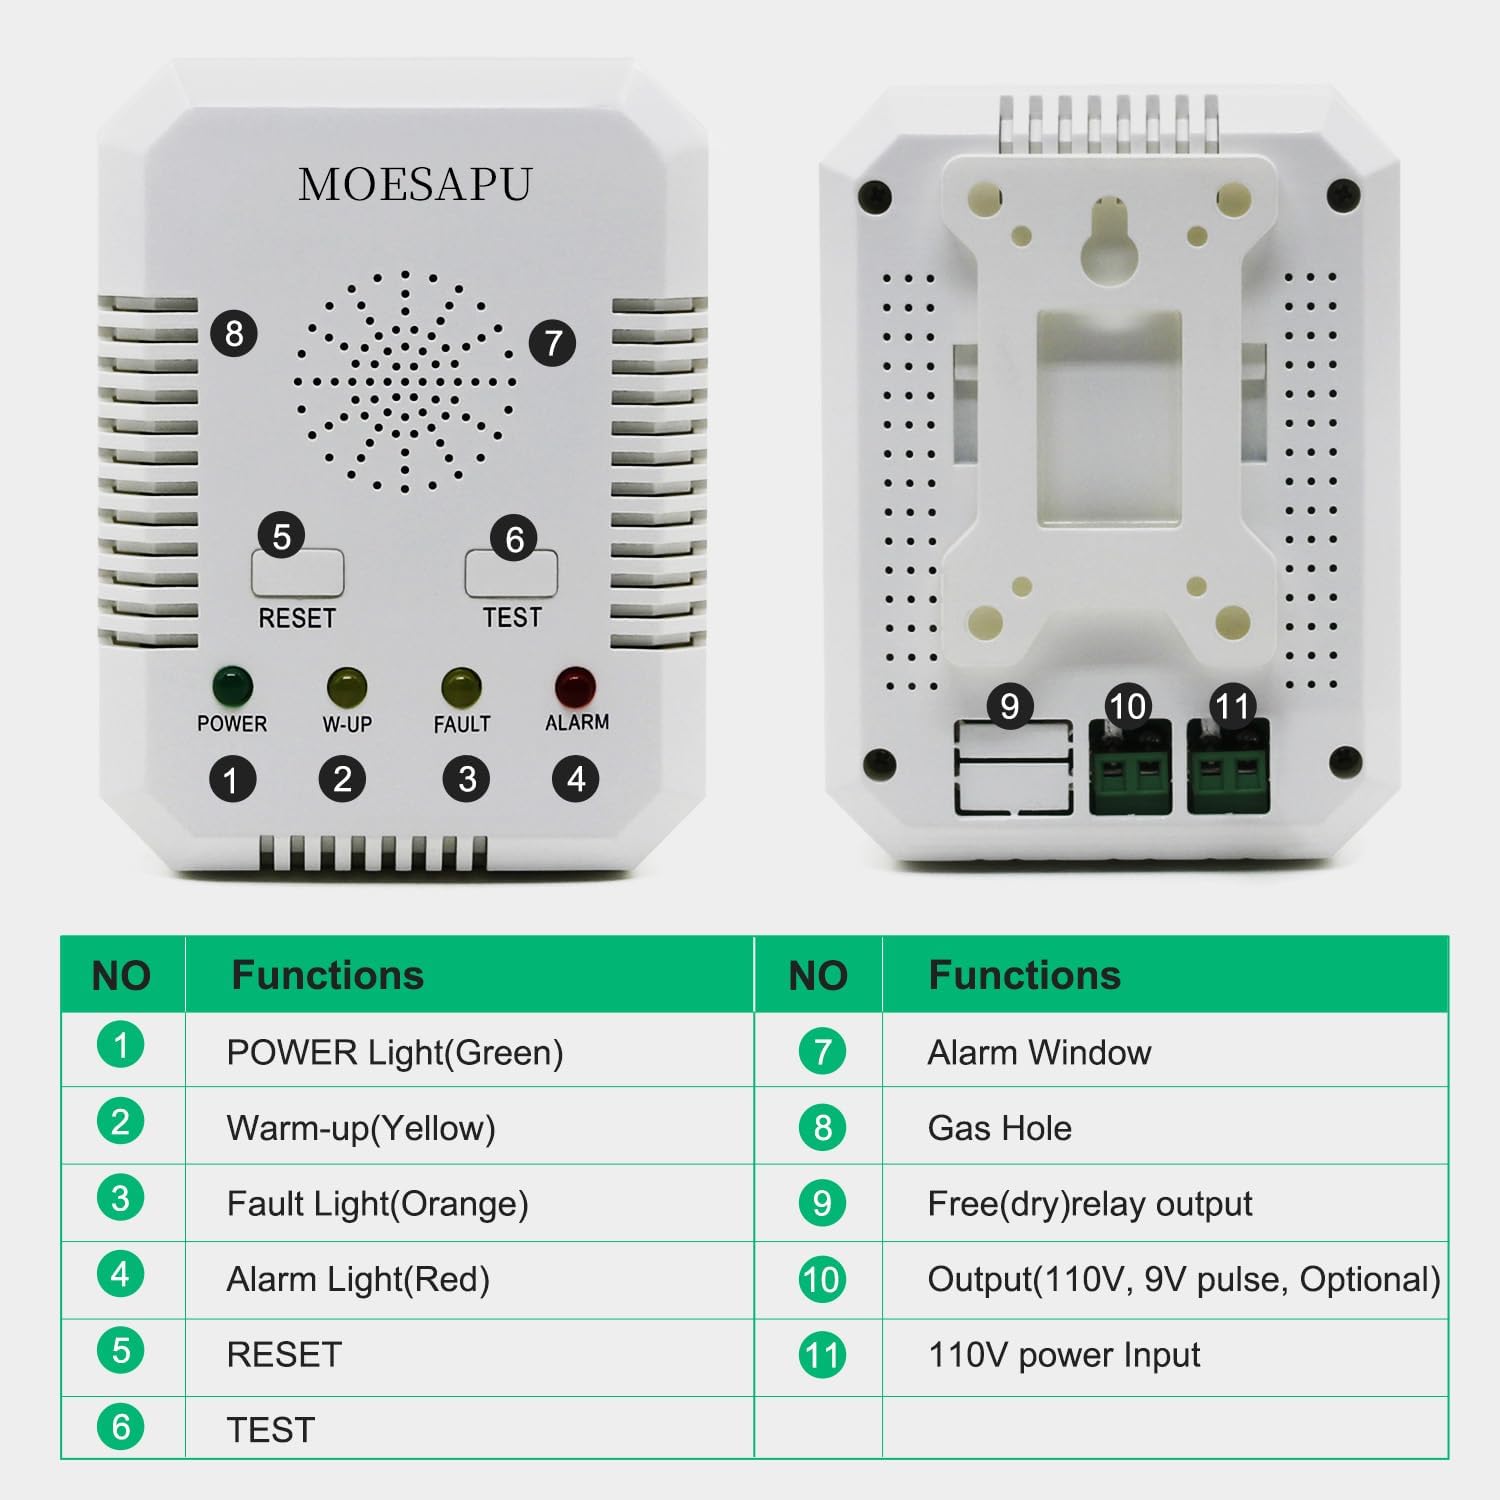
Image: The detector highlighting its capability to detect both natural gas (methane) and carbon monoxide, designed for wall-mounted household use.
3.1 Key Features
- Dual Detection: Detects both combustible gases (natural gas, LPG, propane, methane, butane) and carbon monoxide (CO).
- Audible and Visual Alarm: Provides a loud audible alarm (≥70dB) and a flashing red light during an alarm event.
- Easy Installation: Plug-in design for simple setup.
- Quick Response: Response time typically within 30 seconds for gas detection.
- Long Sensor Life: Equipped with sensors designed for a 10-year service life.
- Warm-up Period: Requires a 3-minute warm-up period upon initial power-on.

Image: Key features of the detector including LED light alarm, loud 70dB alarm, detection of LNG/LPG/CO, and wall-mounted design, ensuring reliable protection.
3.2 Components and Indicators
Familiarize yourself with the detector's components and indicators:

Image: Front and back view of the MOESAPU BH-H3 detector with numbered labels indicating various functions and ports.
- POWER Light (Green): Indicates the device is powered on and operating normally.
- W-UP (Warm-up) Light (Yellow): Illuminates during the initial 3-minute warm-up period.
- FAULT Light (Orange): Indicates a malfunction or fault within the unit.
- ALARM Light (Red): Flashes or illuminates solid red during a gas or CO alarm.
- RESET Button: Used to reset the alarm or clear a fault condition.
- TEST Button: Used to manually test the alarm function.
- Alarm Window: Area where the audible alarm sounds.
- Gas Hole: Sensor intake for gas detection.
- Free (dry) Relay Output: Optional output for integration with other systems.
- Output (110V, 9V pulse, Optional): Optional output for external devices.
- 110V Power Input: Connection point for the power cord.
4. Installation and Setup
4.1 Choosing an Installation Location
Proper placement is crucial for effective detection. Consider the following:
- For Natural Gas (Methane): Natural gas is lighter than air. Install the detector 30 cm (12 inches) below the ceiling and at least 1.5 meters (5 feet) away from gas appliances.
- For LPG (Propane, Butane): LPG is heavier than air. Install the detector 30 cm (12 inches) above the floor and at least 1.5 meters (5 feet) away from gas appliances.
- For Carbon Monoxide (CO): CO mixes with air. Install the detector at a height between 1.5 meters (5 feet) and 1.8 meters (6 feet) from the floor, or at sleeping level in bedrooms.
- General Placement: Avoid installing near windows, doors, ventilation fans, or areas with high humidity or extreme temperatures. Do not place behind curtains or furniture that could obstruct the sensor.

Image: Visual examples of suitable installation locations for the detector, including dining rooms, near chimneys, fireplaces, and gas water heaters.
4.2 Mounting the Detector
- Select a suitable wall location based on the gas type you primarily wish to detect and general CO detection guidelines.
- Use the mounting holes on the back of the detector as a template to mark screw positions on the wall.
- Drill two holes and insert wall anchors if necessary.
- Secure the detector to the wall using screws.
4.3 Power Connection and Warm-up
- Plug the detector's power cord into a standard 110V AC electrical outlet. The cord length is approximately 100 cm (39 inches).
- Upon power-on, the green POWER light will illuminate, and the yellow W-UP light will flash. The device will enter a 3-minute warm-up period.
- During the warm-up period, the detector is calibrating its sensors and is not fully operational. Avoid testing or exposing it to gas during this time.
- Once the warm-up period is complete, the yellow W-UP light will turn off, and the green POWER light will remain steadily lit, indicating the detector is ready for operation.

Image: The MOESAPU BH-H3 detector with its power cord and plug, ready for connection to a standard wall outlet.
5. Operation
5.1 Normal Operation
When the detector is powered on and has completed its warm-up cycle, the green POWER light will be continuously lit. This indicates that the device is actively monitoring for combustible gases and carbon monoxide.
5.2 Testing the Detector
It is recommended to test the detector weekly to ensure proper functionality.
- Press and hold the TEST button (labeled '6' in the components diagram).
- The detector should emit a loud audible alarm, and the red ALARM light should flash.
- Release the TEST button. The alarm should stop, and the red ALARM light should turn off.
- If the detector does not respond as described, refer to the Troubleshooting section.

Image: The detector displaying a flashing red alarm light and indicating an audible warning of 70dB or greater.
6. Alarm Conditions and Actions
6.1 Gas Leak Alarm (Combustible Gas)
When a combustible gas leak is detected (e.g., natural gas, LPG), the detector will:
- Emit a loud, continuous audible alarm.
- The red ALARM light will flash rapidly.
Action in case of Gas Leak Alarm:
- DO NOT operate electrical switches, light matches, or use any ignition sources.
- Immediately open all windows and doors to ventilate the area.
- Turn off the main gas supply valve if safe to do so.
- Evacuate all occupants from the premises.
- From a safe location, call your gas supplier or emergency services.
- Do not re-enter the premises until the gas leak has been confirmed as resolved by a professional.
6.2 Carbon Monoxide (CO) Alarm
When carbon monoxide is detected, the detector will:
- Emit a loud, intermittent audible alarm (e.g., 4 short beeps followed by a pause).
- The red ALARM light will illuminate steadily or flash according to the CO concentration.
Action in case of CO Alarm:
- Immediately move to fresh air outdoors or open all doors and windows to ventilate the area.
- Perform a head count to check that all persons are accounted for.
- Call emergency services or a qualified technician to investigate the source of the CO.
- Do not re-enter the premises until the CO source has been identified and corrected, and the area has been thoroughly ventilated.

Image: Illustration of the detector's alarm behavior: flashing red light and alarm sound for natural gas, and solid red light with alarm sound for CO gas.
7. Maintenance
7.1 Regular Cleaning
Clean the exterior of the detector regularly (e.g., monthly) with a soft, damp cloth. Do not use cleaning agents, solvents, or abrasive materials, as these can damage the sensor or casing. Ensure no dust or debris accumulates around the gas hole/sensor area.
7.2 Sensor Life
The MOESAPU BH-H3 detector is equipped with sensors designed for a service life of approximately 10 years. After this period, the detector should be replaced to ensure continued accuracy and reliability.

Image: The detector shown alongside an illustration emphasizing its 10-year sensor life and service life.
7.3 Testing
Perform the manual test (Section 5.2) weekly to confirm the alarm and indicators are functioning.
8. Troubleshooting
| Problem | Possible Cause | Solution |
|---|---|---|
| Detector does not power on (no green POWER light). | No power supply; faulty outlet; damaged power cord. | Check power outlet with another device. Ensure power cord is securely plugged in. If problem persists, contact support. |
| Yellow W-UP light remains on or flashes indefinitely. | Warm-up cycle not completing; internal fault. | Ensure the detector has been powered for at least 3 minutes. If the issue persists, press the RESET button. If still unresolved, contact support. |
| Orange FAULT light is on. | Internal malfunction or sensor error. | Press the RESET button. If the FAULT light remains on, the unit may be defective and requires replacement. |
| Alarm sounds without apparent gas/CO presence (false alarm). | Interference from aerosols, strong cleaning agents, alcohol vapors, or high humidity; sensor contamination. | Ventilate the area. Relocate the detector away from sources of interference. Clean the detector as per maintenance instructions. If false alarms persist, contact support. |
| Detector fails to alarm during manual test. | Internal fault; unit not powered correctly. | Ensure the green POWER light is on. Press the RESET button and re-test. If it still fails, the unit may be defective and requires replacement. |
9. Specifications
| Feature | Detail |
|---|---|
| Model | BH-H3 |
| Detected Gases | Combustible gases (Natural gas, LPG, Propane, Methane, Butane, Coal gas) & Carbon Monoxide (CO) |
| Power Source | AC 110V ±15%, 50/60Hz |
| Alarm Volume | ≥70dB |
| Response Time | ≤30 seconds |
| Warm-up Time | 3 minutes |
| Sensor Life | 10 years |
| Material | ABS |
| Product Dimensions (D x W x H) | 4.35" x 3.32" x 1.95" (11.05 cm x 8.43 cm x 4.95 cm) |
| Item Weight | 0.53 Pounds (approx. 240g) |
| Working Environment Temperature | 0°C ~ 50°C (32°F ~ 122°F) |
| Relative Humidity | <97% RH |
| Rated Load | <1W |
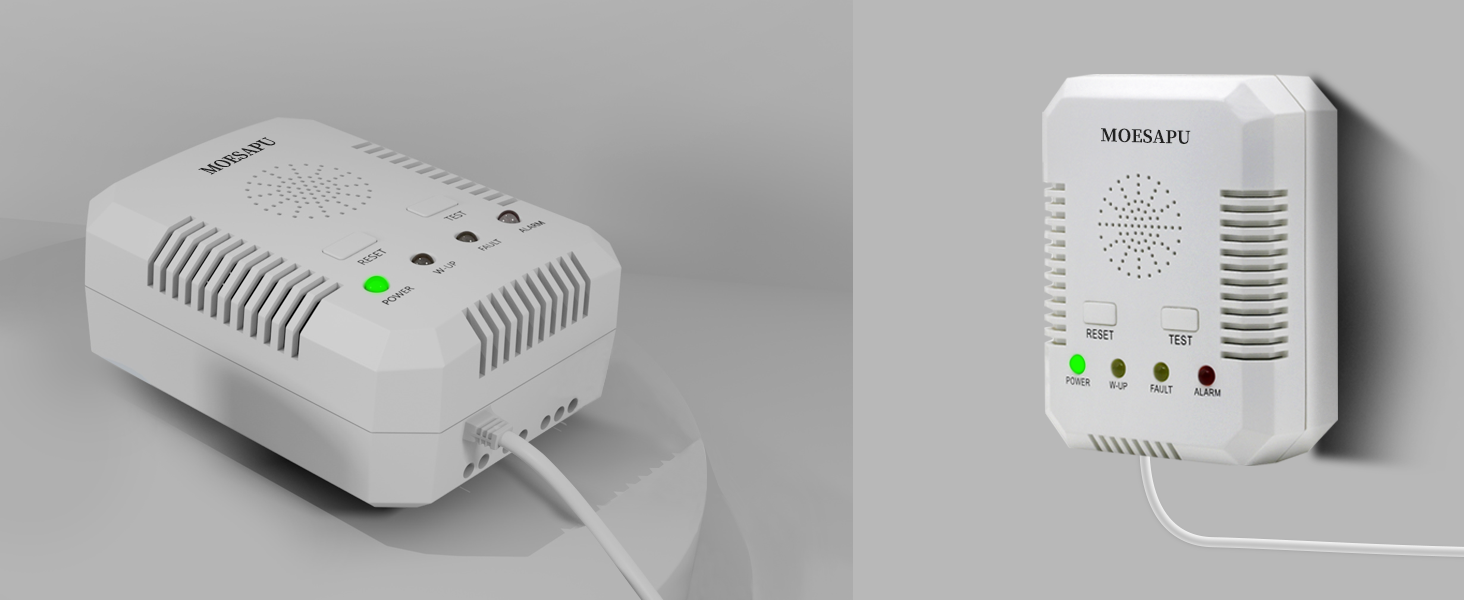
Image: An exploded view diagram illustrating the internal components and key specifications of the detector.
10. Warranty and Support
For warranty information, technical support, or service inquiries, please refer to the contact information provided with your purchase or visit the official MOESAPU website. Keep your purchase receipt as proof of purchase.