Qblahip 3851210025, 3851059042
Qblahip Dometic Refrigerator Thermistor 3851210025 3851059042 Instruction Manual
Brand: Qblahip | Model/Part Numbers: 3851210025, 3851059042
1. Product Overview
This manual provides instructions for the Qblahip replacement thermistor, designed for Dometic RV refrigerators. The thermistor is a critical component for accurate temperature regulation within your refrigerator, ensuring proper cooling and preventing issues like freezing or insufficient cooling. This replacement part is compatible with various Dometic models that utilize a two-wire thermistor.
Function: The refrigerator thermistor is essential for Dometic refrigerator systems to maintain optimal temperature control. It detects the internal temperature and sends signals to the refrigerator's control board, which then adjusts cooling cycles to prevent the refrigerator from becoming too cold or too warm.
2. Compatibility
This thermistor is compatible with Dometic refrigerators that use a two-wire thermistor. It replaces original part numbers 2931863035, 2931863076, and 3851059042.
Applicable Dometic Refrigerator Models:
- Models starting with RM: RM1350, RM2351, RM2354, RM2410, RM2451, RM2454, RM2551, RM2554, RM2607, RM2611, RM2612, RM2620, RM2652, RM2663, RM2807, RM2811, RM2812, RM2820, RM2852, RM2862, RM3807, RM3862, RM3863, RM3962, etc.
- Specific models: DMC702, DMR702, DM2652, DM2672, DM2682, DM2683, DM2852, DM2882, etc.
- Specific models: S520, S530, S619, S620, S630, S819, S820, S830, S1521, S1531, S1621, S1631, S1821, S1831, etc.
- Specific models: NDR1062, NDR1292, NDR1492, etc.
Please verify your refrigerator's model number and existing thermistor type to ensure compatibility before installation.
3. Installation Instructions
Safety First: Before beginning any installation or repair work, always ensure the refrigerator is completely disconnected from its power source (both AC and DC). Failure to do so can result in electrical shock or injury.
- Disconnect Power: Shut down the refrigerator and disconnect it from all power sources.
- Locate Old Thermistor: Identify the existing thermistor within your Dometic refrigerator. It is typically a small probe with wires leading to a connector.
- Prepare New Thermistor: Carefully unwrap the new thermistor wire.
- Remove Old Thermistor: Unplug the old thermistor's connector and gently pull out the entire old thermistor assembly, including its wire, from its routing path.
- Install New Thermistor: Route the new thermistor wire along the same path as the old one. Plug in the new thermistor's connector securely.
- Secure Thermistor Probe: Ensure the thermistor probe is positioned correctly according to your refrigerator's design for accurate temperature sensing.
- Restore Power: Once the new thermistor is securely installed and all connections are verified, reconnect the refrigerator to its power source.
- Verify Operation: Turn on the refrigerator and monitor its operation to ensure it resumes normal cooling and temperature regulation.

Image: The thermistor probe positioned inside an RV refrigerator, demonstrating a typical installation location.
4. Specifications
| Feature | Detail |
|---|---|
| Part Numbers Replaced | 2931863035, 2931863076, 3851059042 |
| Compatibility | Dometic refrigerators with two-wire thermistor (various RM, DM, S, NDR series models) |
| Temperature Range | -20°C to 105°C (-4°F to 221°F) for accurate signal transmission |
| Material Quality | High-quality material with double-layer sealing for improved insulation, wear resistance, and waterproofing. Coated with environmentally friendly epoxy resin. |
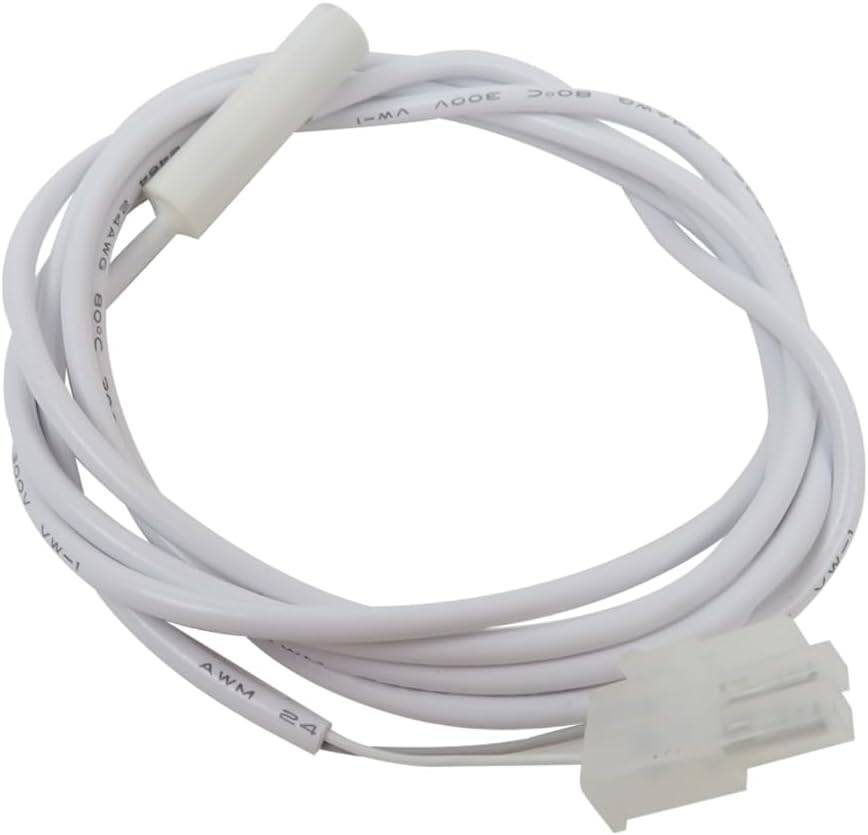
| Probe Dimensions | Approximately 0.81 cm x 2.96 cm (0.32 inches x 1.17 inches) |
| Cable Length | Approximately 50.5 inches (128.27 cm) |

Image: Visual representation of the thermistor's probe and cable length for reference.

Image: Detail showing the construction of the thermistor, emphasizing its double-layer sealing for durability and insulation.
5. Maintenance
The Qblahip thermistor is designed for durability and minimal maintenance. However, periodic checks can help ensure its continued performance:
- Visual Inspection: Periodically inspect the thermistor wire and probe for any signs of physical damage, wear, or corrosion.
- Connection Check: Ensure the electrical connector remains firmly seated.
- Cleanliness: Keep the area around the thermistor probe clean and free from debris that could interfere with accurate temperature sensing.
6. Troubleshooting
If your Dometic refrigerator is not functioning correctly after thermistor replacement, consider the following:
- No Power: Confirm the refrigerator is receiving power and that all circuit breakers or fuses are intact.
- Incorrect Installation: Double-check that the thermistor is correctly plugged into its connector and routed properly. Ensure the probe is in the correct location within the refrigerator compartment.
- Loose Connections: Verify all electrical connections are secure.
- Other Component Failure: If the issue persists, the problem may lie with another component of the refrigerator system, such as the control board, heating element, or cooling unit. Consult a qualified technician or your refrigerator's main service manual for further diagnosis.
7. Product Images