
1. Introduction
Thank you for choosing the ZXXDSGHUS F30070 Astronomical Telescope. This manual provides detailed instructions for the assembly, operation, and maintenance of your new telescope. Designed for beginners and enthusiasts, this 70mm aperture telescope offers clear views of celestial objects such as the Moon and planets, as well as terrestrial observations.
Please read this manual thoroughly before using the telescope to ensure proper setup and optimal viewing experience. Keep this manual for future reference.
2. Product Overview and Components
The ZXXDSGHUS F30070 telescope system includes several key components designed for ease of use and versatility. Familiarize yourself with each part before assembly.

Image 2.1: Labeled components of the ZXXDSGHUS F30070 Astronomical Telescope. This image displays all parts included in the package, such as the telescope tube, tripod, eyepieces, diagonal mirror, finder scope, and smartphone adapter, each clearly identified with a letter.
Included Components:
- A: Telescope Tube (Main optical tube)
- B: Moon Filter (For enhanced lunar observation)
- C: Eyepieces (H20mm and H6mm for varying magnifications)
- D: Diagonal Mirror (For comfortable viewing angle)
- E: Smartphone Adapter (For capturing images with a phone)
- F: Finder Scope with Bracket (For locating objects)
- G: Control Lever (For precise adjustments)
- H: Tripod (Stable base for the telescope)
- K: 3X Barlow Lens (Increases magnification of eyepieces)
- L: 1.5X Erecting Eyepiece (For terrestrial viewing, corrects image orientation)

Image 2.2: The ZXXDSGHUS F30070 telescope fully assembled on its tripod, with a smartphone attached to the adapter, ready for observation.
3. Setup Instructions
The ZXXDSGHUS F30070 telescope is designed for easy assembly without the need for additional tools. Follow these steps to set up your telescope.
- Set up the Tripod: Extend the legs of the tripod (H) to a stable position. Adjust the height as desired. Ensure the tripod is level on a flat surface.
- Attach the Telescope Tube: Locate the mounting bracket on the telescope tube (A). Align it with the mounting screw on the tripod head and secure it firmly.
- Install the Finder Scope: Slide the finder scope (F) into its bracket on the main telescope tube. Tighten the small screws on the bracket to hold it in place.
- Insert the Diagonal Mirror: Remove the dust cap from the focuser tube at the back of the main telescope. Insert the diagonal mirror (D) into the focuser and secure it with the small thumbscrew.
- Insert an Eyepiece: Choose an eyepiece (C), typically the H20mm for wider views, and insert it into the diagonal mirror. Secure it with the thumbscrew.
- Attach the Smartphone Adapter (Optional): If you plan to use your smartphone for photography, attach the smartphone adapter (E) to the eyepiece. Place your phone securely in the adapter, aligning its camera with the eyepiece.

Image 3.1: An illustrative diagram detailing the assembly process of the telescope, showing how each component connects to form the complete unit.
4. Operating Instructions
Once assembled, your telescope is ready for observation. Follow these guidelines for effective use.
4.1. Aligning the Finder Scope
The finder scope helps you locate objects quickly. It must be aligned with the main telescope:
- Point the main telescope at a distant, easily identifiable object (e.g., a tree top or street light) during daylight hours.
- Look through the main telescope's eyepiece and center the object.
- Now, look through the finder scope. Use the adjustment screws on the finder scope bracket to move its crosshairs until they are centered on the same object.
4.2. Observing with Eyepieces and Barlow Lens
The telescope comes with H20mm and H6mm eyepieces, and a 3X Barlow lens, offering various magnifications:
- H20mm Eyepiece: Provides 15X magnification (300mm focal length / 20mm eyepiece = 15X). Ideal for wide-field views and locating objects.
- H6mm Eyepiece: Provides 50X magnification (300mm focal length / 6mm eyepiece = 50X). Suitable for more detailed views of the Moon and planets.
- 3X Barlow Lens: When used with an eyepiece, it triples the magnification. For example, with the H20mm eyepiece, it provides 45X (15X * 3 = 45X). With the H6mm eyepiece, it provides 150X (50X * 3 = 150X).
To change magnification, simply swap eyepieces or insert the Barlow lens between the diagonal mirror and the eyepiece.
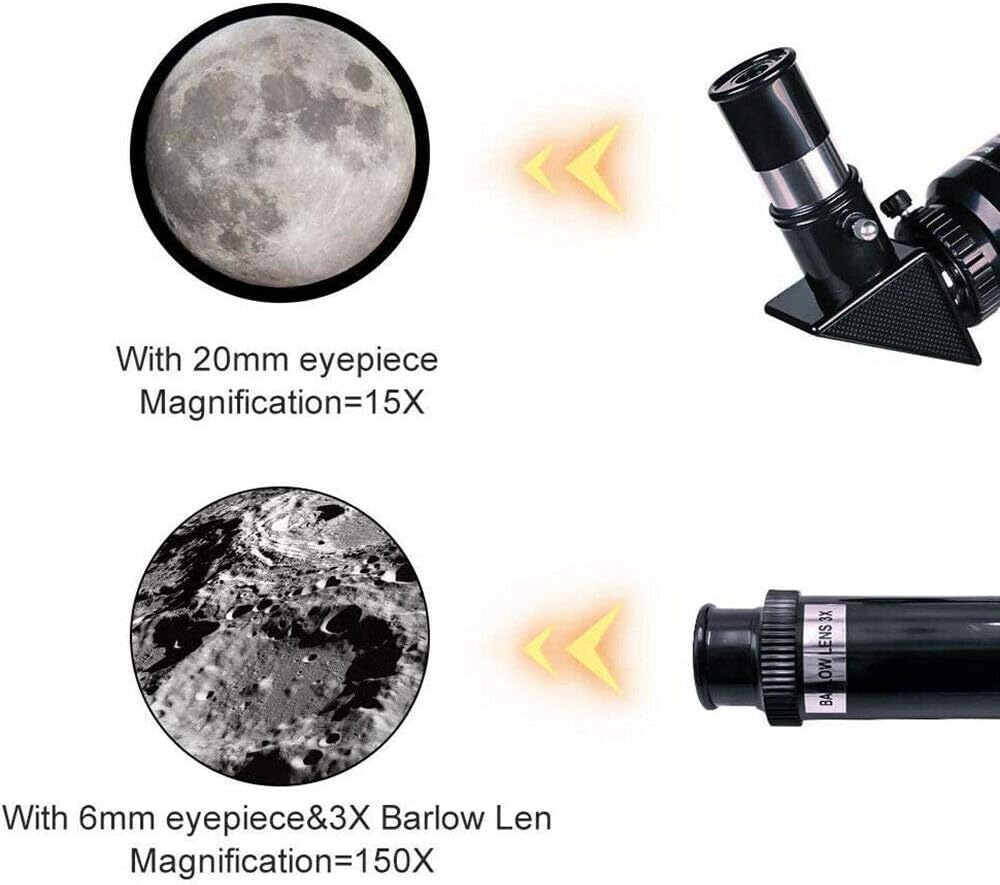
Image 4.1: This image illustrates the different magnifications achievable with the included eyepieces. It shows a 20mm eyepiece providing 15X magnification and a 6mm eyepiece combined with a 3X Barlow lens providing 150X magnification, with corresponding views of the Moon.
4.3. Focusing
Once an object is centered in the eyepiece, slowly turn the focus knob on the focuser until the image is sharp and clear. Fine-tune the focus for the best possible view.
4.4. Using the Moon Filter
For observing the Moon, especially when it is bright, screw the Moon filter (B) onto the bottom of your chosen eyepiece. This will reduce glare and enhance contrast, allowing for more comfortable and detailed viewing.
4.5. Terrestrial Viewing
For observing terrestrial objects, you can use the 1.5X Erecting Eyepiece (L). This eyepiece corrects the inverted image produced by the main telescope, making it suitable for bird watching or landscape viewing.
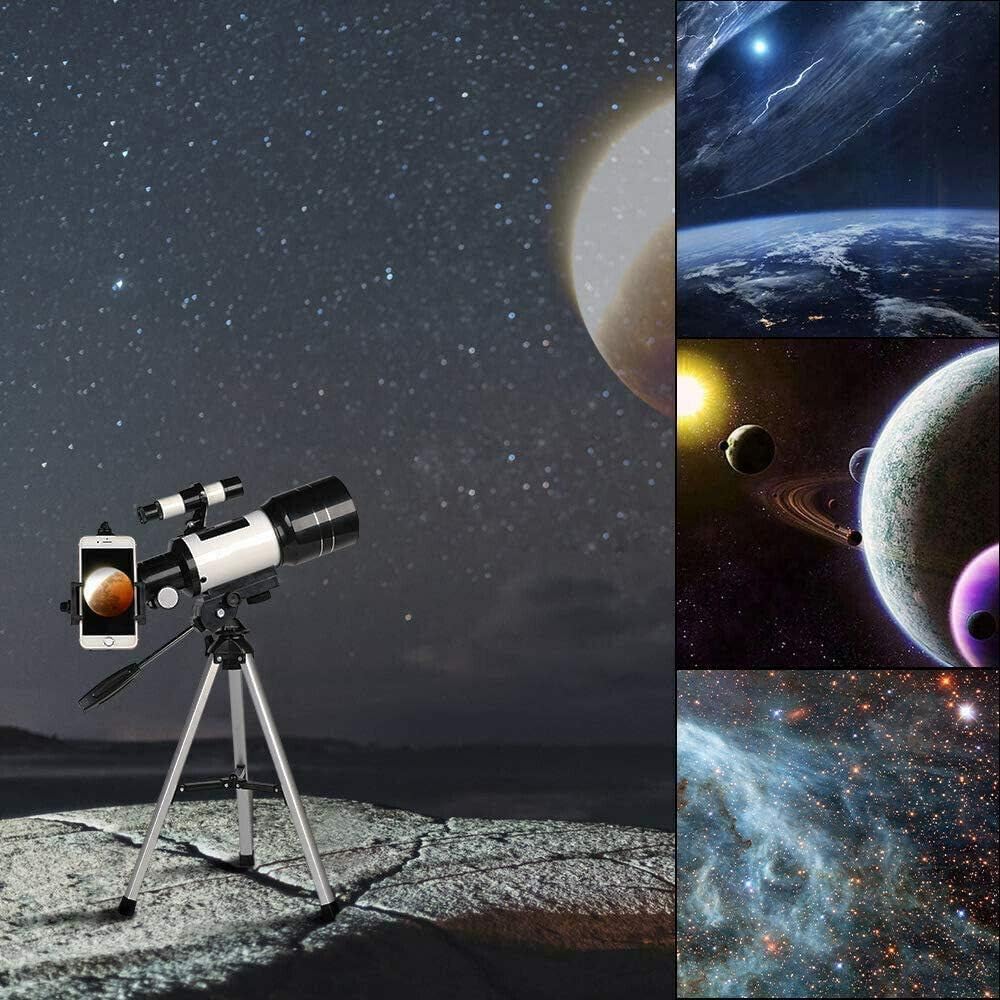
Image 4.2: The ZXXDSGHUS F30070 telescope positioned for night sky observation, with inset images showcasing potential views of planets, nebulae, and other astronomical phenomena.
5. Maintenance
Proper care and maintenance will ensure the longevity and performance of your telescope.
- Cleaning Lenses: Use a soft, lint-free cloth specifically designed for optical lenses. Gently wipe the lens surfaces. For stubborn smudges, use a small amount of optical cleaning fluid on the cloth, not directly on the lens. Avoid touching the lens surfaces with your fingers.
- Dust Protection: Always replace dust caps on the telescope tube, focuser, and eyepieces when not in use.
- Storage: Store the telescope in a dry, dust-free environment. Avoid extreme temperatures and humidity. If possible, store it in its original packaging or a padded case.
- General Care: Avoid dropping or subjecting the telescope to harsh impacts. Do not attempt to disassemble the optical components beyond what is described in this manual.
6. Troubleshooting
If you encounter issues with your telescope, refer to the following common problems and solutions:
- Image is blurry or out of focus:
Solution: Adjust the focus knob slowly until the image becomes sharp. Ensure you are using the correct eyepiece for the desired magnification. - Cannot find objects:
Solution: Ensure the finder scope is properly aligned with the main telescope (refer to Section 4.1). Start with the lowest magnification eyepiece (H20mm) for a wider field of view to locate objects, then switch to higher magnification. - Image is dim or dark:
Solution: Ensure the dust caps are removed from both ends of the telescope tube and the eyepiece. Avoid observing through windows or in heavily light-polluted areas. - Image is upside down or reversed:
Solution: This is normal for astronomical telescopes. For terrestrial viewing, use the 1.5X Erecting Eyepiece (L) to correct the image orientation.
7. Specifications
Key technical specifications for the ZXXDSGHUS F30070 Astronomical Telescope:
| Feature | Specification |
|---|---|
| Objective Aperture | 70mm |
| Focal Length | 300mm |
| Eyepieces Included | H20mm, H6mm |
| Barlow Lens | 3X |
| Erecting Eyepiece | 1.5X |
| Maximum Magnification | 150X |
| Material | ABS plastic, Aluminum alloy, Rubber, Optical glass |
| Color | Black + Silver |

Image 7.1: This image provides the physical dimensions of the telescope, including its length and height when mounted on the tripod.
8. Warranty and Support
Specific warranty details for the ZXXDSGHUS F30070 Astronomical Telescope are not provided in this manual. For warranty information, technical support, or any inquiries regarding your product, please contact the manufacturer or your point of purchase directly.