1. Safety Information
Please read all safety instructions carefully before using the TOMLOV TriL110 Digital Microscope. Retain this manual for future reference.
- Power Supply: Use only the specified power adapter. Ensure the voltage matches the product requirements.
- Environment: Operate the microscope in a dry, clean environment. Avoid exposure to extreme temperatures, humidity, dust, or corrosive substances.
- Handling: Handle the device with care. Avoid dropping or subjecting it to strong impacts.
- Cleaning: Disconnect the power before cleaning. Use a soft, dry cloth. Do not use liquid cleaners or solvents.
- Disassembly: Do not attempt to disassemble or repair the microscope yourself. Unauthorized repairs will void the warranty and may cause damage or injury.
- Children: This device is not a toy. Adult supervision is recommended when children are using the microscope.
2. Product Overview
The TOMLOV TriL110 is a versatile digital microscope featuring a 10.1-inch IPS display, 2K video recording, and 24MP photo capture. It comes equipped with three interchangeable lenses offering magnifications up to 2500x, making it suitable for various applications including coin inspection, circuit board soldering, and biological slide observation. The device supports HDMI and USB output for real-time viewing on larger screens and includes a comprehensive lighting system for optimal illumination.
2.1 Package Contents
- TOMLOV TriL110 Digital Microscope Unit
- 1000X Lens (Pre-installed)
- 1500X Soldering Lens
- 2500X Biological Lens
- Adjustable Stand with Base
- Gooseneck Side Lights (2)
- Slide Glass Bottom Transmitted Light
- Power Adapter
- HDMI Cable
- USB Cable
- Wireless Remote Control
- 64GB SD Card
- User Manual
2.2 Product Features
- 3-Lens System: Easily switch between 1000X (coin/stamp), 1500X (soldering/watch repair), and 2500X (biological slides) lenses by rotating the lens barrel.
- High-Resolution Display: 10.1-inch IPS screen with 178° viewing angle, 24MP photo resolution, and 2K video resolution for clear, vibrant images.
- Versatile Illumination: Features 12 main LED lights, 2 gooseneck side lights, and 1 slide glass bottom transmitted light, all with independent brightness adjustment.
- External Output: Real-time HDMI and USB output for connecting to larger monitors or computers.
- Storage: Includes a 64GB SD card for storing photos and videos.
- Wireless Remote Control: Conveniently capture images, record videos, and adjust zoom without touching the microscope.
- Adjustable Stand: Provides a stable and spacious working area, with adjustable height for different observation needs.

Image: Overview of the TOMLOV TriL110 Digital Microscope highlighting its 3-lens system and 10.1-inch display.
Video: A demonstration of the TOMLOV TriL110 Digital Microscope's features, including lens switching, focusing, and various applications.
3. Setup
3.1 Assembly
- Attach the Display Unit: Securely mount the display unit onto the adjustable stand.
- Install Lenses: The 1000X lens is typically pre-installed. To switch lenses, gently rotate the lens barrel to detach the current lens and attach the desired lens (1500X or 2500X).
- Connect Lights: Plug the gooseneck side lights into their designated ports on the base.
- Insert SD Card: Insert the provided 64GB SD card into the SD card slot on the side of the display unit.
- Connect Power: Connect the power adapter to the microscope and then to a power outlet.

Image: Visual guide showing the simple steps for setting up and using the microscope, including powering on, lens selection, height adjustment, and focusing.
3.2 Powering On/Off
Press and hold the power button on the display unit to turn the microscope on or off.
3.3 Initial Settings
Upon first use, you may need to adjust language, date, and time settings through the on-screen menu. Refer to the 'Operation' section for menu navigation.
4. Operation
4.1 Lens Switching and Magnification
The TriL110 features three specialized lenses. To switch between them, gently rotate the lens barrel to detach the current lens and attach the desired one. Each lens is designed for specific magnification ranges and applications:
- 1000X Lens: Magnification 2X-1000X. Object distance 8mm-500mm. Ideal for observing coins, stamps, and other larger objects.
- 1500X Soldering Lens: Magnification 10X-1500X. Object distance 38mm-180mm. Optimized for detailed work like PCB soldering and watch repair.
- 2500X Biological Lens: Magnification 2000X-2500X. Object distance 3mm-4mm. Best suited for observing biological slides and microscopic mites.

Image: Illustrates the process of rotating the lens barrel to easily switch between the three available lenses.
4.2 Focusing
To achieve a clear image, rotate the focus wheel on the microscope body until the object appears sharp on the display. Adjust the height of the microscope stand as needed for different lenses and object distances.

Image: A user observing a coin using the 1000X lens, demonstrating its suitability for coin and stamp observation.

Image: The microscope in use for soldering a circuit board, showcasing the 1500X lens for precision tasks.

Image: A user observing a biological slide, demonstrating the high magnification capabilities of the 2500X lens.
4.3 Lighting Control
The microscope is equipped with multiple light sources for optimal illumination. The 12 main LED lights, 2 gooseneck side lights, and 1 slide glass bottom transmitted light can be adjusted independently using the controls on the device or the remote control. Adjust the brightness to eliminate shadows and achieve clear visibility of your specimen.

Image: Details of the microscope's lighting system, including the 12 main LEDs, two adjustable side lights, and the transmitted light for transparent specimens.
4.4 Photo and Video Capture
To capture images or record videos, use the dedicated buttons on the display unit or the wireless remote control. The captured media will be saved to the inserted SD card.
- Photo Mode: Press the 'Photo' button to take a still image.
- Video Mode: Press the 'Video' button to start/stop video recording.
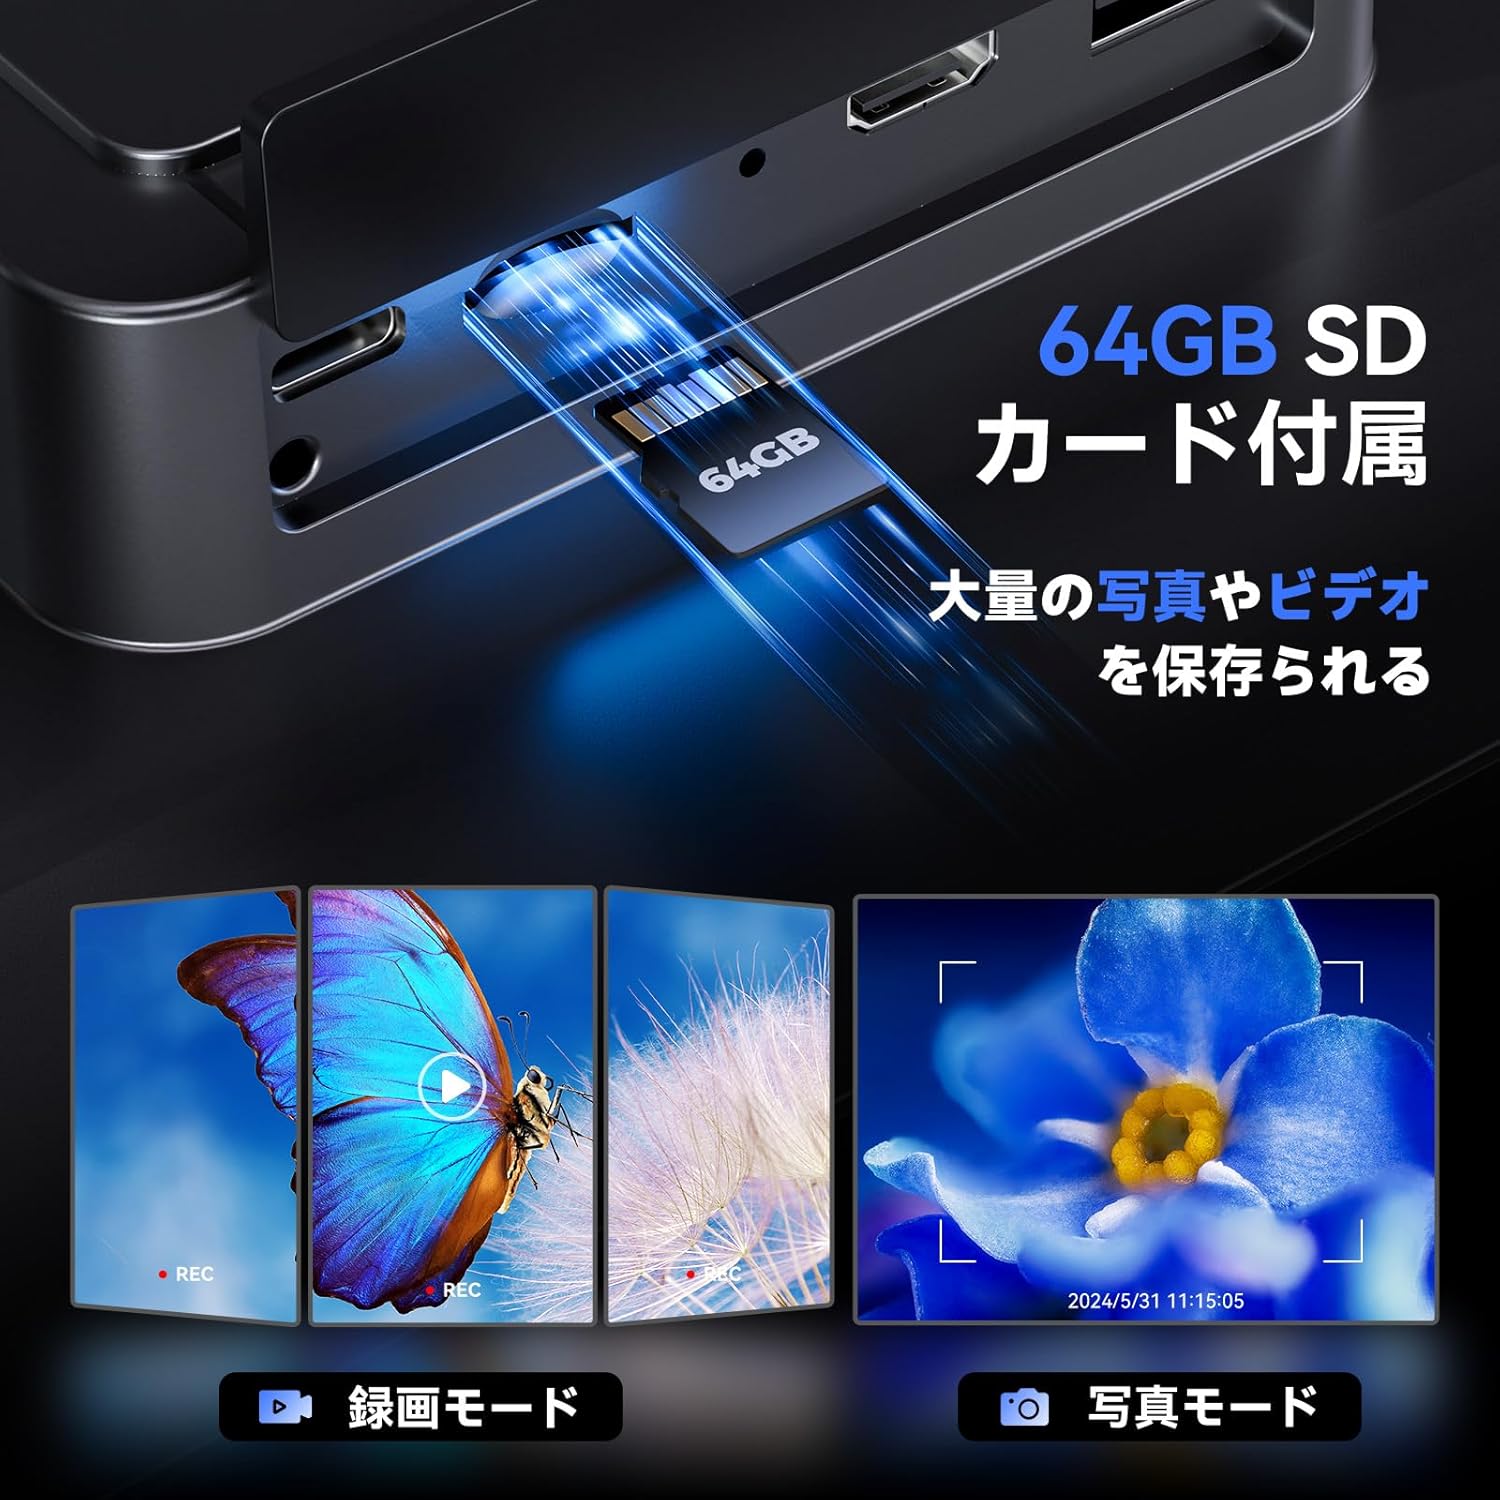
Image: Illustrates the inclusion of a 64GB SD card for extensive photo and video storage.
4.5 Connecting to External Displays (HDMI & USB)
The microscope can output its display to a larger screen for collaborative viewing or detailed analysis:
- HDMI Output: Connect an HDMI cable from the microscope to an HDMI-enabled monitor or TV. The microscope display will automatically switch to output mode.
- USB Output: Connect a USB cable from the microscope to a computer. You may need to install specific software (not included, usually available from manufacturer's website) to view the live feed on your computer.

Image: Shows the microscope connected to a larger TV and a laptop, demonstrating its HDMI and USB output capabilities for real-time viewing.
4.6 Wireless Remote Control
The included wireless remote control allows for convenient operation without disturbing the microscope. Functions include:
- Zoom In/Out
- Photo Capture
- Video Recording
- Menu Navigation (depending on model features)
Image: Depicts the wireless remote control and its functions for convenient operation of the microscope.
5. Maintenance
5.1 Cleaning
- Lenses: Use a soft, lint-free cloth specifically designed for optical lenses. For stubborn smudges, a small amount of lens cleaning solution can be applied to the cloth (not directly to the lens).
- Display Screen: Wipe the screen gently with a microfiber cloth. Avoid harsh chemicals.
- Body: Use a soft, dry cloth to wipe the microscope body.
5.2 Storage
When not in use, store the microscope in a clean, dry place away from direct sunlight and extreme temperatures. It is recommended to cover the lenses to prevent dust accumulation.
6. Troubleshooting
| Problem | Possible Cause | Solution |
|---|---|---|
| No power | Power adapter not connected; Power outlet faulty; Battery drained | Ensure power adapter is securely connected; Try a different outlet; Charge the battery. |
| Image blurry | Not in focus; Incorrect lens for object distance; Lens dirty | Rotate the focus wheel; Adjust microscope height; Clean the lens. |
| No image on external display | Cable not connected properly; Incorrect input selected on TV/monitor; Missing USB driver | Check HDMI/USB cable connections; Select correct input source on TV/monitor; Install necessary USB drivers for PC connection. |
| SD card error | SD card not inserted correctly; SD card full or corrupted | Reinsert SD card; Format SD card (this will erase all data); Try a different SD card. |
| Remote control not working | Battery drained; Obstruction between remote and microscope | Replace remote control battery; Ensure clear line of sight to the microscope's IR receiver. |
7. Specifications
| Feature | Detail |
|---|---|
| Brand | TOMLOV |
| Model | TriL110 |
| Display | 10.1-inch IPS Screen, 178° Viewing Angle |
| Photo Resolution | 24 Megapixels |
| Video Resolution | 2K |
| Magnification (1000X Lens) | 2X-1000X |
| Magnification (1500X Lens) | 10X-1500X |
| Magnification (2500X Lens) | 2000X-2500X |
| Light Source | 12 Main LEDs, 2 Gooseneck Side Lights, 1 Slide Glass Bottom Transmitted Light |
| Output Ports | HDMI, USB |
| Storage | 64GB SD Card (included) |
| Battery Life | Approx. 3 hours continuous operation (3000mAh microscope, 1800mAh base light) |
| Color | Black |
8. Warranty and Support
The TOMLOV TriL110 Digital Microscope comes with a 1-year manufacturer's warranty from the date of purchase. This warranty covers defects in materials and workmanship under normal use.
The warranty does not cover:
- Damage caused by misuse, abuse, accident, or neglect.
- Damage caused by unauthorized modification or repair.
- Normal wear and tear.
For technical support, warranty claims, or any questions regarding your TOMLOV TriL110 Digital Microscope, please contact our customer service team through the retailer where you purchased the product or visit the official TOMLOV website for contact information.