1. Product Overview
The Hammer 6 LTE is a robust push-button phone designed for durability and essential communication. It features a 2.4-inch IPS screen, a long-lasting 2500 mAh battery, and is built to withstand challenging environments with IP68 water and dust resistance, and a 1.5-meter drop test rating. Key functionalities include VoLTE technology for clear calls, an SOS button for emergencies, and an integrated torch.
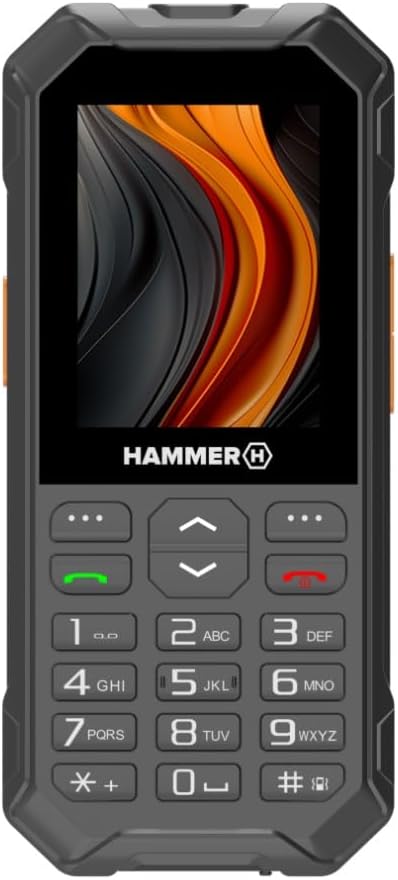
Figure 1.1: Front view of the Hammer 6 LTE phone, showing the display, keypad, and navigation buttons.

Figure 1.2: The Hammer 6 LTE phone demonstrating its IP68 water and dust resistance in a challenging environment.
2. Getting Started: Setup
2.1. Package Contents
Ensure all items are present in the package:
- Hammer 6 LTE Phone
- USB Cable
- User Manual (this document)
2.2. Battery Installation and Charging
The Hammer 6 LTE is equipped with a 2500 mAh battery. For optimal performance, fully charge the device before first use.
- Locate the battery compartment cover on the back of the phone.
- Gently remove the cover.
- Insert the battery, ensuring the contacts align correctly.
- Replace the battery compartment cover.
- Connect the supplied USB cable to the phone's USB-C port (located at the top, under a protective flap).
- Connect the other end of the USB cable to a compatible USB power adapter (not included) or a computer's USB port.
- The charging indicator will illuminate. A full charge typically takes several hours.

Figure 2.1: Top view of the Hammer 6 LTE, highlighting the USB-C charging port.
2.3. SIM Card Installation
The Hammer 6 LTE supports standard SIM cards. Refer to the phone's internal diagram for correct SIM card slot orientation.
- With the battery removed, locate the SIM card slot(s).
- Insert your SIM card(s) into the designated slot(s) according to the diagram.
- Reinstall the battery and battery cover.
3. Operating Instructions
3.1. Power On/Off
- To Power On: Press and hold the Power/End Call button (red button) until the screen illuminates.
- To Power Off: Press and hold the Power/End Call button until the power options appear, then select "Power Off".
3.2. Making and Receiving Calls
- Making a Call: Enter the phone number using the keypad and press the Call button (green button).
- Receiving a Call: When the phone rings, press the Call button (green button) to answer.
- Ending a Call: Press the Power/End Call button (red button).
3.3. Messaging
Navigate to the "Messages" menu from the main screen to compose new messages, read incoming messages, or manage drafts.
3.4. SOS Button Functionality
The Hammer 6 LTE features a dedicated SOS button for emergencies. This button can be configured to call or send an SMS to pre-set emergency contacts.
- Setup: Access the phone's settings to configure the SOS contacts and preferred action (call/SMS).
- Activation: In an emergency, press and hold the SOS button (located on the back of the phone) for several seconds. The phone will initiate the pre-programmed emergency action.
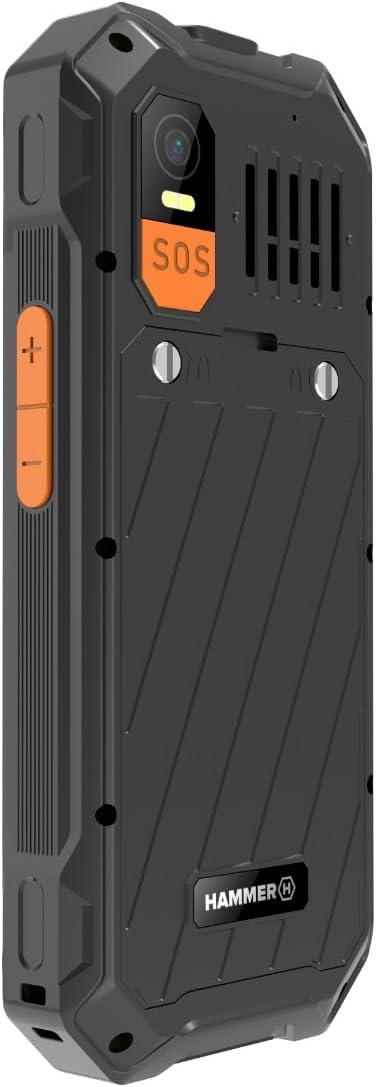
Figure 3.1: Rear view of the Hammer 6 LTE, highlighting the SOS button and camera module.
3.5. Torch Functionality
The phone includes a built-in torch for illumination in dark environments.
- Activation: Press and hold the dedicated torch button (located on the side of the phone) for 3 seconds to switch it on or off. This function works even when the screen is locked.

Figure 3.2: Side view of the Hammer 6 LTE, showing the dedicated torch button.
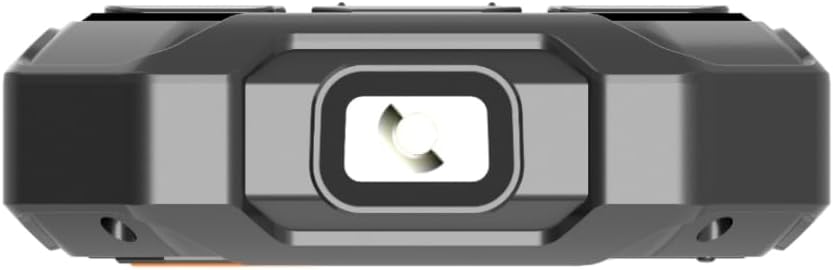
Figure 3.3: Bottom view of the Hammer 6 LTE, showing the torch LED.
4. Maintenance
4.1. Cleaning Your Device
To clean the phone, use a soft, dry cloth. For stubborn dirt, a slightly damp cloth can be used. Avoid using harsh chemicals or abrasive materials.
4.2. Water and Dust Resistance (IP68)
The Hammer 6 LTE is IP68 certified, meaning it is resistant to dust ingress and can withstand immersion in water up to 1.5 meters for 30 minutes. Ensure all port covers (e.g., USB-C port) are securely closed to maintain water resistance.
4.3. Battery Replacement
The 2500 mAh battery is user-replaceable. If a replacement is needed, ensure you use an official Hammer H battery to maintain device integrity and safety. Follow the battery installation steps in Section 2.2.
5. Troubleshooting
| Problem | Possible Cause | Solution |
|---|---|---|
| Phone does not power on | Low battery; Battery not installed correctly; Software issue. | Charge the battery; Reinstall the battery; Perform a soft reset (remove and reinsert battery). |
| Cannot make/receive calls | No network signal; SIM card not installed or faulty; Account issues. | Move to an area with better signal; Reinstall SIM card; Contact your network provider. |
| Torch not working | Battery too low; Software glitch. | Charge the phone; Restart the phone. |
| Poor call quality (VoLTE) | Weak network signal; Network congestion. | Move to an area with stronger 4G signal; Try calling again later. |
6. Specifications
| Feature | Detail |
|---|---|
| Model Name | Hammet 6 LTE |
| Brand | Hammer H |
| Screen Size | 2.4 Inches |
| Resolution | 240 x 320 pixels |
| Battery Capacity | 2500 mAh (up to 7 days standby, 10 hours talk time) |
| Durability Rating | IP68 (Water and Dust Resistant), 1.5 meter drop test |
| Cellular Technology | 4G (VoLTE support) |
| Wireless Carrier | Unlocked for All Carriers |
| RAM Memory Installed Size | 4 MB |
| Memory Storage Capacity | 0.12 GB |
| CPU Model | Cortex A7 |
| Operating System | Other (Feature Phone OS) |
| Dimensions | 16 x 9.4 x 5.8 cm |
| Weight | 150 g |
| Country of Origin | Poland |
7. Warranty and Support
This product comes with a standard manufacturer's warranty. For detailed warranty terms and conditions, please refer to the warranty card included in your product packaging or visit the official Hammer H website. For technical support or service inquiries, please contact Hammer H customer service through their official channels.
Online Support: Visit the Hammer H Store on Amazon


