
1. Introduction
This manual provides detailed instructions for the installation, operation, and maintenance of your new incifum QLED 8 Core Radio Upgrade for Ford Mustang models from 2010 to 2014. This unit is designed to enhance your vehicle's infotainment system with modern features while retaining essential OEM functionalities. Please read this manual thoroughly before installation and use to ensure proper operation and to maximize your experience.
2. Product Features
- Vehicle Compatibility: Specifically designed for Ford Mustang models 2010, 2011, 2012, 2013, and 2014. Features a plug-and-play design for straightforward installation.
- Operating System: Runs on an Android operating system, providing access to a wide range of applications.
- Display: 9-inch capacitive touch screen with QLED technology for vivid colors and sharp resolution.
- Performance: Equipped with an 8-core CPU, 2GB RAM, and 32GB ROM for smooth performance.
- Connectivity: Built-in wireless Apple CarPlay and Android Auto compatibility, integrated WiFi, and Bluetooth for seamless device connection.
- OEM Integration: Retains factory steering wheel control functionality.
- Rearview Camera Support: Includes a rearview camera for enhanced visibility when reversing.
- Multimedia: Supports various multimedia functions, including navigation, audio playback, hands-free calling, and access to thousands of apps.
3. Package Contents
Verify that all items listed below are included in your package:
- incifum QLED 8 Core Head Unit
- Instruction Manual
- GPS Antenna
- USB-4P Cable
- RCA Cable Set
- Rear View Camera Cable
- Main Wiring Harness
- Rearview Camera

Figure 3.1: Package Contents. This image displays all components included in the product package: the main QLED 8 Core head unit, a user instruction manual, GPS antenna, USB-4P cable, RCA cable set, rearview camera cable, and the main wiring harness.
4. Installation Guide
The incifum QLED 8 Core unit is designed for a plug-and-play installation in compatible Ford Mustang models (2010-2014). While the installation is intended to be straightforward, professional installation is recommended if you are unfamiliar with car audio systems or vehicle electronics.
4.1 Pre-Installation Steps
- Disconnect Battery: Before starting any electrical work, disconnect the vehicle's negative battery terminal to prevent electrical shorts.
- Remove Factory Radio: Carefully remove the existing factory radio and dashboard trim. Refer to your vehicle's service manual for specific instructions on trim removal.
- Inspect Wiring: Familiarize yourself with the vehicle's existing wiring harness.
4.2 Connecting the Unit
- Connect Main Harness: Connect the provided main wiring harness to the vehicle's factory wiring. Ensure all connections are secure.
- Connect Peripherals: Connect the GPS antenna, rearview camera cable, USB cables, and RCA cables as needed. Refer to the wiring diagram for correct connections.
- Test Connections: Before fully reassembling the dashboard, reconnect the battery and perform a basic test of the unit's functions (power, audio, display).
- Secure Unit: Carefully mount the incifum QLED 8 Core unit into the dashboard opening. Ensure it sits flush and is securely fastened.
- Reassemble Dashboard: Reinstall all dashboard trim pieces.

Figure 4.1: Before and After Installation. This image illustrates the visual transformation of the Ford Mustang dashboard. The top two panels show the original factory radio setup, while the bottom panel displays the integrated incifum QLED 8 Core unit, highlighting its larger screen and modern interface.

Figure 4.2: Wiring Diagram. A comprehensive view of the wiring harness and connections for the incifum QLED 8 Core unit. Labels indicate connections for RCA outputs, USB adapters, reverse camera, radio antenna, power cable, and GPS antenna, facilitating proper installation.

Figure 4.3: Connection Points. This composite image illustrates two aspects of installation: connecting the wiring harness to the vehicle's original port for a seamless fit, and the integration of a USB port, typically located in the glove compartment, for media and connectivity.
5. Operating Instructions
This section covers the basic operation and key features of your incifum QLED 8 Core unit.
5.1 Basic Operation
- Power On/Off: The unit typically powers on with the vehicle's ignition. A long press on the power button (if available) may turn the screen off or put the unit into standby.
- Volume Control: Adjust volume using the physical knobs or steering wheel controls.
- Touch Screen: Navigate the Android interface by tapping, swiping, and pinching on the capacitive touch screen.

Figure 5.1: Main Interface. The main home screen of the incifum QLED 8 Core unit, featuring large, easy-to-access icons for primary functions such as navigation, video playback, Bluetooth connectivity, music, and vehicle settings.
5.2 Wireless CarPlay & Android Auto
Connect your smartphone wirelessly to access navigation, music, messages, and more directly on the unit's screen.
- Ensure Bluetooth and Wi-Fi are enabled on your smartphone.
- On the head unit, select the CarPlay or Android Auto application.
- Follow the on-screen prompts to pair your phone. Once paired, the CarPlay or Android Auto interface will appear.

Figure 5.2: Wireless CarPlay. This image demonstrates the wireless Apple CarPlay functionality. The unit's screen shows the familiar CarPlay interface with navigation, music, and communication apps, while a smartphone is shown connecting wirelessly to the system.
5.3 Bluetooth Connectivity
Pair your phone for hands-free calling and audio streaming.
- Go to the Bluetooth settings on the head unit.
- Enable Bluetooth on your phone and search for available devices.
- Select the head unit's Bluetooth name (e.g., "incifum Car Stereo") from your phone's list and confirm pairing.
5.4 Rearview Camera
The rearview camera automatically displays when the vehicle is shifted into reverse, providing a clear view of the area behind your car.
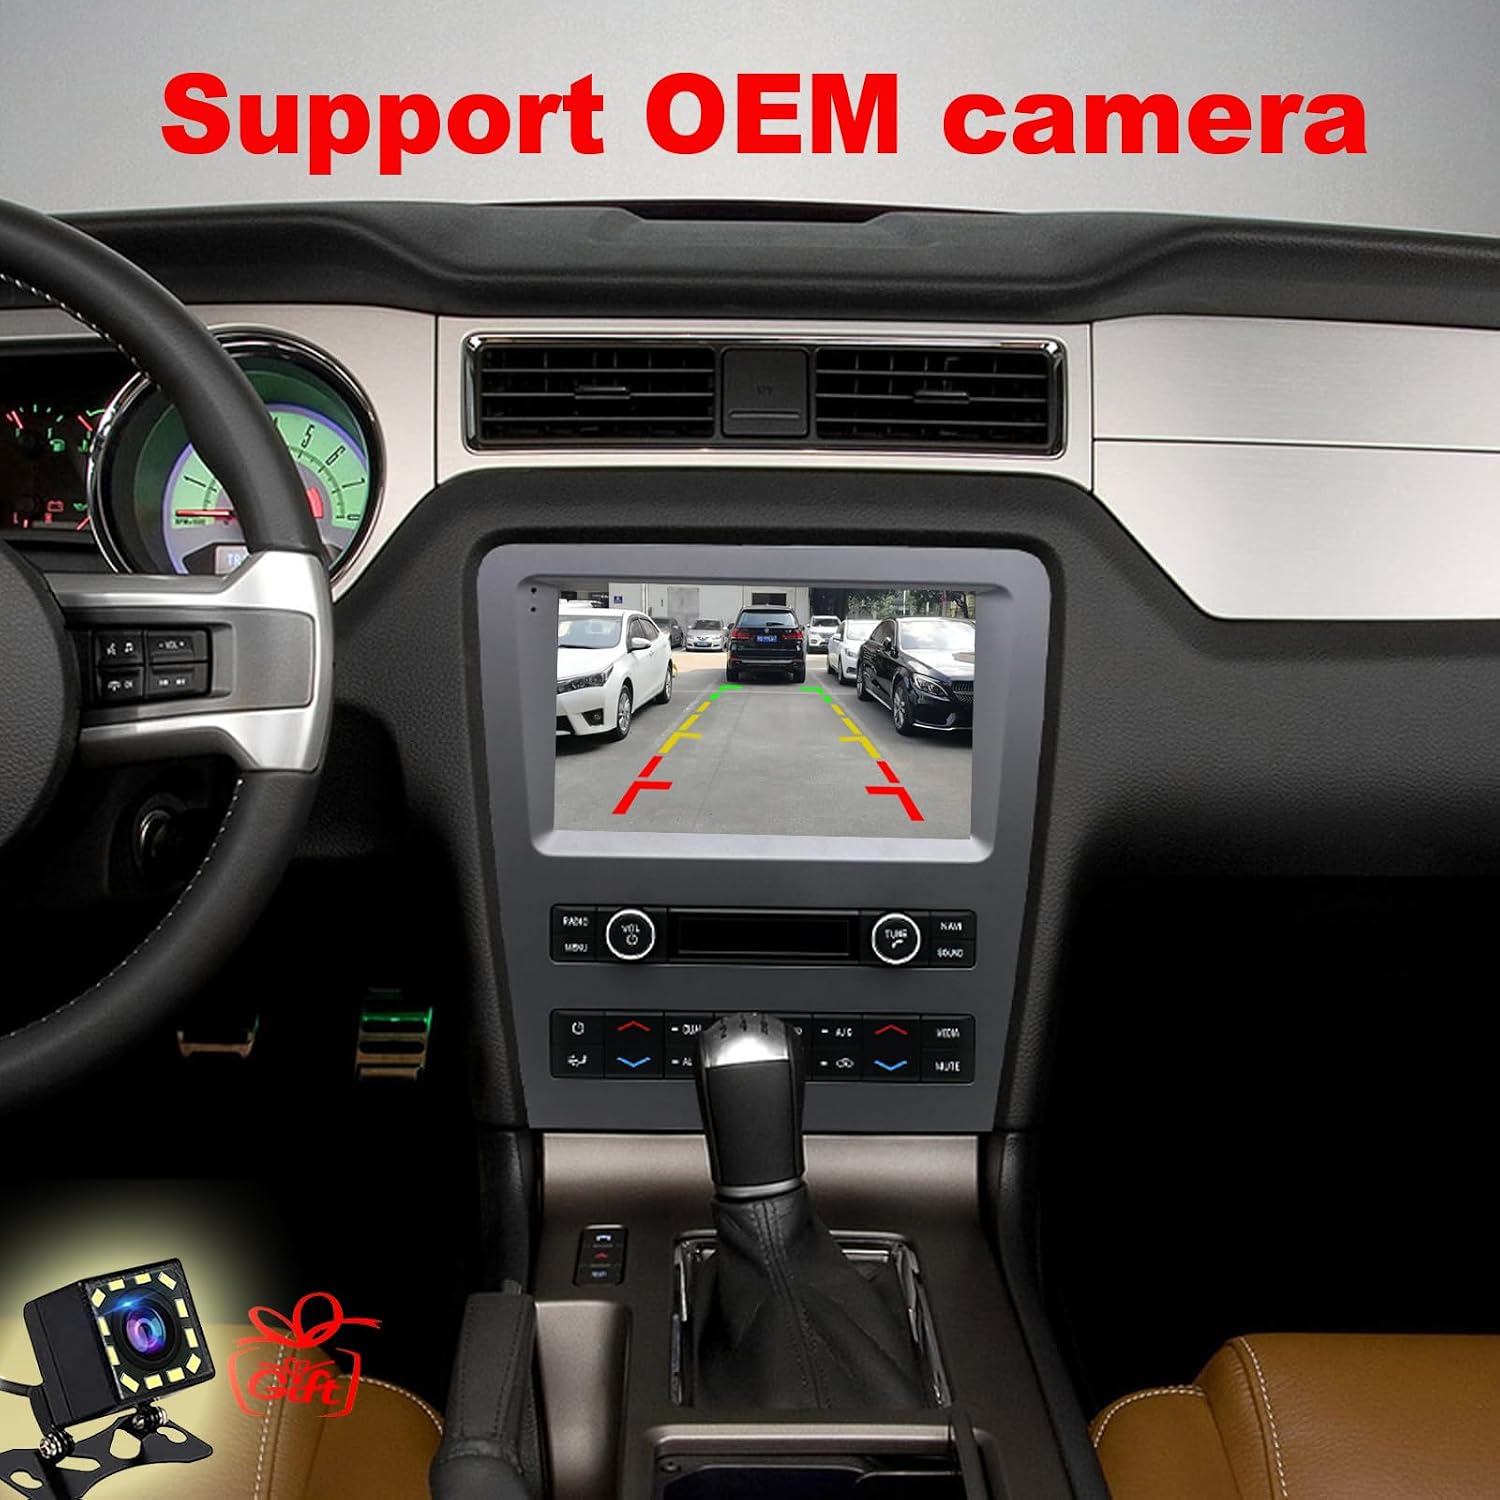
Figure 5.3: Rearview Camera Display. The incifum QLED 8 Core unit seamlessly integrates with the vehicle's existing OEM rearview camera system, providing a clear display of the area behind the vehicle with dynamic parking guidelines when reversing.
5.5 Steering Wheel Controls
The unit is designed to retain your vehicle's original steering wheel control functionality, allowing you to manage audio and other features without taking your hands off the wheel.
5.6 Audio Equalizer
Customize your audio experience with the built-in equalizer.
- Access the 'Sound' or 'EQ' settings from the main menu.
- Adjust the 48-band equalizer to fine-tune bass, treble, and mid-range frequencies to your preference.

Figure 5.4: Audio Equalizer. The unit's advanced audio settings are shown, featuring a 48-band digital Hi-bit tune equalizer, allowing users to precisely adjust sound frequencies for an optimized listening experience.
5.7 QLED Display Quality
Experience superior visual clarity and vibrant colors thanks to the QLED display technology, offering a full 16 million color gamut and high-definition resolution.

Figure 5.5: QLED Display. This image showcases the superior visual quality of the QLED display, demonstrating its 16 million full-color gamut and high-definition resolution with a vivid picture of a parrot against a mountain backdrop.
6. Maintenance
Proper maintenance ensures the longevity and optimal performance of your incifum QLED 8 Core unit.
- Screen Cleaning: Use a soft, lint-free cloth to gently wipe the screen. For stubborn smudges, slightly dampen the cloth with water or a screen-safe cleaner. Avoid harsh chemicals.
- Software Updates: Periodically check for software updates through the unit's settings or the manufacturer's website to ensure you have the latest features and bug fixes.
- Environmental Conditions: Avoid exposing the unit to extreme temperatures, direct sunlight for prolonged periods, or excessive moisture.
7. Troubleshooting
If you encounter issues with your unit, refer to the following common troubleshooting steps. If the problem persists, contact customer support.
- No Power:
- Check all power connections to ensure they are securely plugged in.
- Verify the vehicle's fuse for the radio is intact.
- Ensure the vehicle's battery is properly connected and charged.
- No Sound:
- Check the volume level on both the unit and your connected device.
- Ensure speaker wires are correctly connected.
- Verify the audio source is correctly selected.
- CarPlay/Android Auto Not Connecting:
- Ensure Bluetooth and Wi-Fi are active on your smartphone.
- Restart both your phone and the head unit.
- Check for any software updates for the head unit or your phone's operating system.
- Screen Unresponsive:
- Perform a soft reset by pressing and holding the power button for 10-15 seconds.
- If the issue persists, disconnect the vehicle's battery for a few minutes, then reconnect.
8. Specifications
| Feature | Specification |
|---|---|
| Model Name | QLED 8 Core |
| Display Size | 9 Inches |
| Operating System | Android |
| CPU | 8 Core |
| RAM | 2GB |
| ROM (Memory Storage Capacity) | 32 GB |
| Connectivity Technology | Bluetooth, Wi-Fi |
| Voice Command | Touchscreen |
| Mounting Type | Dashboard Mount |
| Item Weight | 2.28 Kilograms (5.02 pounds) |
| Package Dimensions | 14.25 x 13.11 x 5.67 inches |
| Compatible Vehicle Service Type | Car (Ford Mustang 2010-2014) |
9. Support
For any questions, technical assistance, or troubleshooting beyond what is covered in this manual, a professional after-sales support team is available online 24/7 to provide assistance.