
Introduction
This manual provides comprehensive instructions for the assembly, operation, and maintenance of your Jinrrenyi 41.3-inch Outdoor Package Delivery Box. Please read these instructions carefully before installation and use to ensure proper function and longevity of the product. Keep this manual for future reference.
Product Features
The Jinrrenyi Package Delivery Box is designed for secure and convenient package reception. Key features include:
- Large Capacity: Accommodates multiple packages, letters, and magazines.
- Anti-Theft Design: Features a secure drop slot with an anti-theft baffle and a combination lock on the main access door.
- Durable Construction: Made from professional-grade automotive steel (HC340/590DP) with a coating resistant to water, rust, scratches, and corrosion.
- Weatherproof: IPX3 waterproof rating ensures protection against rainwater.
- Secure Contactless Delivery: A '1 Way 2 Tray' design ensures packages are securely placed and can only be retrieved from the locked main compartment.

Figure 1: Key Features. This image illustrates the internal connecting rod for smooth lid operation, the multi-layer protection with a built-in lock, the non-slip reinforced bottom, and a close-up of the combination lock mechanism.
Specifications
| Brand | Jinrrenyi |
| Model Number | Package Delivery Box 41.3inch |
| Material | Alloy Steel (HC340/590DP) |
| Color | Black |
| Overall Dimensions (W x D x H) | Approximately 20.86 in x 15.15 in x 41.33 in |
| Top Opening Height | Approximately 16.53 in |
| Lock Type | Combination Lock |
| Mounting Type | Freestanding |
| Included Components | Installation tools |

Figure 2: Product Dimensions. This image provides a visual representation of the delivery box's width, depth, and height, including the top opening dimensions.
Assembly Instructions
Your package delivery box comes with necessary accessories and an installation manual. Follow these steps for quick and easy assembly.
- Unpack Components: Carefully remove all parts from the packaging. Verify that all components and installation tools are present.
- Assemble the Main Body: Connect the side panels, back panel, and bottom panel. Ensure all tabs and slots align correctly. You may need to gently kick the bottom clips into place for a secure connection.
- Attach the Door: Secure the main access door to the front of the box using the provided hinges and screws.
- Install the Top Lid: Attach the top lid to the main body. The lid features a connecting rod mechanism for smooth opening and slow closing.
- Adjust Hinges (if necessary): If the lid or door does not operate smoothly, you can adjust the angle of the hinges using pliers. Gently bend the hinge to achieve the desired alignment.

Figure 3: Assembly Details. This image demonstrates how to adjust the hinge using pliers and how to secure the bottom connection by snapping clips into place.

Figure 4: Adjustable Hinge. A detailed view of the adjustable hinge, showing how pliers can be used to fine-tune its angle for optimal lid movement.
Operating Instructions
Package Delivery
The delivery box is designed for easy and secure package drop-off:
- Open Top Lid: Lift the top lid of the delivery box. The connecting rod will assist in smooth opening.
- Place Package: Place the package into the drop slot. The internal anti-theft baffle ensures that once a package is dropped, it cannot be easily retrieved from the top.
- Close Top Lid: Gently close the top lid. The connecting rod will ensure a slow and controlled closure.
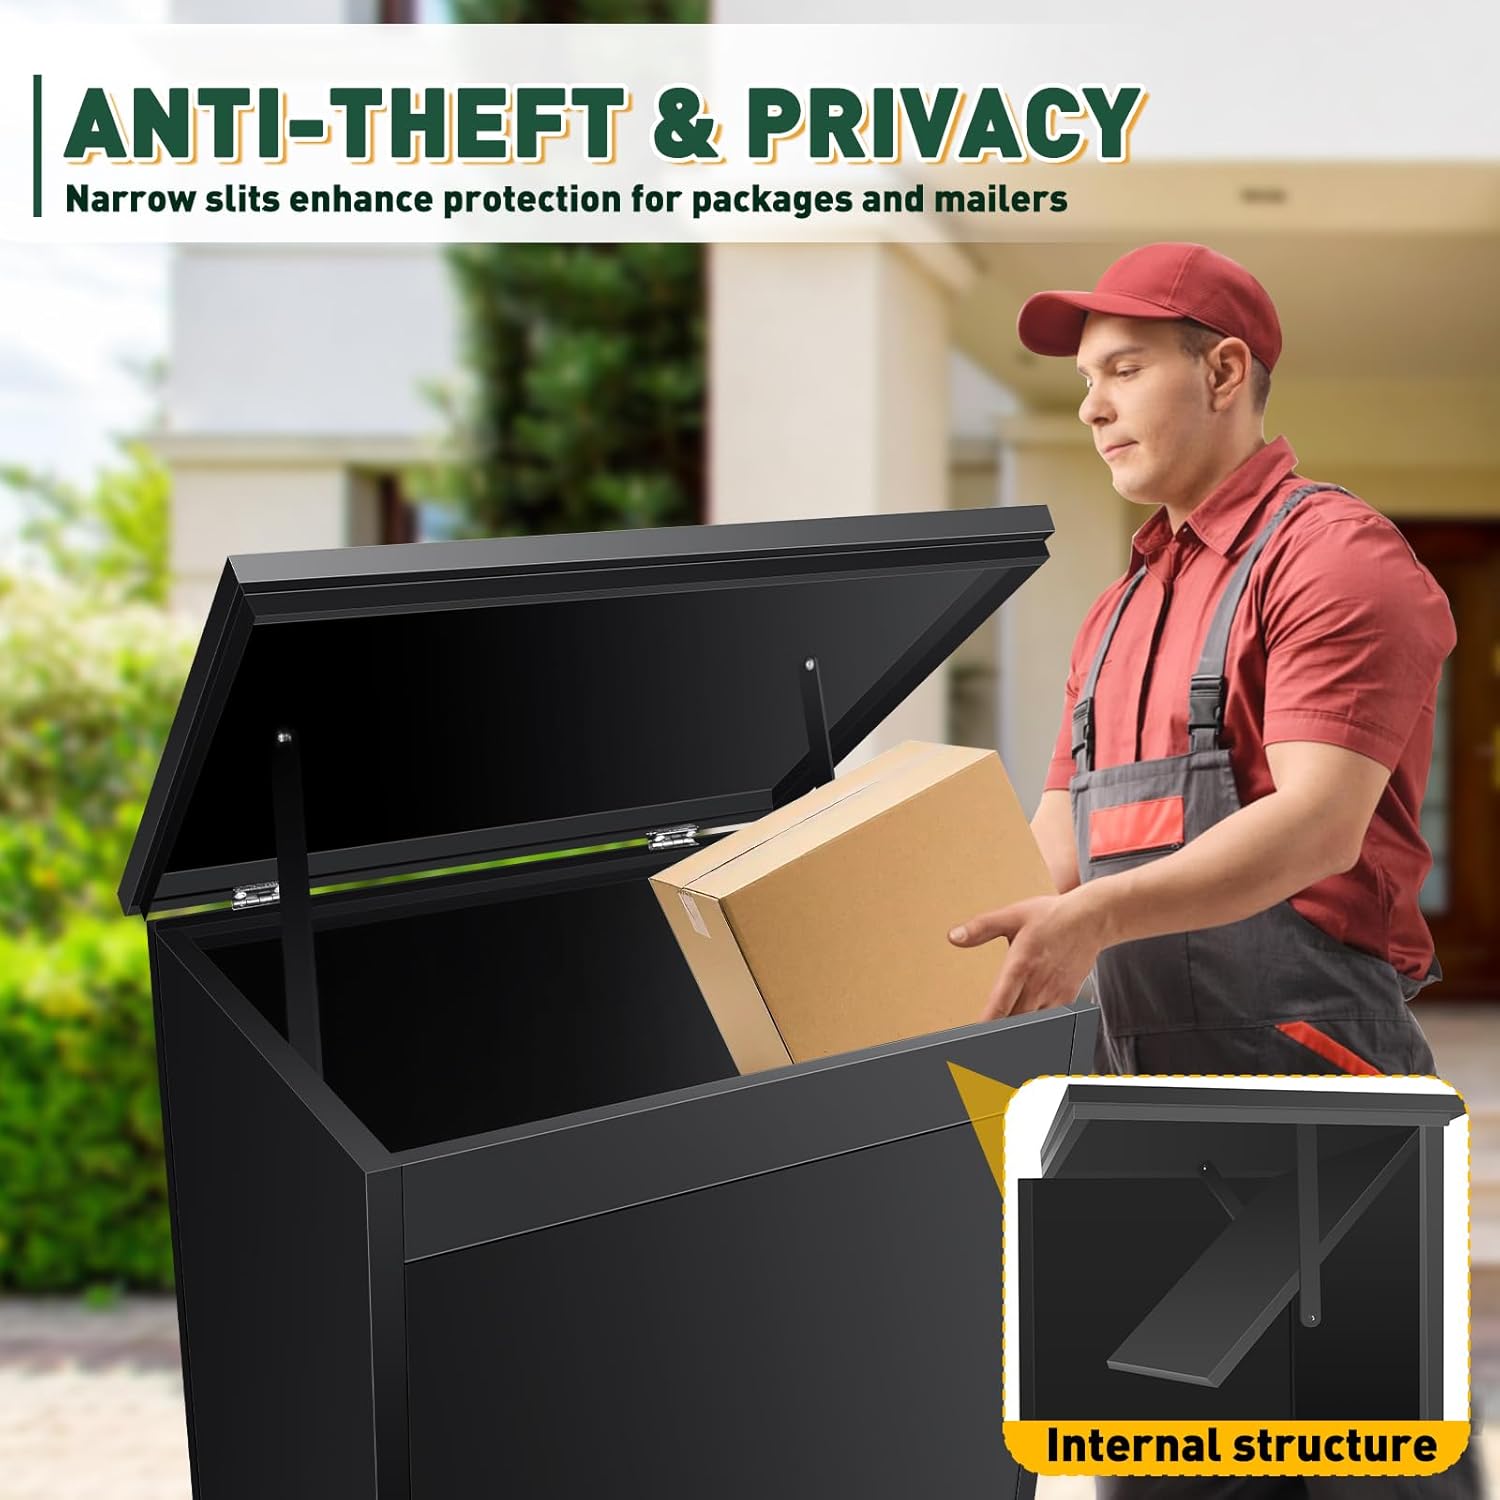
Figure 5: Package Drop-off. This image shows a delivery person placing a package into the secure top slot of the delivery box, highlighting the internal structure that prevents retrieval from the top.
Package Retrieval
To retrieve your packages, use the combination lock on the front door:
- Unlock the Door: Enter your personal combination code into the lock on the front door.
- Open Door: Turn the handle to open the main access door.
- Retrieve Packages: Collect your packages from the secure storage compartment.
- Close and Lock: Close the main access door and scramble the combination lock to secure the box.

Figure 6: Package Retrieval. This image shows a user opening the front door of the delivery box to retrieve packages, demonstrating the '1 Way 2 Tray' design for secure storage.
Setting the Combination Lock
Follow these steps to set or reset your personal combination code:
- Adjust to Initial Password: Ensure the lock is set to the initial password, typically '000'.
- Adjust Lever: Locate the small lever on the back of the lock mechanism (inside the door). Adjust this lever to the setting position.
- Set New Code: While the lever is in the setting position, dial your desired new combination.
- Return Lever: After setting the new code, return the lever to its original locking position. Your new code is now set.

Figure 7: Combination Lock Reset. This image illustrates the three steps required to correctly reset the combination password for the intelligent keyless combination lock.
Maintenance
To ensure the longevity and optimal performance of your Jinrrenyi Package Delivery Box, follow these maintenance guidelines:
- Regular Cleaning: Wipe down the exterior surfaces with a soft, damp cloth to remove dust and dirt. Avoid abrasive cleaners that could damage the protective coating.
- Inspect for Damage: Periodically check for any signs of wear, dents, or corrosion. Although made of durable steel, prompt attention to any damage can prevent further issues.
- Lubricate Moving Parts: If the hinges or lock mechanism become stiff, apply a small amount of silicone-based lubricant to ensure smooth operation.
- Weather Protection: The box is IPX3 waterproof, meaning it is protected against spraying water. While designed for outdoor use, ensure it is not submerged in water. Clear any debris from the top surface to prevent water pooling.

Figure 8: IPX3 Waterproof Feature. This image highlights the waterproof capabilities of the delivery box, demonstrating its resistance to rainwater and suitability for long-term outdoor placement.
Troubleshooting
If you encounter any issues with your package delivery box, refer to the following common problems and solutions:
- Difficulty during Assembly (Parts not aligning):
Solution: Ensure all panels are correctly oriented. Sometimes, a gentle tap with a rubber mallet (not included) can help align holes. For bottom connections, a gentle kick can help snap clips into place. If screws strip easily, consider using higher-quality self-tapping screws (not included) for better security and fit. - Lid or Door is Stiff/Hard to Open/Close:
Solution: The hinges may require adjustment. Refer to the 'Adjust Hinges' step in the Assembly Instructions (Figure 3 and 4). Apply a small amount of silicone lubricant to the hinge points. - Combination Lock Not Working:
Solution: Ensure you are entering the correct code. If you suspect the code is incorrect or forgotten, follow the 'Setting the Combination Lock' instructions (Figure 7) to reset it. Make sure the internal lever is fully returned to the locking position after setting a new code. - Packages Not Dropping Properly:
Solution: Ensure the package size is appropriate for the drop slot. The internal baffle is designed to prevent retrieval from the top, so packages must clear this mechanism. Do not force oversized packages. - Water Accumulation Inside:
Solution: While the box is waterproof, extreme weather or improper sealing during assembly can lead to leaks. Check all seams and connections for tightness. Ensure the box is placed on a level surface to prevent water from pooling around the base.
Warranty and Support
For warranty information or technical support, please contact the seller or manufacturer directly. Keep your purchase receipt as proof of purchase. The manufacturer, Jinrrenyi, is committed to providing quality products and assistance.