1. Introduction
The Radiolink F722 Flight Controller is a high-performance, open-source flight control system designed for racing drones and quadcopters. It is equipped with advanced components to ensure stable and precise flight. This manual provides detailed instructions to help you set up, operate, and maintain your F722 Flight Controller effectively.

Figure 1.1: Radiolink F722 Flight Controller, top view.
2. Key Features
The Radiolink F722 Flight Controller boasts a range of features designed for optimal performance:
- High Configuration: Equipped with a STM32F722RET6 main processor, ICM42688 gyroscope, BMP280/DPS310 barometer, 128MB Black Box capacity, and MP2491C switching power supply chip from MPS. Supports BETAFLIGHT and INAV firmware.
- DJI/CADDX HD Digital Video Transmission Plug-and-play: Supports high-definition digital image transmission for DJI and CADDX systems.
- Built-in Multiple BEC: Selectable voltages (3.3V/4.5V/5V/12V) via a switch, with support for toggling image transmission power and modifying power frequency transmission via transmitter and goggles.
- Variety Function Supported: Supports current mainstream throttle signals, including two-way DShot, OneShot, and PWM signals. ESC information telemetry is also supported.
- OSD Module Integrated: Graphically displays OSD information such as flight mode, distance, GPS satellites, longitude and latitude, home direction, GPS speed, and battery voltage for enhanced FPV experience.
- Multiple Interfaces: Supports up to 8 channels output and is adaptable to 2-8 axis multi-rotors, including X8 models. Features a combination of socket interfaces and solder pads for convenient external device connections.
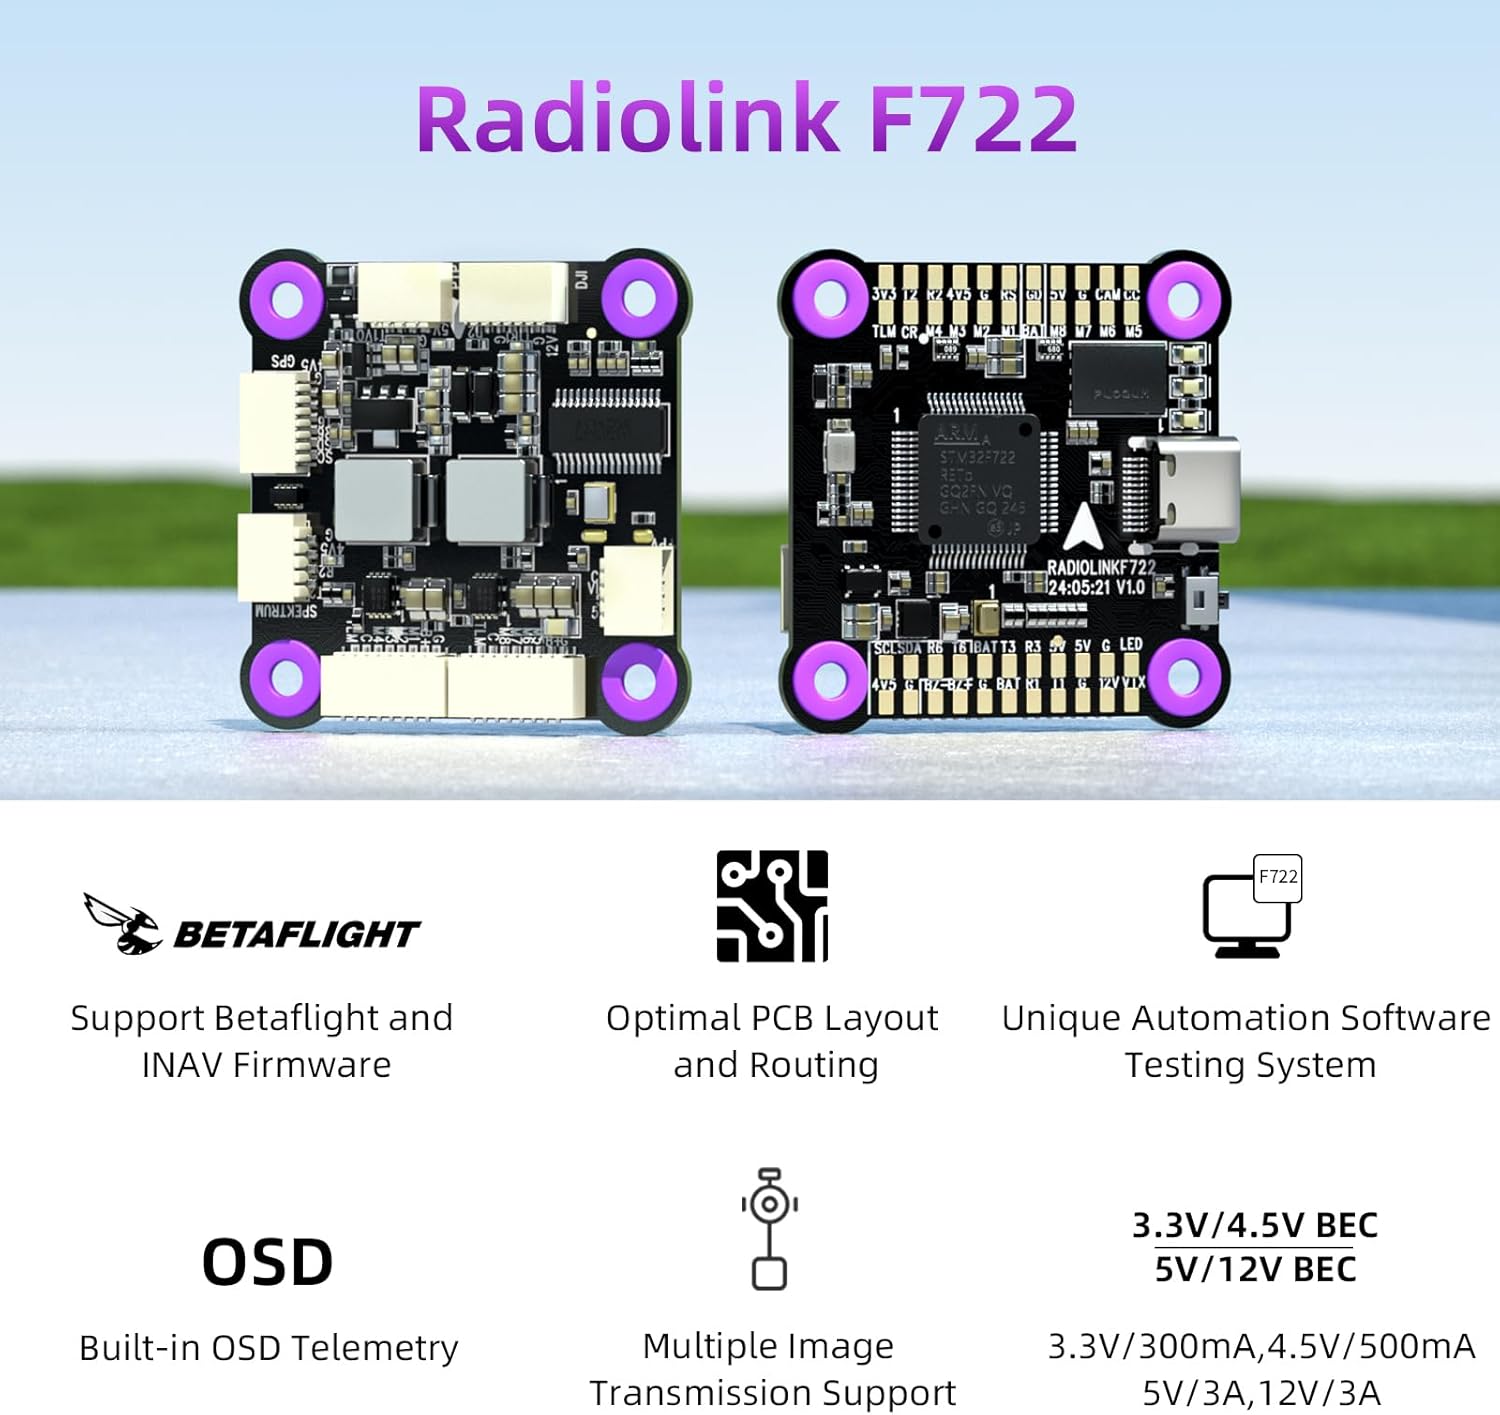
Figure 2.1: Overview of Radiolink F722 Flight Controller's main features.

Figure 2.2: Detailed view of the F722's high-performance components, including the STM32F722RET6 main processor, ICM42688 gyroscope, and BMP280 barometer.
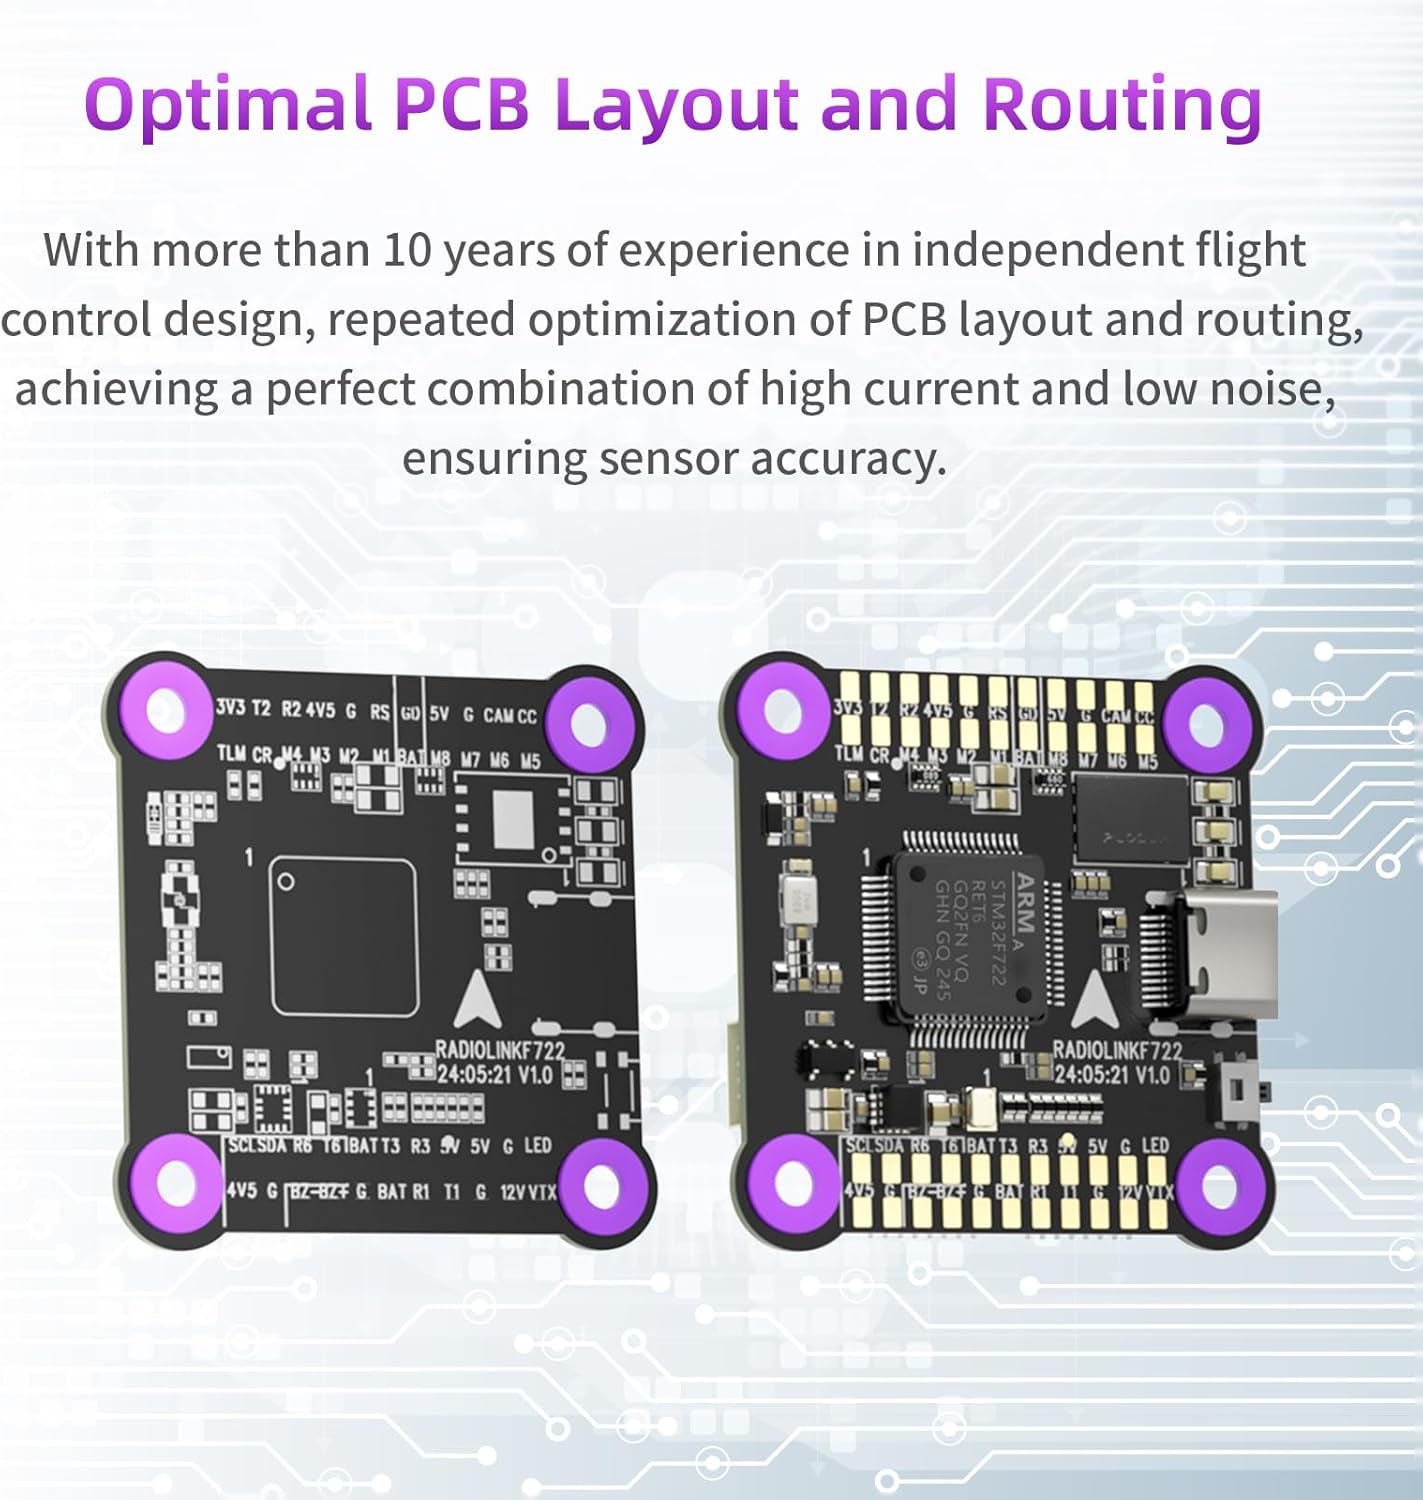
Figure 2.3: Illustration of the optimal PCB layout and routing, ensuring high current capacity and low noise for sensor accuracy.
3. Setup
Setting up your Radiolink F722 Flight Controller involves connecting it to your drone's components and configuring it using Betaflight or INAV firmware.
3.1 Connections
The F722 offers multiple interfaces for connecting various peripherals. Refer to the diagram below for common connection points:

Figure 3.1: Diagram illustrating the multiple interfaces on the F722 Flight Controller for connecting components like SBUS Receiver, GPS, Four-in-one ESC, Analog Video Transmission, and Camera.

Figure 3.2: Detailed view of the F722's connection ports and solder pads, including ESC Connect Ports, Camera Connect Port, Receiver Connect Port, GPS Connect Port, Analog Video Transmission Connect Port, and various solder pads for Buzzer, LED Strip, GPS, DJI HD Image Transmission, and Analog Video Transmission.
For DJI and CADDX HD digital video transmission, the F722 supports plug-and-play functionality, simplifying the connection process.

Figure 3.3: The F722 supports both Analog Video Transmission and HD Digital Image Transmission (CADDX and DJI).
3.2 Firmware and Configuration
The F722 supports both Betaflight and INAV firmware. You can configure the flight controller using the respective configurator software on a PC or mobile phone.

Figure 3.4: The F722 supports Betaflight setup via both PC and mobile phone applications.
3.3 Quality Assurance Testing
Each Radiolink F722 Flight Controller undergoes a unique automation software testing process to ensure all connectors and functionalities are working correctly before shipment. This rigorous testing helps ensure reliability and ease of initial setup.
Video 3.1: Demonstration of the Radiolink F722 Flight Controller automation software testing process, ensuring all ports and functions are operational.

Figure 3.5: The unique automation software testing system used to verify the functionality of the F722 Flight Controller.
4. Operating
Once your F722 Flight Controller is properly installed and configured, you can begin operating your drone. The integrated OSD module provides critical flight information directly to your FPV display.
4.1 On-Screen Display (OSD)
The built-in OSD module allows pilots to view real-time flight data, such as flight mode, distance, GPS status, speed, and battery voltage, enhancing situational awareness during FPV flights.

Figure 4.1: The integrated OSD module provides essential flight information directly on your FPV display, and ESC information telemetry is supported.
4.2 Flight Performance
The F722 is designed for stable and responsive flight, supporting various multi-rotor configurations. Its compatibility with Betaflight and INAV allows for fine-tuning of flight characteristics to suit your preferences.
Video 4.1: A Radiolink F722 Flight Controller in action, demonstrating stable flight performance of a drone.
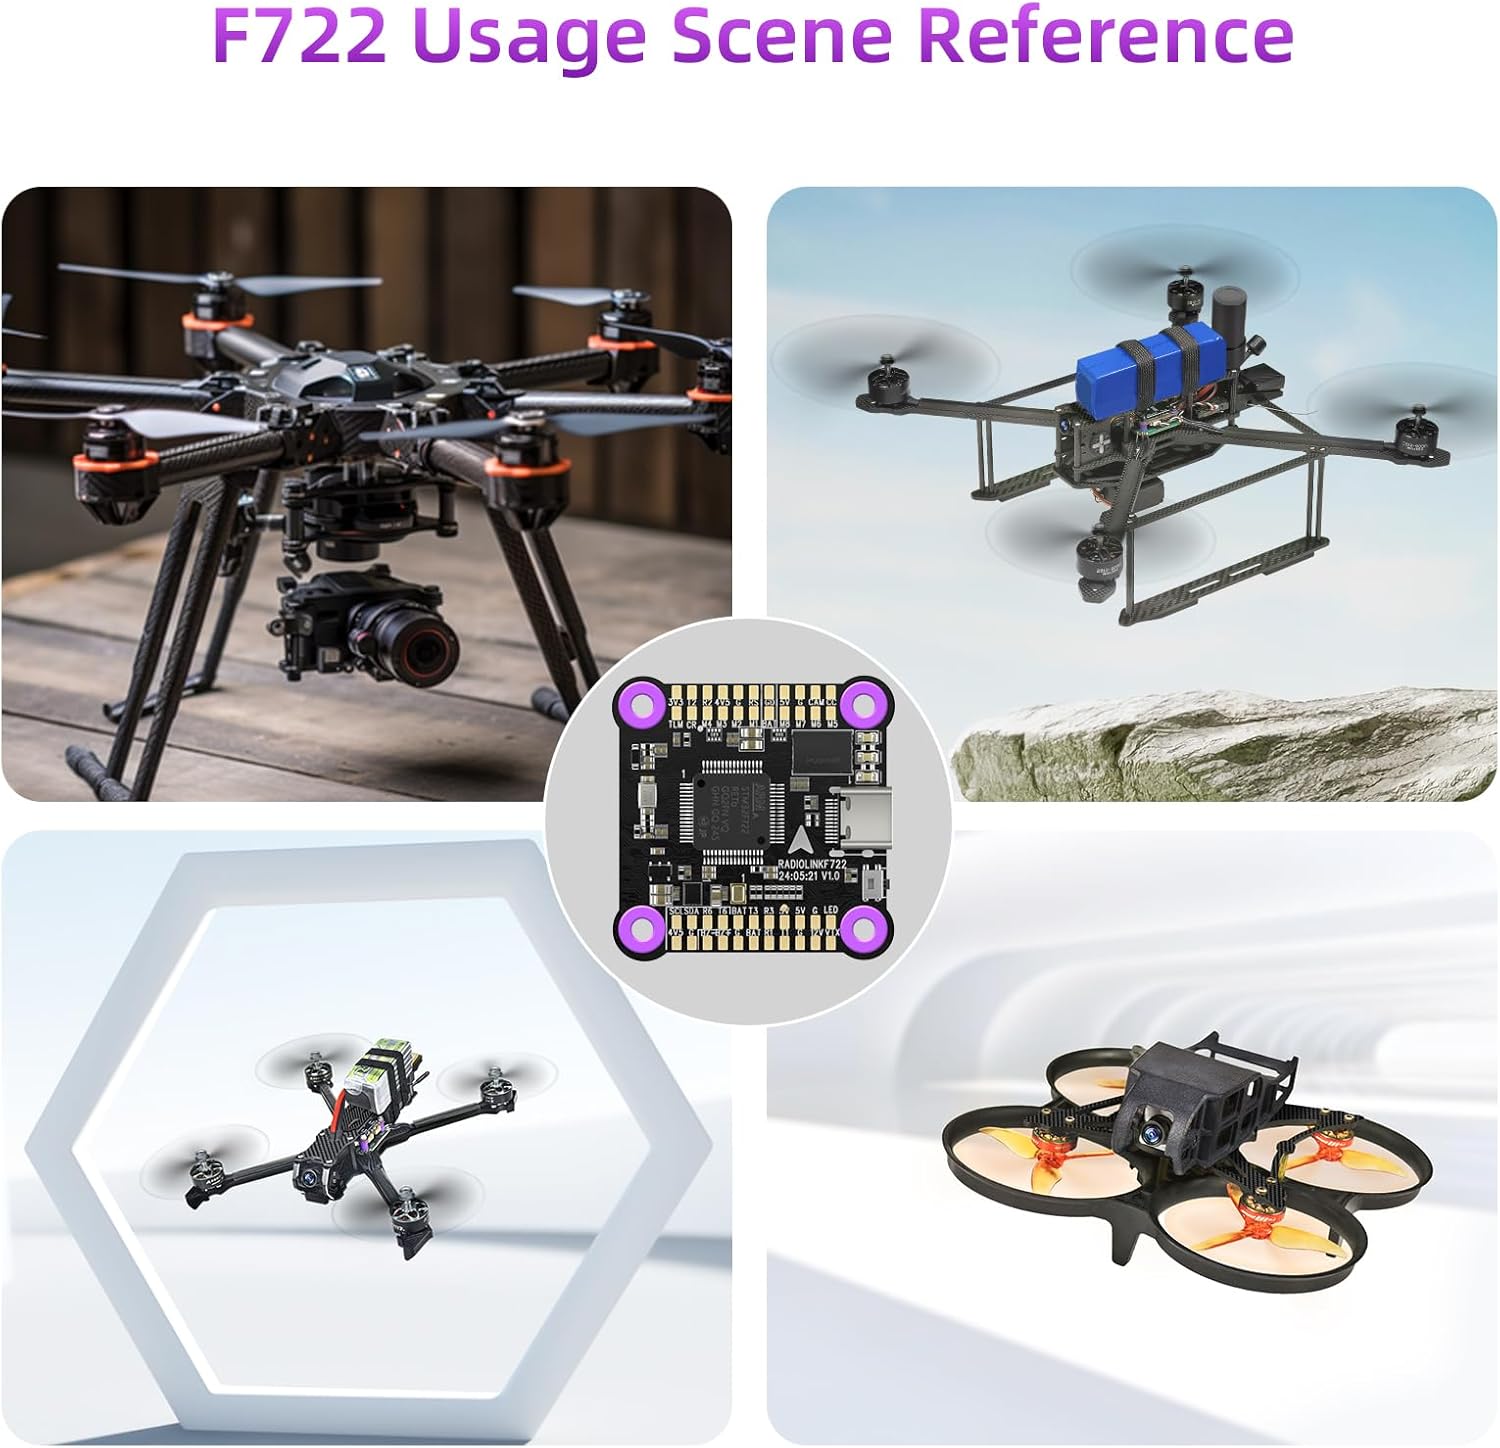
Figure 4.2: Examples of F722 Flight Controller applications in various drone types, highlighting its versatility.

Figure 4.3: A diagram illustrating how the F722 Flight Controller integrates into a drone system, showcasing a cost-effective solution for drone builds.
5. Maintenance
Proper maintenance ensures the longevity and reliable performance of your Radiolink F722 Flight Controller.
- Keep Clean: Regularly inspect the flight controller for dust, dirt, or debris. Use a soft brush or compressed air to gently clean the board and connectors.
- Avoid Physical Damage: Protect the flight controller from impacts and excessive vibrations. Consider using a protective enclosure if your drone frame does not provide adequate protection.
- Inspect Connections: Periodically check all soldered joints and connector pins for looseness or corrosion. Re-solder or re-seat connections as necessary.
- Proper Storage: When not in use, store the flight controller in a dry, anti-static environment, away from extreme temperatures and direct sunlight.
6. Troubleshooting
If you encounter issues with your Radiolink F722 Flight Controller, consider the following troubleshooting steps:
- No Power/No Lights: Ensure the power supply is connected correctly and providing the appropriate voltage. Check for any short circuits.
- Connection Issues: If components are not detected or data transmission fails, verify all cables are securely connected and not damaged. The automated testing system (refer to Section 3.3) highlights the importance of proper connections; a disconnected pin will prevent the system from passing its internal tests.
- Firmware Problems: If the flight controller behaves erratically, try reflashing the Betaflight or INAV firmware. Ensure you are using the correct target for your F722 board.
- Sensor Malfunction: If flight stability is compromised, check sensor calibration in the configurator software. Ensure the flight controller is mounted securely and free from excessive vibrations.
- OSD Not Displaying: Verify OSD settings in Betaflight/INAV configurator. Check video signal connections from the camera to the flight controller and from the flight controller to the video transmitter.
For further assistance, refer to the online User Instruction and FAQ troubleshooting files available on the Radiolink Direct store page.
7. Specifications
Below are the technical specifications for the Radiolink F722 Flight Controller (Model: F722-FC-01):
| Specification | Value |
|---|---|
| Item Weight | 0.32 ounces |
| Country of Origin | China |
| Item Model Number | F722-FC-01 |
| Manufacturer Recommended Age | 14 years and up |
| Manufacturer | Radiolink |
7.1 What's in the Box
The product package includes the following items:
- F722 Flight Controller (x1)
- Receiver Connect Cable (3 Pin) (x1)
- R8SM Receiver Connect Cable (x1)
- ELRS Receiver Connect Cable (x1)
- Analog Video Transmission Connect Cable (x1)
- ESC Connect Cable (x2)
- Camera Connect Cable (x1)
- TS100 GPS Connect Cable (x1)
- Plastic Box (x1)
- Instruction Manual (x1)

Figure 7.1: Contents included in the Radiolink F722 Flight Controller package.
8. Warranty
For detailed warranty information regarding your Radiolink F722 Flight Controller, please refer to the official Radiolink website or contact Radiolink customer support directly. Warranty terms and conditions may vary based on region and purchase location.
9. Support
Should you require further assistance or have questions not covered in this manual, please utilize the following support resources:
- Radiolink Direct Store: Visit the official Radiolink Direct store on Amazon for product information, FAQs, and support contact details.
- Online User Instruction: Comprehensive user manuals and troubleshooting guides are often available online.
- Customer Service: Contact Radiolink customer service through their official channels for technical support and inquiries.