1. Introduction and Overview
Thank you for choosing the Eigotrav PD-270 Car Jump Starter with Tire Inflator. This device is designed to provide reliable emergency power for vehicle jump-starting and convenient tire inflation, along with other useful features. Please read this manual thoroughly before use to ensure safe and optimal operation.
The Eigotrav PD-270 device, a compact and robust car jump starter and tire inflator, shown in its silver finish.
2. What's in the Box
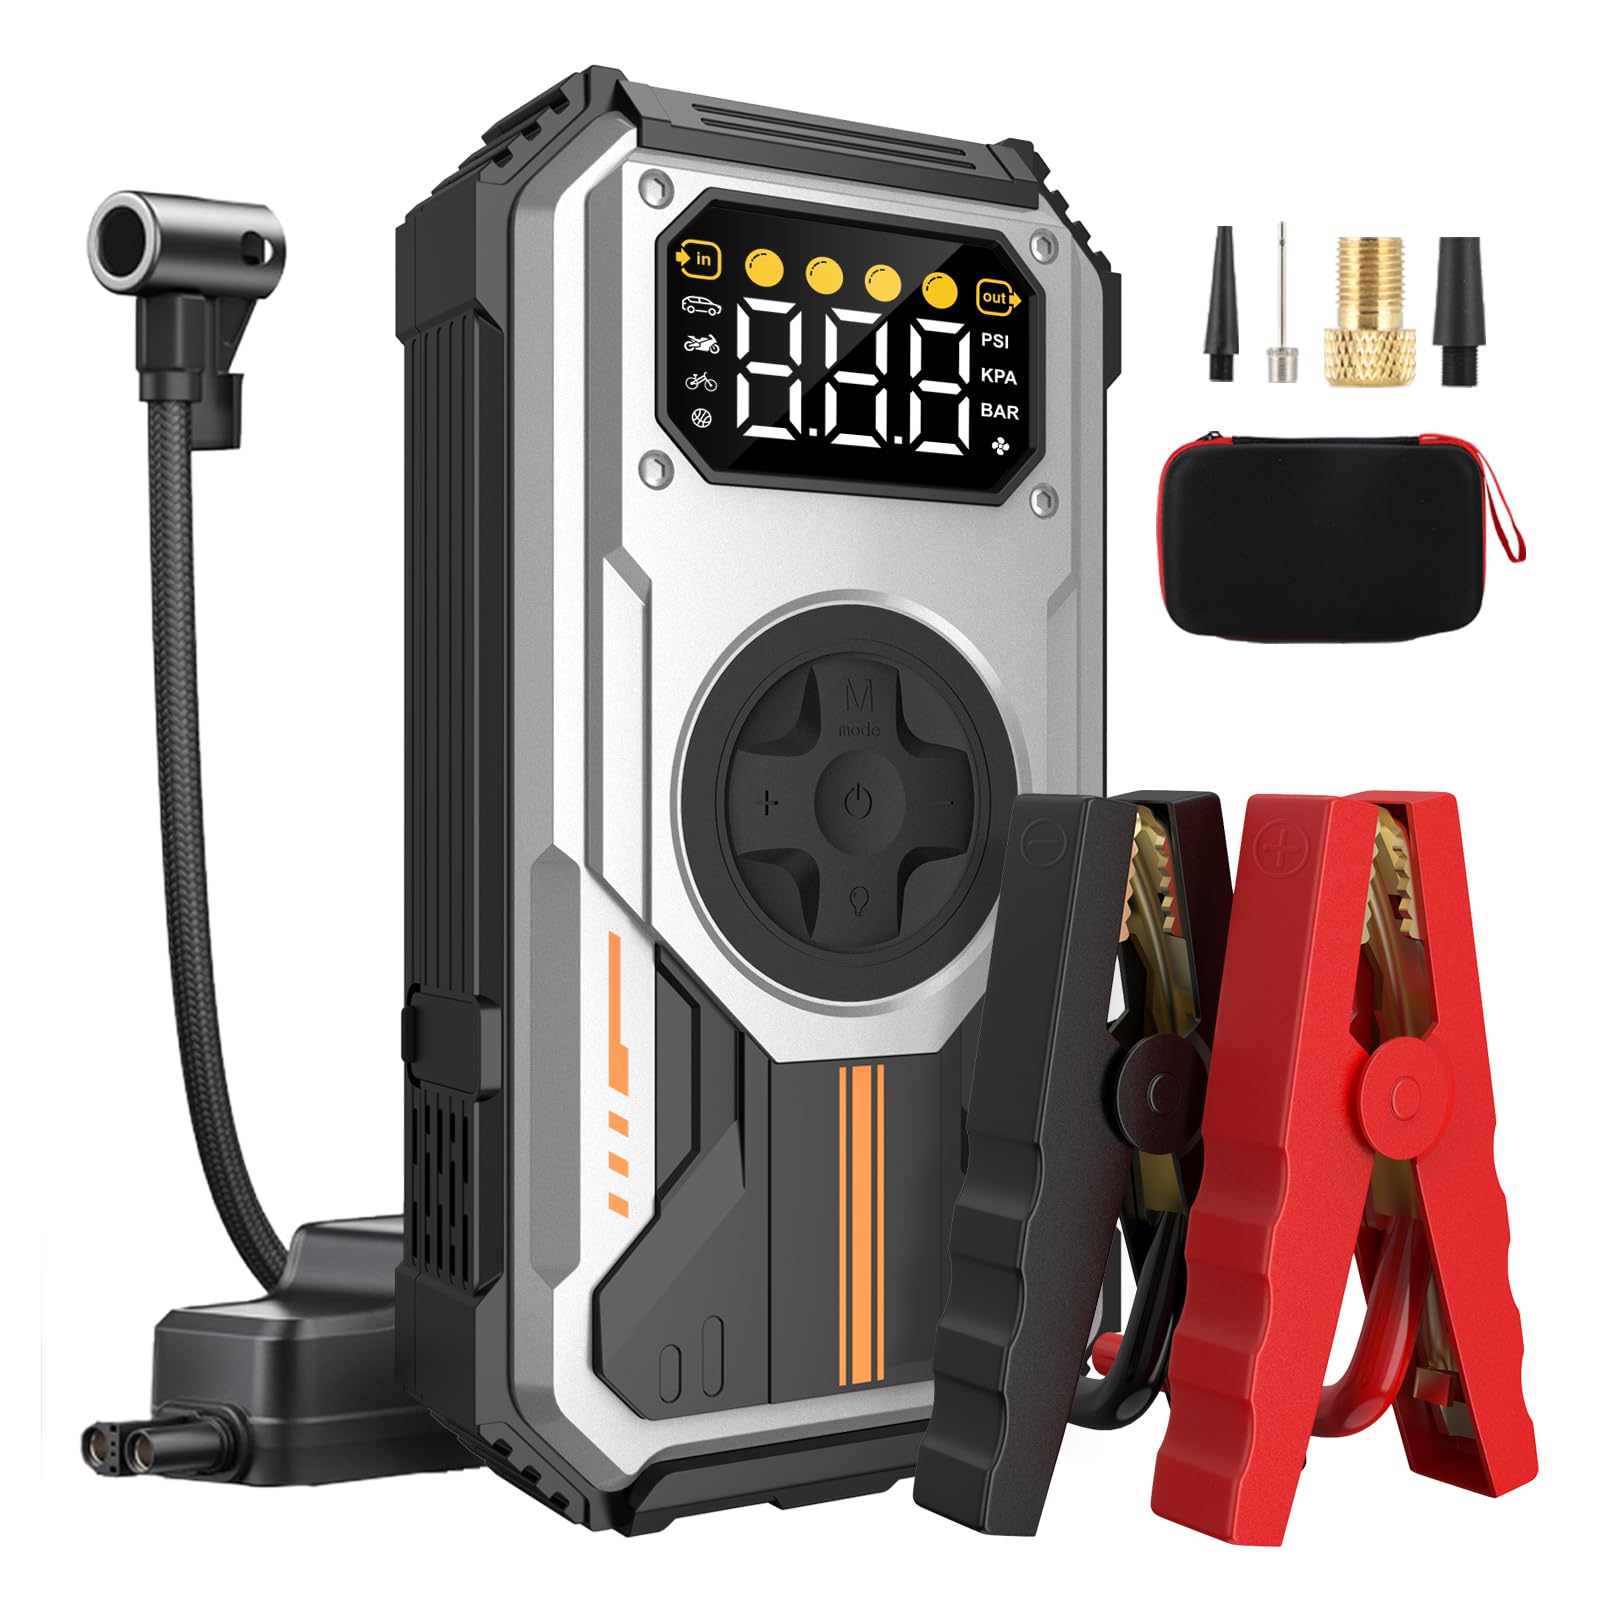
Please check the package contents upon receipt:
- Jump Starter Unit x 1
- Valve Adapter x 1
- Air Tube x 1
- Smart Cable Clamps x 1
- Instruction Manual x 1

Visual representation of all items included in the Eigotrav PD-270 package.
3. Key Features
- Exceptional Power: Capable of jump-starting gasoline vehicles up to 7.5L and diesel vehicles up to 6L.
- Convenient Inflation Function: Inflates car tires, bicycle tires, balls, and other inflatables up to 150 PSI.
- Weather Resistant: Operates reliably in temperatures from -20℃ to 70℃.
- Multi-functional LED Lighting: Includes high-intensity flash, SOS signal, and emergency lighting modes.
- Fast USB Charging: 5V/2.1A USB output for quick charging of smartphones and other devices.

An overview of the Eigotrav PD-270's main functions: power bank, jump starter, tire inflator, and emergency light.
4. Safety Information
Always follow these safety guidelines to prevent injury or damage to the device and your vehicle:
- Ensure the jump starter is fully charged before use.
- Connect the smart cable clamps correctly: red to positive (+), black to negative (-).
- Do not touch the red and black clamps together.
- Do not attempt to jump-start a frozen battery.
- Remove the jump starter from the vehicle battery within 30 seconds after the engine starts.
- Keep out of reach of children.
- Store in a cool, dry place.
Integrated Protection Features:
- Reverse Polarity Protection: Prevents damage if clamps are connected incorrectly.
- Overcharge Protection: Safeguards the device during charging.
- Reverse Connection Protection: Alerts if clamps are connected in reverse.
- Short Circuit Protection: Automatically shuts off in case of a short circuit.
- No Spark Protection: Ensures safe connection without sparks.

An illustration highlighting the comprehensive safety features of the Eigotrav PD-270 jump starter.
5. Setup and Charging
Charging the PD-270 Unit:
Before first use, fully charge the PD-270 unit. Connect the provided USB charging cable to the input port on the device and to a 5V/2A USB power adapter (not included). The display will indicate charging progress. A full charge is recommended for optimal performance.
Accessing Air Nozzles:
The various air nozzles for inflation are stored in a compartment on the back of the unit. Gently open the cover to access them.

A view of the integrated storage compartment on the Eigotrav PD-270, designed to securely hold various air nozzles for different inflation needs.
6. Operating Instructions
6.1. Jump Starting a Vehicle
- Ensure the PD-270 unit is sufficiently charged.
- Connect the smart cable clamps to the jump starter unit.
- Connect the red (+) clamp to the positive terminal of the vehicle battery.
- Connect the black (-) clamp to the negative terminal of the vehicle battery.
- Once connected, the indicator on the smart cable will show a solid green light, indicating a safe connection.
- Start your vehicle's engine.
- Once the engine starts, immediately remove the smart cable clamps from the vehicle battery within 30 seconds.
- Disconnect the smart cable clamps from the PD-270 unit.

A visual guide showing the four steps to jump-start a car using the Eigotrav PD-270.
6.2. Inflating Tires and Other Items
- Connect the air tube to the air compression output port on the PD-270 unit.
- Attach the appropriate nozzle to the air tube for the item you wish to inflate.
- Connect the nozzle to the tire valve or inflatable item.
- Power on the PD-270 unit. Use the mode button to select the desired inflation mode (Car, Motorcycle, Bicycle, Ball).
- Adjust the target pressure using the '+' and '-' buttons.
- Press the start button to begin inflation. The unit will automatically stop once the target pressure is reached.
- Disconnect the nozzle and air tube.

This image demonstrates the four distinct inflation modes of the Eigotrav PD-270.
6.3. Charging External Devices (Power Bank Function)
The PD-270 unit can act as a power bank to charge your electronic devices.
- Connect your device's USB charging cable to the USB output port (5V/2.1A) on the PD-270 unit.
- The PD-270 will automatically begin charging your device.

The Eigotrav PD-270 unit is shown charging multiple devices via its USB output.
6.4. Using the LED Light
The integrated LED light offers multiple modes for various situations:
- Press the light button once for constant illumination (flashlight mode).
- Press again for strobe light mode.
- Press a third time for SOS signal mode.
- Press a fourth time to turn off the light.

The Eigotrav PD-270 unit demonstrating its multi-functional LED lighting, including strobe, flashlight, and SOS modes.
7. Maintenance
- Recharge the unit every 3-6 months, even if not used, to maintain battery health.
- Clean the exterior with a soft, dry cloth. Do not use harsh chemicals or abrasives.
- Store the unit in a cool, dry place away from direct sunlight and extreme temperatures.
- Ensure all ports and connections are free from dust and debris.
8. Troubleshooting
| Problem | Possible Cause | Solution |
|---|---|---|
| Vehicle does not start after jump-starting. |
|
|
| Tire inflator not working or not reaching desired pressure. |
|
|
| USB charging not working. |
|
|
9. Specifications
| Feature | Detail |
|---|---|
| Brand | Eigotrav |
| Model Number | PD-270 |
| Battery Composition | Lithium |
| Voltage | 12 Volts |
| Peak Amperage | 6000 A |
| Max Inflation Pressure | 150 PSI |
| Gas Engine Compatibility | Up to 7.5L |
| Diesel Engine Compatibility | Up to 6L |
| Operating Temperature | -20℃ to 70℃ |
| USB Output | 5V/2.1A |
| Manufacturer Part Number | PD-270 |
| Country of Origin | China |
| UPC | 768556961007 |
| ASIN | B0DFQ497XN |

A close-up of the Eigotrav PD-270 jump starter, displaying its key power specifications.
10. Warranty and Support
The Eigotrav PD-270 Car Jump Starter with Tire Inflator comes with a 2-year manufacturer's warranty from the date of purchase. This warranty covers defects in materials and workmanship under normal use.
For warranty claims, technical support, or any questions regarding your product, please contact Eigotrav customer service through the retailer where you purchased the product or visit the official Eigotrav website for contact information.
Please retain your proof of purchase for warranty validation.