Maupvit White
Maupvit Makeup Vanity with LED Lighted Sliding Mirror User Manual
Model: White | Brand: Maupvit
1. Introduction
Thank you for choosing the Maupvit Makeup Vanity with LED Lighted Sliding Mirror. This vanity desk is designed to enhance your daily beauty routine with its intelligent features, ample storage, and modern design. This manual provides essential information for assembly, operation, maintenance, and troubleshooting to ensure you get the most out of your new vanity.
Important Safety Information
- Read all instructions carefully before assembly and use.
- Keep all small parts and packaging materials away from children.
- Ensure all connections are secure before using the electrical components (LED lights, charging station).
- Do not overload the charging station.
- Use only in dry indoor environments.
2. Package Contents
Upon opening the package, please verify that all components are present and undamaged. While a detailed parts list is included with your product, the main components typically include:
- Vanity Desk Panels and Hardware
- LED Lighted Sliding Mirror
- Vanity Stool
- Drawer Slides and Handles
- Charging Station Unit
- Assembly Instructions Manual
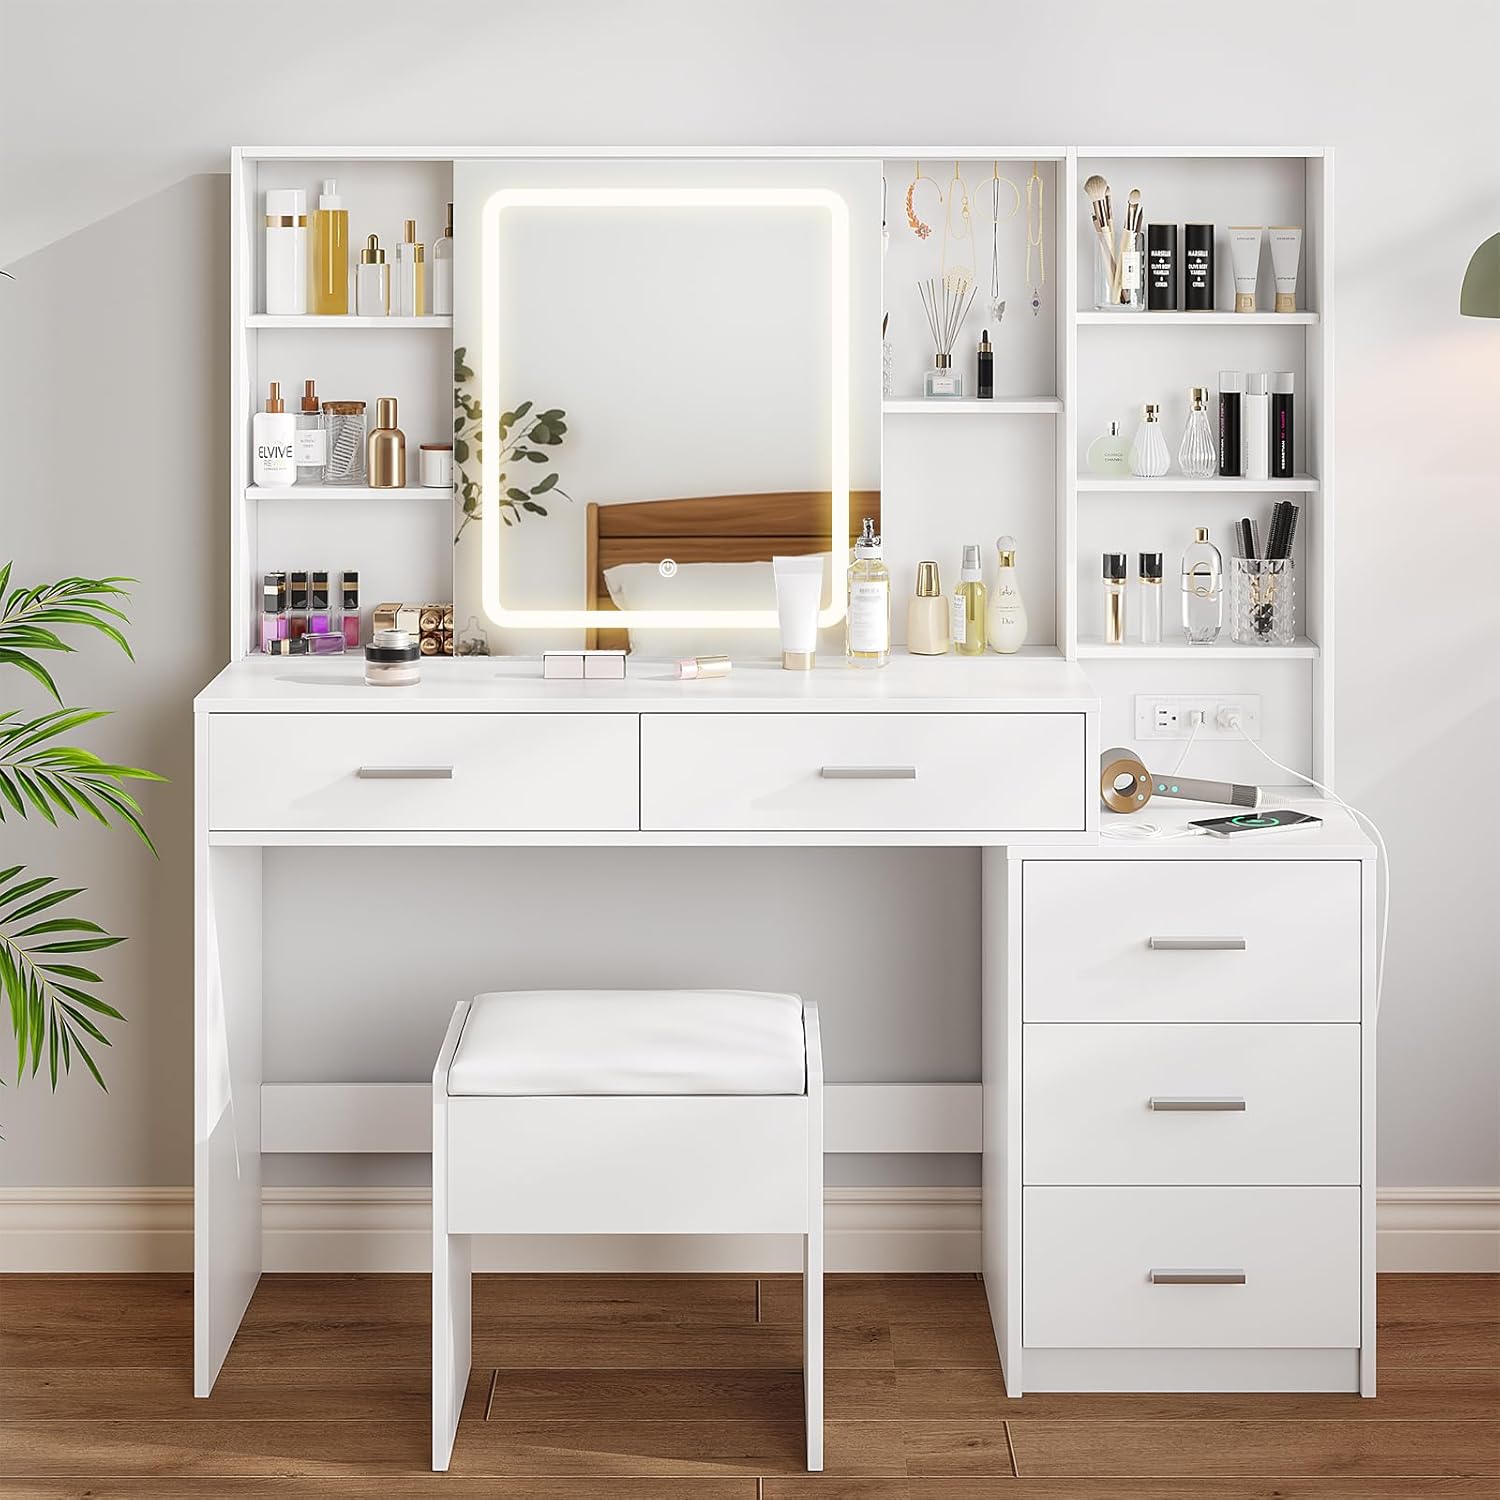
Figure 2.1: Overview of the Maupvit Makeup Vanity with Stool.
3. Setup & Assembly
Assembly of the Maupvit Makeup Vanity requires careful attention to detail and can be time-consuming. It is recommended to have ample space and possibly assistance during the process. Please follow the step-by-step instructions provided in the separate assembly manual included with your product.
Tools Required (Not Included)
- Phillips Head Screwdriver
- Hammer (for dowels)
- Measuring Tape (optional, for verification)
General Assembly Steps
- Unpack and Organize: Lay out all numbered parts and hardware according to the assembly manual. Verify all pieces are present.
- Assemble Base Structure: Begin by connecting the main desk panels and supports.
- Install Drawers: Assemble the drawer boxes and install the drawer slides onto both the drawers and the vanity frame.
- Attach Upper Storage Unit: Secure the top shelving unit to the main desk.
- Integrate Mirror and Electrical Components: Carefully install the sliding mirror and connect the charging station unit. Ensure all wiring is properly routed and secured.
- Assemble Stool: Put together the vanity stool.

Figure 3.1: Product dimensions for planning your space. Overall size: 51.18"(W) x 15.74"(D) x 53.39"(H).
Note: Some users have reported issues with pre-drilled holes or bent parts. If you encounter such issues, please contact customer support for assistance. Do not attempt to force parts together.
4. Operating Instructions
4.1 LED Lighted Sliding Mirror
The high-definition mirror features an integrated LED light strip with adjustable settings.
- Power On/Off: Lightly touch the designated touch switch on the mirror surface to turn the LED lights on or off.
- Change Color Mode: With the lights on, short press the touch switch to cycle through the three color modes: Warm Yellow (3000K), Warm White (4000K), and Cold White (6000K).
- Adjust Brightness: To adjust the brightness, press and hold the touch switch. The brightness will gradually increase or decrease. Release when the desired brightness is achieved.

Figure 4.1: Adjusting light modes and brightness at a touch.
4.2 Sliding Mirror Function
The mirror is designed to slide horizontally, revealing hidden storage shelves behind it.
- Gently push the mirror to the left or right to access the concealed storage compartments.
- Ensure the track is clear of obstructions for smooth operation.

Figure 4.2: Sliding mirror for hidden storage access.
4.3 Built-in Charging Station
The vanity includes a convenient charging station with power outlets and USB ports.
- AC Outlets: Plug in hair dryers, curling irons, or other small appliances (2 standard plug sockets, 125V/12A).
- USB Ports: Charge your phone, tablet, or other mobile devices (2 USB ports, 5V/2.1A).
- Ensure the vanity is plugged into a wall outlet for the charging station to function.
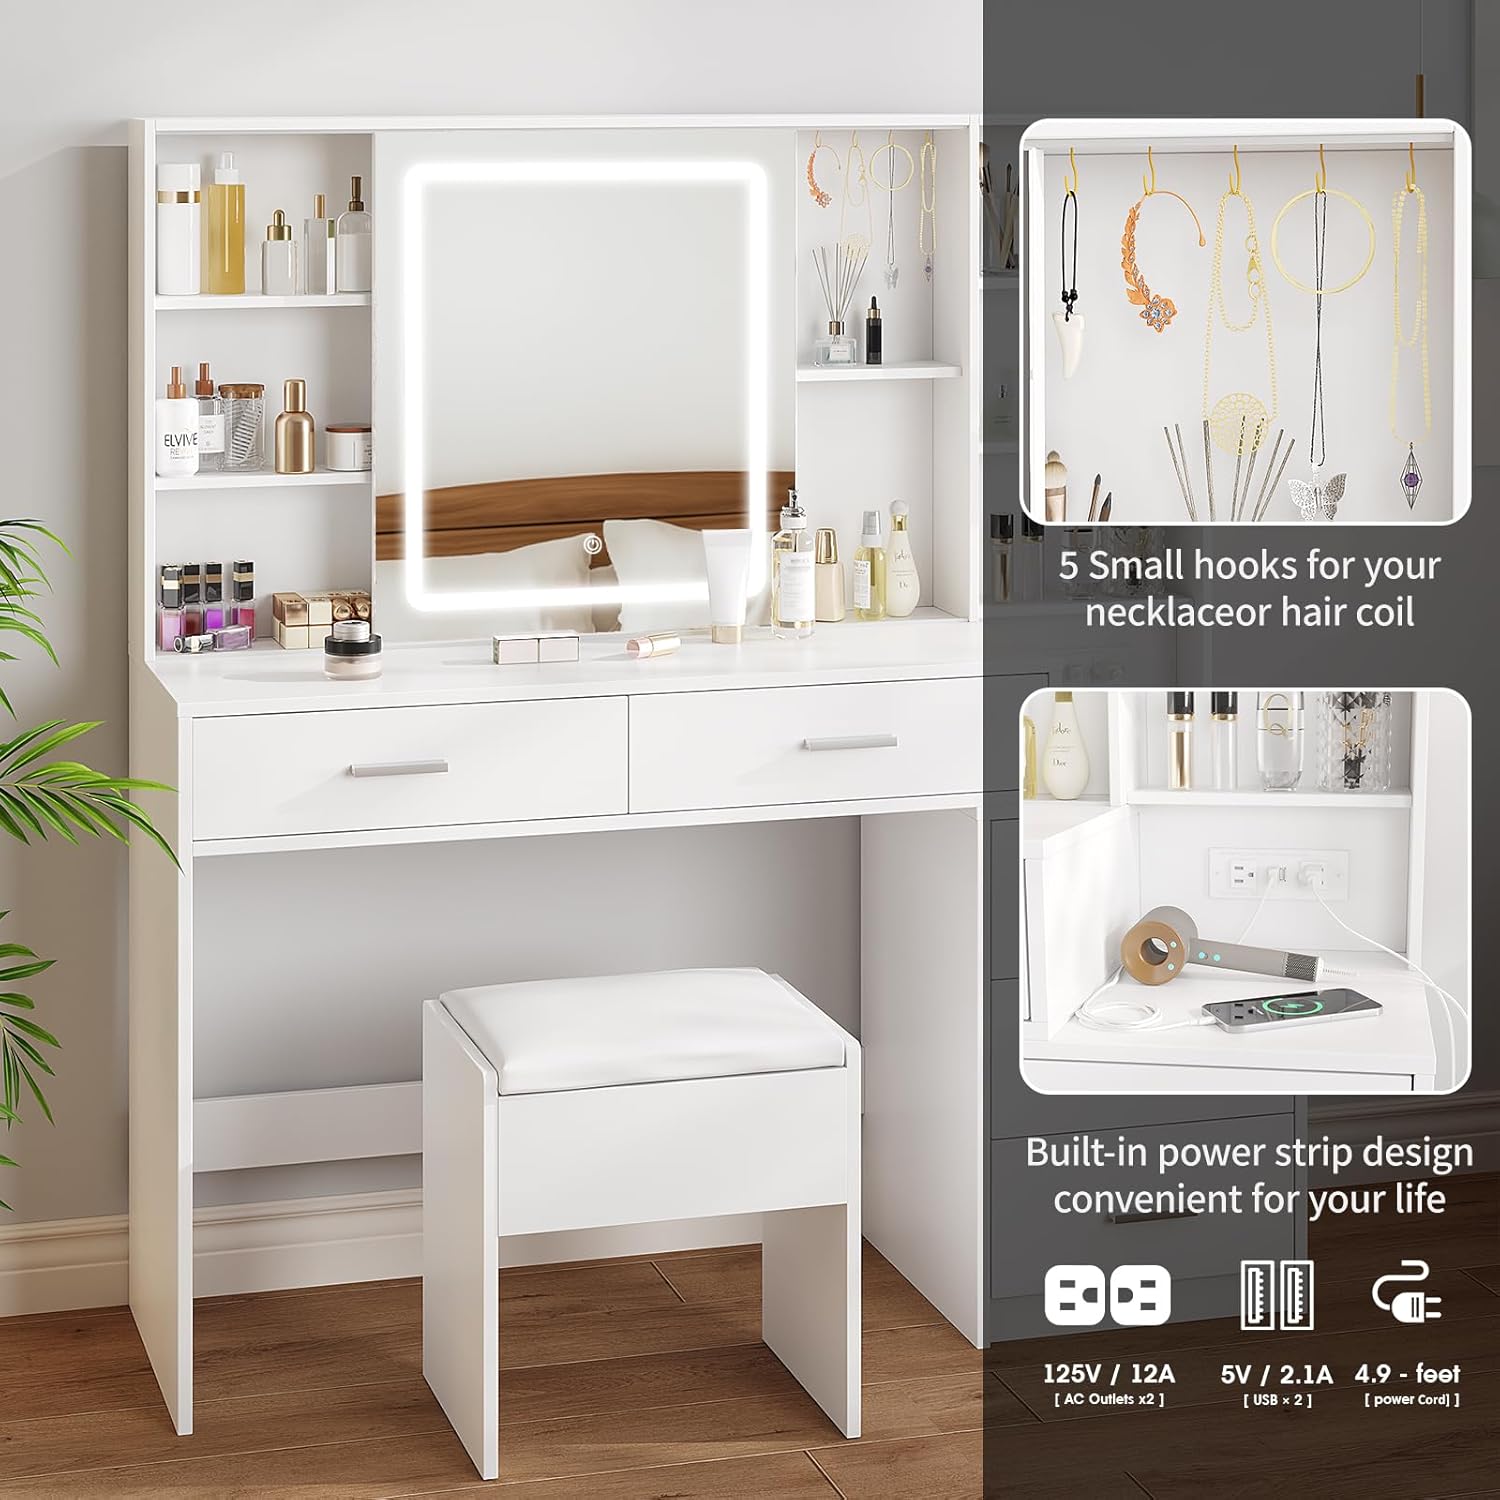
Figure 4.3: Convenient built-in charging station.
4.4 Storage Features
The vanity offers various storage options to keep your items organized.
- Drawers: Utilize the 5 large drawers for cosmetics, jewelry, and other essentials.
- Hidden Storage Shelves: Access these by sliding the mirror. Ideal for items you want to keep out of sight.
- Open Storage Shelves: Display frequently used items or decorative pieces.
- 5 Hooks: Located on the upper right corner, these hooks are perfect for hanging necklaces, bracelets, or hair accessories.

Figure 4.4: Ample storage space with drawers and shelves.
5. Maintenance
Proper care will ensure the longevity and appearance of your Maupvit Makeup Vanity.
- Cleaning Surfaces: Wipe down all surfaces with a soft, damp cloth. Avoid abrasive cleaners or harsh chemicals that may damage the finish.
- Mirror Care: Clean the mirror with a glass cleaner and a lint-free cloth. Do not spray cleaner directly onto the mirror, especially near the LED strip. Spray onto the cloth first.
- Electrical Components: Ensure the charging station and LED lights are unplugged before cleaning. Do not expose electrical components to water.
- Drawer Maintenance: Periodically check drawer slides for smooth operation. If they become stiff, a small amount of silicone lubricant can be applied.
- General Inspection: Regularly check all screws and fittings to ensure they remain tight. Retighten as necessary.
6. Troubleshooting
If you encounter any issues with your vanity, please refer to the following common problems and solutions:
| Problem | Possible Cause | Solution |
|---|---|---|
| LED Mirror Lights Not Working | Not plugged in; Loose connection; Faulty power outlet; Damaged LED strip. | Ensure the vanity's main power cord is securely plugged into a working wall outlet. Check the connection of the LED strip to the power source. If issues persist, contact customer support. |
| Charging Station Not Functioning | Vanity not plugged in; Device not properly connected; Overload. | Verify the vanity is plugged in. Ensure devices are fully inserted into the outlets/USB ports. Unplug some devices if overloaded. |
| Drawers are Stiff or Misaligned | Improper assembly; Loose screws; Obstruction in slide. | Check assembly instructions to ensure drawers and slides were installed correctly. Tighten all screws on drawer slides. Clear any debris from the tracks. |
| Sliding Mirror is Not Smooth | Obstruction in track; Dust/debris. | Inspect the mirror track for any objects or debris. Clean the track thoroughly. |
| Missing or Damaged Parts During Assembly | Manufacturing defect; Shipping damage. | Do not proceed with assembly if critical parts are missing or damaged. Contact customer support immediately with your purchase details. |
7. Specifications
| Feature | Detail |
|---|---|
| Brand | Maupvit |
| Model Number | White |
| Product Dimensions | 51.18"W x 15.74"D x 53.39"H (15.74 x 51.18 x 53.39 inches) |
| Frame Material | Engineered Wood |
| Furniture Finish | White |
| LED Mirror Light Modes | Warm Yellow (3000K), Warm White (4000K), Cold White (6000K) |
| Charging Station | 2 Standard AC Outlets (125V/12A), 2 USB Ports (5V/2.1A) |
| Drawers | 5 Large Drawers |
| Additional Storage | Hidden storage shelves, Open storage shelves, 5 Hooks |
| Country of Origin | China |
8. Warranty & Support
Maupvit products are manufactured with quality and customer satisfaction in mind. For specific warranty information regarding your Makeup Vanity, please refer to the warranty card included in your product packaging or visit the official Maupvit website.
Customer Support
If you have any questions, require assistance with assembly, or need to report missing/damaged parts, please contact Maupvit customer support. Have your purchase details and model number (White) ready for faster service.
Contact Information: (Please refer to your product packaging or the brand's official website for the most current contact details.)
Related Documents - White
 |
Ebern Designs Vanity Desk Installation Guide Comprehensive installation instructions for the Ebern Designs Vanity Desk, featuring a lighted mirror, multiple drawers, and a stool. This guide provides detailed steps, a complete parts list, and assembly tips for a successful setup. |
 |
FAMAPY Vanity Desk with Mirror and Lights - Assembly Instructions Comprehensive assembly instructions for the FAMAPY Vanity Desk with Mirror and Lights, including parts list, step-by-step guidance, and important safety warnings. This guide covers the KF210096-01 model. |
 |
Latitude Run Makeup Vanity Desk Installation and Assembly Guide Step-by-step instructions for assembling the Latitude Run Makeup Vanity Desk with lighted mirror, drawers, and charging station. Includes parts list and assembly diagrams. |
 |
Gracie Oaks DJ0592BR/DJ0592WTBR Vanity Set Assembly Instructions Comprehensive assembly instructions for the Gracie Oaks DJ0592BR and DJ0592WTBR vanity set. This guide includes a detailed parts list, hardware specifications, required tools, and step-by-step assembly procedures with textual descriptions of diagrams. Features a tempered-glass visible top, charging station, and sliding lighted mirror. |
 |
Wade Logan Carsin 48" Fluted Makeup Vanity Desk Assembly Instructions Comprehensive assembly guide for the Wade Logan Carsin 48" Fluted Makeup Vanity Desk. Includes parts list, hardware details, general guidelines, and step-by-step instructions for building your vanity. |
 |
Wall Mounted Lighted Makeup Vanity Mirror RM307A - User Manual Comprehensive user manual for the RM307A Wall Mounted Lighted Makeup Vanity Mirror. Includes detailed safety instructions, product specifications, installation guide, operation details, troubleshooting tips, and warranty information for this 8-inch, rechargeable, dimmable vanity mirror. |
Ask a question about this manual
Ask about setup, troubleshooting, compatibility, parts, safety, or missing instructions. Manuals+ will review the question and use this page’s manual context to help answer it.