1. Introduction
Thank you for choosing the Proshine 24 Egg Incubator. This automatic incubator is designed to provide optimal conditions for hatching various types of poultry eggs, including chicken, duck, quail, goose, and pigeon. It features precise temperature and humidity control, automatic egg turning, and a built-in candling light to maximize hatching success. Please read this manual thoroughly before operation to ensure safe and effective use.
2. Safety Instructions
- Always place the incubator on a stable, level surface away from direct sunlight or heat sources.
- Ensure the power supply matches the specifications of the incubator (AC110V).
- Do not immerse the incubator in water or any other liquid.
- Keep out of reach of children and pets.
- Unplug the incubator from the power outlet before cleaning or maintenance.
- Avoid opening the incubator frequently during incubation to maintain stable temperature and humidity.
3. Package Contents
Verify that all items are present in the package:
- Proshine 24 Egg Incubator Unit
- English Instruction Manual
- Humidifying Cotton Pad
- Incubation Trays (2 units)
- Thermohygrometer (external)
- Water Bottle for humidity control
- Power Cord (AC110V)
- DC 12V Battery Interface Cable
4. Setup
Follow these steps to prepare your incubator for use:
4.1. Install Egg Turning Rods and Trays
Insert the egg turning rods into the designated slots on the incubation trays. Adjust the spacing of the rods according to the size of the eggs you intend to incubate. Place the assembled trays inside the incubator.

Figure 1: Step-by-step guide for installing egg turning rods and trays.
4.2. Connect Water Bottle for Humidity
Connect the transparent tube from the incubator's water inlet to the water bottle base. Secure a standard water bottle (not included) filled with water onto the base. This system automatically supplies water to maintain humidity.

Figure 2: Water bottle connection for automatic humidity supply.
4.3. Power Connection
Plug the incubator into a standard AC110V power outlet. The digital display will illuminate, showing current temperature and humidity readings. The incubator can also be powered by a DC 12V battery (not included) using the provided cable, useful in case of power outages.
4.4. Placing Eggs
Carefully place your fertilized eggs onto the turning rods in the trays. Ensure eggs are clean and free from cracks. Close the incubator door securely.
Video 1: Demonstrates the easy setup and operation of the incubator, including placing eggs and using the control panel.
5. Operation
5.1. Digital Display and Control Panel
The clear digital display provides real-time updates on temperature and humidity. It is equipped with an over-temperature alert function, a high-accuracy thermometer, and a hygrometer to ensure optimal conditions. The control panel allows for easy adjustment of settings.

Figure 3: Digital display and control panel for monitoring and adjusting incubator settings.
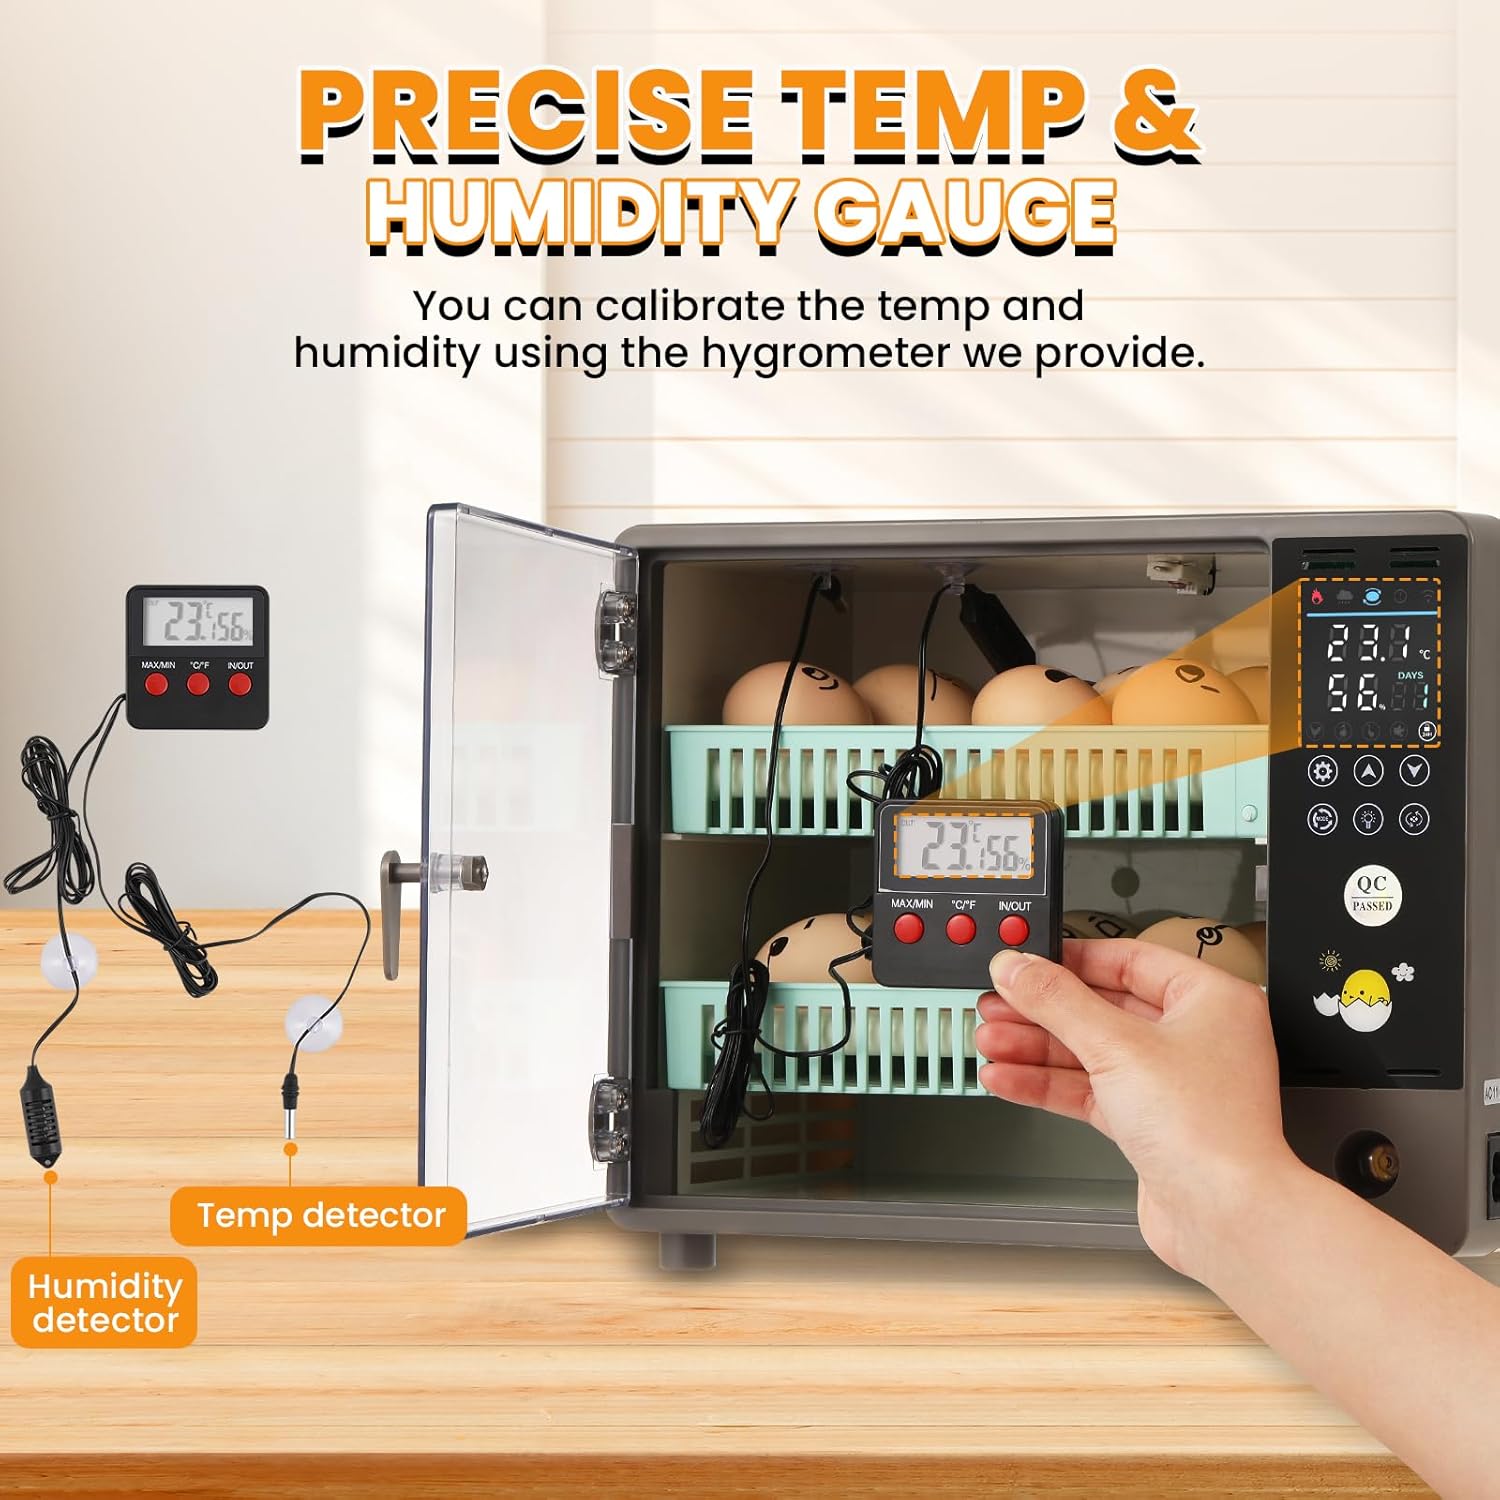
Figure 4: External thermohygrometer for accurate calibration of internal conditions.
5.2. Automatic Egg Turning
The incubator features an automatic egg turning system that gently rotates the eggs to ensure consistent heat distribution and prevent the embryo from sticking to the shell. This function significantly boosts the chances of successful hatching. Two built-in temperature-equalizing fans further ensure stable and uniform hatching conditions.

Figure 5: Automatic egg turning mechanism for even heat distribution.
5.3. Customizable Incubation Modes
The incubator offers 4 preset modes tailored for different egg species (chicken, duck, goose, pigeon). Users can easily select the best settings for each type. For experienced users, manual adjustments offer flexibility, allowing for precise control over temperature and humidity to maximize hatching success.

Figure 6: Icons for selecting specific incubation modes.
5.4. Egg Candling Light
A built-in egg candling light provides a hassle-free way to check embryo development without disrupting the incubation process. This feature minimizes the need to open the incubator, preserving the ideal conditions for the eggs.

Figure 7: Using the built-in candling light to observe egg development.
Video 2: Detailed demonstration of the incubator's features, including the candling light and automatic turning.
6. Recommended Incubation Parameters
The following tables provide recommended incubation parameters for various egg types. These are general guidelines; actual conditions may vary based on specific egg characteristics and environmental factors.
6.1. Chicken Eggs
| Incubation Time | Temp | Humidity | Egg Turning Parameters |
|---|---|---|---|
| 1-7 days | 38°C | 60% RH | 90min (26s) |
| 8-14 days | 37.8°C | 60% RH | 90min (26s) |
| 15-18 days | 37.7°C | 60% RH | 90min (26s) |
| 17-18 days | 37.7°C | 60% RH | 90min (26s) |
| Day 19 and beyond | 37.5°C | 65% RH | Do not turn the eggs |
6.2. Duck Eggs
| Incubation Time | Temp | Humidity | Egg Turning Parameters |
|---|---|---|---|
| 1-3 days | 38.2°C | 60% RH | 90min (27s) |
| 4-7 days | 38°C | 60% RH | 90min (27s) |
| 8-15 days | 37.8°C | 60% RH | 90min (27s) |
| 16-20 days | 37.5°C | 65% RH | 90min (27s) |
| 21-25 days | 37.5°C | 65% RH | 90min (27s) |
| Day 26 and beyond | 37.2°C | 75% RH | Do not turn the eggs |
6.3. Goose Eggs
| Incubation Time | Temp | Humidity | Egg Turning Parameters |
|---|---|---|---|
| 1-3 days | 38.3°C | 60% RH | 90min (32s) |
| 4-7 days | 38°C | 60% RH | 90min (32s) |
| 8-15 days | 37.8°C | 60% RH | 90min (32s) |
| 16-23 days | 37.5°C | 65% RH | 90min (32s) |
| 24-25 days | 37.5°C | 65% RH | 90min (32s) |
| Day 26 and beyond | 37.2°C | 70% RH | Do not turn the eggs |
6.4. Pigeon Eggs
| Incubation Time | Temp | Humidity | Egg Turning Parameters |
|---|---|---|---|
| 1-3 days | 38.2°C | 60% RH | 90min (18s) |
| 4-7 days | 38°C | 60% RH | 90min (18s) |
| 8-13 days | 37.8°C | 60% RH | 90min (18s) |
| 14 days | 37.8°C | 60% RH | 90min (18s) |
| Day 15 and beyond | 37.8°C | 65% RH | Do not turn the eggs |
7. Maintenance
Proper maintenance ensures the longevity and optimal performance of your incubator.
7.1. Cleaning
- After each hatch, unplug the unit and allow it to cool completely.
- Wipe down all interior surfaces with a soft, damp cloth and a mild disinfectant. Avoid harsh chemicals.
- Clean the egg trays and turning rods thoroughly.
- Ensure all components are dry before reassembling or storing.
7.2. Humidity Control Maintenance
- Regularly check the water level in the external bottle and refill as needed.
- Clean the humidifying cotton pad periodically to prevent mold or bacterial growth.

Figure 8: Internal fan for air circulation and temperature equalization.
8. Troubleshooting
If you encounter any issues with your Proshine incubator, refer to the following common problems and solutions:
- Inaccurate Temperature/Humidity Readings: Calibrate the internal readings using the provided external thermohygrometer. Ensure sensors are clean and properly placed.
- Eggs Not Turning: Verify that the egg turning rods are correctly installed and connected. Check for any obstructions preventing smooth rotation.
- Low Hatch Rate: Review incubation parameters (temperature, humidity, turning frequency) against recommended settings for your specific egg type. Ensure eggs are fertile and handled properly before incubation.
- Power Issues: Ensure the power cord is securely plugged into a functional outlet. If using a DC 12V battery, confirm it is fully charged and correctly connected.
- Unusual Noises: Check for any loose components or obstructions within the incubator. If unusual noises persist, contact customer support.
9. Specifications
| Feature | Detail |
|---|---|
| Brand | Proshine |
| Model Name | Automatic |
| Item Model Number | JHY45FQ |
| Capacity | Up to 24 Eggs |
| Material | Plastic |
| Color | Gray |
| Product Dimensions (LxWxH) | 14.57 x 9.84 x 11.81 inches |
| Item Weight | 7.15 pounds |
| Target Audience | Birds, Chickens, Ducks, Geese, Pigeons |
| Special Feature | Durable |
| Power | 50W |
| Voltage | AC110V / DC12V |
10. Warranty and Support
The Proshine 24 Egg Incubator comes with a 1-year warranty from the date of purchase. This warranty covers manufacturing defects and malfunctions under normal use.
10.1. Customer Support
For technical assistance, warranty claims, or any questions regarding your incubator, please contact Proshine customer support through the retailer's platform or the official Proshine website. Please have your model number (JHY45FQ) and purchase date available when contacting support.