1. Introduction
Thank you for choosing the STRONG RHINO RLS-900 Articulated TV Wall Mount. This product is designed to securely hold televisions and monitors ranging from 32 to 90 inches, offering versatile viewing angles through its articulated arm and tilt functions. Please read this manual thoroughly before installation and use to ensure safe and correct operation.
2. Safety Information
Improper installation or use of this product can result in serious injury or damage. Please observe the following safety guidelines:
- Professional Installation Recommended: If you are unsure about the installation process, consult a qualified professional.
- Weight Capacity: Do not exceed the maximum weight capacity of 50 kg (110 lbs).
- Screen Size: This mount is designed for screens between 32 and 90 inches.
- Wall Structure: Ensure the mounting surface can safely support the combined weight of the mount and your display. This mount is intended for installation into solid concrete walls, brick walls, or wood stud walls.
- Hardware: Use only the provided mounting hardware. Do not substitute parts.
- Children: Keep children away from the installation area. Small parts may be a choking hazard.
- Tools: Use appropriate tools and wear safety gear during installation.
3. Package Contents
Please verify that all components are present and undamaged before proceeding with installation. If any parts are missing or damaged, contact customer support.
- Wall Plate Assembly (with articulated arm)
- TV Bracket Arms (2x)
- Mounting Hardware Kit (screws, anchors, washers, spacers)
- Instruction Manual
4. Specifications
| Brand | STRONG RHINO |
| Model | RLS-900 |
| Screen Size Compatibility | 32 to 90 inches |
| Weight Capacity | 50 kg (110 lbs) |
| Tilt Angle | 0 to 28 degrees |
| Swivel/Articulation | Up to 180 degrees (dependent on screen size and wall distance) |
| Mounting Type | Wall Mount |
| Color | Black |
| Material | Durable Steel |
| Package Dimensions | 55 x 25 x 8 cm |
| Package Weight | 4.54 kg |
5. Setup and Installation
5.1 Tools Required (Not Included)
- Electric Drill
- Stud Finder (for wood stud walls)
- Level
- Phillips Head Screwdriver
- Socket Wrench
- Pencil
- Measuring Tape
5.2 Pre-Installation Checklist
- Confirm your TV's weight and VESA mounting pattern are within the mount's specifications.
- Identify the type of wall you will be mounting to (wood stud, concrete, brick).
- Ensure there are no hidden electrical wires or plumbing in the drilling area.
- Determine the desired height for your TV.
5.3 Installation Steps
- Locate Wall Studs and Mark Drilling Points: Use a stud finder to locate the center of the wood studs. For concrete or brick walls, mark the desired drilling locations. Use the wall plate as a template to mark the pilot hole positions. Ensure the marks are level.
- Attach Wall Plate to Wall: Drill pilot holes at the marked locations. For wood studs, drill directly. For concrete/brick, insert wall anchors into the pilot holes. Secure the wall plate assembly to the wall using the appropriate screws and washers. Ensure it is firmly attached and level.
- Attach TV Brackets to TV: Carefully place your TV face down on a soft, clean surface. Attach the two TV bracket arms to the back of your TV using the appropriate screws, washers, and spacers from the hardware kit. Ensure the brackets are centered and securely fastened to the VESA mounting holes.
- Hang TV onto Wall Plate: With assistance, carefully lift the TV and hook the TV bracket arms onto the wall plate assembly. Ensure the TV is securely seated on the mount.
- Secure TV to Wall Plate: Locate the safety screws or locking mechanisms on the bottom of the TV bracket arms. Tighten these to secure the TV to the wall plate, preventing accidental dislodgement.
- Adjust Tilt and Swivel: Once the TV is securely mounted, you can adjust its position. Refer to the 'Operating Instructions' section for details.

Figure 1: STRONG RHINO RLS-900 Mount, fully extended, showing the TV mounting plate and articulated arm.
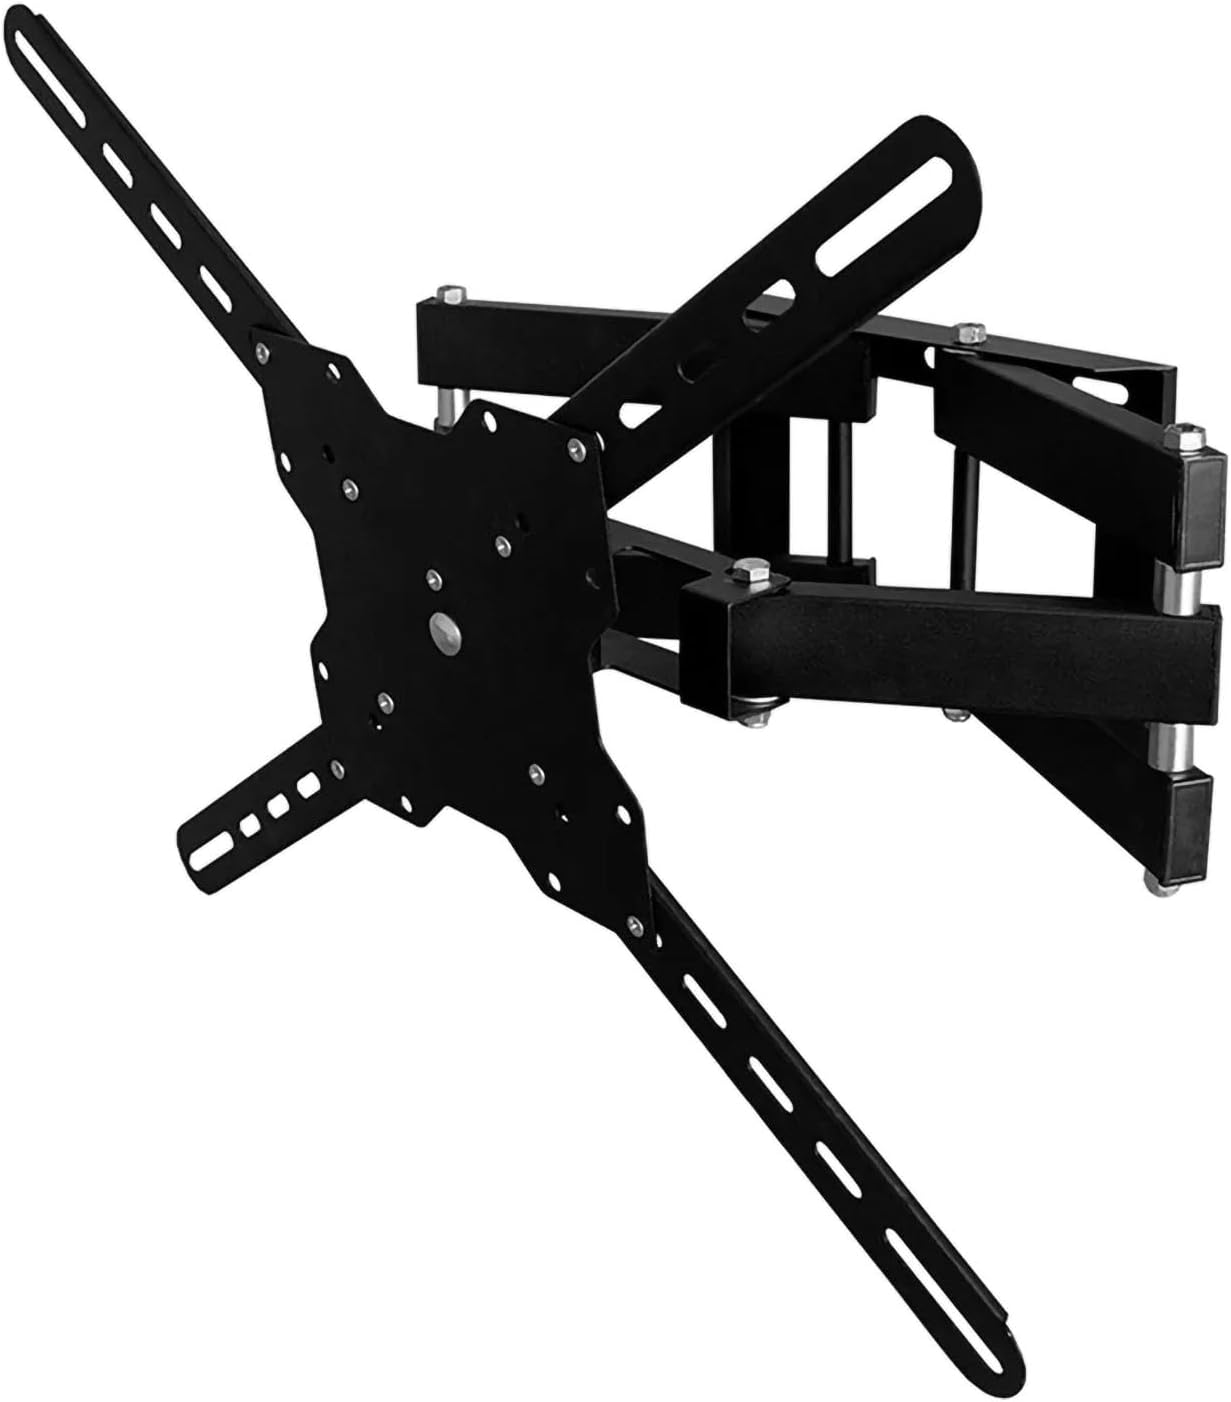
Figure 2: Side-angled view of the RLS-900 mount, demonstrating its articulation capability.

Figure 3: Side profile of the RLS-900 mount, showing its extension from the wall.

Figure 4: Front view of the RLS-900 mount in a retracted position, close to the wall.
6. Operating Instructions
The RLS-900 mount allows for flexible positioning of your display to achieve optimal viewing angles.
6.1 Adjusting Tilt
To adjust the vertical tilt angle (0 to 28 degrees), gently loosen the tilt adjustment knobs located on the TV bracket arms. Set the desired upward or downward angle, and then securely tighten the knobs to lock the position. Do not overtighten.
6.2 Adjusting Swivel/Articulation
To change the horizontal viewing angle, gently push or pull the TV to the left or right. The articulated arm allows for a wide range of swivel motion. Ensure the mount moves smoothly and does not hit any obstructions or pull on cables. Always move the TV by grasping the edges of the display, not by pulling on the mount arms directly.
7. Maintenance
- Periodic Checks: Periodically check all screws and connections to ensure they remain tight and secure.
- Cleaning: Clean the mount with a soft, dry cloth. Avoid using abrasive cleaners or solvents that could damage the finish.
- Lubrication: The moving parts of the articulated arm are designed for smooth operation. No additional lubrication is typically required. If movement becomes stiff, consult customer support.
8. Troubleshooting
| Issue | Possible Cause | Solution |
|---|---|---|
| Mount is not level after installation. | Wall plate not installed level. | Carefully loosen wall plate screws, adjust with a level, and re-tighten. If necessary, remove and re-install. |
| Difficulty moving the articulated arm or adjusting tilt. | Screws are overtightened; obstructions; mount not properly installed. | Check for any obstructions. Ensure tilt adjustment knobs are loosened. Verify all installation screws are tightened appropriately, not excessively. |
| TV feels unstable on the mount. | TV not properly seated; safety screws not tightened; wall plate not secure. | Ensure the TV bracket arms are fully engaged with the wall plate. Tighten the safety screws on the bottom of the TV brackets. Re-check all wall plate connections. |
9. Warranty and Support
For warranty information, technical assistance, or to report missing/damaged parts, please refer to the official STRONG RHINO website or contact your authorized retailer. Please retain your purchase receipt as proof of purchase for warranty claims.