BUNGPUNG BP-HDC-SWC11A
BUNGPUNG 8K@60Hz HDMI ARC/eARC Audio Extractor Adapter
Model: BP-HDC-SWC11A
User Manual
1. Introduction
Thank you for purchasing the BUNGPUNG 8K@60Hz HDMI ARC/eARC Audio Extractor Adapter. This device is designed to provide flexible audio routing solutions for your home theater system, allowing you to extract or inject audio signals between HDMI sources, TVs, soundbars, and AV receivers. It supports high-resolution video up to 8K@60Hz and a wide range of audio formats, ensuring a premium audio-visual experience.

Figure 1: Front and Rear View of the Audio Extractor Adapter
2. Key Features
- HDMI ARC/eARC Audio Conversion: Capable of converting HDMI audio to ARC/eARC audio (e.g., Dolby Atmos) from an HDMI source to eARC/ARC sound systems, and converting ARC/eARC audio from an eARC TV to AV receivers.
- High Resolution Video Support: Supports video resolutions up to 8K@60Hz 4:2:0 12bit and 4K@120Hz 4:4:4 12bit.
- Advanced HDMI Specifications: Compliant with 48Gbps HDMI 2.1, HDCP 2.3, HDR, and CEC.
- Extensive Audio Format Support: Supports LPCM, Dolby Digital/Plus/EX, Dolby True HD, Dolby Atmos, DTS, DSD DTS-EX, DTS-96/24, DTS High Res, DTS-HD Master Audio, DTS:X.
- Durable Construction: Features a durable metal body for rapid heat absorption and dissipation, reducing EMI/RFI noise interference.
- Compact and User-Friendly: Compact size, easy plug-and-play installation, and independent power supply for stable operation.

Figure 2: Product Dimensions and Feature Highlights
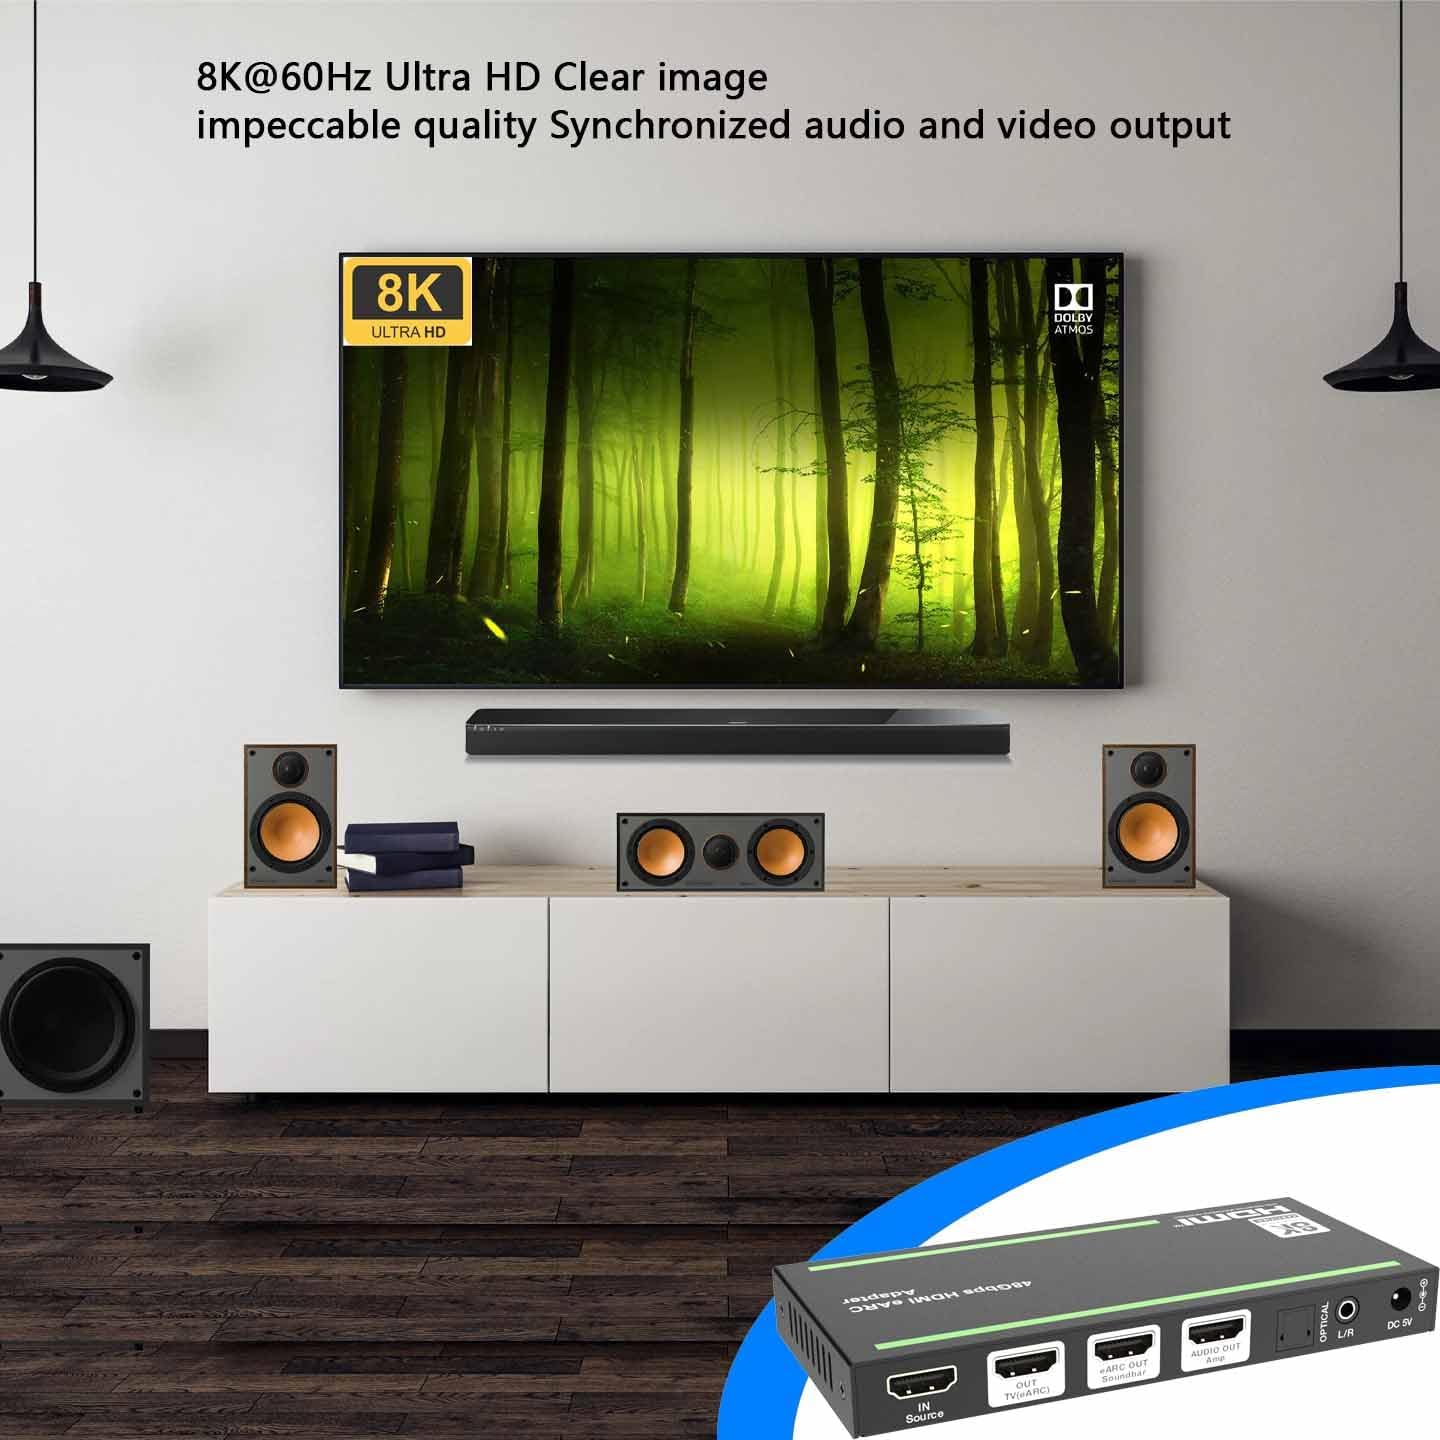
Figure 3: 8K@60Hz Ultra HD Visual Experience
3. Product Diagram and Port Descriptions
Familiarize yourself with the various ports, indicators, and controls on your audio extractor adapter.

Figure 4: Product Interface and Controls
| No. | Name | Function Description |
|---|---|---|
| 1 | Power LED | The red LED is on when the device is working. |
| 2 | IN LED | The green LED will be on when the input source signal is detected. |
| 3 | OUT LED | The green LED will be on when the HDMI OUT port connects a display device and outputs signal. |
| 4 | Soundbar LED | The green LED will be on when a soundbar is connected properly. |
| 5 | Amp LED | The green LED will be on when an amplifier is connected properly. |
| 6 | eARC LED |
|
| 7 | eARC button | Press this button to enable or disable the eARC/ARC mode. |
| 8 | EDID DIP switch | Use the DIP switch to set EDID:
|
| 9 | SERVICE | Used for firmware update and serial commands control. |
| 10 | Source IN | HDMI signal input port, connected to HDMI source device such as 8K PC, DVD or PSS with an HDMI cable. |
| 11 | TV(eARC) OUT | HDMI signal output port, connected to TV (eARC/ARC) with an HDMI cable. It can be used as an eARC/ARC audio channel when the eARC/ARC mode is enabled. |
| 12 | Soundbar eARC OUT | HDMI audio output port, connected to a soundbar (eARC/ARC). |
| 13 | Amp AUDIO OUT | HDMI audio output port, connected to an amplifier. |
| 14 | OPTICAL | Optical fiber audio output port. |
| 15 | L/R | Analog audio output port. |
| 16 | DC 5V | DC 5V/2A Power input port. |
4. Setup and Connection
Follow these steps to connect your BUNGPUNG HDMI ARC/eARC Audio Extractor Adapter to your audio-visual system.
4.1. Converting HDMI Audio to ARC/eARC Audio (eARC OFF Mode)
In this mode, the adapter extracts audio from an HDMI source and outputs it to your soundbar, amplifier, or other audio devices, while passing the video signal to your TV. The eARC function on the adapter should be disabled.
- Connect your HDMI source device (e.g., Blu-ray player, gaming console, PC) to the Source IN port (10) of the adapter using an HDMI cable.
- Connect the TV(eARC) OUT port (11) of the adapter to your TV's HDMI input using an HDMI cable.
- Connect the Soundbar eARC OUT port (12) to your eARC/ARC compatible soundbar using an HDMI cable.
- Optionally, connect the Amp AUDIO OUT port (13) to your amplifier, the OPTICAL port (14) to an optical audio device, or the L/R port (15) to analog audio devices.
- Ensure the eARC button (7) is set to disable eARC/ARC mode (eARC LED (6) is OFF).
- Connect the provided DC 5V power adapter to the DC 5V port (16) and plug it into a power outlet.

Figure 5: Connection Diagram for eARC OFF Mode
4.2. Converting ARC/eARC Audio to HDMI Audio (eARC ON Mode)
In this mode, the adapter receives ARC/eARC audio from your TV and outputs it to your soundbar, amplifier, or other audio devices. An HDMI source device connection is not required in this configuration.
- Connect your TV's eARC/ARC HDMI output to the TV(eARC) OUT port (11) of the adapter using an HDMI cable. This port now acts as an input for the TV's eARC/ARC audio.
- Connect the Soundbar eARC OUT port (12) to your eARC/ARC compatible soundbar using an HDMI cable.
- Optionally, connect the Amp AUDIO OUT port (13) to your amplifier, the OPTICAL port (14) to an optical audio device, or the L/R port (15) to analog audio devices.
- Ensure the eARC button (7) is pressed to enable eARC/ARC mode (eARC LED (6) is ON).
- Connect the provided DC 5V power adapter to the DC 5V port (16) and plug it into a power outlet.

Figure 6: Connection Diagram for eARC ON Mode
5. Operating Instructions
5.1. eARC/ARC Mode Selection
The eARC button (7) allows you to toggle between eARC/ARC enabled and disabled modes. Press the button to switch modes. The eARC LED (6) will indicate the current status:
- eARC LED ON: eARC/ARC mode is enabled. This is used for converting TV eARC/ARC audio to other audio outputs.
- eARC LED OFF: eARC/ARC mode is disabled. This is used for extracting audio from an HDMI source.
- eARC LED Flashing: eARC/ARC mode is enabled, but there might be an issue with CEC communication or eARC functionality. Refer to the troubleshooting section.
5.2. EDID Management
The EDID DIP switch (8) allows you to manually configure the Extended Display Identification Data (EDID) settings. EDID communicates the display's capabilities (like resolution and audio formats) to the source device. Adjusting these settings can help resolve compatibility issues or optimize audio/video output.
Refer to Table 1 for the specific EDID configurations corresponding to each DIP switch setting.
6. Troubleshooting
If you encounter issues with your BUNGPUNG HDMI ARC/eARC Audio Extractor Adapter, please refer to the following common problems and solutions:
| Problem | Possible Cause & Solution |
|---|---|
| No audio output |
|
| No video output |
|
| eARC LED (6) is flashing |
|
| Intermittent audio/video |
|
7. Specifications
| Feature | Detail |
|---|---|
| Product Dimensions (L x W x H) | 5.71 x 2.68 x 0.71 inches (145 x 68 x 18 mm) |
| Item Weight | 9.2 ounces (262 grams) |
| Model Number | BP-HDC-SWC11A |
| Compatible Devices | Amplifiers, Soundbars, TVs, DVD Players, TV Boxes |
| Connector Type | HDMI, Optical (SPDIF), 3.5mm L/R Audio |
| HDMI Version | HDMI 2.1 |
| HDCP Version | HDCP 2.3 |
| Max Resolution Support | 8K@60Hz 4:2:0 12bit, 4K@120Hz 4:4:4 12bit |
| Bandwidth | 48Gbps |
| HDR Support | Yes |
| CEC Support | Yes |
| Power Supply | DC 5V/2A |
8. Maintenance
To ensure the longevity and optimal performance of your audio extractor adapter, follow these maintenance guidelines:
- Cleaning: Use a soft, dry cloth to clean the exterior of the device. Do not use liquid cleaners or aerosol sprays, as they may damage the unit.
- Ventilation: Ensure the device is placed in a well-ventilated area to prevent overheating. Do not block any ventilation openings.
- Storage: When not in use for extended periods, store the device in a cool, dry place away from direct sunlight and extreme temperatures.
- Handling: Handle the device with care. Avoid dropping or subjecting it to strong impacts.
9. Warranty and Support
This BUNGPUNG HDMI ARC/eARC Audio Extractor Adapter is covered by a one-year warranty from the date of purchase. This warranty covers defects in materials and workmanship under normal use.
For technical support, warranty claims, or any questions regarding your product, please contact BUNGPUNG customer service through the retailer's platform or the official BUNGPUNG website. Please have your model number (BP-HDC-SWC11A) and purchase information ready when contacting support.
Ask a question about this manual
Ask about setup, troubleshooting, compatibility, parts, safety, or missing instructions. Manuals+ will review the question and use this page’s manual context to help answer it.