Plixify BTAI7811
Plixify Single Din Car Radio User Manual
Model: BTAI7811
1. Introduction
This manual provides comprehensive instructions for the installation, operation, and maintenance of your Plixify Single Din Car Radio. Designed to enhance your in-car audio experience, this unit features Bluetooth connectivity, AI voice control, multiple audio inputs, and FM radio. Please read this manual thoroughly before using the product to ensure proper function and safety.
2. What's in the Box
Upon opening the package, verify that all the following components are included:
- 7 inch Car Radio Unit
- Steering Wheel Controls
- Wiring Harness
3. Product Specifications
| Feature | Detail |
|---|---|
| Model Number | BTAI7811 |
| Dimensions (Body) | 7.0 x 2.4 x 2.3 inches (17.8 x 6.1 x 5.8 cm) |
| Dimensions (Panel) | 7.4 x 2.4 x 2.3 inches (18.8 x 6.1 x 5.8 cm) |
| Weight | 14.4 ounces (408 grams) |
| Wattage | 60 watts |
| Connectivity | Bluetooth, USB, TF Card, AUX, RCA Output |
| FM Frequency Range | 87.5-108MHz |
| USB Charging | 2.1A Fast Charging |
| Special Features | AI Voice Control, Customizable EQ Settings, Power-off Memory |
4. Setup and Installation
Proper installation is crucial for optimal performance. If you are unsure about any steps, it is recommended to seek professional assistance.
4.1 Physical Installation
The Plixify car radio is designed for standard U.S. Single-DIN slots. Ensure your vehicle has adequate space for the unit's dimensions (7.0 x 2.4 x 2.3 inches).
- Mounting: Securely mount the head unit into the vehicle's dashboard opening using the provided mounting hardware.
- Wiring: Connect the included wiring harness to the corresponding wires in your vehicle's wiring system. Ensure all connections are secure and properly insulated to prevent short circuits. Refer to your vehicle's specific wiring diagram if necessary.
4.2 Connecting Peripherals

Image: Bluetooth hands-free calling demonstration.
This image illustrates the Bluetooth hands-free calling feature, showing a phone screen with an incoming call and the car radio unit in the dashboard.
Bluetooth Connectivity
To connect your mobile device via Bluetooth:
- Turn on the car radio and ensure Bluetooth is enabled on your mobile device.
- On your mobile device, search for available Bluetooth devices. The radio will appear as "SWM-7811" or similar.
- Select the radio from the list to pair. A confirmation tone or message may indicate successful pairing.

Image: RCA audio output ports.
This image displays the rear of the car radio, highlighting the RCA audio output ports (red and white jacks) for connecting an external subwoofer or amplifier.
RCA Subwoofer Output
The unit features RCA outputs for connecting an external subwoofer or amplifier. Connect the RCA cables from the radio's output to the corresponding input on your subwoofer/amplifier for enhanced bass performance.
Steering Wheel Control (SWC)
Connect the steering wheel control wires from your vehicle to the designated SWC input on the radio's wiring harness. This allows you to operate basic radio functions (e.g., volume, track change) directly from your steering wheel for safer driving.
5. Operation

Image: Front view of the Plixify Single Din Car Radio.
This image shows the main display and control buttons on the front panel of the Plixify Single Din Car Radio, including the volume knob, mode button, and USB/TF card slots.
5.1 Basic Functions
- Power On/Off: Press the POW/MUTE button to turn the unit on or off. Long press to mute/unmute audio.
- Volume Control: Rotate the central knob to adjust the volume level.
- Mode Selection: Press the MODE button to cycle through available audio sources: FM, Bluetooth, USB, TF Card, AUX.
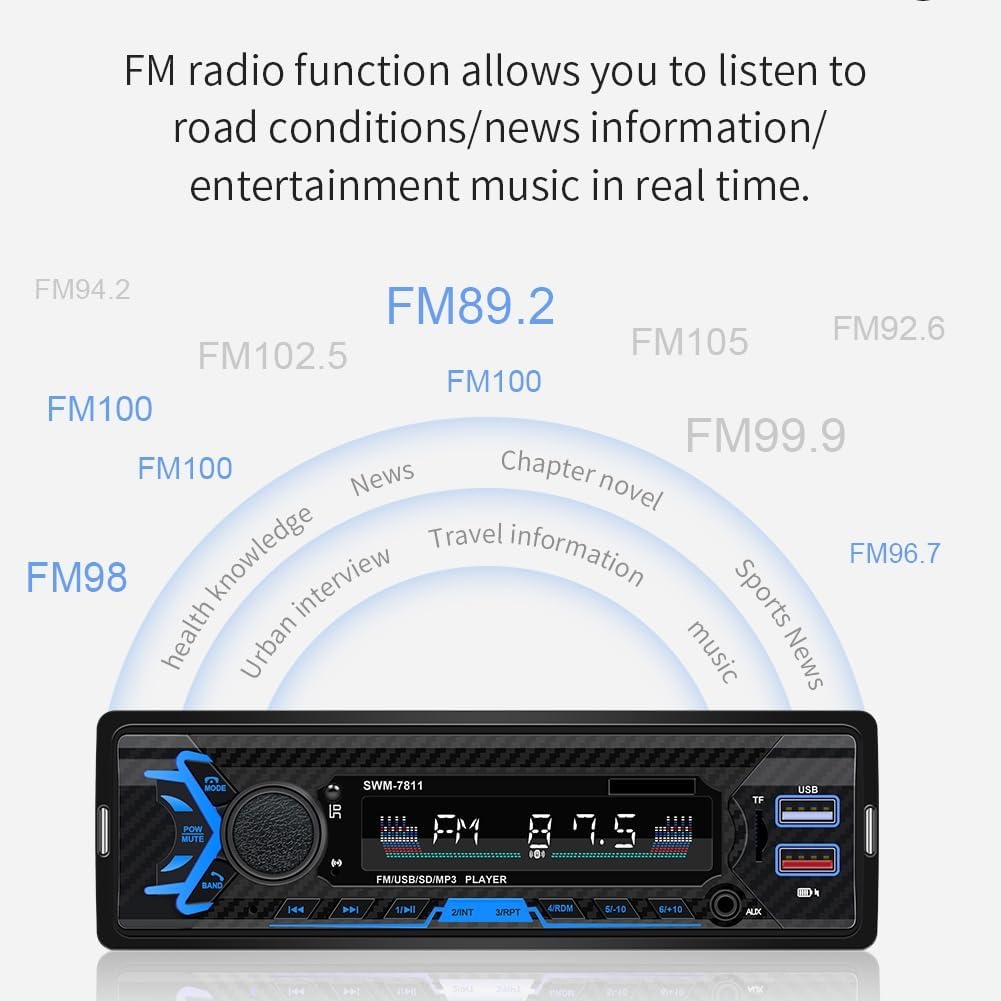
Image: FM radio function display.
This image illustrates the FM radio functionality, showing various frequency options and types of content like news, music, and travel information that can be accessed.
5.2 FM Radio Operation
- Tune: In FM mode, use the << and >> buttons to manually tune to a specific frequency.
- Auto Scan: Press and hold the BAND button to automatically scan and save strong stations.
- Preset Stations: Use the numbered buttons (1-6) to select saved preset stations.

Image: USB, TF card, and AUX input ports.
This image provides a close-up view of the USB, TF card, and AUX input ports on the car radio, along with text descriptions of their functions, including USB charging and lossless music playback.
5.3 Media Playback (USB/TF/AUX)
- USB Playback: Insert a USB drive into the USB port. The unit will automatically switch to USB mode and begin playing compatible audio files (MP3/MP4). The USB port also supports 2.1A fast charging for your devices.
- TF Card Playback: Insert a TF (microSD) card into the TF card slot. The unit will switch to TF mode and play compatible audio files.
- AUX Input: Connect an external audio device (e.g., smartphone, MP3 player) to the 3.5mm AUX input jack using an audio cable. Select AUX mode to play audio from the connected device.

Image: AI Voice Control feature.
This image demonstrates the AI Voice Control feature, showing a user interacting with the radio using voice commands for navigation and music playback.
5.4 AI Voice Control
In Bluetooth mode, long press the volume knob to activate your mobile phone's voice assistant (e.g., Siri, Google Assistant). You can then use voice commands for navigation, music playback, making calls, and other functions supported by your phone's assistant.
5.5 Audio Settings
The unit offers customizable EQ settings to tailor the audio output to your preference. Access these settings through the menu to adjust bass, treble, balance, and fader.
6. Maintenance
- Cleaning: Use a soft, dry cloth to clean the unit's display and buttons. Avoid using abrasive cleaners or solvents, which may damage the surface.
- Dust Removal: Periodically clean any dust accumulation around the ports and vents to ensure proper airflow and prevent overheating.
- Power-off Memory: The unit retains the last playback position after power-off, ensuring a seamless listening experience upon restart.
7. Troubleshooting
If you encounter issues with your Plixify car radio, refer to the following common problems and their solutions:
| Problem | Possible Cause | Solution |
|---|---|---|
| Unit does not power on. | Incorrect wiring, blown fuse, power supply issue. | Check all power connections and fuses. Ensure the wiring harness is correctly installed. |
| No sound or poor sound quality. | Incorrect speaker wiring, volume too low, incorrect audio source, damaged speakers. | Verify speaker connections. Increase volume. Select the correct audio source. Check speaker integrity. |
| Bluetooth not connecting. | Bluetooth not enabled on device, unit not in pairing mode, interference. | Ensure Bluetooth is on and discoverable on your device. Re-pair the device. Move closer to the unit. |
| Radio reception is poor. | Antenna not connected, weak signal area, antenna damage. | Check antenna connection. Try tuning to different stations. Consider an antenna booster if in a weak signal area. |
| Unit randomly stops working / requires unplugging. | Potential power fluctuation, internal reset, or software glitch. | Disconnect the main power harness from the back of the unit for 10 minutes, then reconnect. If the issue persists, contact customer support. |
8. Warranty and Support
Your Plixify Single Din Car Radio comes with a one-year replacement warranty from the date of purchase. This warranty covers manufacturing defects and ensures peace of mind.
For technical support, warranty claims, or any questions regarding your product, please contact Plixify customer service through the retailer's platform or visit our official website for contact information.
Ask a question about this manual
Ask about setup, troubleshooting, compatibility, parts, safety, or missing instructions. Manuals+ will review the question and use this page’s manual context to help answer it.