1. Introduction
The AESGOGO 12-in-1 Electric Robot Kit provides an engaging and educational experience for users aged 8 and up. This kit allows for the construction of 12 distinct robot models from 202 individual parts, fostering hands-on skills and logical thinking. The robots are designed to operate on both land and water, offering diverse play and learning opportunities. This manual provides detailed instructions for assembly, operation, maintenance, and troubleshooting.
2. Safety Information
WARNING: CHOKING HAZARD
This product contains small parts and is not suitable for children under 3 years of age. Adult supervision is recommended during assembly and operation, especially for younger users, to ensure safe handling of components.
3. Package Contents
Please verify that all components are present before beginning assembly. The kit includes:
- Robot parts (202 pieces)
- Main robot body/motor unit
- Instruction Manual
- USB-C charging cable
- Required Lithium Ion battery (pre-installed or included separately)
4. Key Features
- 12 Different Robot Models: Construct a variety of robots, including land-based vehicles and water-faring designs.
- STEM Education Integration: Designed to enhance children's concentration, hands-on ability, and logical thinking through building and experimentation.
- Battery Powered: The robots are powered by a rechargeable Lithium Ion battery, offering consistent performance.
- Land and Water Operation: Specific models are capable of movement on land and propulsion in water.
- Durable ABS Material: Components are made from long-lasting ABS material suitable for repeated assembly and disassembly.

Figure 4.1: Overview of the 12 distinct robot models achievable with this kit.

Figure 4.2: The robot kit supports both land and water-based operation for various models.
5. Setup and Assembly
5.1 Initial Charging
Before first use, ensure the robot's internal battery is fully charged. Connect the provided USB-C charging cable to the robot's charging port and a compatible USB power source (not included). The charging indicator will typically show a specific status (e.g., red for charging, green for full) as described in the detailed assembly manual.
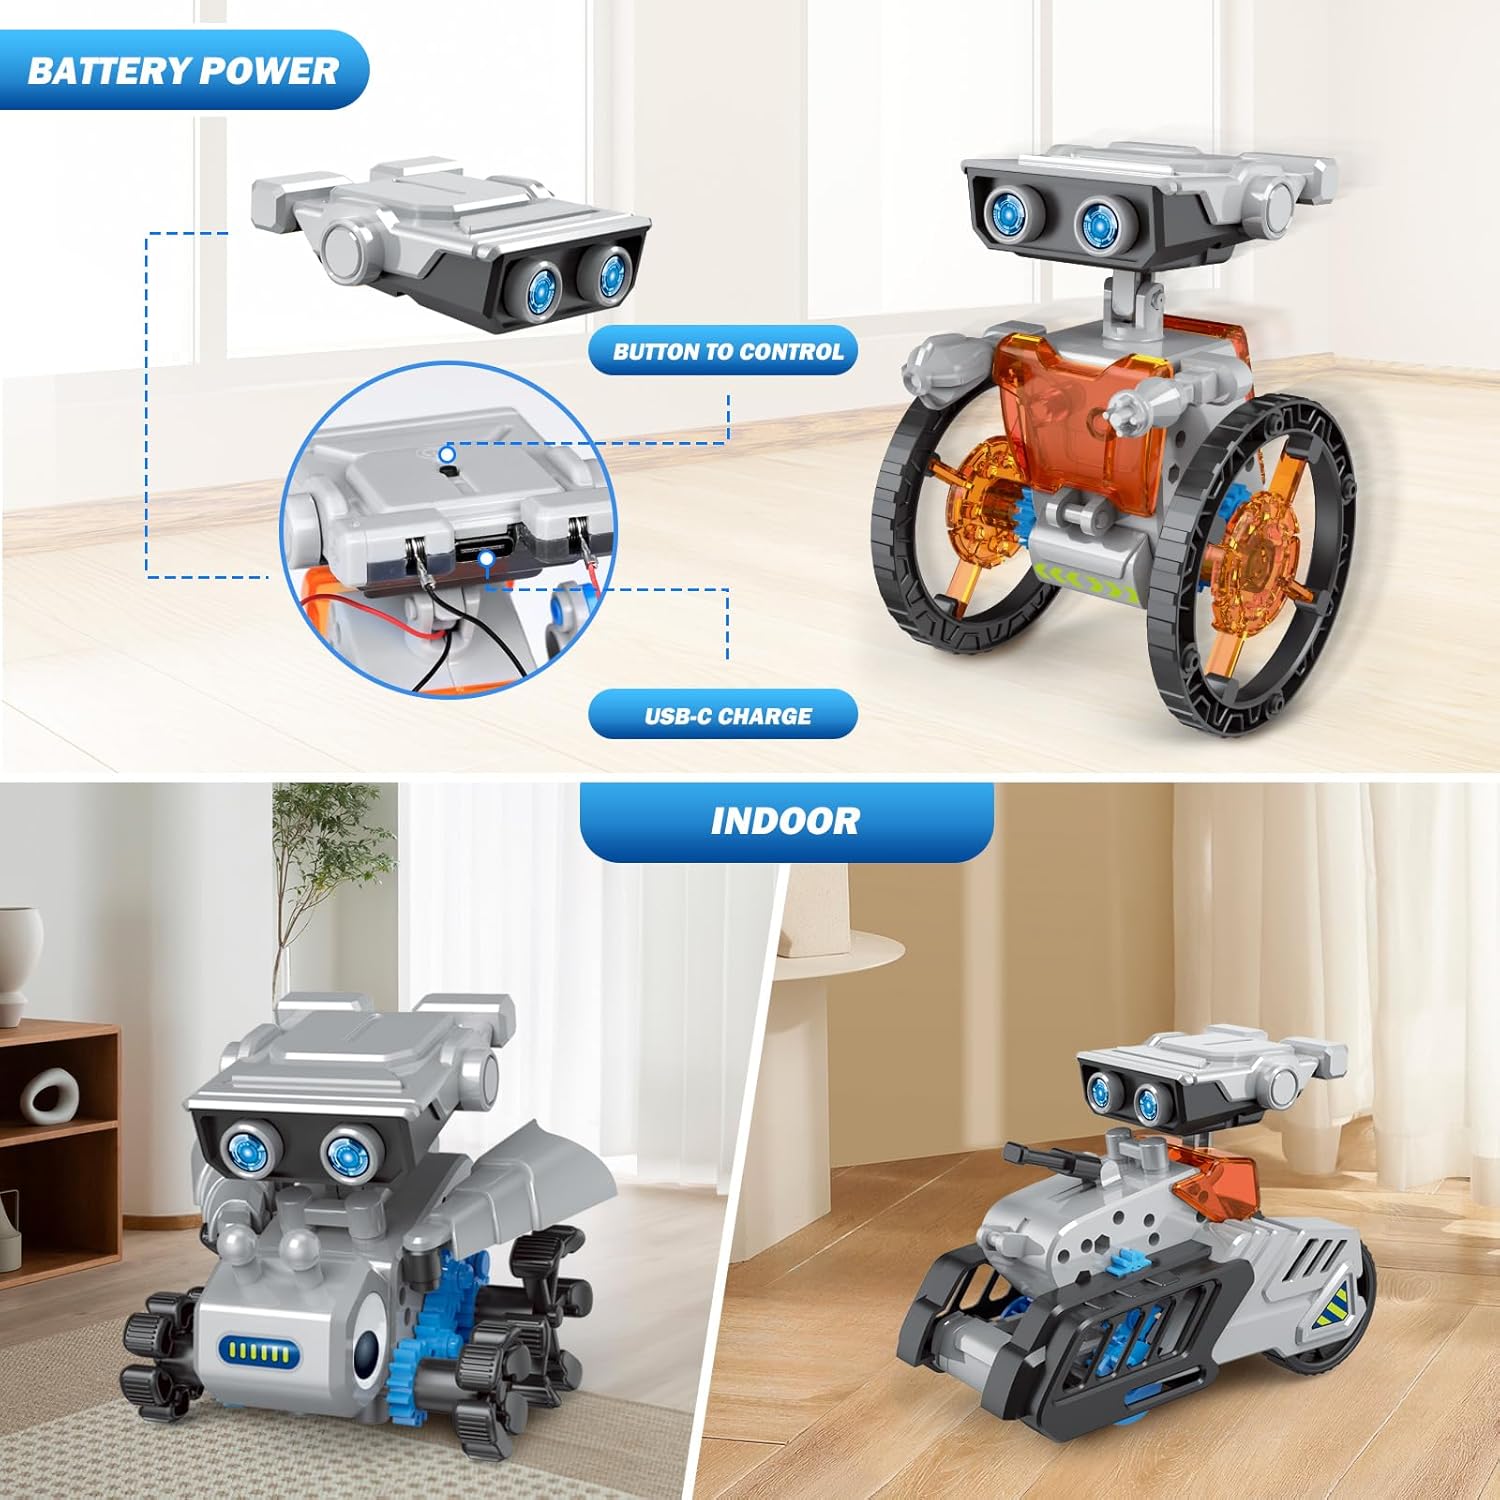
Figure 5.1: Battery power unit with USB-C charging port and control button.
5.2 Robot Assembly
Refer to the included detailed instruction manual for step-by-step assembly guides for each of the 12 robot models. Each model requires careful construction following the diagrams and part lists. It is recommended to:
- Organize all parts before starting.
- Follow the instructions sequentially.
- Ensure all connections are secure.
- Seek adult assistance if difficulties arise.

Figure 5.2: Assembly process with an adult and child following the instruction manual.
6. Operating Instructions
6.1 Powering On/Off
Once assembled and charged, locate the power button on the main robot body (refer to Figure 5.1). Press the button to turn the robot on. Press it again to turn the robot off.
6.2 Movement and Control
The robot's movement is controlled by its internal motor and gear system. Depending on the model built, the robot will move forward or perform specific actions. Some models may have additional features or movements detailed in their specific assembly instructions.
6.3 Land and Water Operation
For land-based robots, ensure operation on a flat, clear surface. For water-faring robots, use in shallow, still water. Always ensure the water-resistant seals are properly in place before placing the robot in water. Avoid saltwater or chlorinated water, as these can damage components over time.
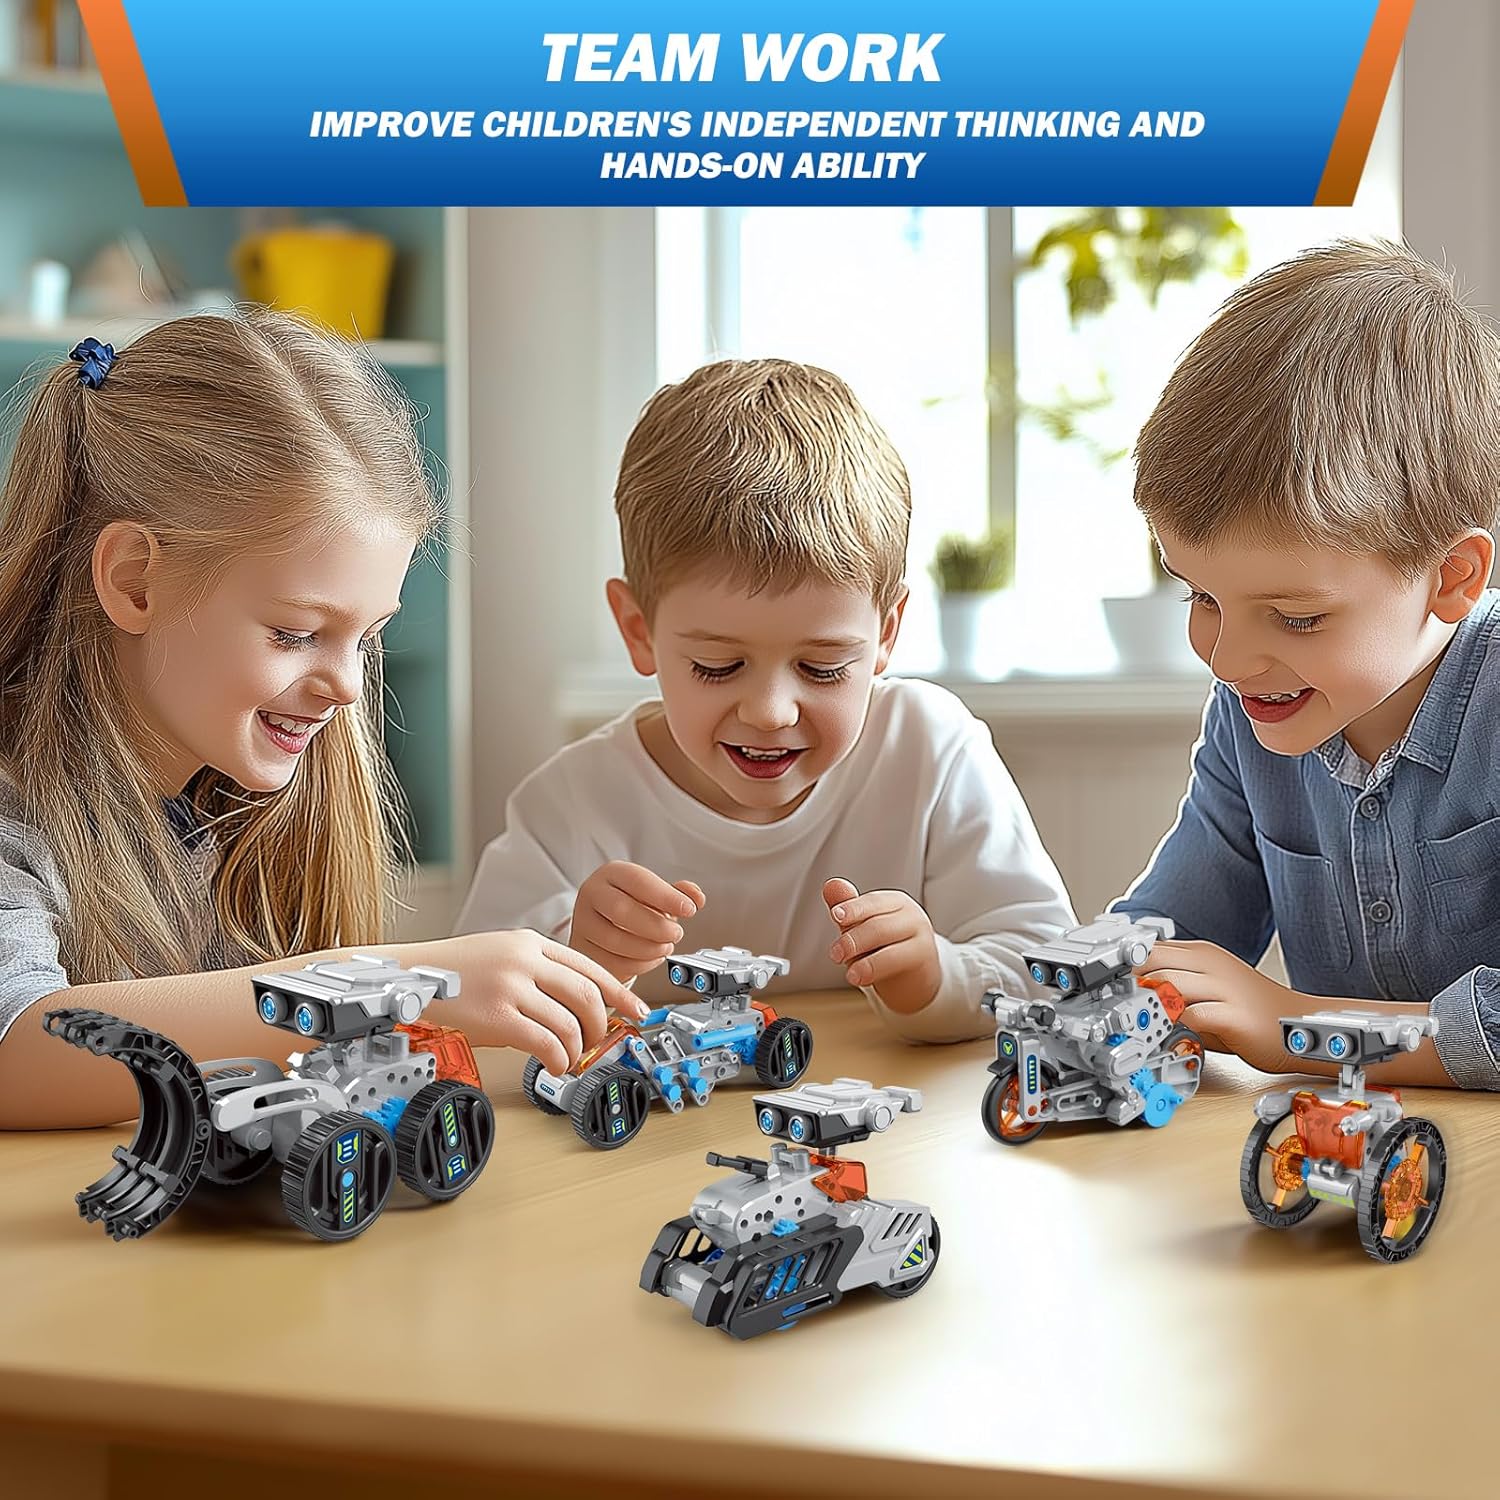
Figure 6.1: Children engaging with multiple assembled robot models.
7. Maintenance
- Cleaning: Wipe the robot parts with a dry or slightly damp cloth. Do not submerge non-waterproof parts in water.
- Storage: Store the robot and its components in a cool, dry place away from direct sunlight. For long-term storage, it is advisable to disassemble the robot and store parts in their original packaging or a suitable container.
- Battery Care: Recharge the battery regularly, even if not in use, to maintain its lifespan. Avoid overcharging or completely draining the battery.
- Gear Inspection: Periodically check gears for any debris or misalignment that might hinder movement. Clean or adjust as necessary.
8. Troubleshooting
| Problem | Possible Cause | Solution |
|---|---|---|
| Robot does not move. | Battery is low or uncharged. Power switch is off. Gears are jammed or loose. | Charge the battery. Ensure the power switch is on. Check for obstructions in gears; reassemble gears if loose. |
| Robot moves slowly or inconsistently. | Low battery. Incorrect assembly. Friction from external factors. | Recharge the battery. Review assembly steps for errors. Ensure operating surface is smooth and clear. |
| Parts do not fit together. | Incorrect part selection. Misalignment. | Double-check the instruction manual for the correct parts and orientation. Apply gentle, even pressure. Do not force parts. |
9. Specifications
| Feature | Detail |
|---|---|
| Product Dimensions | 11 x 3 x 10 inches |
| Item Weight | 1.23 pounds |
| Model Number | 214A |
| Manufacturer Recommended Age | 3 years and up (with supervision, 8+ for independent assembly) |
| Batteries | 1 Lithium Ion battery required (included) |
| Main Material | ABS Plastic |
| Number of Parts | 202 |
10. Warranty and Support
For warranty information, technical support, or assistance with missing/damaged parts, please contact AESGOGO customer service. Refer to the product packaging or the official AESGOGO website for contact details. Please have your model number (214A) and purchase information ready when contacting support.