1. Introduction
This manual provides essential information for the safe and efficient operation, maintenance, and troubleshooting of your 10L Tabletop Electric Mini Oven. Please read these instructions thoroughly before using the appliance and retain them for future reference.
2. Important Safety Instructions
When using electrical appliances, basic safety precautions should always be followed to reduce the risk of fire, electric shock, and injury to persons, including the following:
- Read all instructions before using the oven.
- Do not touch hot surfaces. Use handles or knobs.
- To protect against electrical shock, do not immerse cord, plugs, or appliance in water or other liquid.
- Close supervision is necessary when any appliance is used by or near children.
- Unplug from outlet when not in use and before cleaning. Allow to cool before putting on or taking off parts.
- Do not operate any appliance with a damaged cord or plug, or after the appliance malfunctions or has been damaged in any manner.
- The use of accessory attachments not recommended by the appliance manufacturer may cause hazards.
- Do not use outdoors.
- Do not let cord hang over edge of table or counter, or touch hot surfaces.
- Do not place on or near a hot gas or electric burner, or in a heated oven.
- Extreme caution must be used when moving an appliance containing hot oil or other hot liquids.
- Do not use appliance for other than intended use.
- Oversize foods or metal utensils must not be inserted in a toaster oven as they may create a fire or risk of electric shock.
- A fire may occur if the oven is covered or touching flammable material, including curtains, draperies, walls, and the like, when in operation.
- Do not place any of the following materials in the oven: paper, cardboard, plastic, and the like.
- Do not store any materials, other than manufacturer's recommended accessories, in this oven when not in use.
- Do not cover crumb tray or any part of the oven with metal foil. This will cause overheating of the oven.
3. Product Components
Familiarize yourself with the parts of your 10L Tabletop Electric Mini Oven:
- Oven Cavity: Main baking area.
- Glass Door: Allows viewing of food during cooking.
- Temperature Control Knob: Adjusts oven temperature (0-230 ℃).
- Timer Knob: Sets cooking time (up to 30 minutes).
- Power Indicator Light: Illuminates when the oven is operating.
- Heating Elements: Quartz tubes for efficient heating.
- Baking Rack/Tray: For placing food items.
- Top Cooking Surface: For frying or roasting on top (specific models).

Figure 3.1: Oven dimensions and control panel layout. The oven measures approximately 28.9cm (11.38in) wide, 26.6cm (10.47in) high, and the top cooking surface is 23.2cm (9.13in) wide by 15.3cm (6.02in) deep.

Figure 3.2: Front view of the oven, highlighting the temperature and timer control knobs on the lower right, and the power indicator light.
4. Setup
- Unpacking: Carefully remove the oven and all accessories from the packaging. Remove any protective films or packing materials.
- Placement: Place the oven on a stable, heat-resistant, and level surface. Ensure there is adequate clearance (at least 10-15 cm) on all sides and above the oven for proper ventilation. Do not place it near flammable materials.
- Initial Cleaning: Before first use, wipe the interior and exterior of the oven with a damp cloth. Wash the baking rack and tray with warm, soapy water, rinse, and dry thoroughly.
- First Use Burn-off: Plug the oven into a grounded electrical outlet. Turn the temperature knob to maximum (230 ℃) and the timer knob to 15 minutes. Allow the oven to operate empty for 15 minutes to burn off any manufacturing residues. A slight odor or smoke is normal during this process. Ensure the area is well-ventilated.
5. Operating Instructions
Your 10L Mini Oven is designed for versatile cooking, including baking, roasting, and a top-surface cooking function.
5.1. Baking and Roasting
- Prepare Food: Place food items on the baking rack or tray.
- Insert Food: Carefully slide the rack/tray into the oven cavity.
- Set Temperature: Turn the temperature control knob to the desired temperature (0-230 ℃).
- Set Timer: Turn the timer knob to the desired cooking time (up to 30 minutes). The power indicator light will illuminate, and the oven will begin heating.
- Monitor Cooking: Observe food through the glass door. The oven uses double light quartz heating tubes for rapid and stable heating, reducing preheating time.
- Completion: The oven will automatically turn off when the timer reaches zero, and a bell will sound. Carefully remove cooked food using oven mitts.

Figure 5.1: Examples of baked items such as egg tarts, chicken wings, and toast, demonstrating the oven's baking capabilities.
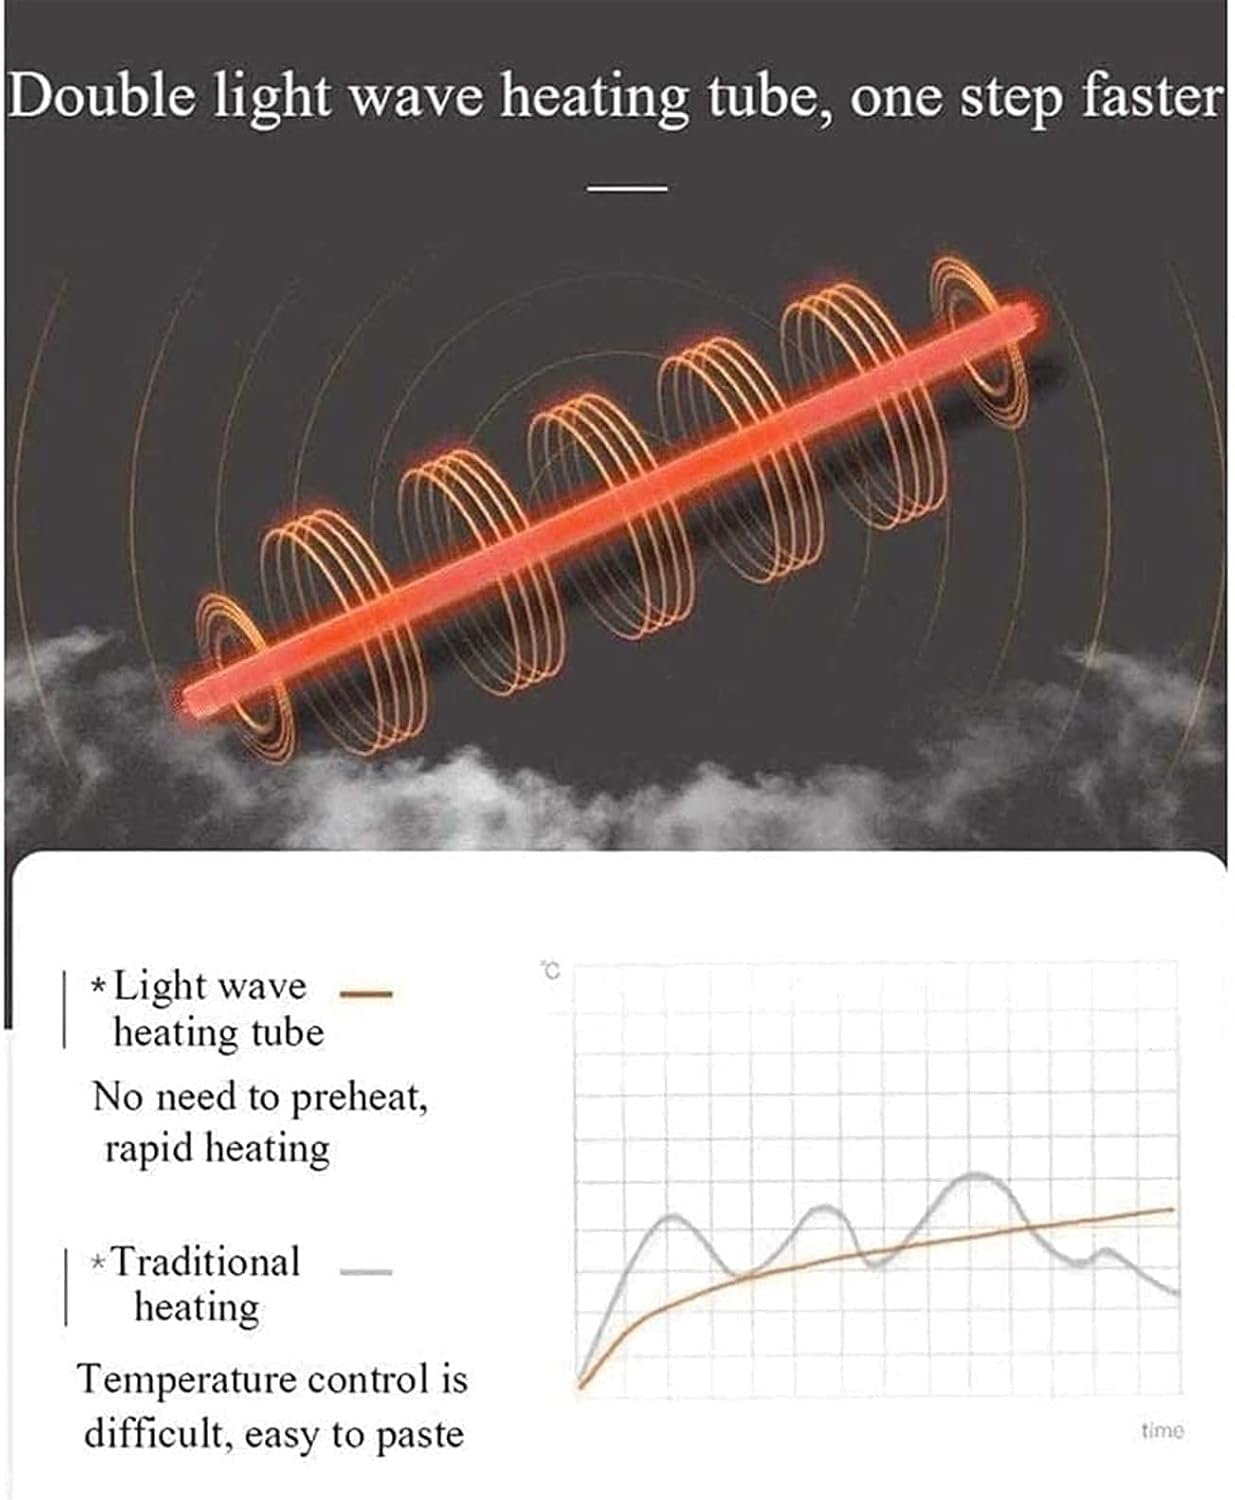
Figure 5.2: Illustration of the double light quartz heating tube, which provides rapid heating without the need for preheating, ensuring accurate and stable temperatures for better baking results compared to traditional heating methods.
5.2. Top Surface Cooking (if applicable)
Some models feature a top cooking surface for additional versatility.
- Place Cookware: Place a suitable pan or directly place food (e.g., shrimp, eggs) on the designated top cooking area.
- Activate: The top cooking surface typically activates when the oven is turned on for baking/roasting. Refer to specific model instructions if a separate control is present.
- Cook: Monitor food and cook as desired.
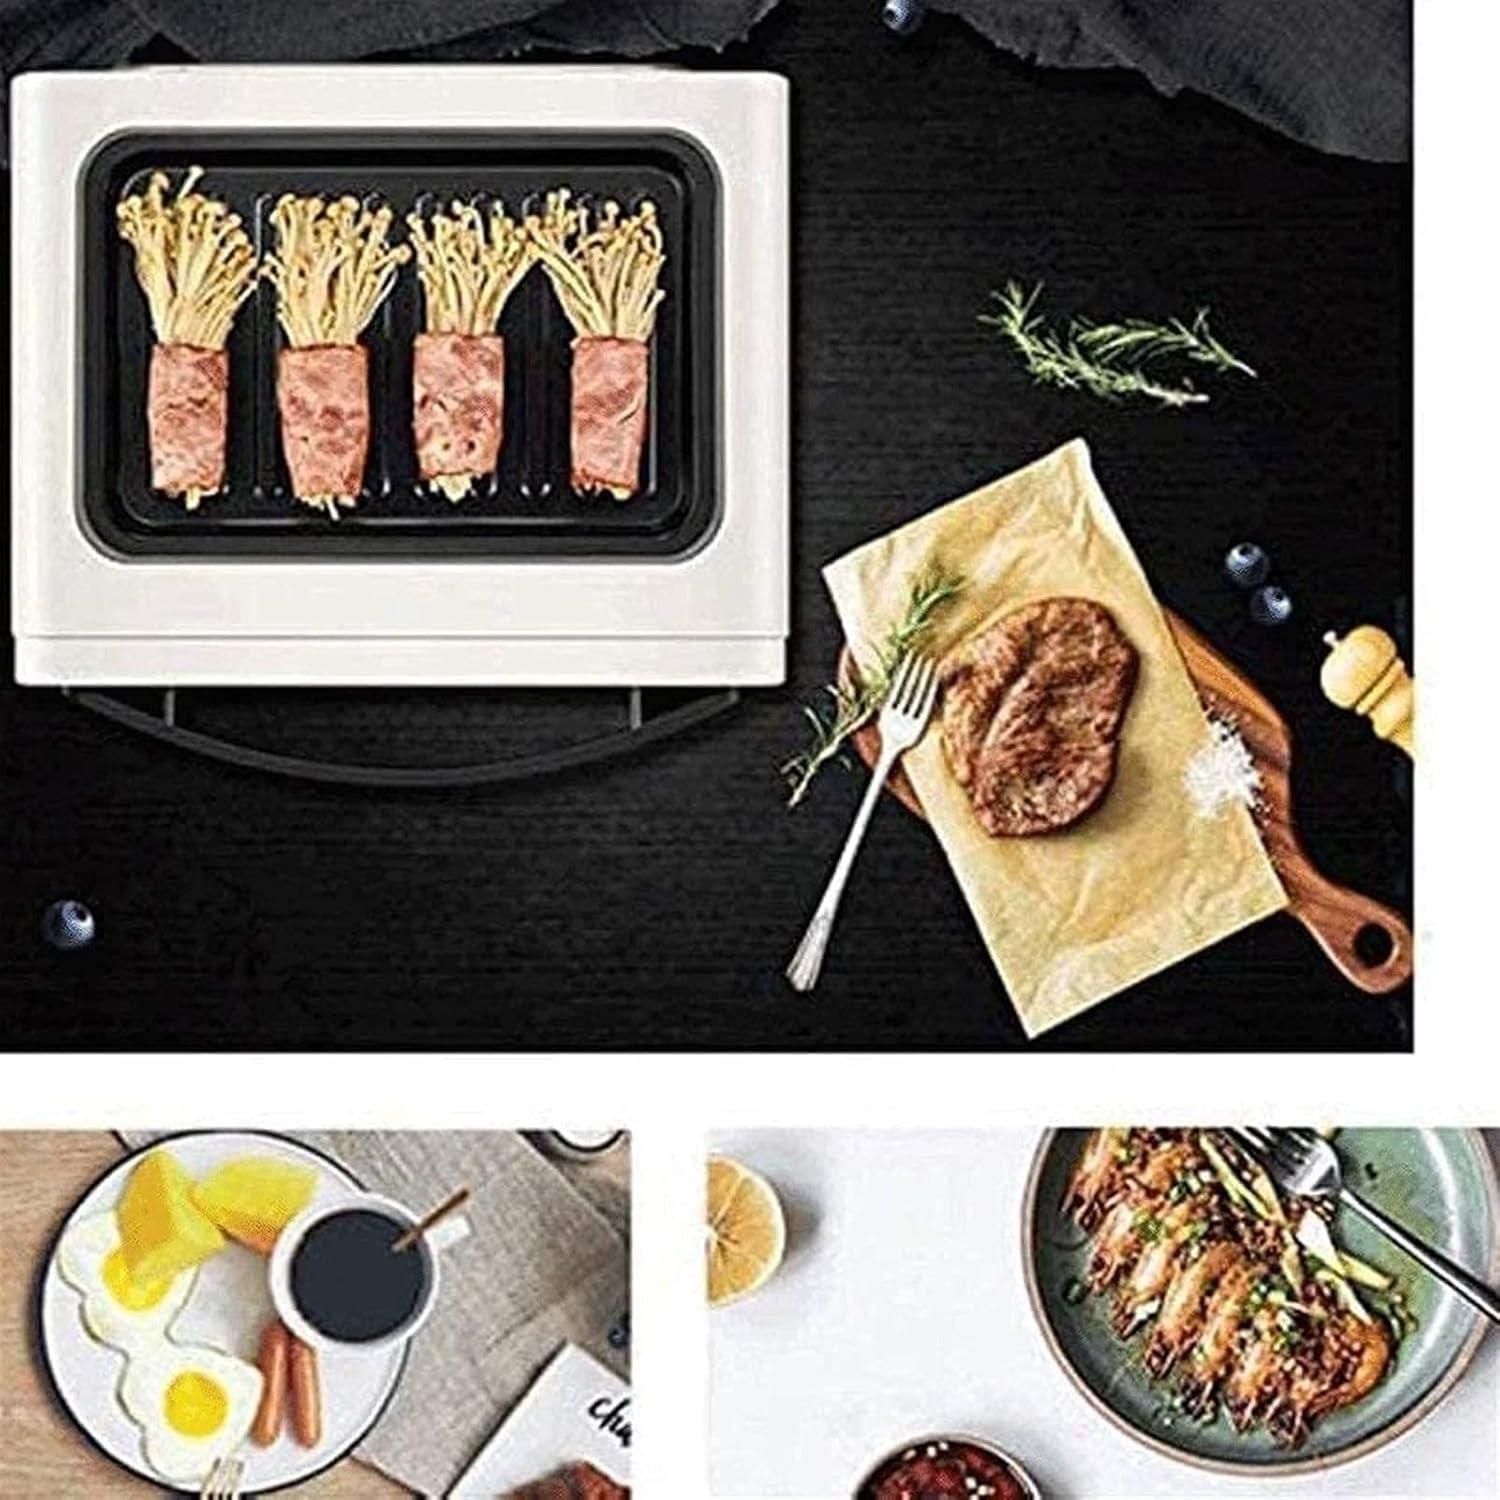
Figure 5.3: The top surface of the oven being used for cooking, demonstrating its dual functionality for preparing items like fried steak or other small dishes.
6. Maintenance and Cleaning
Regular cleaning ensures optimal performance and extends the life of your oven.
- Always Unplug: Before cleaning, always unplug the oven from the power outlet and allow it to cool completely.
- Exterior: Wipe the exterior with a damp cloth and mild detergent. Do not use abrasive cleaners or scouring pads.
- Interior: Wipe the interior walls with a damp cloth. For stubborn stains, a non-abrasive cleaner designed for ovens can be used sparingly. Avoid spraying cleaners directly onto heating elements.
- Baking Rack/Tray: Wash with warm, soapy water. For baked-on food, soak in hot water before cleaning.
- Crumb Tray: Regularly remove and clean the crumb tray to prevent grease buildup and potential fire hazards.
- Do Not Immerse: Never immerse the oven body, cord, or plug in water or any other liquid.
7. Troubleshooting
If you encounter issues with your oven, refer to the following common problems and solutions:
| Problem | Possible Cause | Solution |
|---|---|---|
| Oven does not turn on. | Not plugged in; power outage; timer not set. | Ensure plug is securely in outlet; check household circuit breaker; turn timer knob to desired cooking time. |
| Food not cooking evenly. | Incorrect temperature setting; uneven food placement. | Adjust temperature; ensure food is spread evenly on the tray. |
| Excessive smoke during operation. | Food spills; crumb tray needs cleaning; initial burn-off. | Clean oven interior and crumb tray; ensure proper ventilation during first use. |
| Timer not working. | Timer knob not fully wound. | Turn the timer knob past the desired time and then back to set it correctly. |
If the problem persists after attempting these solutions, please contact customer support.
8. Specifications
- Model: 10L Mini Oven
- Capacity: 10 Liters
- Liner Material: Aluminum-plated liner
- Heating Method: Quartz tube
- Temperature Range: 0-230 ℃
- Timer: Up to 30 minutes
- Rated Voltage: 110V-240V/50Hz
- Rated Power: 900W
- Product Net Weight: 3.14 kg
- Product Color: Milky white
- Product Size (L x W x H): 28.9 x 26.6 x 23.7 cm (11.38 x 10.47 x 9.33 inches)
- ASIN: B0DFHBXK9N
9. Warranty and Support
This product comes with a standard manufacturer's warranty. For specific warranty details, please refer to the documentation provided at the time of purchase or contact the seller directly.
For technical support, troubleshooting assistance, or to inquire about replacement parts, please contact the retailer or manufacturer's customer service department. Keep your purchase receipt and product model information handy when contacting support.


