1. Introduction
The Yosoo ATU-100 Pro+ is an automatic antenna tuner designed for radio stations, offering efficient and hassle-free tuning. This device features a robust aluminum alloy casing, high-performance internal components, and a clear OLED display for monitoring. It is equipped with a Type-C charging interface for convenience.
Key Features:
- Sturdy Aluminum Casing: Constructed with durable aluminum alloy for enhanced stability and longevity.
- High-performance Components: Utilizes top-quality capacitors, imported chips, and ultrahigh frequency connections for reliable operation.
- Easy Monitoring: Features a 0.96-inch OLED display screen for clear and effortless adjustment and monitoring of settings.
- Convenient Charging: Integrated Type-C charging interface for efficient and simple power replenishment.
- Premium Automatic Tuning: Provides automatic tuning capabilities without the need for control lines, suitable for various broadcasting stations.
2. Setup
Follow these steps to set up your ATU-100 Pro+ antenna tuner:
- Unpack the Device: Carefully remove the ATU-100 Pro+ tuner and any accessories from its packaging.
- Connect Antenna: Connect your antenna to the "ANT" connector on the tuner. Ensure a secure connection.
- Connect Radio/Transceiver: Connect your radio or transceiver to the "RFIN" connector on the tuner. Ensure a secure connection.
- Power On: Locate the power switch on the tuner and switch it to the "ON" position. The OLED display should illuminate.
- Initial Charge (if needed): If the device does not power on, connect a Type-C USB cable to the charging port and a suitable USB power source to charge the internal battery. A red "charge" indicator light will show charging status.
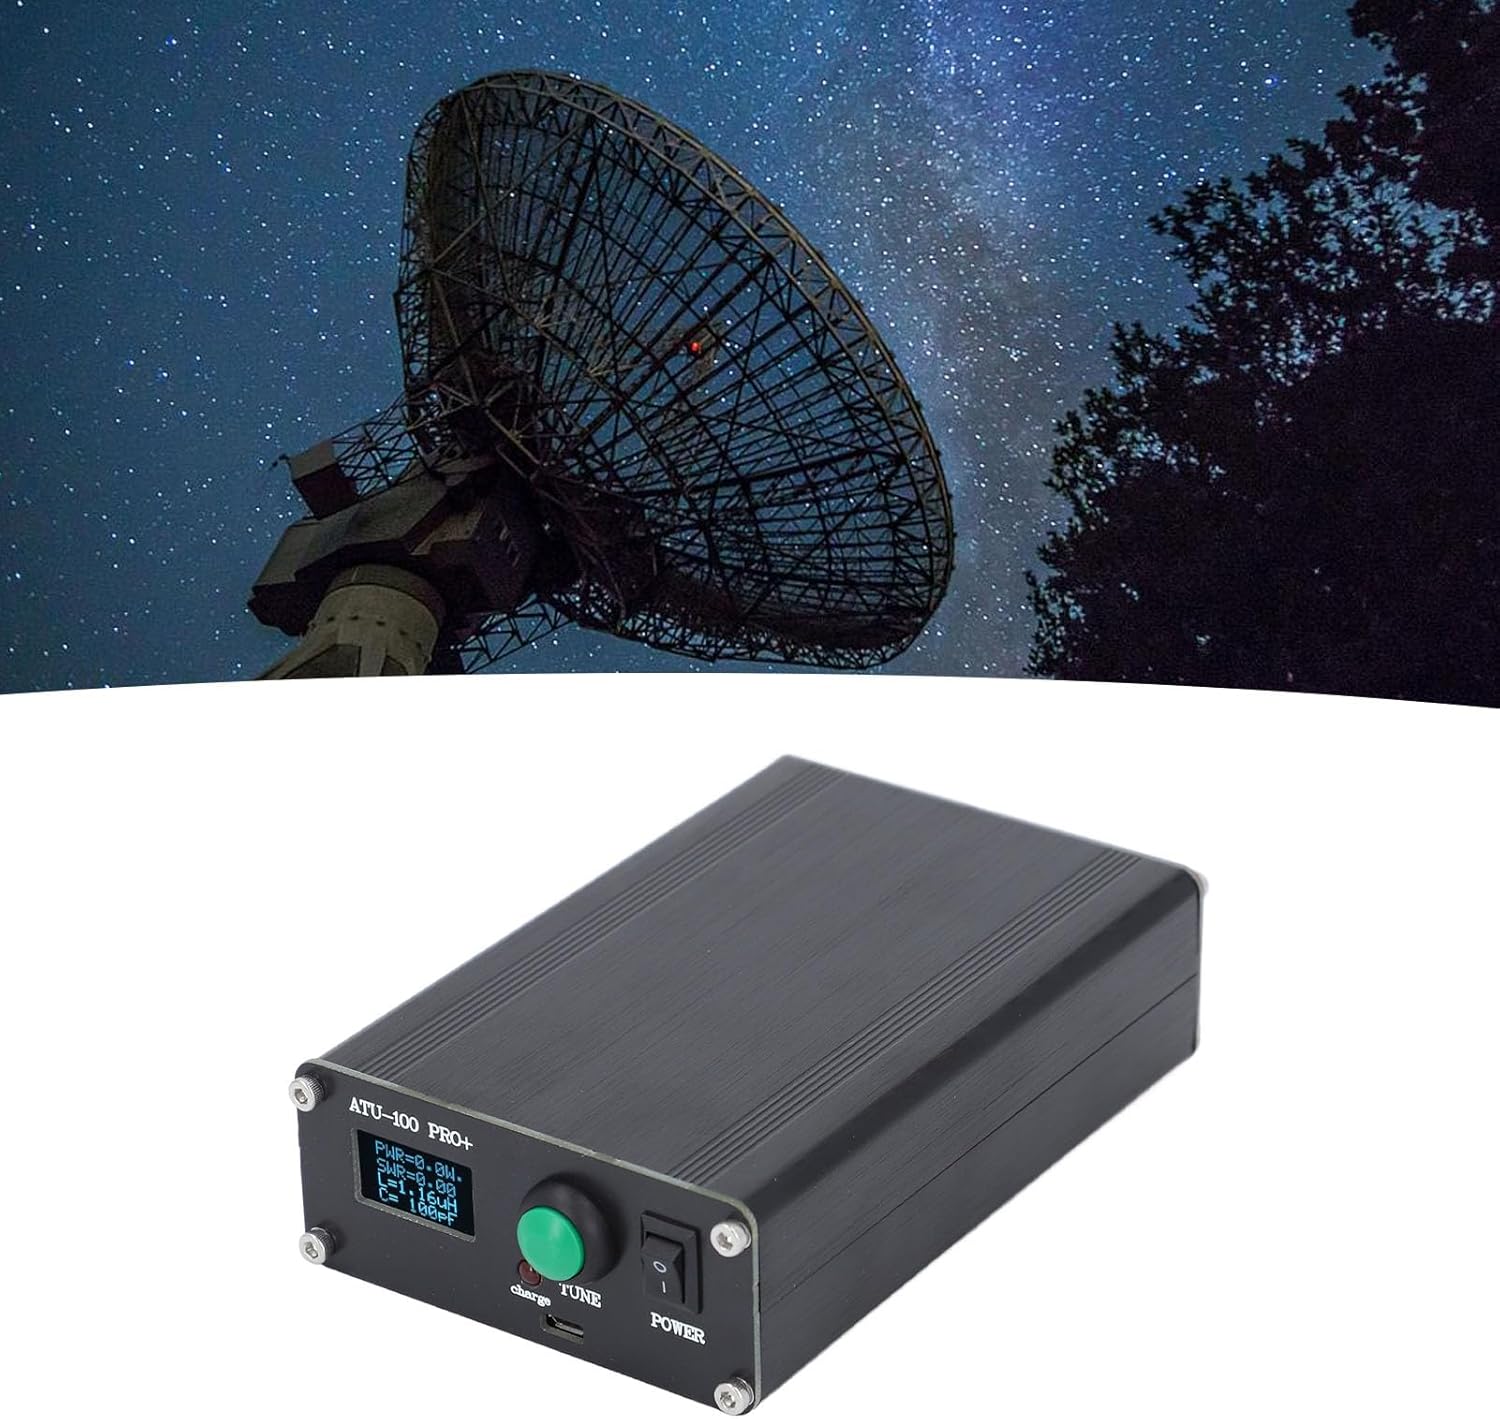
Image: Rear view of the ATU-100 Pro+ showing the ANT (Antenna) and RFIN (Radio Frequency Input) connectors.

Image: Detailed view of the tuner's front panel, highlighting the OLED display, TUNE button, and charging port.
3. Operating Instructions
The ATU-100 Pro+ features an intuitive interface for automatic antenna tuning.
3.1. Display and Controls
The 0.96-inch OLED display provides real-time information on power (PWR), Standing Wave Ratio (SWR), inductance (L), and capacitance (C). The primary control is the TUNE button.

Image: Front view of the ATU-100 Pro+ with its OLED display active, showing tuning parameters.
3.2. Automatic Tuning
To initiate automatic tuning:
- Ensure your radio is transmitting a low-power signal (e.g., 5-10W) on the desired frequency.
- Press the TUNE button. The tuner will automatically adjust its internal components (inductance and capacitance) to achieve the lowest possible SWR.
- Monitor the SWR reading on the OLED display. The tuning process is complete when the SWR stabilizes at a low value.
The tuner is designed for hassle-free operation, automatically finding the optimal settings for your antenna and frequency.
3.3. Configuration Interface
The ATU-100 Pro+ features a configuration interface for advanced settings. To access and navigate this interface:
- Access Method: The specific method to enter the configuration menu is typically by a long press or a combination of presses on the TUNE button while powering on, or a dedicated menu button if present. Refer to the device's on-screen prompts.
- Mode Selection: Short press the TUNE button to modify the current value within a setting.
- Switch Settings: Long press the TUNE button to switch between different configuration settings.
- Auto Mode (ON/OFF): This setting allows you to enable or disable the automatic tuning mode. Adjust this as needed for your operational preferences.
The tuner comes with firmware version 3.1, which includes an optimized power measurement calibration algorithm for improved accuracy.
3.4. Video Demonstration
Video: A demonstration of the ATU-100 Pro+ automatic antenna tuner in operation, showing the tuning process and display readings. This video illustrates how the device adjusts to achieve optimal SWR.
4. Maintenance
Proper maintenance ensures the longevity and optimal performance of your ATU-100 Pro+.
- Cleaning: Use a soft, dry cloth to clean the exterior of the tuner. Avoid using abrasive cleaners or solvents, which can damage the aluminum casing and display.
- Storage: Store the tuner in a cool, dry place away from direct sunlight and extreme temperatures when not in use.
- Battery Care: For optimal battery life, avoid fully discharging the device frequently. Charge the battery regularly, especially if storing for extended periods.
- Connection Checks: Periodically inspect all cable connections (antenna, radio, charging) for wear or damage. Ensure they are securely fastened.
5. Troubleshooting
If you encounter issues with your ATU-100 Pro+, refer to the following common problems and solutions:
| Problem | Possible Cause | Solution |
|---|---|---|
| Device does not power on. | Low or depleted battery. | Connect the tuner to a power source using the Type-C USB cable and allow it to charge. |
| High SWR after tuning. | Antenna mismatch, faulty cable, or out of tuner's range. |
|
| Tuner does not respond to TUNE button. | Device frozen or temporary software glitch. | Power off the device, wait a few seconds, then power it back on. |
| Display is blank or unreadable. | Power issue or display malfunction. |
|
6. Specifications
Detailed technical specifications for the Yosoo ATU-100 Pro+ Automatic Antenna Tuner:
| Feature | Value |
|---|---|
| Item Model Number | ATU-100 Pro+ |
| Material | Aluminum Alloy |
| Display Screen | 0.96 Inch Organic Light Emitting Diode (OLED) |
| Operating Frequency | 1.8-55 MHz |
| USB Charging Current | 1A |
| Battery Model | 3.6V Lithium Battery 1350MAH (Built-in) |
| Maximum Current | 400mA |
| Maximum Power | 100W |
| Maximum Measurable Power | 150W |
| Minimum Power for Setting Start | 5W |
| Minimum Measurable Power | 0.1W |
| Power Measurement Step Below 10W | 0.1W |
| Power Measurement Step 10W | 1W |
| Power Measurement Accuracy | 10% |
| Specified Maximum Inductance | 8.53uH |
| Minimum Inductor Installation Step | 0.05µH |
| Maximum Installation Capacity | 1869pF capacitor |
| Minimum Capacitor Installation Step | 10pF |
| Product Dimensions | 7.09 x 4.33 x 2.36 inches |
| Item Weight | 1.1 pounds |
7. Warranty and Support
Yosoo products are manufactured to high-quality standards. For specific warranty information, please refer to the documentation included with your purchase or contact Yosoo customer support directly.
If you require technical assistance or have questions regarding your ATU-100 Pro+, please visit the official Yosoo website or contact their customer service department. Keep your purchase receipt handy for any warranty claims.