1. Introduction
This manual provides detailed instructions for the iZEEKER Solar Trail Camera iG220 and the iZEEKER 4G LTE Cellular Trail Camera iG500. This bundle offers advanced features for capturing wildlife and monitoring remote areas, combining solar power efficiency with cellular connectivity for comprehensive surveillance.

Figure 1: The iZEEKER iG220 Solar Trail Camera (left) and iG500 4G LTE Cellular Trail Camera (right) bundle, including a SIM card and 32GB SD card.
2. Package Contents
iG220 Package:
- 1 x iG220 Trail Camera
- 1 x USB Cable
- 1 x User Manual
- 1 x Strap
iG500 Package:
- 1 x iG500 Trail Camera
- 1 x SIM Card
- 1 x Micro SD Card
- 1 x Solar Panel
- 1 x User Manual
- 1 x USB Cable
- 1 x Outdoor Mount
- 1 x Positioning Sticker
- 1 x Installation Bracket
3. Specifications
iG220 Specifications:
| Feature | Detail |
|---|---|
| Trigger Speed | 0.1s~0.3s |
| Photo Resolution | 36MP |
| Video Resolution | 1520P, 1080P, 720P, 480P |
| Night Vision Distance | 65ft (20m) |
| IR Flash | 36 no glow LEDs (940nm) |
| Detection Angle | 90° |
| Lens Angle | 55° |
| Screen | 2.0'' LCD Screen |
| Waterproof Rating | IP66 |
iG500 Specifications:
| Feature | Detail |
|---|---|
| Trigger Speed | 0.1~0.3s |
| Video Resolution | 2K (15FPS) |
| IR Flash | 940nm Low Glow Infrared LEDs |
| Detection Angle | 336° pan, 90° tilt |
| Lens Angle | 360° |
| Batteries | 2 Lithium Ion batteries (included) |
| Waterproof Rating | IP65 |

Figure 2: The iG220 camera offers 36MP photo resolution and 1520P video resolution, providing clear images in both day and night conditions.

Figure 3: The iG500 camera provides a 360-degree panoramic view with 336-degree pan and 90-degree tilt functionality, allowing for extensive coverage.
4. Setup Guide
4.1 Battery Installation
Both cameras are designed for efficient power usage. The iG220 uses standard AA batteries (not included), while the iG500 includes two Lithium Ion batteries. Ensure batteries are inserted with correct polarity.

Figure 4: Both iG220 and iG500 models can utilize solar power for extended battery life, reducing the need for frequent battery replacement.
4.2 SD Card Insertion
Insert the provided Micro SD card (for iG500) or your own SD card (for iG220) into the designated slot. Ensure the card is formatted before first use for optimal performance. The iG220 supports continuous loop recording, overwriting old files when the card is full.
4.3 SIM Card Installation (iG500 Only)
For the iG500 cellular trail camera, insert the provided SIM card into its slot. The camera is designed to auto-connect to cellular networks with strong signals (Verizon, T-Mobile, AT&T compatible).

Figure 5: The iG500 camera features 4G Auto Connect Technology, allowing it to automatically connect to cellular networks without requiring Wi-Fi.
4.4 Mounting the Camera
Use the provided strap (iG220) or outdoor mount and installation bracket (iG500) to secure the camera to a tree or pole. Position the camera to capture the desired area, considering the detection and lens angles.

Figure 6: The iG500 can be paired with its solar panel for continuous charging, extending battery life significantly.
5. Operating Instructions
5.1 Powering On and Basic Modes
Turn on the camera using the power switch. Navigate through the menu on the LCD screen (iG220) or via the mobile app (iG500) to select desired modes: Photo, Video, or Photo+Video. Adjust settings such as resolution, trigger speed, and PIR sensitivity.

Figure 7: Both cameras feature a rapid 0.1-0.3 second trigger speed, ensuring minimal delay in capturing fast-moving subjects.
5.2 Night Vision Operation
Both cameras are equipped with 940nm no-glow infrared LEDs for discreet night vision. The iG500 also features 4 white LEDs for color images at night. Ensure the camera is positioned to avoid obstructions that might reflect IR light.

Figure 8: The 940nm no-glow infrared LEDs ensure the camera remains stealthy during night operation, preventing disturbance to wildlife.
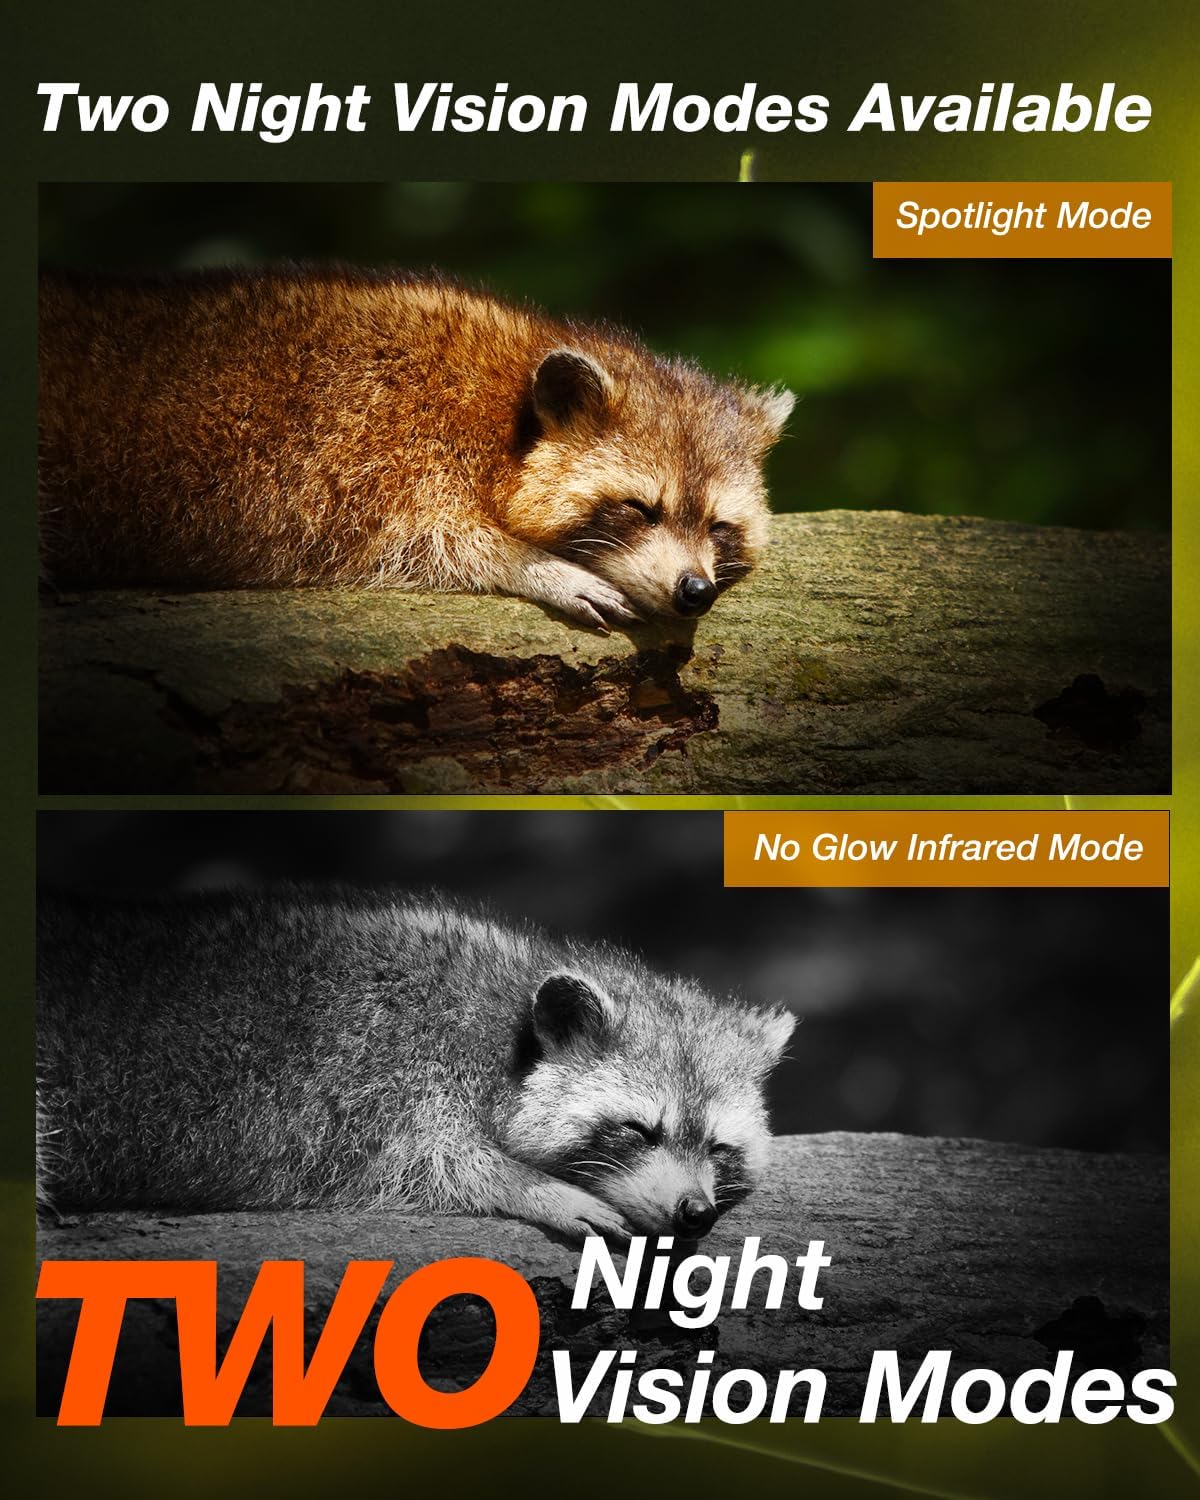
Figure 9: The iG500 offers two night vision modes: a spotlight mode for color images and a no-glow infrared mode for discreet black and white capture.
5.3 Advanced Features (iG220)
- Time Interval: Set the delay between consecutive triggers.
- Timer: Schedule the camera to operate only during specific hours.
- Time Lapse: Capture images at set intervals over a long period.
- Loop Recording: Automatically overwrite the oldest files when the SD card is full.
- PIR Sensitivity: Adjust the motion sensor's sensitivity to prevent false triggers.
- Password Protection: Secure your camera settings with a password.
5.4 Advanced Features (iG500)
- Remote Access & Control: Use your smartphone to access and control the camera remotely.
- Two-way Intercom: Communicate through the camera (if supported by app/firmware).
- Multi-user Sharing: Share camera access with multiple users.
- Alarm Timer: Set specific times for alerts.
- Storage Method: Choose between SD card and cloud storage options.
- Pan & Tilt: Remotely adjust the camera's viewing angle (336° pan, 90° tilt).
6. Maintenance
- Cleaning: Regularly clean the camera lens and PIR sensor window with a soft, dry cloth. Avoid abrasive materials.
- Battery Check: Periodically check battery levels, especially if not using solar charging. Replace or recharge as needed.
- SD Card Management: Format the SD card regularly to maintain optimal performance and prevent data corruption. Back up important files before formatting.
- Firmware Updates: Check the iZEEKER website for any available firmware updates to ensure your camera has the latest features and bug fixes.
- Storage: When not in use, store the camera in a cool, dry place, away from direct sunlight and extreme temperatures. Remove batteries if storing for extended periods.
7. Troubleshooting
Camera Not Turning On:
- Ensure batteries are inserted correctly with proper polarity.
- Check battery charge level. Replace or recharge batteries.
- Verify the power switch is in the "ON" position.
Poor Image/Video Quality:
- Clean the camera lens.
- Ensure the camera is stable and not subject to vibrations.
- Check resolution settings in the camera menu.
- For night vision, ensure no reflective surfaces are too close to the camera.
No Motion Detection:
- Adjust PIR sensitivity settings (increase if needed).
- Ensure the PIR sensor window is clean and unobstructed.
- Verify the camera is positioned within the detection angle.
- Check for environmental factors like extreme heat or cold that might affect sensor performance.
iG500 Cellular Connectivity Issues:
- Ensure the SIM card is correctly inserted and activated with a data plan.
- Check cellular signal strength in the camera's location. Relocate if signal is weak.
- Restart the camera.
- Verify APN settings if manual configuration is required (refer to your cellular provider's instructions).
8. Warranty & Support
iZEEKER products come with a standard manufacturer's warranty. For specific warranty details, technical support, or service inquiries, please visit the official iZEEKER website or contact their customer support directly. Keep your purchase receipt as proof of purchase for warranty claims.
You can visit the iZEEKER Store on Amazon for more information: iZEEKER Amazon Store


