1. Introduction
Thank you for choosing the HERISKEER 42V 2A 3-Pin XLR Charger. This manual provides essential information for the safe and efficient operation, maintenance, and troubleshooting of your charger. This charger is designed for 36V Lithium-ion battery packs with a specific 3-Pin XLR connector.
Important Note: Please verify the connector type (3-Pin XLR) and battery voltage (36V Lithium) of your device to ensure compatibility before use. This charger is not compatible with 48V, 24V, or Lead-Acid batteries.
2. Compatibility
This charger is specifically designed for 36V Lithium-ion battery packs that utilize a 3-Pin XLR connector. Verified compatible models include:
- Heybike Cityscape (Note: Not for other Heybike series)
- Ecotric Starfish Dolphin Peacedove 20" (Note: Not for other Ecotric series)
- Swagtron EB6 Fat-tire
- Phantom 400
- Other 36V devices with a specific 3-Pin XLR connector
Always confirm your device's battery voltage and connector type before connecting the charger.

Figure 2.1: Examples of compatible electric bikes and scooters. This charger is designed for 36V lithium batteries with a 3-pin XLR connector.
3. Safety Instructions
Please read and understand all safety instructions before using the charger. Failure to follow these instructions may result in electric shock, fire, or serious injury.
- Indoor Use Only: This charger is designed for indoor use in dry conditions. Do not expose to rain, moisture, or extreme temperatures.
- Correct Battery Type: Only use this charger with 36V Lithium-ion battery packs that have a 3-Pin XLR connector. Attempting to charge other battery types (e.g., 48V, 24V, Lead-Acid) may damage the charger, battery, or both, and poses a fire risk.
- Ventilation: Ensure adequate ventilation around the charger during operation. Do not cover the charger.
- Avoid Drops: Electronic components are delicate. Avoid dropping the charger, especially on hard surfaces like concrete or asphalt.
- No User Serviceable Parts: Do not open the charger casing. There are no user-serviceable parts inside. Refer all servicing to qualified personnel.
- Disconnect After Use: Always disconnect the charger from the power outlet and the battery once charging is complete.
- Inspect Before Use: Before each use, inspect the charger, cables, and connectors for any signs of damage. Do not use if damaged.
- Children and Pets: Keep the charger out of reach of children and pets.

Figure 3.1: Overview of the HERISKEER 42V 2A 3-Pin XLR Charger, showing the main unit, AC power cord, and 3-pin XLR output connector.
4. Setup
Before initial use, ensure the charging environment is safe and dry.
- Unpack: Carefully remove the charger from its packaging.
- Inspect: Check the charger unit, AC power cord, and 3-Pin XLR connector for any visible damage. Do not proceed if damage is observed.
- Placement: Place the charger on a stable, flat, and dry surface away from direct sunlight, heat sources, and flammable materials. Ensure good air circulation around the unit.
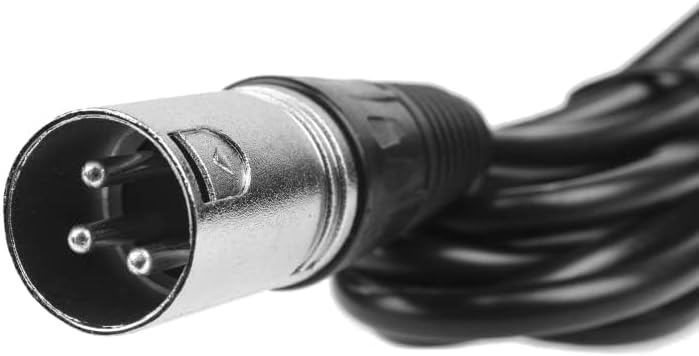
Figure 4.1: Detailed view of the 3-Pin XLR connector, which must match your device's charging port.
5. Operating Instructions
Follow these steps to charge your 36V Lithium-ion battery:
- Connect to Battery: First, connect the 3-Pin XLR connector of the charger securely into the charging port of your 36V Lithium-ion battery pack.
- Connect to Power: Next, plug the AC power cord into a standard 100V-240V AC wall outlet.
- Monitor Charging: Observe the LED indicator on the charger unit:
- RED LED: Indicates that the battery is currently charging.
- GREEN LED: Indicates that the battery is fully charged or the charger is disconnected from the battery.
- Disconnect: Once the LED indicator turns green, the battery is fully charged. Disconnect the charger from the wall outlet first, then disconnect the 3-Pin XLR connector from the battery.

Figure 5.1: The LED indicator on the charger provides visual feedback on the charging status.
6. Maintenance
- Cleaning: Disconnect the charger from all power sources before cleaning. Use a soft, dry cloth to wipe the exterior of the charger. Do not use liquid cleaners or solvents.
- Storage: Store the charger in a cool, dry place when not in use. Avoid extreme temperatures and humidity. Keep cables neatly coiled to prevent damage.
- Cable Care: Do not pull on the cables to disconnect the charger. Always grasp the plug or connector directly. Avoid bending or crimping the cables sharply.
7. Troubleshooting
If you encounter issues with your charger, refer to the following common problems and solutions:
| Problem | Possible Cause | Solution |
|---|---|---|
| Charger LED does not light up. | No power from outlet; loose connection; charger malfunction. | Check wall outlet with another device. Ensure AC cord is securely plugged into both the charger and the wall. Verify the 3-Pin XLR connector is firmly seated in the battery port. |
| LED remains green when connected to battery. | Battery is already fully charged; incorrect battery voltage/type; faulty battery. | Confirm the battery requires charging. Ensure the battery is a 36V Lithium-ion type. Test with a different compatible battery if available. |
| Charger gets excessively hot. | Poor ventilation; internal fault. | Ensure the charger is in a well-ventilated area and not covered. Discontinue use immediately if overheating persists and contact support. |
| Battery does not charge. | Loose connections; incompatible battery; faulty charger or battery. | Recheck all connections. Confirm battery compatibility (36V Lithium, 3-Pin XLR). If possible, test the charger with another compatible battery or the battery with another compatible charger to isolate the issue. |
If the problem persists after attempting these solutions, please contact HERISKEER customer support.
8. Specifications
| Feature | Detail |
|---|---|
| Model | HRK-84W-10S |
| Input Voltage | 100V-240V AC, 50/60Hz |
| Output Voltage | 42V DC, 2A Max |
| Connector Type | 3-Pin XLR |
| Compatible Battery Type | 36V Lithium-ion (42V Max charge) |
| Cable Length | Approximately 9 feet |
| Product Dimensions | 4.5 x 1.8 x 0.8 inches (approx.) |
| Item Weight | 12 ounces (approx.) |
| Safety Standards | CE, FCC, UL Approved |
| Protection Features | OVP (Over Voltage Protection), OCP (Over Current Protection), Overload Protection, Short-circuit Protection |

Figure 8.1: The charger incorporates multiple intelligent protection features for safe operation.
9. Warranty and Support
HERISKEER stands behind the quality of its products. If you are not satisfied with your purchase, please contact us for assistance. We offer a money-back guarantee, and our customer support team is available to help with any questions or concerns regarding the operation or performance of your charger.
For support, please refer to the contact information provided with your purchase or visit the official HERISKEER website.