1. Introduction
The SpaceX Starlink Mini is a compact and powerful satellite dish designed to provide high-speed, low-latency internet access. Utilizing SpaceX's advanced satellite network, it offers reliable connectivity even in remote areas. This manual will guide you through the installation, configuration, and daily use of your Starlink Mini.
Key Features:
- High-speed, low-latency satellite internet connectivity.
- Dual-band WiFi 5 (802.11ac) support for robust wireless performance.
- 3x3 MU-MIMO technology for efficient multi-device communication.
- Latching Ethernet LAN port for secure wired connections.
- Compact and weatherproof design for versatile placement.
2. Package Contents
Please verify that all items are present in your Starlink Mini package:
- Starlink Mini Satellite Dish (Model: UTA-231)
- Power Supply Unit
- Ethernet Cable
- Quick Start Guide
3. Safety Information
Read all safety warnings and instructions before installing or operating your Starlink Mini. Failure to do so may result in injury, electric shock, fire, or damage to the device.
- Electrical Safety: Only use the provided power supply unit. Do not expose the device to water or excessive moisture. Ensure proper grounding.
- Installation Safety: When installing outdoors, ensure the dish is securely mounted to prevent it from falling. Avoid installing during lightning storms.
- Environmental Conditions: Operate the device within specified temperature and humidity ranges. Do not block ventilation openings.
- Children and Pets: Keep the device out of reach of children and pets to prevent accidental damage or injury.
4. Setup
4.1 Unboxing and Inspection
Carefully remove all components from the packaging. Inspect the Starlink Mini and all accessories for any signs of damage. If any component is damaged or missing, contact customer support immediately.
4.2 Placement Considerations
Optimal performance requires an unobstructed view of the sky. Avoid placing the dish near trees, buildings, or other structures that could block the satellite signal.

Image: Starlink Mini dish positioned outdoors, demonstrating ideal placement with an unobstructed view of the sky.
4.3 Physical Installation
The Starlink Mini is designed for easy setup. It features an integrated kickstand for ground or flat surface placement. For permanent installations, consider purchasing a compatible mounting accessory.
- Position the Dish: Place the Starlink Mini on a stable, flat surface with a clear view of the sky. The dish will automatically orient itself to find the optimal satellite connection.
- Connect Power: Connect the power cable from the power supply unit to the Starlink Mini. Plug the power supply unit into a standard electrical outlet.
- Optional Ethernet Connection: If a wired connection is desired, connect one end of the Ethernet cable to the latching Ethernet LAN port on the Starlink Mini and the other end to your computer or network device.
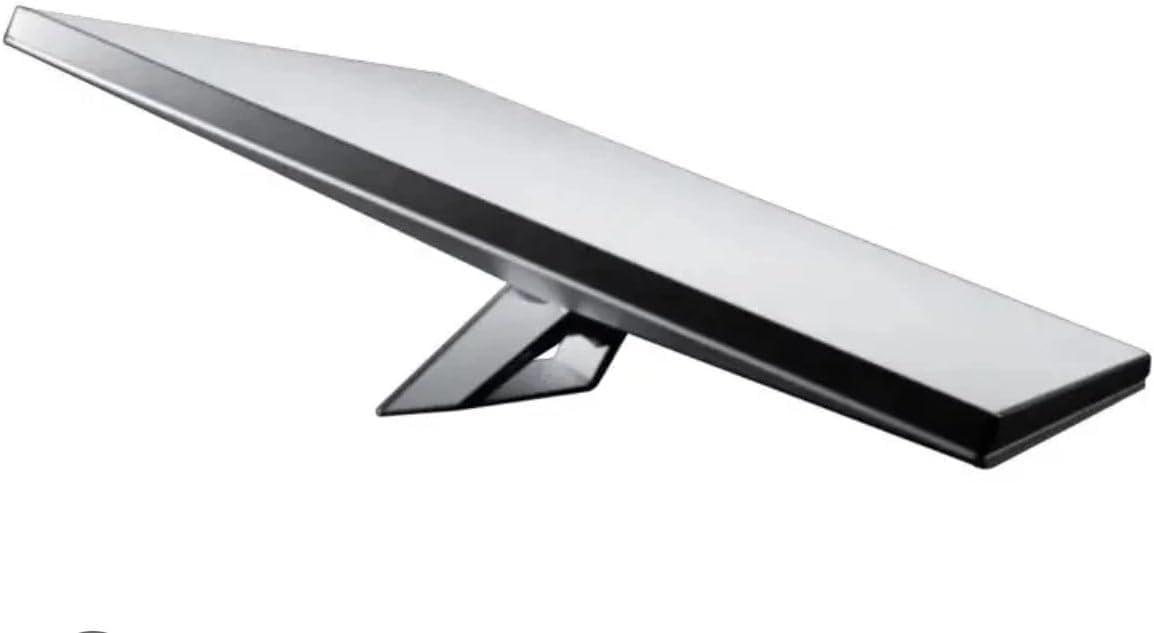
Image: Front view of the Starlink Mini Satellite Dish, showcasing its compact design.
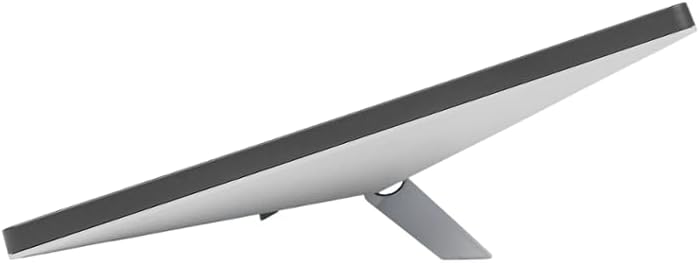
Image: Rear view of the Starlink Mini Satellite Dish, highlighting the connection ports.
4.4 Initial Power-Up and Configuration
Once powered on, the Starlink Mini will begin its startup sequence. This may take several minutes as it searches for satellites and establishes a connection.
- Wait for Connection: The indicator light on the device will change to solid blue once a stable internet connection is established.
- Connect to Wi-Fi: On your device (smartphone, laptop), search for available Wi-Fi networks. Select the Starlink network (SSID) and enter the password found on the bottom of your Starlink Mini or in the Quick Start Guide.
- Download Starlink App: For advanced settings and monitoring, download the official Starlink app from your device's app store.
5. Operating Instructions
5.1 Connecting Devices
You can connect multiple devices to your Starlink Mini via Wi-Fi or the Ethernet port.
- Wi-Fi: Use the Wi-Fi settings on your smartphone, tablet, or computer to connect to the Starlink network.
- Ethernet: For devices like gaming consoles or desktop computers, use an Ethernet cable for a stable wired connection.
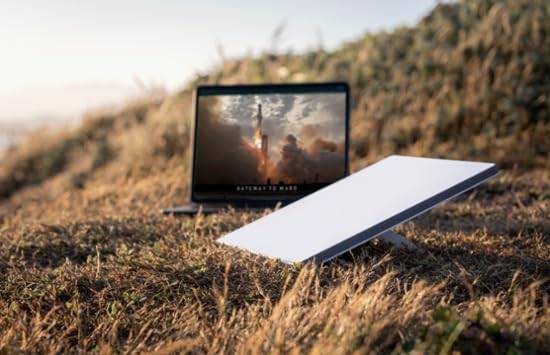
Image: Starlink Mini dish positioned next to a laptop, illustrating its use for internet connectivity.
5.2 Using the Starlink App
The Starlink app provides a user-friendly interface for managing your internet service. With the app, you can:
- Monitor internet speed and latency.
- View real-time obstruction data.
- Adjust Wi-Fi settings (SSID, password).
- Access support resources.
- Reboot the Starlink Mini.
6. Maintenance
6.1 Cleaning
Periodically inspect the dish surface for dirt, debris, or snow accumulation. Gently clean the surface with a soft, damp cloth. Do not use abrasive cleaners or solvents.
6.2 Firmware Updates
The Starlink Mini automatically receives firmware updates to improve performance and add new features. Ensure your device is powered on and connected to the internet for these updates to occur.
6.3 Environmental Considerations
While weatherproof, extreme weather conditions (e.g., heavy snow, ice, severe storms) can temporarily affect performance. Ensure the dish is not covered by snow or ice for prolonged periods.
7. Troubleshooting
If you encounter issues with your Starlink Mini, refer to the table below for common problems and solutions.
| Problem | Possible Cause | Solution |
|---|---|---|
| No Internet Connection | Power issue, obstructed view, network configuration. | Check power connections. Ensure clear view of sky. Reboot Starlink Mini via app or by unplugging for 30 seconds. Verify Wi-Fi password. |
| Slow Internet Speed | Obstructions, network congestion, firmware outdated. | Check for obstructions using the Starlink app. Reduce number of connected devices. Ensure firmware is up-to-date. |
| Wi-Fi Not Visible | Starlink Mini not powered on, Wi-Fi disabled. | Ensure Starlink Mini is powered on. Check Wi-Fi settings in the Starlink app. |
| Dish Not Orienting | Obstruction, faulty unit. | Ensure the dish is on a level surface with no obstructions. Reboot the device. If issue persists, contact support. |
8. Specifications
Detailed technical specifications for the Starlink Mini Satellite Dish:
| Feature | Specification |
|---|---|
| Model | UTA-231 |
| Dimensions (L x W x H) | 25.91 x 3.68 x 29.85 cm (10.2 x 1.45 x 11.75 inches) |
| Weight | 2.2 kg (4.85 lbs) |
| Wireless Standard | 802.11a/b/g/n/ac (WiFi 5) |
| Frequency | 5 GHz |
| MU-MIMO | 3x3 |
| Ethernet Ports | 1 (Latching LAN) |
| Data Transfer Rate | Up to 100 Megabits Per Second (typical) |
| Voltage | 12 Volts |
| Power Source | Corded Electric |
| Special Features | Weatherproof |
| Compatible Devices | Gaming Console, Personal Computer, Smartphone |
9. Warranty Information
The Starlink Mini Satellite Dish comes with a limited warranty. Please refer to the warranty card included in your product packaging or visit the official Starlink website for detailed terms and conditions. This warranty covers defects in materials and workmanship under normal use.
10. Customer Support
For technical assistance, troubleshooting, or warranty claims, please contact Starlink Customer Support through the official Starlink app or website. Have your product model number (UTA-231) and serial number ready when contacting support.
Online Support: Visit the Starlink support portal for FAQs, guides, and community forums.
Starlink App: Use the 'Support' section within the Starlink app for direct assistance.


