1. Introduction
The TALTAW Active Stylus Pen 2.0 SA203H is designed to provide a precise and responsive writing and drawing experience on compatible devices. Utilizing Microsoft Pen Protocol (MPP) 2.0 technology, it offers low latency and high accuracy for various creative and productivity tasks.
1.1 Package Contents
- 1 x TALTAW Active Stylus Pen 2.0 SA203H
- 1 x AAAA Battery (pre-installed in the stylus pen)
- 1 x Replacement Nibs Tip
1.2 Compatibility
This stylus pen is compatible with a range of ASUS devices, including but not limited to:
- ASUS ROG ZFlow 13-ACRNM RMT02 GZ301VIC-RMT02
- ASUS ROG Flow X16 (2023) GV601VI-CS94
- ASUS ROG Zephyrus Duo 16 (2023) GX650PZ-XS96
- ASUS ROG Zephyrus M16 (2023) GU604VZ-CS94
- ASUS Zenbook 14 Flip OLED
- ASUS Zenbook Pro 15 OLED
- ASUS 11.6'' BR1100F
- ASUS Zenbook Duo 14
- ASUS Zenbook Flip 13 OLED
- ASUS Zenbook 14 Flip
- ASUS Vivobook S 14 Flip
- ASUS Vivobook Flip 14
- ASUS Vivobook 13 Slate OLED (T3304)

Image 1.1: The TALTAW Active Stylus Pen 2.0 SA203H, shown with its sleek design and included replacement nibs.
2. Stylus Pen Components
Familiarize yourself with the various parts of your TALTAW Active Stylus Pen 2.0 SA203H:
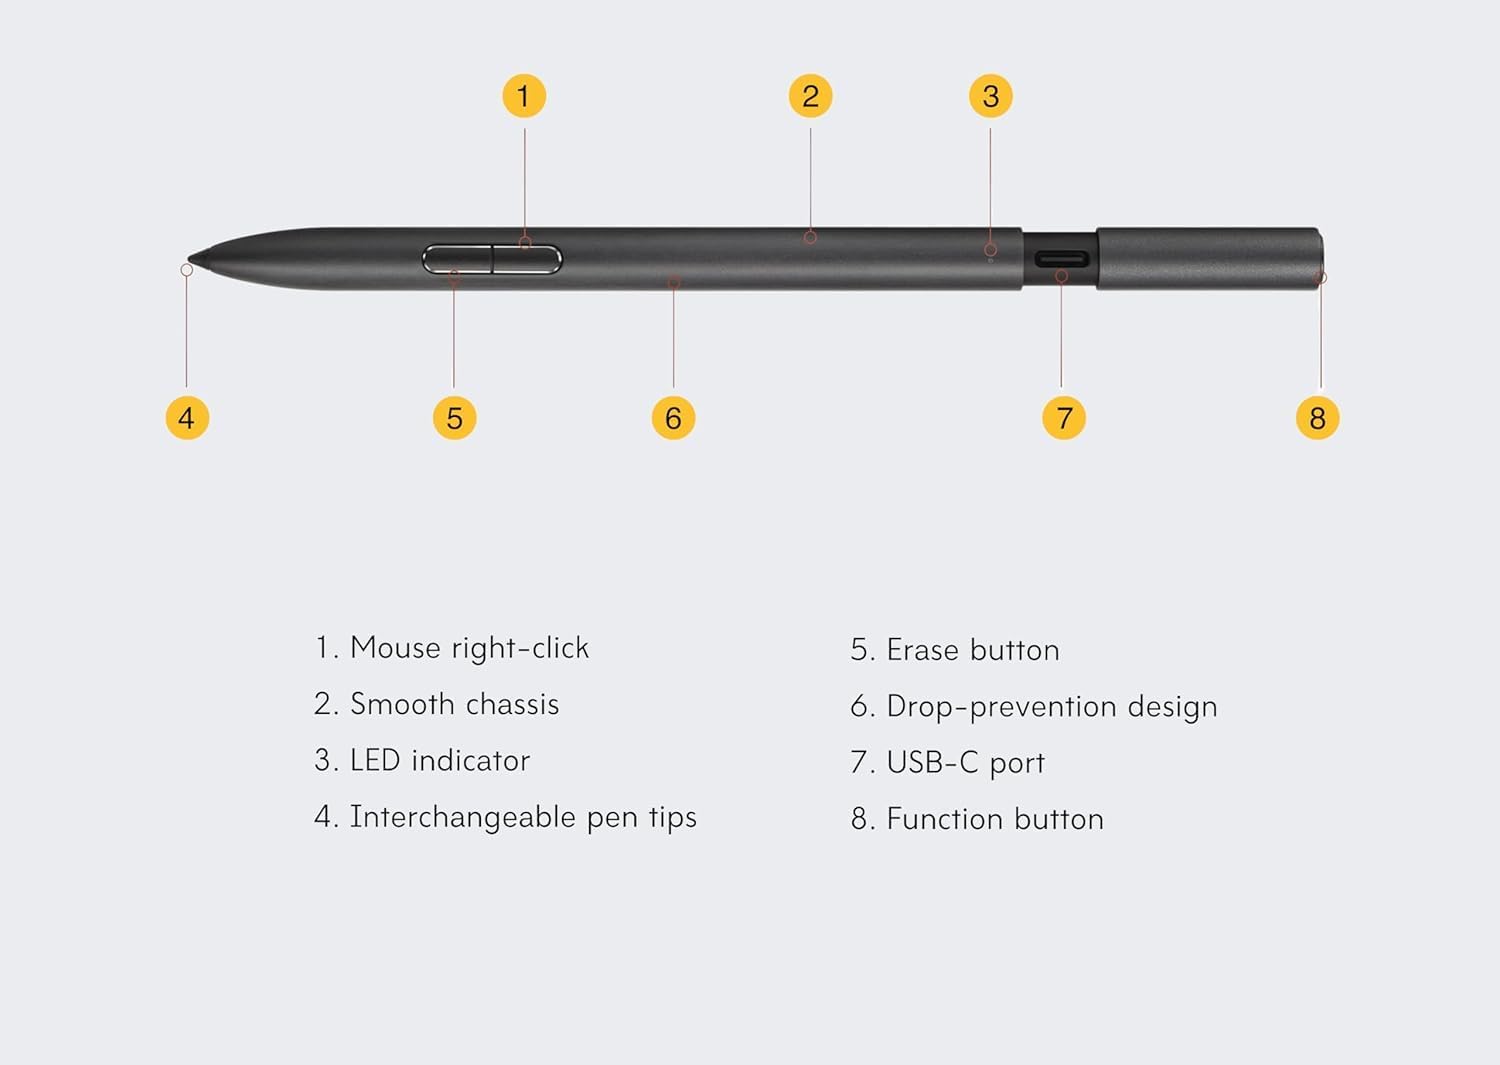
Image 2.1: Labeled diagram of the stylus pen components.
- Mouse Right-click Button: Functions as a right-click when pressed.
- Smooth Chassis: The main body of the pen, designed for comfortable grip.
- LED Indicator: Displays charging status and pairing status.
- Interchangeable Pen Tips: The writing/drawing tip, which can be replaced.
- Erase Button: Functions as an eraser when pressed.
- Drop-prevention Design: Ergonomic design feature.
- USB-C Port: Used for charging the stylus pen.
- Function Button: A multi-purpose button for various Bluetooth functions.
3. Setup and Initial Use
3.1 Battery Installation (Pre-installed)
The TALTAW Active Stylus Pen 2.0 SA203H comes with an AAAA battery pre-installed. No immediate battery installation is required for initial use. If the battery needs replacement in the future, gently twist and pull the top cap of the pen to access the battery compartment.
3.2 Charging the Stylus Pen
To charge the stylus pen, locate the USB-C port (Component 7 in Image 2.1). Gently pull the top cap of the pen to reveal the hidden USB-C charging port. Connect a USB-C cable (not included) to the port and to a compatible power source (e.g., laptop, charger, power bank). The LED indicator (Component 3) will show the charging status.
- Charging Indicator: The LED will typically illuminate during charging and change color or turn off when fully charged.
- A full charge provides over 140 hours of use.
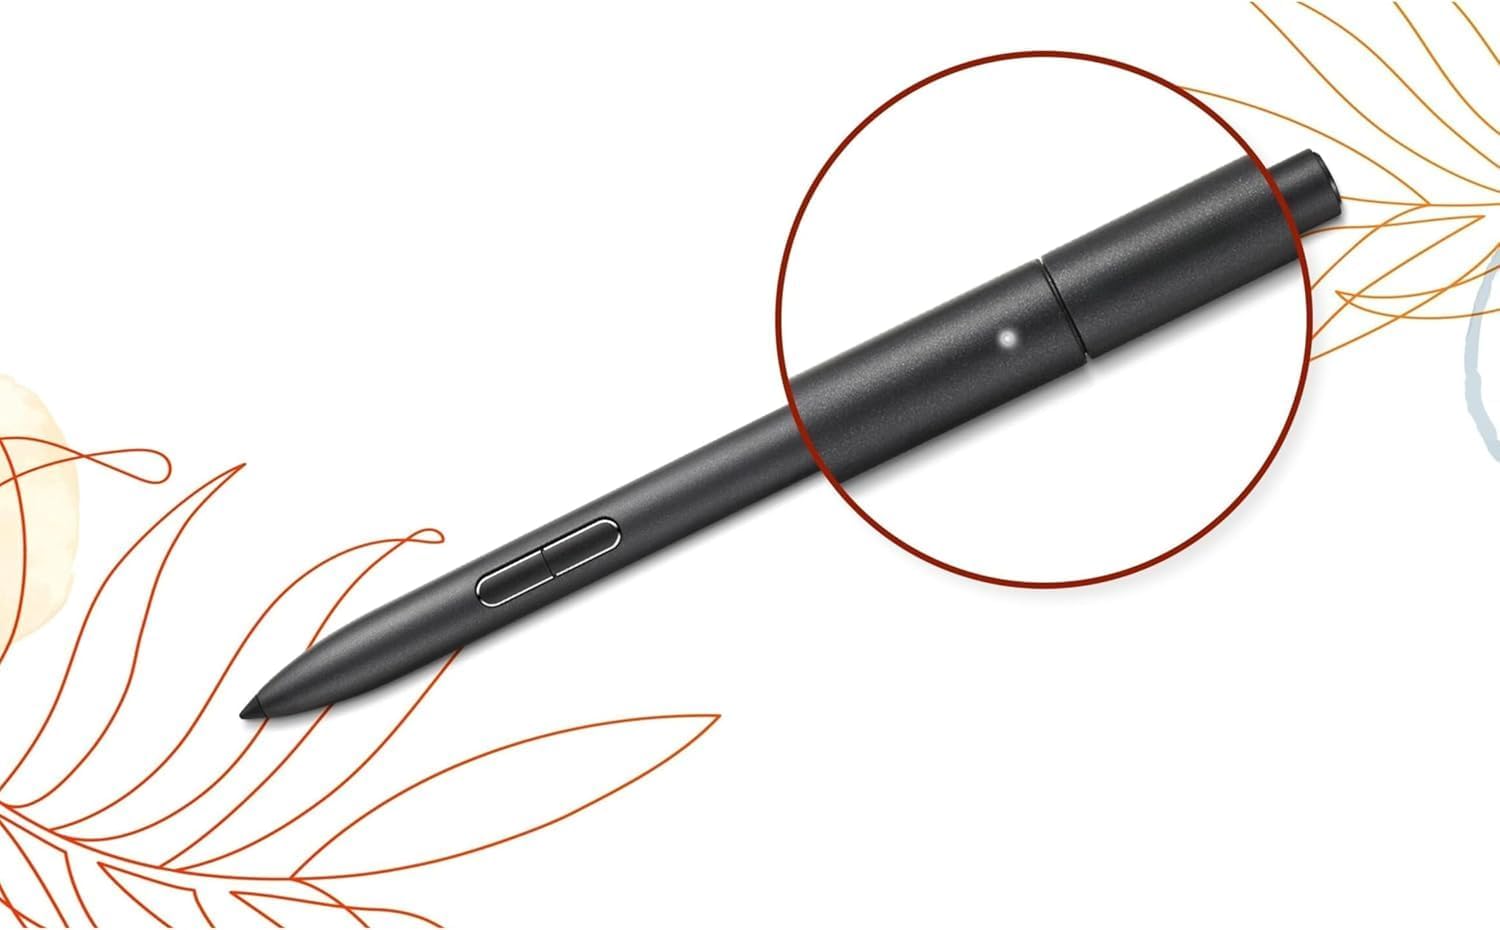
Image 3.1: The LED indicator on the stylus pen, which shows charging and pairing status.
3.3 Bluetooth Pairing
To enable advanced functions like screenshots or launching Whiteboard, pair the stylus pen via Bluetooth:
- Ensure your compatible device's Bluetooth is enabled.
- Hold down the Function Button (Component 8) on the stylus pen until the LED indicator (Component 3) begins to flash, indicating it is in pairing mode.
- On your device, search for Bluetooth devices and select the TALTAW Active Stylus Pen 2.0 SA203H to complete the pairing process.
4. Operating the Stylus Pen
4.1 Basic Usage
The stylus pen functions like a traditional pen on your compatible touchscreen device. Simply touch the pen tip to the screen to interact with applications, write, or draw.

Image 4.1: Proper grip for using the stylus pen.
4.2 Pressure Sensitivity
The stylus pen supports 4096 levels of pressure sensitivity and a tip force range of 5-350g. This allows for precise control over line thickness and opacity in drawing and writing applications. Apply varying pressure to achieve different effects.

Image 4.2: The stylus pen's pressure sensitivity allows for detailed digital artwork.
4.3 Button Functions
- Mouse Right-click Button (Component 1): Press this button to perform a right-click action, similar to a mouse.
- Erase Button (Component 5): Press this button to activate the eraser function in compatible applications.
- Function Button (Component 8): After Bluetooth pairing, this button can be used for various shortcuts, such as:
- Taking screenshots
- Advancing to the next page in presentations
- Launching Microsoft Whiteboard

Image 4.3: Key features of the stylus pen, including Bluetooth functionality and charging.

Image 4.4: The stylus pen is versatile for different user activities, from note-taking to creative work.
5. Maintenance
5.1 Replacing Pen Tips
Over time, the pen tip may wear down. To replace it:
- Gently pull the old pen tip straight out from the stylus.
- Insert a new replacement tip firmly into the stylus until it clicks into place.
5.2 Cleaning
To clean your stylus pen, wipe it with a soft, dry, lint-free cloth. Avoid using harsh chemicals or abrasive materials, as these can damage the pen's finish or internal components.
6. Troubleshooting
If you encounter issues with your stylus pen, refer to the following common solutions:
- Pen not responding: Ensure the pen is charged. Check if the AAAA battery is correctly installed. Restart your device.
- Bluetooth pairing issues: Make sure Bluetooth is enabled on your device. Ensure the pen is in pairing mode (LED flashing). Try unpairing and re-pairing the device.
- Inaccurate tracking: Ensure your device's screen is clean. Check for any physical damage to the pen tip.
- Buttons not working: Confirm the pen is properly paired via Bluetooth for advanced button functions. Ensure the application you are using supports the button functions.
For persistent issues, consult your device's manual or contact customer support.
7. Specifications
| Model Number | SA203H |
| Brand | TALTAW |
| Color | Black |
| Material | Aluminum |
| Item Weight | 3.2 ounces (0.09 Kilograms) |
| Package Dimensions | 8.54 x 2.01 x 1.34 inches |
| Pressure Levels | 4096 |
| Pen Tip Force | 5-350g |
| Sampling Rate | 266 Hz |
| Connectivity | Microsoft Pen Protocol (MPP) 2.0, Bluetooth |
| Charging Port | USB-C |
| Battery Type | AAAA (pre-installed) |
| Battery Life | Over 140 hours of use on a full charge |
8. Warranty and Support
For information regarding product warranty, returns, or technical support, please refer to the documentation provided with your purchase or contact the manufacturer directly. Keep your proof of purchase for warranty claims.


