Yoidesu Yoidesu8fk4eorynd-13
Yoidesu 4K 48MP Digital Vlogging Camera User Manual
Model: Yoidesu8fk4eorynd-13
1. Introduction
Thank you for choosing the Yoidesu 4K 48MP Digital Vlogging Camera. This compact and portable camera is designed to capture high-quality photos and videos with ease. Featuring 4K video recording, 48-megapixel photos, 16x digital zoom, and anti-shake technology, it is ideal for vlogging, travel, and everyday photography. This manual provides detailed instructions to help you get started and make the most of your new camera.

Image: Yoidesu Digital Cameras in various colors, highlighting the sleek and portable design.
2. Package Contents
Please check the package contents to ensure all items are present:
- 1 x Yoidesu Digital Camera
- 1 x Wrist Strap
- 1 x Charging Cable (Type-C)
- 1 x Instruction Manual
- Note: A memory card is not included and must be purchased separately.

Image: The Yoidesu camera along with its accessories: wrist strap and charging cable.
3. Camera Overview
Front View

Image: Front view of the camera, highlighting the lens.
- Lens: Captures images and videos.
- Flash/Fill Light: Provides additional illumination in low-light conditions (if supported).
Side View
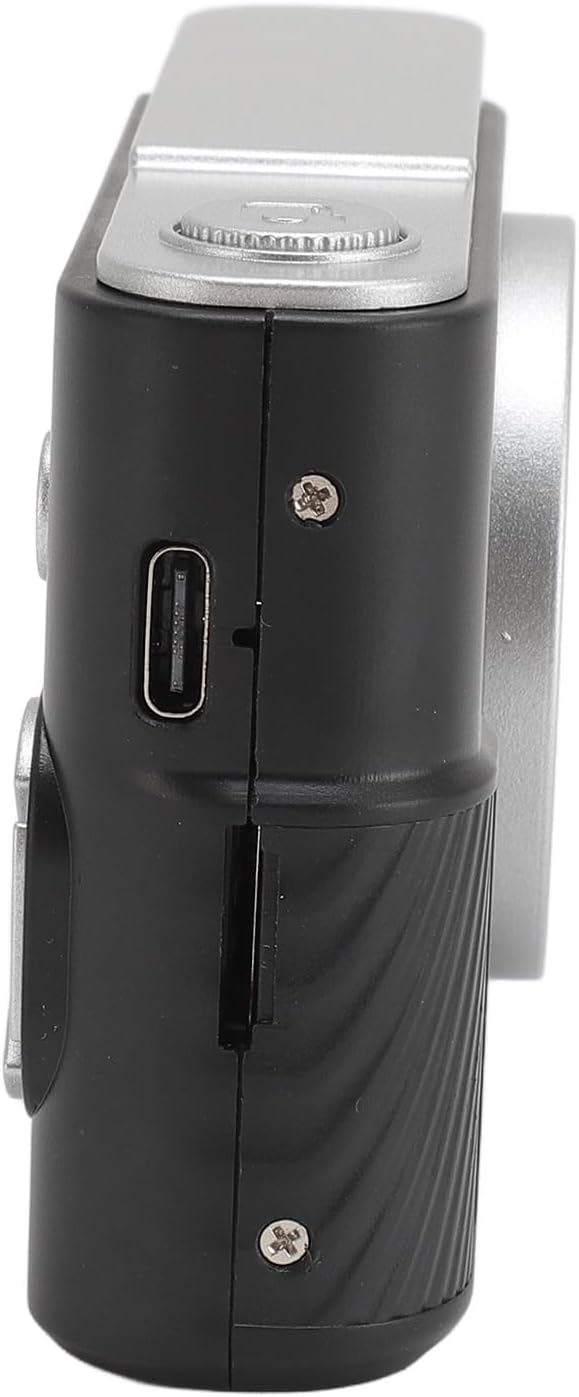
Image: Side view of the camera, showing the charging port and memory card slot.
- Type-C Charging Port: For charging the camera's internal battery.
- Memory Card Slot: Insert your MicroSD card here.
Rear View

Image: Rear view of the camera, displaying the screen and control buttons.
- 2.4 Inch TFT Screen: Displays live view, menus, and playback.
- Power Button: Press and hold to turn the camera on or off.
- Shutter Button: Press to take a photo or start/stop video recording. Also acts as a confirm key in menus.
- Directional Buttons (Up/Down/Left/Right): Navigate menus and can serve as shortcut function keys.
- Menu/Back Button: Access the camera menu or go back to the previous screen.
4. Initial Setup
4.1 Charging the Battery
The camera has a built-in 600mAh lithium-ion battery. Before first use, fully charge the camera.
- Connect the provided Type-C charging cable to the camera's charging port.
- Connect the other end of the cable to a USB power adapter (not included) or a computer's USB port.
- The charging indicator will illuminate. Once charging is complete, the indicator may change color or turn off.
4.2 Inserting a Memory Card
A memory card (MicroSD, up to 64GB) is required to save photos and videos. It is not included in the package.
- Locate the memory card slot on the side of the camera.
- Insert the MicroSD card into the slot with the metal contacts facing the front of the camera until it clicks into place.
- To remove the card, gently push it in until it clicks, then release, and it will eject.
5. Operating Instructions
5.1 Powering On/Off
Press and hold the Power Button for approximately 3 seconds to turn the camera on or off.
5.2 Taking Photos
- Turn on the camera. The screen will display the live view.
- Frame your shot using the 2.4-inch TFT screen.
- Press the Shutter Button to take a photo. The camera supports autofocus to ensure clear images.
5.3 Recording Videos
- Turn on the camera.
- Navigate to video mode using the menu or directional buttons (if assigned as shortcuts).
- Press the Shutter Button to start recording. Press it again to stop recording.
5.4 Digital Zoom
The camera features 16x digital zoom.
- While in photo or video mode, use the designated zoom buttons (often the Up/Down directional buttons) to zoom in or out.
5.5 Menu Navigation and Settings
Access the camera's settings and features via the menu.
- Press the Menu Button to enter the menu interface.
- Use the Directional Buttons to navigate through options.
- Press the Shutter Button (or a dedicated OK/Confirm button) to select an option.
- Press the Menu/Back Button to exit the current menu or go back.
Key settings include:
- Mode Selection: Switch between photo, video, and playback modes.
- White Balance: Supports auto white balance for accurate color representation.
- Color Filters & Photo Frames: Apply various creative effects.
- Anti-Shake: Electronic anti-shake function helps reduce blur from camera movement.
- Language: Select your preferred language (English, Traditional Chinese, Simplified Chinese, Russian, Japanese, French, German, Korean, Italian, Portuguese, Spanish, Hebrew).
6. Care and Maintenance
- Cleaning: Use a soft, dry cloth to clean the camera body. For the lens and screen, use a specialized lens cleaning cloth. Avoid using harsh chemicals or abrasive materials.
- Storage: Store the camera in a cool, dry place away from direct sunlight, dust, and moisture when not in use.
- Battery Care: Avoid fully discharging the battery frequently. Charge it regularly, even if not in use, to maintain battery health.
- Water Resistance: This camera is not waterproof. Avoid exposure to water or high humidity.
7. Troubleshooting
| Problem | Possible Cause | Solution |
|---|---|---|
| Camera does not turn on. | Battery is depleted. | Charge the camera using the provided Type-C cable. |
| Cannot take photos/videos. | No memory card inserted or card is full/corrupted. | Insert a compatible MicroSD card (up to 64GB). Format the card if necessary (this will erase all data). Delete unnecessary files to free up space. |
| Images are blurry. | Lens is dirty; insufficient light; camera shake. | Clean the lens. Ensure adequate lighting. Activate the anti-shake function. Hold the camera steady. |
| Camera freezes or is unresponsive. | Software glitch. | Press and hold the Power Button for 10 seconds to force a shutdown, then restart the camera. |
8. Specifications
- File Format: JPG (Image), AVI (Video)
- Image Resolution: Up to 48 Megapixels
- Video Resolution: Up to 4K
- Aspect Ratio: 16:9
- Digital Zoom: 16x
- White Balance: Automatic
- Battery Type: Built-in Lithium Ion
- Battery Capacity: 600mAh
- Storage Support: MicroSD Card, up to 64GB (not included)
- Charging Interface: Type-C
- Display Screen: 2.4 Inch TFT
- Language Support: English, Traditional Chinese, Simplified Chinese, Russian, Japanese, French, German, Korean, Italian, Portuguese, Spanish, Hebrew
- Item Weight: Approximately 6 ounces (170g)
- Dimensions: Approximately 4.33 x 4.33 x 1.97 inches (11 x 11 x 5 cm)
9. Warranty and Support
For warranty information or technical support, please refer to the purchase platform or contact Yoidesu customer service directly. Keep your proof of purchase for any warranty claims.
Ask a question about this manual
Ask about setup, troubleshooting, compatibility, parts, safety, or missing instructions. Manuals+ will review the question and use this page’s manual context to help answer it.