
1. Introduction
This manual provides detailed instructions for the installation, operation, and maintenance of your Hapytrip 12V USB Outlet Marine Switch Panel. This product is designed to provide versatile power and charging solutions for various 12V/24V vehicles and marine applications, including motorcycles, cars, boats, RVs, and ATVs.
The panel integrates a powerful USB charger with PD3.0 and Dual Quick Charge 3.0 ports, alongside a 150W waterproof cigarette lighter socket, offering a comprehensive power solution for your electronic devices.
2. Safety Information
- Electrical Safety: Always disconnect the power source (vehicle battery) before attempting any installation or wiring to prevent electrical shock or damage to the product and vehicle.
- Correct Wiring: Ensure correct polarity when connecting the wires. Connect the red wire to the positive (+) terminal and the black wire to the negative (-) terminal. Incorrect wiring can cause damage.
- Voltage Compatibility: This product is designed for 12V/24V DC systems. Do not connect to higher voltage systems.
- Wattage Limits: Do not exceed the maximum wattage of 120W (12V) / 150W (24V) for the cigarette lighter socket. Overloading can lead to overheating and potential damage.
- Waterproof Covers: Always ensure the waterproof covers are securely closed when the ports are not in use, especially in marine or outdoor environments, to protect against water and dust ingress.
- Ventilation: Ensure adequate ventilation around the installed unit to prevent overheating during prolonged use.
3. Package Contents
Verify that all items are present in your package:
- 1x 12V USB Outlet (with PD3.0 & Dual QC3.0 ports)
- 1x 150W Cigarette Lighter Socket
- 1x 2-in-1 Panel
- 4x Fixing Screws
- 4x Terminals (blue)
- 2x Short Wires (red and black)
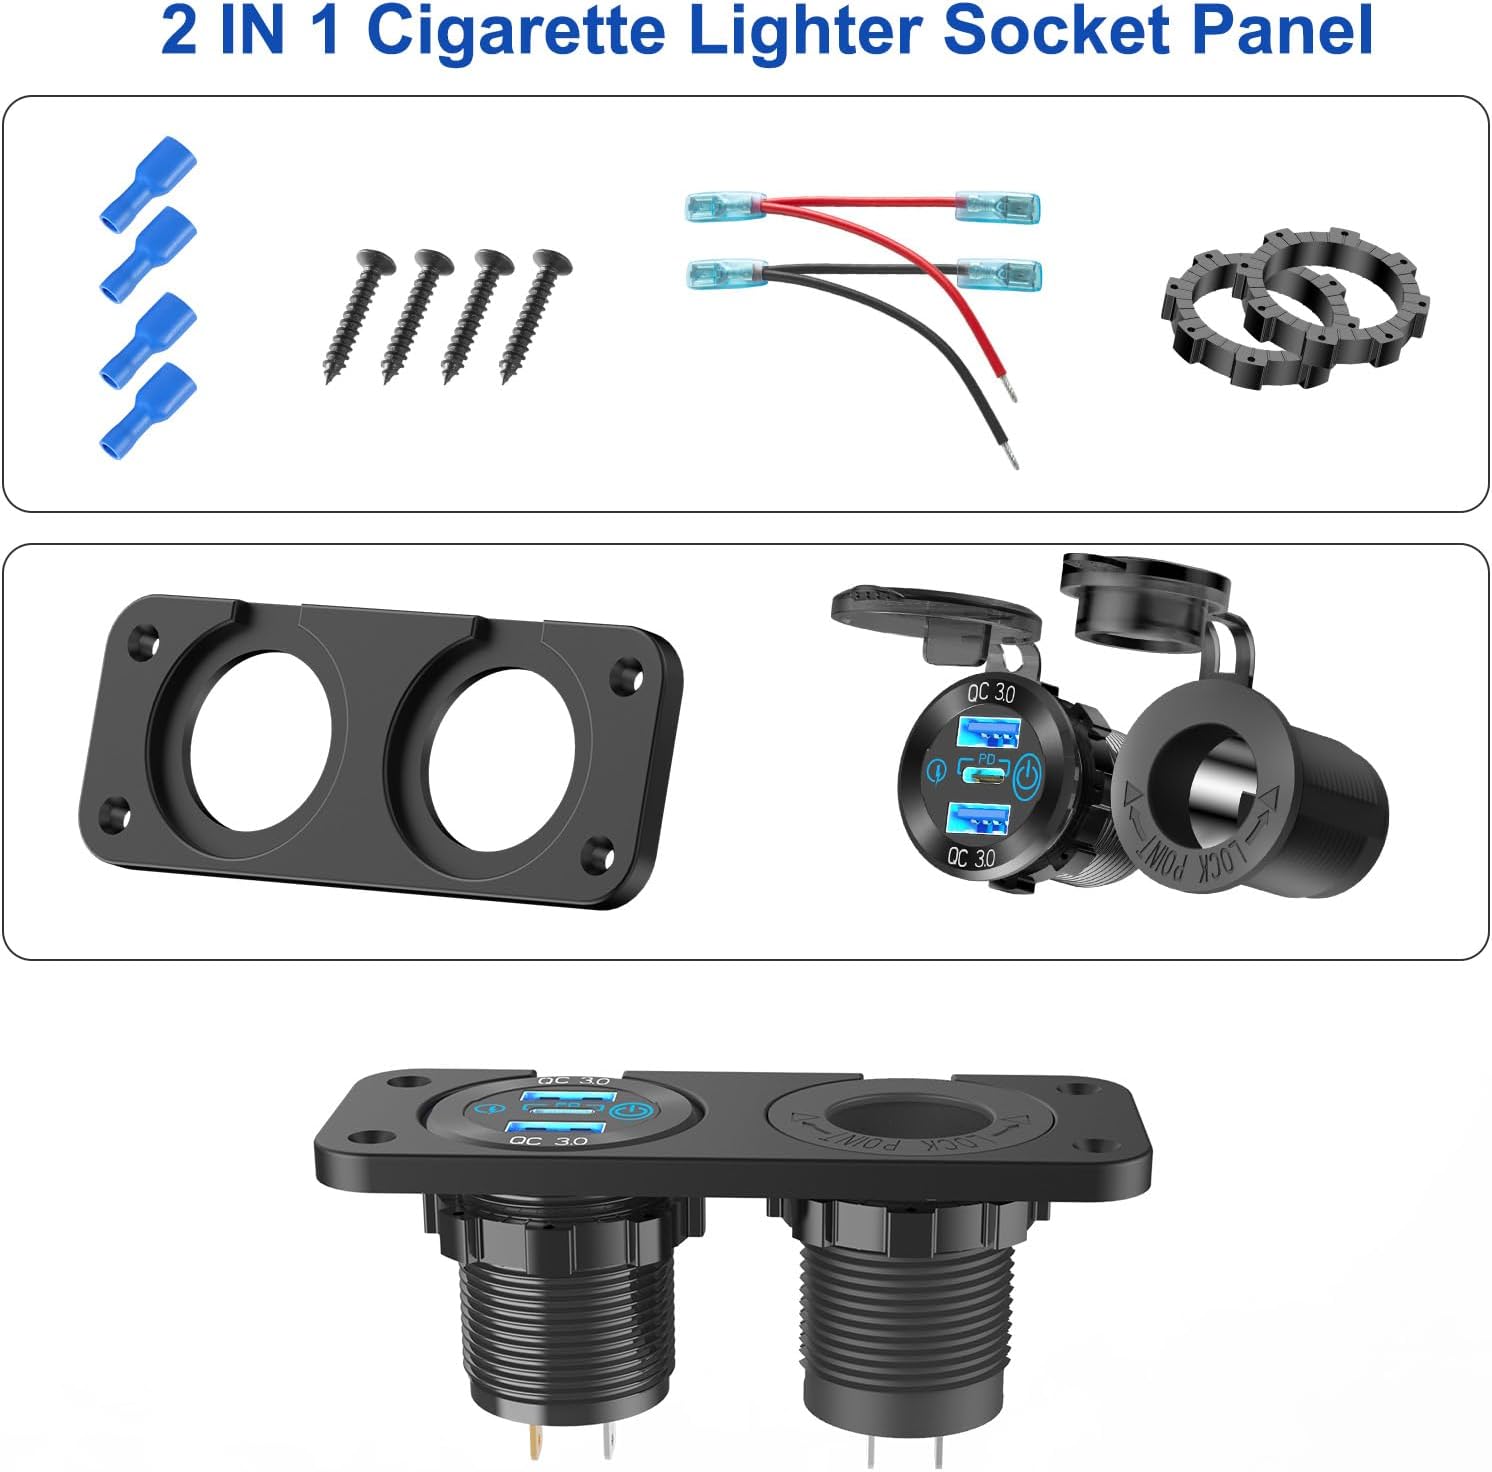
Figure 1: Included components of the Hapytrip 2-in-1 Marine Switch Panel.
4. Product Features
- Advanced USB Charging: Features one PD3.0 (30W) port and two Quick Charge 3.0 (18W each) ports, providing a total maximum output of 66W for rapid charging of compatible devices.
- 150W Cigarette Lighter Socket: A robust 150W (24V) / 120W (12V) socket suitable for powering various accessories like dash cameras, GPS units, vacuum cleaners, and air purifiers.
- Durable Construction: The USB charger is constructed from aluminum alloy, offering scratch resistance, wear resistance, and efficient heat dissipation, ensuring longevity and safety.
- Integrated Touch Switch: The USB charger includes a touch-sensitive power switch for convenient operation and to prevent unnecessary power drain when not in use.
- Waterproof Design: Equipped with detachable waterproof covers for both the USB outlet and cigarette lighter socket, ensuring protection in harsh environments (IP66 rated).
- Multiple Safety Protections: Built-in overload, overcurrent, and short circuit protection, along with an intelligent IC, safeguard your devices and vehicle's electrical system.
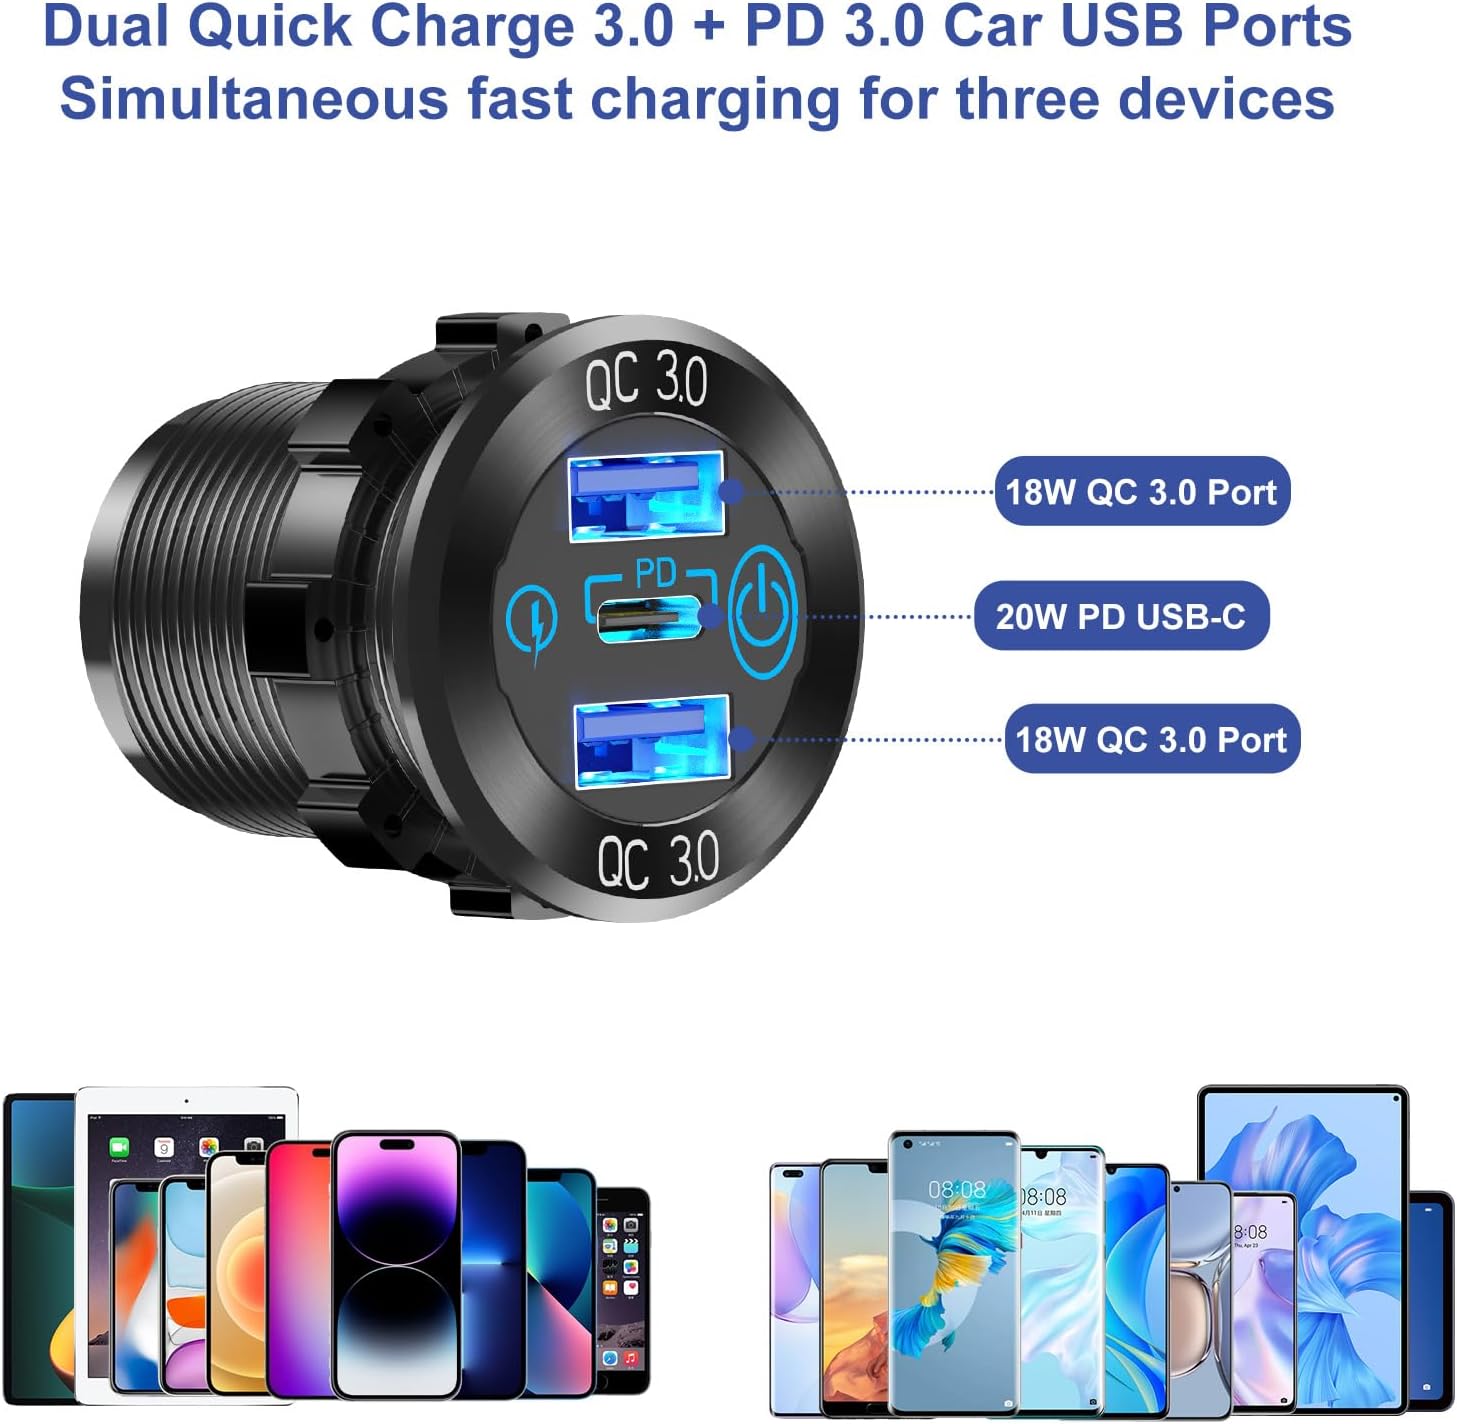
Figure 2: USB Charger with PD3.0 and Dual QC3.0 Ports.
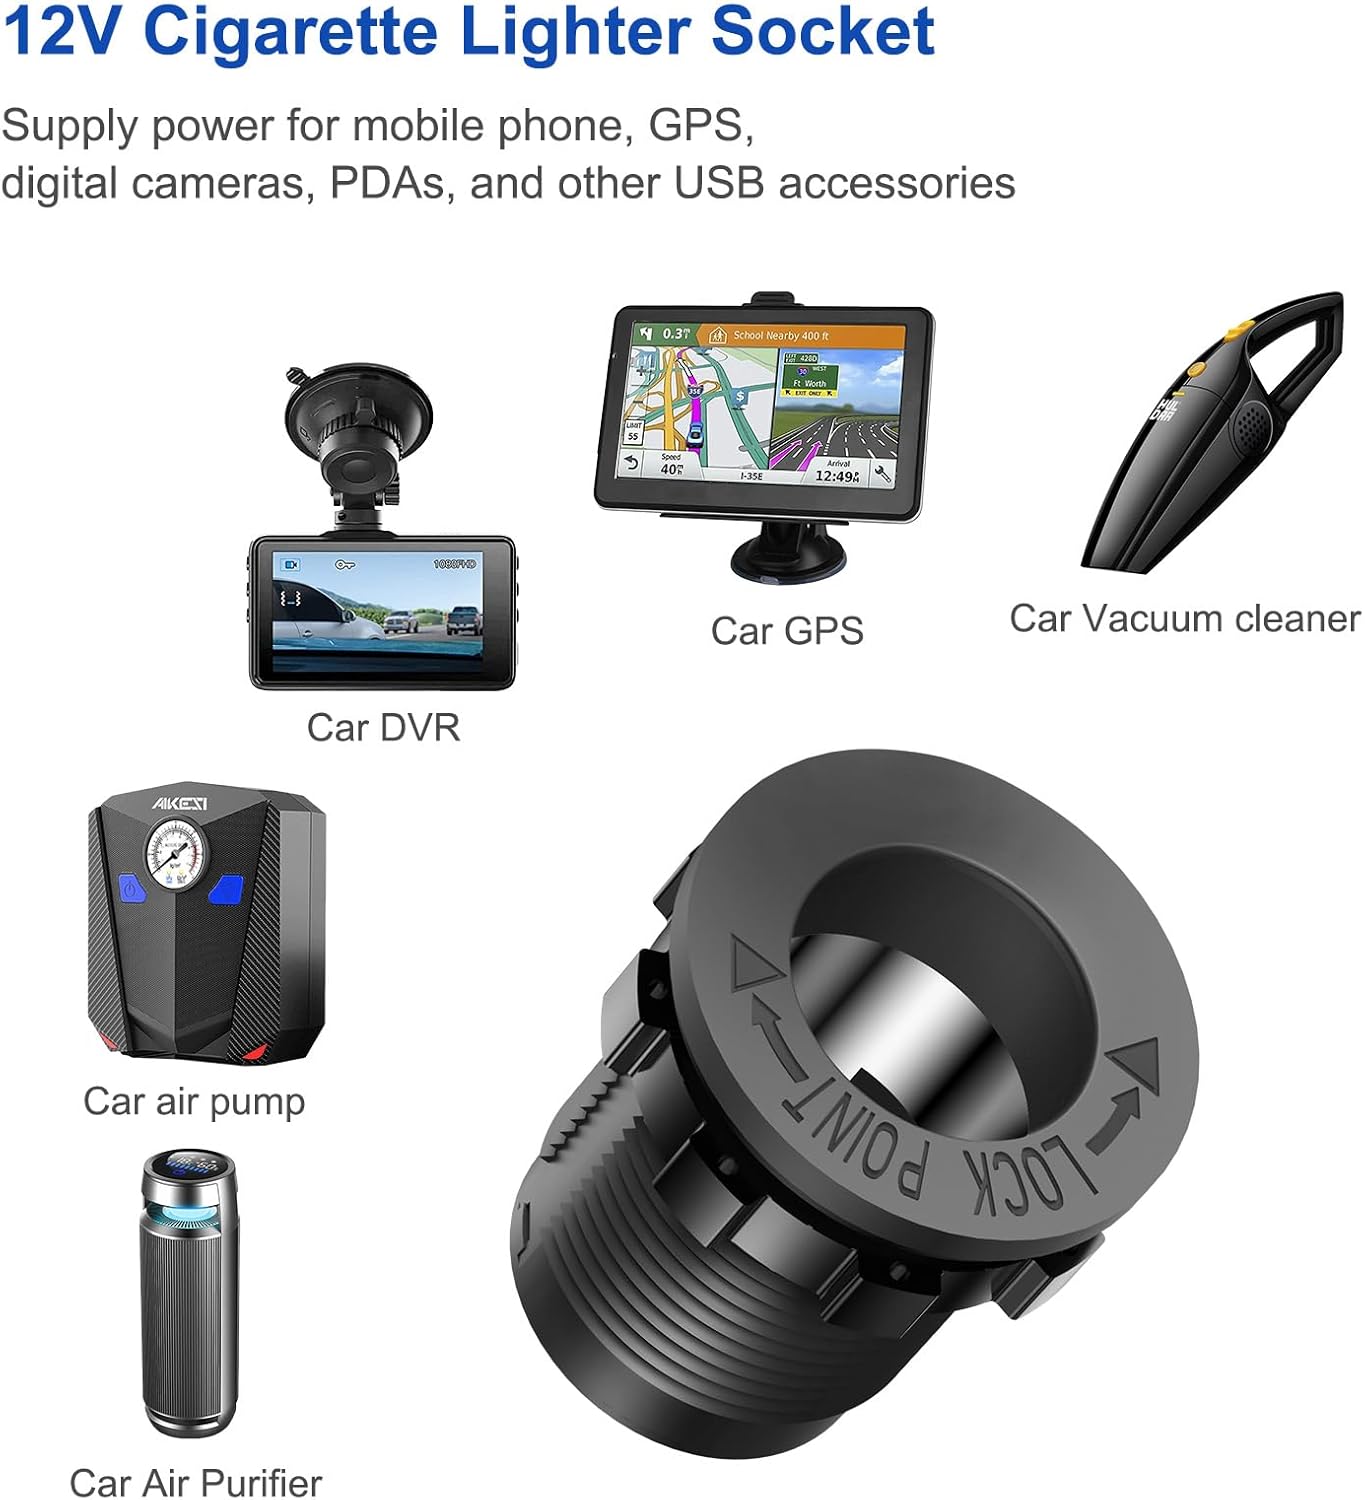
Figure 3: 12V Cigarette Lighter Socket and Compatible Devices.
5. Installation Guide
Follow these steps for proper installation:
- Prepare the Mounting Location: Choose a suitable flat surface on your vehicle's dashboard, console, or marine panel. Ensure there is enough space behind the panel for the components and wiring.
- Cut Mounting Holes: Using appropriate tools, cut two circular holes in the chosen location. The panel dimensions are approximately 10.5cm (4.13") in length and 4.2cm (1.65") in width. The depth required for the components is approximately 5cm (1.96").
- Assemble Components: Insert the USB outlet and the cigarette lighter socket into the respective holes in the 2-in-1 panel. Secure them with the provided retaining nuts from the back.
- Wiring Connections:
- Connect the supplied short red wire to the positive (+) terminal of the USB outlet and the positive (+) terminal of the cigarette lighter socket.
- Connect the supplied short black wire to the negative (-) terminal of the USB outlet and the negative (-) terminal of the cigarette lighter socket.
- Connect the main red wire from your vehicle's 12V/24V power source (with an inline fuse, not included) to the combined positive (+) terminals.
- Connect the main black wire from your vehicle's ground to the combined negative (-) terminals.
- Secure the Panel: Place the assembled panel into the prepared opening and secure it using the four provided fixing screws.
- Test Functionality: Reconnect the vehicle battery and test the USB ports and cigarette lighter socket to ensure they are functioning correctly.

Figure 4: Wiring Diagram for the Hapytrip Switch Panel.
Video 1: Installation and demonstration of the Hapytrip 12V USB Outlet Marine Switch Panel. This video illustrates the assembly process and shows the product in operation.
6. Operating Instructions
Using your Hapytrip 12V USB Outlet Marine Switch Panel is straightforward:
- USB Charger Operation:
- To activate the USB charger, gently touch the power icon on the USB outlet. The blue LED indicators will illuminate.
- Connect your USB-C (PD3.0) or standard USB (QC3.0) compatible devices using appropriate charging cables.
- To deactivate, touch the power icon again. This conserves power when not in use.
- Cigarette Lighter Socket Operation:
- Open the waterproof cover.
- Insert your 12V/24V compatible accessory plug into the socket.
- Ensure the accessory is properly seated for a secure connection.
- Always close the waterproof cover when the socket is not in use.

Figure 5: Activating the USB Charger via Touch Switch.

Figure 6: Hapytrip Switch Panel in use within a vehicle.
7. Maintenance
- Cleaning: Wipe the surface of the panel with a soft, damp cloth. Avoid using abrasive cleaners or solvents that could damage the finish or electronic components.
- Connection Check: Periodically inspect all wiring connections to ensure they remain secure and free from corrosion. Loose connections can lead to intermittent power or overheating.
- Waterproof Covers: Regularly check the integrity of the waterproof covers. Ensure they are not cracked or damaged and always close them tightly when ports are not in use to maintain water resistance.
8. Troubleshooting
| Problem | Possible Cause | Solution |
|---|---|---|
| No power to USB ports or cigarette lighter. |
|
|
| Slow charging or device not recognized. |
|
|
| Cigarette lighter socket not working. |
|
|
9. Specifications
| Feature | Detail |
|---|---|
| Brand | Hapytrip |
| Model | Charger+Socket |
| Operating Voltage | 12V / 24V DC |
| USB Output (PD3.0) | 30W (USB Type-C) |
| USB Output (QC3.0) | 2x 18W (USB Type-A) |
| Total USB Output | Max 66W |
| Cigarette Lighter Socket Wattage | 120W (12V) / 150W (24V) |
| Material | Aluminum Alloy (USB charger), Plastic (Panel, Socket) |
| International Protection Rating | IP66 (with covers closed) |
| Operation Mode | Manual (USB touch switch) |
| Package Dimensions | 6.46 x 4.57 x 1.5 inches |
| Item Weight | 3.17 ounces |
10. Warranty and Support
Warranty: Please refer to the product packaging or contact Hapytrip customer service for specific warranty terms and conditions. Typically, warranty information is included with your purchase documentation.
Customer Support: If you encounter any issues or have questions regarding your Hapytrip 12V USB Outlet Marine Switch Panel that are not covered in this manual, please contact Hapytrip customer support through the retailer where you purchased the product or visit the official Hapytrip website for assistance.


