Kassionel RG10A(B2S)/BGEF
User Manual for Kassionel RG10A BGEF Replacement Remote Control
Model: RG10A(B2S)/BGEF
Brand: Kassionel
Introduction
This manual provides instructions for the Kassionel RG10A BGEF Replacement Remote Control, designed for compatibility with Midea AC Air Conditioners. This remote is a direct replacement and requires no programming, functioning immediately upon battery installation.

Figure 1: Front view of the RG10A BGEF Replacement Remote Control.
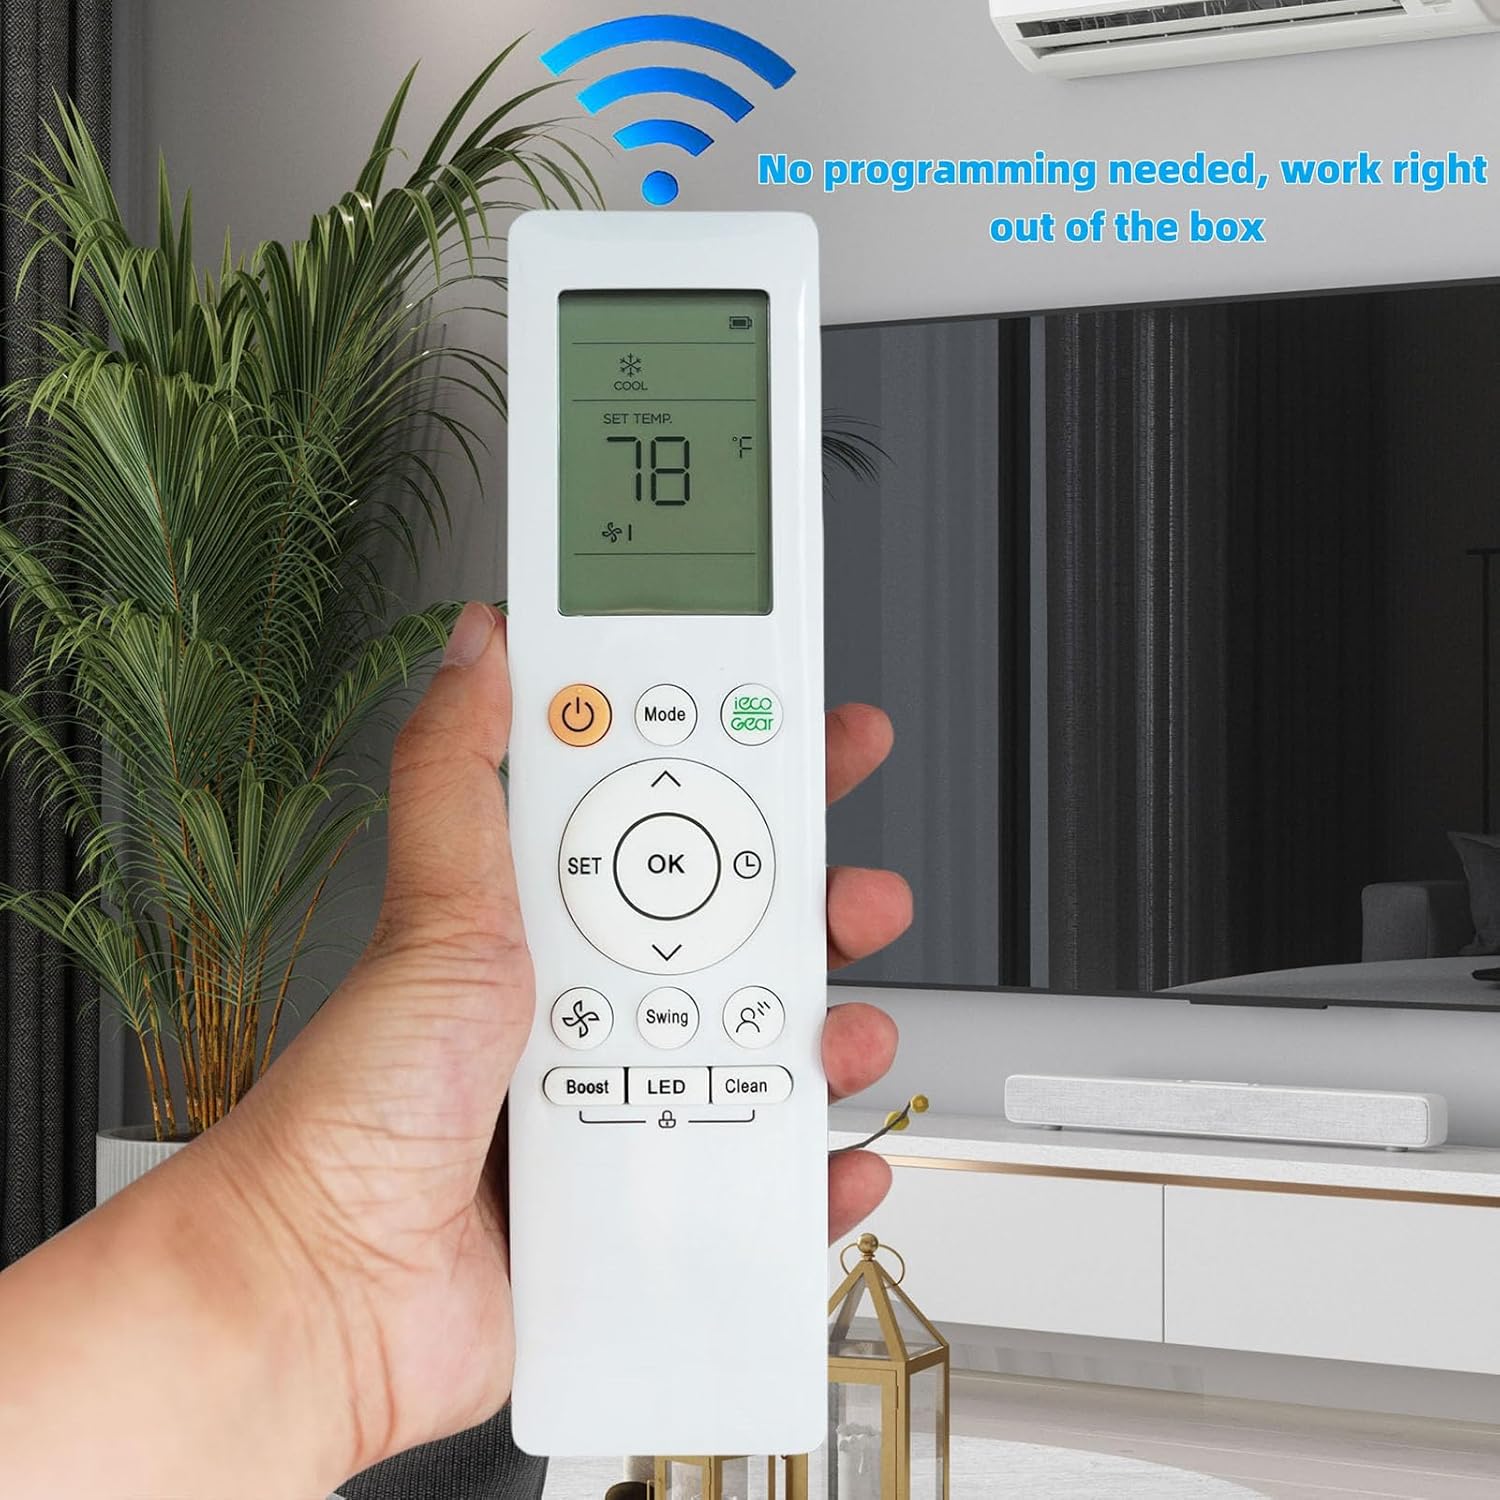
Figure 2: The remote control is pre-programmed and ready for immediate use.
Package Contents
- 1 x Kassionel RG10A BGEF Replacement Remote Control
Note: 2x 1.5V AAA Alkaline Batteries are required and are not included with this product. A user manual is also not included, making this document essential for operation.
Setup
Battery Installation
- Locate the battery compartment cover on the back of the remote control.
- Slide the cover downwards to open the compartment.
- Insert two (2) 1.5V AAA alkaline batteries, ensuring the positive (+) and negative (-) terminals align correctly with the markings inside the compartment.
- Slide the battery compartment cover back into place until it clicks securely.

Figure 3: Battery compartment for 2x AAA batteries.
Initial Use
This replacement remote control is pre-programmed and does not require any setup or pairing. Once batteries are installed, it is ready to operate your compatible Midea AC Air Conditioner immediately.
Operating Instructions
Button Functions
| Button | Function |
|---|---|
| Power (⏻) | Turns the air conditioner ON or OFF. |
| Mode | Cycles through operating modes (e.g., Cool, Heat, Fan, Dry, Auto). |
| ▲ / ▼ (Up/Down Arrows) | Adjusts temperature settings, fan speed, or navigates menu options. |
| SET | Used to confirm selections or access advanced settings. |
| OK | Confirms the current selection or setting. |
| Eco Gear | Activates or deactivates energy-saving mode. |
| Swing | Controls the vertical or horizontal swing of the air conditioner's louvers. |
| Boost | Activates a rapid cooling or heating function. |
| LED | Turns the air conditioner's display LED ON or OFF. |
| Clean | Initiates a self-cleaning function for the air conditioner (if supported). |
Changing Temperature Unit (Celsius/Fahrenheit)
The remote control supports display in both Celsius (°C) and Fahrenheit (°F). To switch between these units:
- Ensure the remote control is powered on.
- Simultaneously press and hold the ▲ (Up Arrow) and ▼ (Down Arrow) buttons for approximately 5 seconds.
- The temperature unit on the remote's display will switch between Celsius and Fahrenheit.

Figure 4: Instructions for switching between Celsius and Fahrenheit display.
Maintenance
Battery Replacement
Replace batteries when the remote's display becomes dim or the remote stops responding. Always replace both batteries simultaneously with new 1.5V AAA alkaline batteries. Do not mix old and new batteries, or different types of batteries.
Cleaning
Wipe the remote control with a soft, dry cloth. Do not use liquid cleaners, abrasive cleaners, or chemical solvents, as these may damage the remote's surface or internal components.
Storage
If the remote control will not be used for an extended period, remove the batteries to prevent leakage and potential damage to the remote.
Troubleshooting
- Remote not responding:
- Check if the batteries are inserted correctly with the correct polarity.
- Replace old batteries with new 1.5V AAA alkaline batteries.
- Ensure there are no obstructions between the remote control and the air conditioner's receiver.
- Verify that you are within the effective operating range of the air conditioner.
- Display is dim or blank:
- This usually indicates low battery power. Replace the batteries.
- Air conditioner not responding to specific functions:
- Ensure your Midea AC model supports the specific function (e.g., "Clean" or "Eco Gear").
- Some functions may only be available in certain operating modes.
Specifications
| Model Number | RG10A(B2S)/BGEF |
| Compatible Devices | Midea AC Air Conditioners |
| Power Source | 2 x 1.5V AAA Alkaline Batteries (not included) |
| Product Dimensions | 7.62 x 1.92 x 0.86 inches (19.35 x 4.88 x 2.18 cm) |
| Item Weight | 3.39 ounces (96.1 grams) |
| Color | White |
| Special Feature | No programming needed, works right out of the box. |

Figure 5: Back of the remote control showing model and voltage information.

Figure 6: Key features of the remote control, including durability and material.
Warranty and Support
As a replacement remote control, specific warranty information may vary. Please refer to the seller's policy on the platform where the product was purchased for details regarding returns, exchanges, or warranty claims.
For any issues or questions not covered in this manual, please contact the seller directly for assistance.
Ask a question about this manual
Ask about setup, troubleshooting, compatibility, parts, safety, or missing instructions. Manuals+ will review the question and use this page’s manual context to help answer it.