1. Introduction
This manual provides essential information for the proper installation, operation, and maintenance of your Pricol Xenus 4W Remote Control Locking & Security System. This system is designed to enhance the security of your vehicle by providing remote central locking and an alarm function. Please read this manual thoroughly before attempting any installation or operation to ensure correct usage and to prevent damage.
2. Safety Information
Always observe the following safety precautions:
- Professional Installation Recommended: While this system is described as 'wireless DIY', professional installation is highly recommended to ensure correct wiring, optimal performance, and to avoid damage to your vehicle's electrical system.
- Power Disconnection: Disconnect the vehicle's battery before performing any wiring or installation to prevent electrical shorts or injury.
- Wiring: Ensure all wiring connections are secure and properly insulated to prevent short circuits and potential fire hazards.
- Component Placement: Mount the control unit in a dry, secure location away from excessive heat, moisture, and direct sunlight.
- Remote Control: Keep the remote control away from water and extreme temperatures. Do not attempt to open or repair the remote control yourself.
3. Product Overview
3.1 Key Features
- Comprehensive Security: This 4W remote control locking and security system includes four actuators for enhanced protection.
- Enhanced Features: The '+Series' offers improved features for better performance and reliability.
- Remote Operation: Control the system conveniently with the included remote.
- Locking Mechanism: Secure your vehicle by remotely locking entry points with this system.
- Easy Installation: Designed for user-friendly setup.
- Alert Type: Audio Only, Motion Only.
3.2 Package Contents
The package typically includes the following components:
- Control Unit (Main Module)
- Remote Control (Quantity: 1 or more, as specified on packaging)
- Four Actuators (for central locking)
- Wiring Harnesses
- Mounting Hardware and Accessories
- Installation Manual & User Guide (this document)

Image 1: Product packaging highlighting enhanced features. This box contains the main control unit, remote, actuators, and wiring.
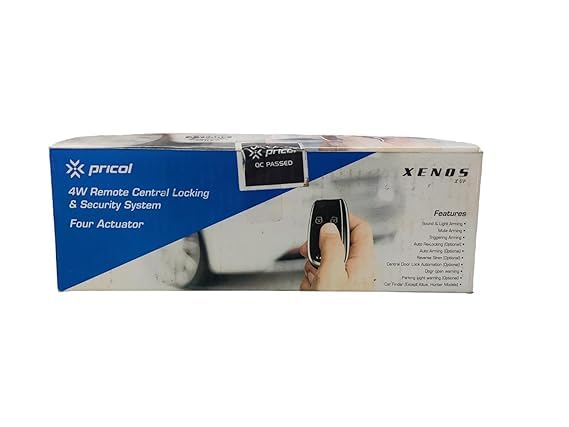
Image 2: Front view of the product packaging, displaying the system name and a visual of the remote control.
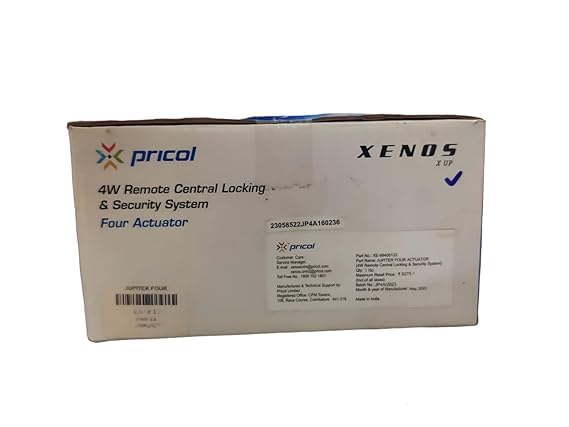
Image 3: Rear view of the product packaging, showing detailed information including part numbers and manufacturing details.
4. Installation Guide
The Pricol Xenus 4W Remote Control Locking & Security System is designed for 'wireless DIY' installation, however, due to the complexity of vehicle electrical systems, professional installation is strongly recommended. If you choose to install it yourself, proceed with caution and ensure you have a basic understanding of automotive wiring.
4.1 Pre-Installation Steps
- Read the Entire Manual: Familiarize yourself with all instructions before starting.
- Gather Tools: You will need basic automotive tools, wire strippers, crimpers, electrical tape, and a multimeter.
- Disconnect Battery: Always disconnect the negative terminal of your vehicle's battery before beginning any electrical work.
4.2 Control Unit Placement
Select a secure, hidden, and dry location inside the vehicle, such as under the dashboard or behind a panel. Ensure it is away from direct heat sources and moisture.
4.3 Wiring Connections
Refer to the detailed wiring diagram provided in the product manual (if separate) or on the packaging for specific connections. General connections include:
- Power: Connect the main power wire to a constant 12V power source.
- Ground: Connect the ground wire to a solid chassis ground point.
- Actuators: Connect the four actuators to the central locking mechanism of your vehicle's doors. This typically involves integrating with existing door lock motors or installing new ones.
- Ignition: Connect to the ignition wire for system arming/disarming logic.
- Signal Wires: Connect any additional signal wires for features like siren output, parking light flash, or door trigger inputs.
Note: Incorrect wiring can cause serious damage to the security system and your vehicle's electrical components. If you are unsure, consult a qualified automotive technician.
4.4 Testing
After all connections are made and secured, reconnect the vehicle's battery and test the system's functions before reassembling interior panels.
5. Operating Instructions
The system is primarily operated using the provided remote control.
5.1 Remote Control Functions
The remote control typically features buttons for the following actions:
- Lock/Arm: Press this button once to lock all doors and arm the security system. The vehicle's lights may flash, and a confirmation sound may be emitted.
- Unlock/Disarm: Press this button once to unlock all doors and disarm the security system. The vehicle's lights may flash, and a confirmation sound may be emitted.
- Trunk Release (if supported): Some remotes may have a dedicated button for remote trunk release.
- Panic/Car Finder: A dedicated button or a long press on another button might activate a panic alarm or help locate your vehicle by flashing lights and sounding the siren.
Note: Specific button functions may vary slightly. Refer to any additional quick start guides or remote-specific instructions included with your product.
6. Maintenance
6.1 Remote Control Battery Replacement
If the remote control's range decreases or it stops responding, the battery may need replacement. Typically, these remotes use a small coin-cell battery (e.g., CR2032). To replace:
- Carefully open the remote control casing using a small screwdriver or prying tool.
- Note the orientation of the old battery and remove it.
- Insert a new battery of the same type, ensuring correct polarity.
- Close the remote control casing securely.
6.2 Cleaning
Wipe the control unit and remote control with a soft, dry cloth. Do not use harsh chemicals or abrasive cleaners, as these can damage the components.
7. Troubleshooting
If you encounter issues with your security system, try the following troubleshooting steps:
- System Not Responding:
- Check the remote control battery.
- Ensure the vehicle's battery is charged and properly connected.
- Verify all wiring connections to the control unit are secure.
- Doors Not Locking/Unlocking:
- Check the connections to the actuators.
- Ensure the actuators are properly installed and not obstructed.
- Inspect the vehicle's door lock mechanisms for any mechanical issues.
- Alarm Triggers Randomly:
- Check for loose wiring or faulty sensors (if additional sensors are installed).
- Ensure the vehicle is parked in a stable environment, away from strong vibrations.
If problems persist after attempting these steps, it is recommended to consult a professional automotive technician or contact customer support.
8. Specifications
| Model Number | XE-99400131 |
| Brand | Generic |
| Colour | Black |
| Power Source | Battery Powered (Vehicle's 12V system) |
| Connectivity Technology | Wireless |
| Installation Type | Wireless DIY (Professional installation recommended) |
| Alert Type | Audio Only, Motion Only |
| Control Method | Remote |
| Item Weight | 300 Grams |
| Product Dimensions (L x W x H) | 10 x 8 x 5 Centimeters |
9. Warranty and Support
For warranty information and technical support, please refer to the documentation provided with your purchase or contact the seller/manufacturer directly. Keep your proof of purchase for any warranty claims.


