1. Introduction
Thank you for purchasing the TEEROK T20 Mini Drone. This drone is designed for children and beginners, offering an easy-to-control and safe flying experience. Please read this manual carefully before operating the drone to ensure proper use and to maximize your enjoyment.
2. Package Contents
- TEEROK T20 Mini Drone (1)
- Remote Control (1)
- Rechargeable Drone Batteries (3)
- USB Charging Cable (1)
- Spare Propellers (4)
- Propeller Guards (4, pre-installed or separate)
- User Manual (1)
3. Safety Precautions
- Always operate the drone in open, clear areas, away from people, animals, and obstacles.
- Do not fly near high-voltage lines, airports, or crowded areas.
- Keep the drone within your line of sight at all times.
- Adult supervision is recommended for children operating the drone.
- Do not touch the propellers when they are spinning.
- Ensure batteries are fully charged before each flight.
- Do not expose batteries to extreme temperatures or direct sunlight.
- In case of emergency, press the emergency stop button (if available) or pull both joysticks down and inwards simultaneously.
4. Setup
4.1 Charging the Drone Batteries
- Connect the USB charging cable to a USB power adapter (not included) or a computer USB port.
- Connect the other end of the charging cable to the drone battery.
- The indicator light on the USB cable will show charging status (e.g., red for charging, off for fully charged).
- Charging typically takes 60-90 minutes per battery. Do not overcharge.
4.2 Installing Drone Batteries
- Insert a fully charged battery into the battery compartment on the drone. Ensure it clicks securely into place.
4.3 Installing Remote Control Batteries
- Open the battery cover on the back of the remote control.
- Insert 3 AAA batteries (not included) according to the polarity markings.
- Close the battery cover.
4.4 Attaching Propeller Guards
- If not pre-installed, carefully snap the propeller guards onto the drone's motor arms. Ensure they are securely fastened to protect the propellers and for user safety.
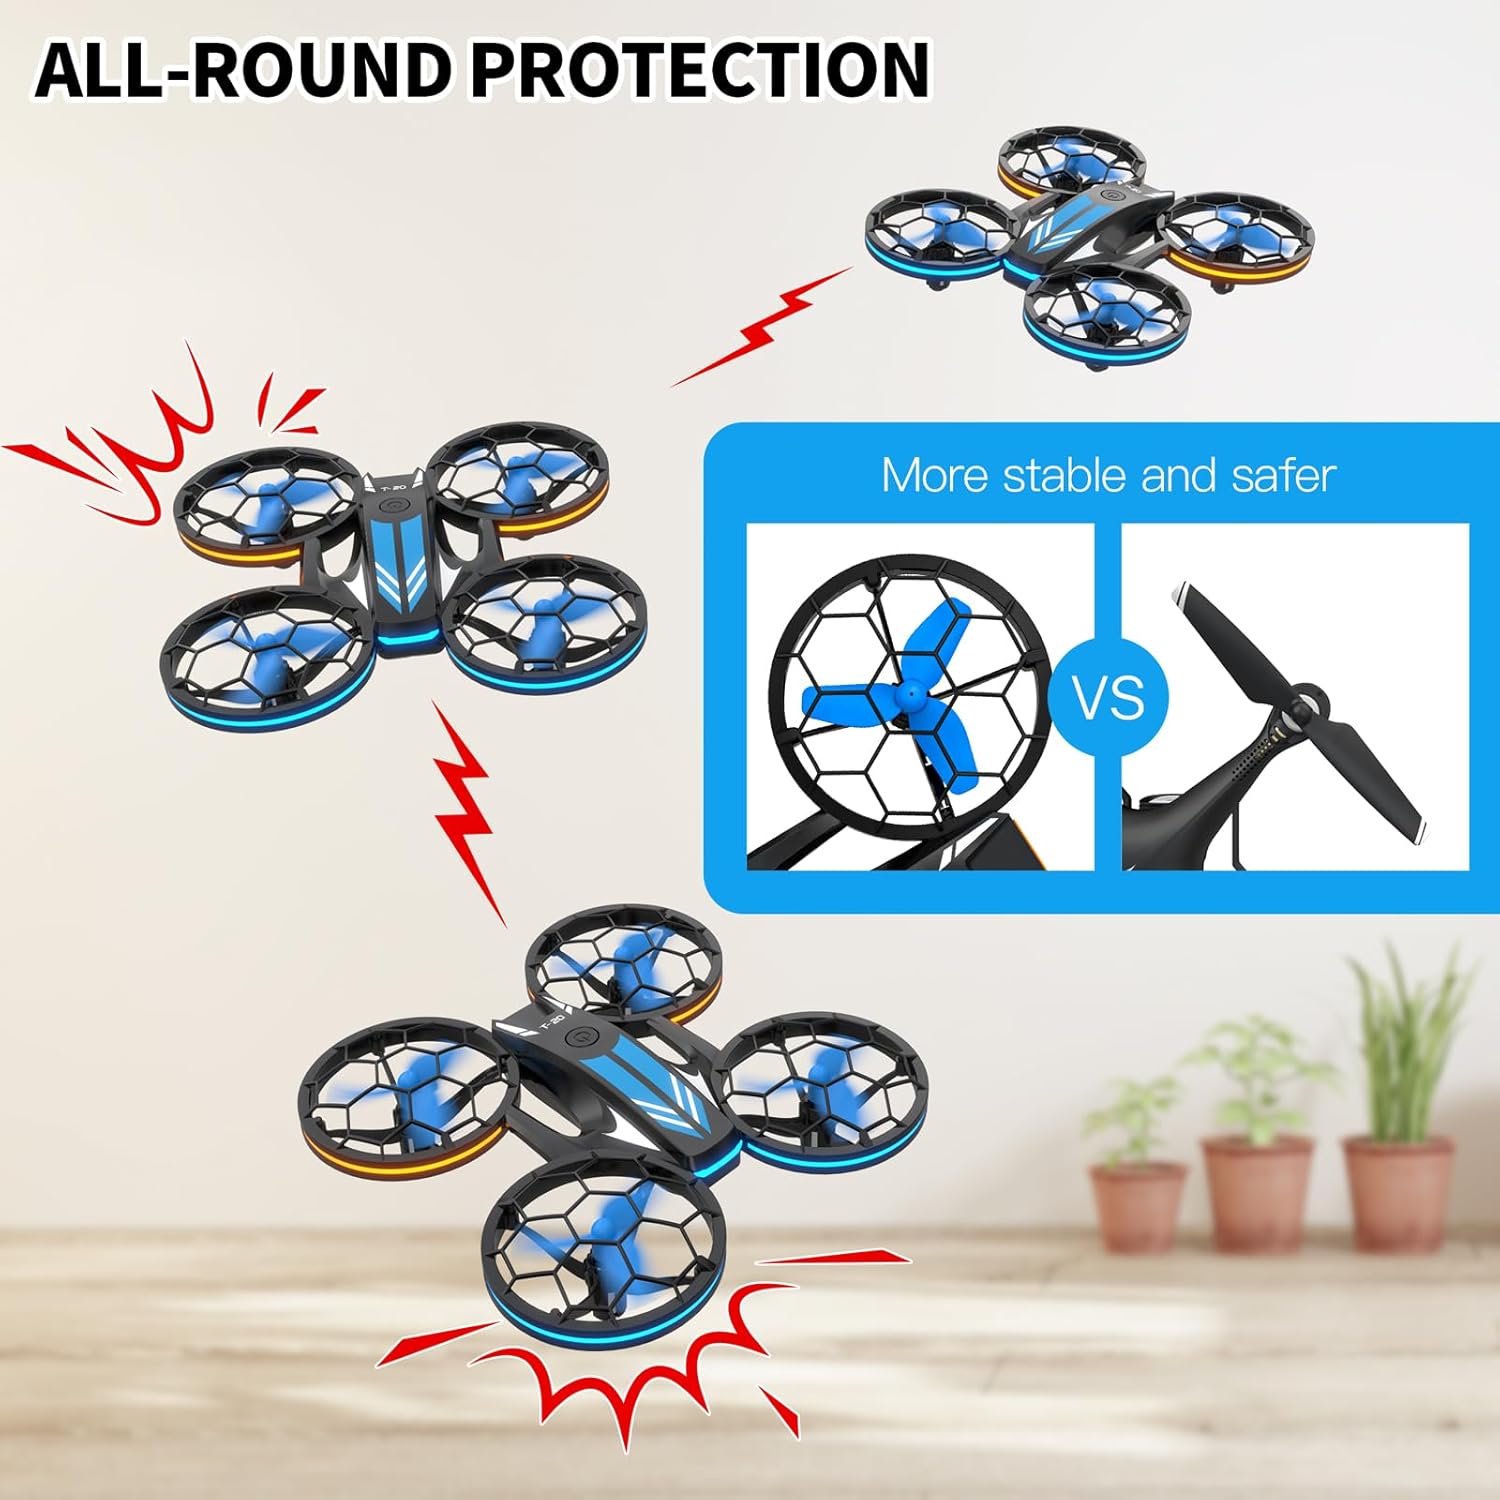
Image: The TEEROK T20 drone featuring its all-round propeller protection, highlighting its stable and safer design compared to drones without guards.
4.5 Pairing the Drone and Remote Control
- Place the drone on a flat, level surface.
- Turn on the drone by pressing the power button. The drone's LED lights will flash.
- Turn on the remote control.
- Push the left joystick (throttle) all the way up, then all the way down. The drone's lights will stop flashing and remain solid, indicating successful pairing.

Image: A visual representation of the user-friendly features including one-key start, headless mode, auto slow down, and the auto-connection process between the drone and its remote control.
5. Operating Instructions
5.1 Basic Controls
- Left Joystick (Throttle): Up/Down for ascend/descend; Left/Right for yaw (rotate).
- Right Joystick (Direction): Up/Down for forward/backward; Left/Right for left/right sideward flight.
- Refer to the remote control diagram (if provided with product) for specific button functions.
5.2 One-Key Takeoff and Landing
- After pairing, press the One-Key Takeoff button (usually indicated by an arrow pointing up) on the remote control. The drone will automatically ascend and hover at a certain altitude.
- To land, press the One-Key Landing button (usually indicated by an arrow pointing down). The drone will slowly descend and land automatically.
5.3 Altitude Hold
- The T20 drone features an altitude hold function, allowing it to maintain a stable height without constant throttle input. This makes it easier for beginners to control.
5.4 Headless Mode
- Press the Headless Mode button on the remote control to activate. In Headless Mode, the drone's forward direction is relative to the pilot, regardless of the drone's actual orientation. This simplifies control for beginners.
- Press the button again to exit Headless Mode.
5.5 Speed Adjustment
- The drone has three adjustable speed modes: Low, Medium, and High.
- Press the Speed button (often indicated by a fan icon or speed indicator) on the remote control to cycle through the speed settings.
- Start with Low speed for learning and gradually increase as you gain experience.

Image: The TEEROK T20 drone illustrating its three adjustable speed modes: Low, Medium, and High, allowing users to choose their preferred flight speed.
5.6 3D Flips
- Ensure the drone is flying at a sufficient height (at least 2-3 meters).
- Press the 3D Flip button (if available, or a combination of joystick presses).
- Immediately push the right joystick in the desired direction (forward, backward, left, or right) to perform a flip.

Image: The TEEROK T20 drone demonstrating its 3D flip capability, alongside an illustration of its extended battery life with three included batteries.
5.7 LED Lights
- The drone is equipped with blue and orange LED lights.
- These lights can be switched on or off using a dedicated button on the remote control (refer to remote diagram).
- The lights also feature three changing modes: flashing one by one, flashing back and forth alternately, and flashing left and right alternately.

Image: The TEEROK T20 drone showcasing its switchable blue and orange LED lighting modes, including three distinct flashing patterns.
6. Maintenance
6.1 Cleaning
- Use a soft, dry cloth to clean the drone and remote control.
- Do not use water or chemical cleaners.
6.2 Propeller Replacement
- If a propeller is damaged, carefully remove it and replace it with a spare propeller from the package.
- Ensure the new propeller is installed correctly according to its rotation direction (usually marked A or B).
6.3 Battery Care and Storage
- Remove batteries from the drone and remote control when not in use for extended periods.
- Store batteries in a cool, dry place, away from direct sunlight and heat.
- Do not store fully charged or completely depleted batteries for long periods. Charge them to about 50% for optimal storage.
7. Troubleshooting
| Problem | Possible Cause | Solution |
|---|---|---|
| Drone does not respond to remote. | Not paired; Low battery (drone/remote); Out of range. | Re-pair the drone and remote; Charge/replace batteries; Fly within range. |
| Drone flies erratically or drifts. | Not calibrated; Damaged propeller; Uneven surface during takeoff. | Calibrate the drone (refer to remote instructions); Replace damaged propellers; Take off from a flat surface. |
| Short flight time. | Battery not fully charged; Old battery. | Ensure batteries are fully charged; Consider replacing old batteries. |
| Propellers do not spin. | Obstruction; Motor issue; Low battery. | Check for obstructions; Charge battery. If issue persists, contact support. |
8. Specifications
| Feature | Detail |
|---|---|
| Model Name | T20 |
| Brand | TEEROK |
| Dimensions (L x W x H) | 15 x 15 x 3.5 cm |
| Weight | 440 grams |
| Drone Battery | 600 mAh Lithium-ion (3 included) |
| Remote Control Battery | 3 x AAA (not included) |
| Control Type | Remote Control (Radio Frequency) |
| Special Features | 3D Flip Capability, Multiple Speed Modes, Headless Mode, Altitude Hold, LED Lights |
| Recommended Age | Child |
9. Warranty and Support
The TEEROK T20 Mini Drone comes with a standard manufacturer's warranty. For detailed warranty information, please refer to the documentation included in your product packaging or contact the seller directly.
If you encounter any issues or have questions regarding your drone, please contact TEEROK customer support through the retailer's platform or the contact information provided with your purchase. Please have your model number (T20) and purchase date ready when contacting support.