Betopper LPC010N
Betopper 54 * 4W High CRI Par Light Instruction Manual
Model: LPC010N
Brand: Betopper
1. Introduction
The Betopper 54 * 4W High CRI Par Light (Model: LPC010N) is a professional-grade LED stage lighting fixture designed for various applications including photography, video production, weddings, parties, and live performances. This light features 54 x 4W RGBW (Red, Green, Blue, White) LEDs, offering superior brightness and exceptional color accuracy with a Color Rendering Index (CRI) greater than 90.

Figure 1.1: Betopper 54 * 4W High CRI Par Lights (LPC010N-2 Pack).
2. Key Features
- High CRI (>90) Output: Ensures exceptional color accuracy, making objects and skin tones appear natural and vibrant. Ideal for professional photography, studio lighting, and video recording.
- Superior Brightness: Equipped with 54 x 4W LED bulbs, delivering up to 5500 lumens for powerful illumination in large venues.
- RGBW Full Color Mixing: Features Red, Green, Blue, and White LEDs for a wider spectrum of colors and purer white light compared to traditional RGB lights.
- Flexible Control Modes: Supports DMX512, automatic, and sound-activated modes. Includes multiple pre-set colors for easy scene creation.
- Durable Construction: Built with a robust aluminum housing and an efficient cooling fan, ensuring long-term durability and heat dissipation. Designed to operate in temperatures from -20 to 40 degrees Celsius with a life expectancy of 50,000 hours.

Figure 2.1: High CRI for Natural Color Reproduction.

Figure 2.2: Brightness Comparison of Betopper LED Par Light.
3. Setup
The Betopper Par Light is designed for easy setup and can be used in various configurations.
3.1 Unpacking
Carefully remove the light fixture and all accessories from the packaging. Verify that all components listed in the "What's in the Box" section (see Section 6) are present and undamaged.
3.2 Mounting Options
The light features a versatile bracket for multiple mounting options:
- Floor Mount: Place the light directly on a flat surface.
- Bracket Mount: Use the integrated bracket to hang the light from a truss or T-bar. Ensure the mounting clamp (not included) is securely fastened and the light is balanced.

Figure 3.1: Easy Setup Options.
3.3 Power Connection
Connect the provided power cable to the "POWER IN" port on the rear of the unit. The light supports AC100-240V input. For daisy-chaining multiple units, use the "POWER OUT" port to connect to the next fixture. Ensure the total power consumption does not exceed the circuit's capacity.
3.4 DMX Connection (Optional)
For DMX control, connect a DMX cable from your DMX controller to the "DMX IN" port of the first light. To connect multiple lights, use the "DMX OUT" port of the first light to the "DMX IN" of the next, and so on. Ensure proper DMX termination for stable operation.

Figure 3.2: Rear Panel Connections and Controls.
4. Operating Modes
The Betopper Par Light offers several operating modes to suit different needs:
- DMX512 Mode: Allows for precise control over color, brightness, and effects using an external DMX controller. The light supports 4 or 8 DMX channels. Refer to the DMX chart in Appendix A for channel assignments.
- Automatic Mode: The light cycles through pre-programmed color changes and effects automatically.
- Sound-Activated Mode: The light reacts to sound and music, changing colors and patterns in sync with the beat.
- Master-Slave Mode: Connect multiple lights via DMX cables. Set one light as the "Master" and others as "Slave" to synchronize their operation without a DMX controller.
4.1 Menu Navigation
Use the MENU, UP, DOWN, and ENTER buttons on the rear panel to navigate through the light's settings and select operating modes. The digital display will show the current mode or parameter.
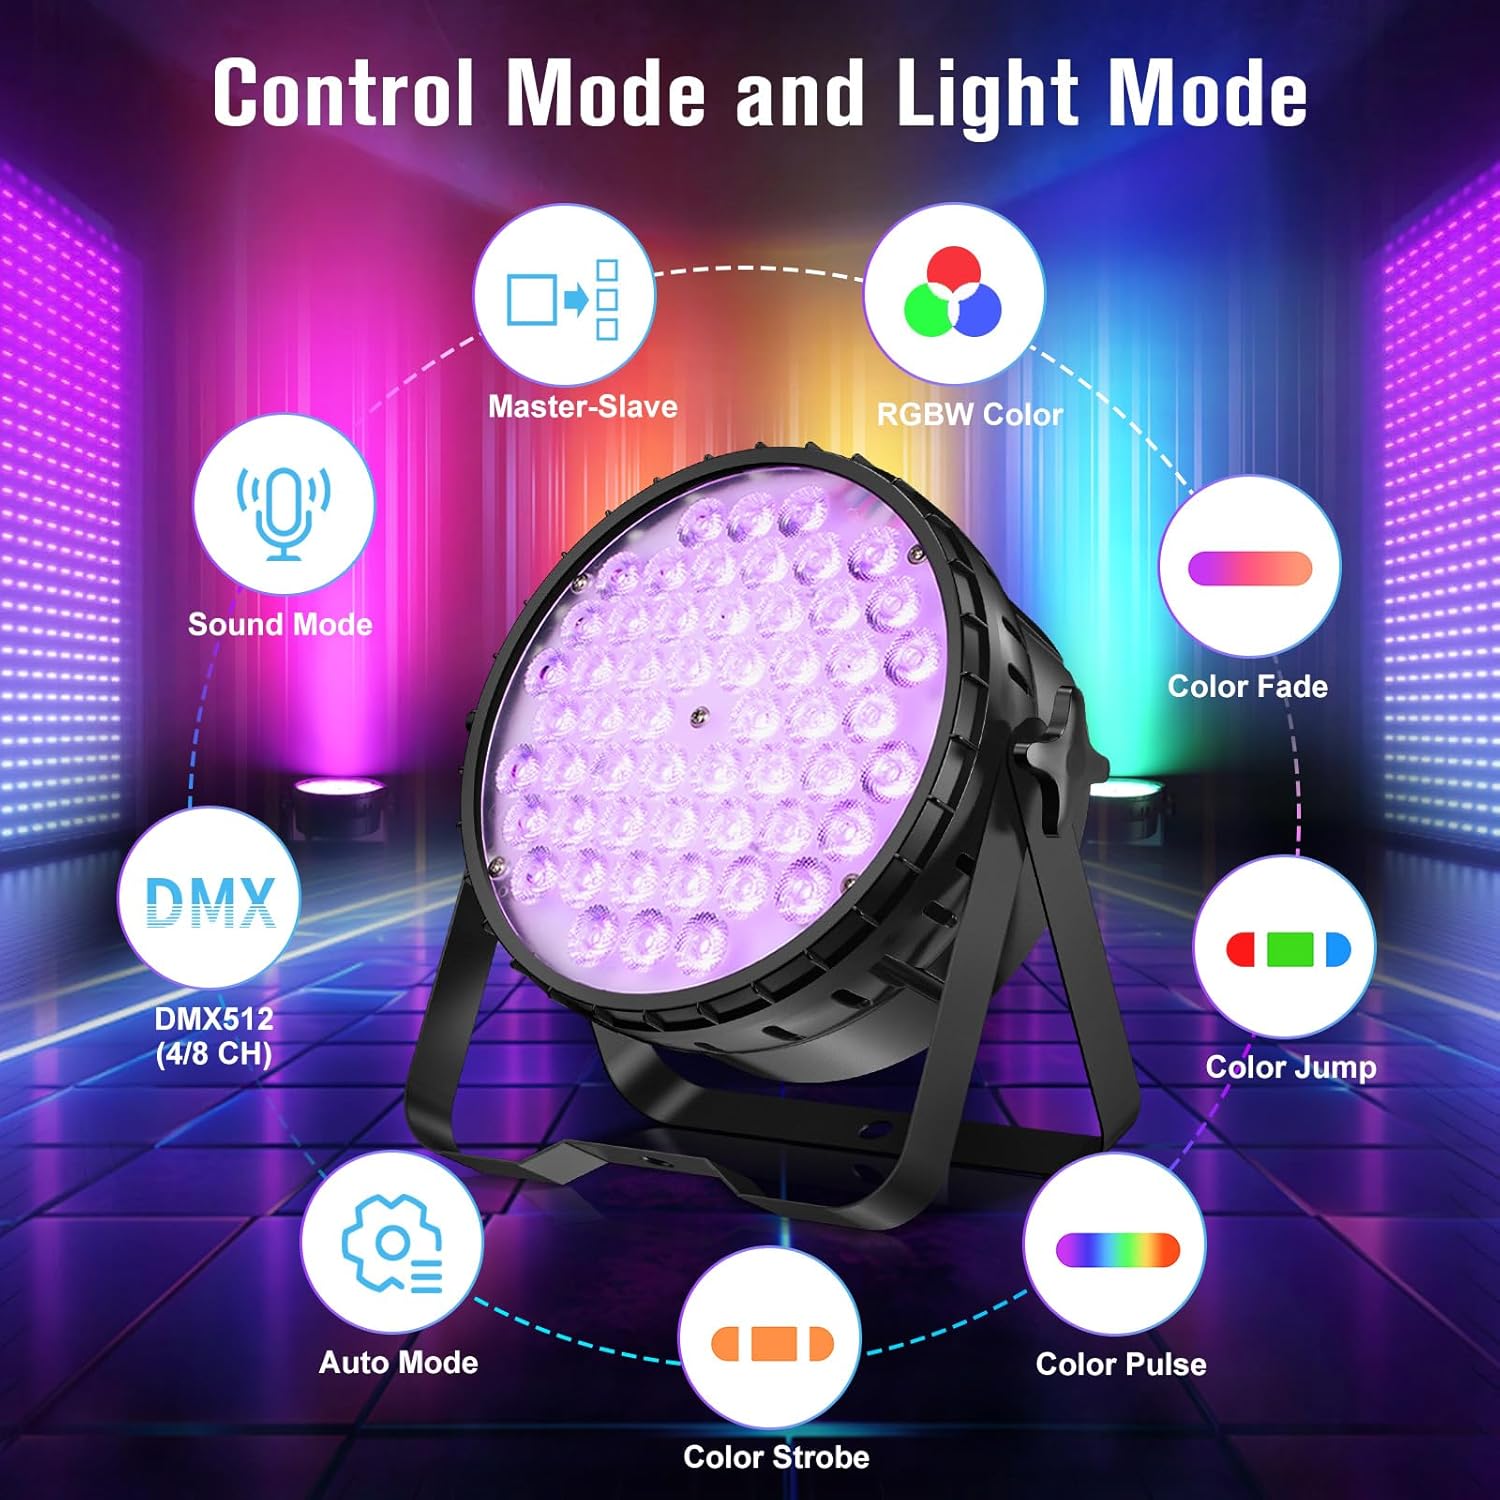
Figure 4.1: Control Mode and Light Mode Overview.

Figure 4.2: Examples of Lighting Effects.

Figure 4.3: Vivid Color Illuminations.
Video 4.1: Demonstration of Betopper Stage Light with High CRI LED Par Lighting (54x4W) showcasing various lighting effects and features.
5. Maintenance
Regular maintenance ensures the longevity and optimal performance of your Betopper Par Light.
- Cleaning: Periodically clean the lens and housing with a soft, dry cloth. Do not use abrasive cleaners or solvents.
- Fan and Vents: Ensure the cooling fan and ventilation openings are free from dust and debris to prevent overheating. Use compressed air if necessary.
- Cable Inspection: Regularly check power and DMX cables for any signs of wear, cuts, or damage. Replace damaged cables immediately.
- Storage: When not in use, store the light in a dry, dust-free environment, preferably in its original packaging or a padded case.
6. Troubleshooting
| Problem | Possible Cause | Solution |
|---|---|---|
| Light does not power on. | No power supply; faulty cable; internal fuse blown. | Check power connection and outlet. Test with a different power cable. If fuse is accessible, check and replace. Contact support if issue persists. |
| No DMX control. | Incorrect DMX address; faulty DMX cable; no DMX terminator; incorrect DMX mode. | Verify DMX address matches controller. Check DMX cables. Use a DMX terminator. Ensure light is set to DMX mode. |
| Colors are not accurate or vibrant. | Incorrect color mode; low CRI setting. | Ensure light is in RGBW mode. Adjust CRI settings via the menu if applicable. |
| Light overheats and shuts down. | Blocked ventilation; excessive ambient temperature. | Clear any obstructions from fan and vents. Ensure adequate airflow around the unit. Operate within specified temperature range. |
7. Specifications
| Attribute | Detail |
|---|---|
| Model Number | LPC010N |
| Light Source Type | Light Emitting Diode |
| Number of Light Sources | 54 |
| Light Source Wattage | 4 Watts per LED |
| Total Wattage | 120 Watts (Maximum Compatible) |
| Brightness | Up to 5500 Lumens |
| Color | RGBW (Red, Pink, Green, Blue, White) |
| Color Rendering Index (CRI) | >90 (High CRI mode), 95 (General) |
| Color Temperature | 4500 Kelvin |
| Material | Aluminum |
| Finish Type | Polished |
| Product Dimensions | 9.84"L x 4.5"W x 9.84"H |
| Item Weight | 7.54 pounds |
| Power Source | Corded Electric |
| Mounting Type | Bracket Mount, Floor Mount |
| Bulb Features | Color-changing, Dimmable, Sound-activated, Pre-set colors |
| Item Package Quantity | 2 (for LPC010N-2) |
| Included Components | Light kit included |
8. Warranty and Support
Betopper products are designed for reliability and performance. For warranty information and technical support, please refer to the contact details provided with your purchase or visit the official Betopper website. Keep your purchase receipt as proof of purchase for any warranty claims.
For additional resources and product updates, you may visit the Betopper Store on Amazon.
Ask a question about this manual
Ask about setup, troubleshooting, compatibility, parts, safety, or missing instructions. Manuals+ will review the question and use this page’s manual context to help answer it.