Introduction
This manual provides detailed instructions for the setup, operation, and maintenance of your Newentor Indoor Outdoor Thermometer Q8 and CO2 Monitor C1. The CO2 Detector C1 accurately measures carbon dioxide concentration, indoor temperature, and humidity, and features calibration capabilities. The Inside Outside Thermometer Q8 includes an indoor main unit and an outdoor sensor, designed to detect both indoor and outdoor temperature and humidity levels.
Safety Information
Please read and understand all safety precautions before using the devices. Failure to follow these instructions may result in damage to the product or personal injury.
- Do not expose the devices to extreme temperatures, direct sunlight, or high humidity.
- Keep the devices away from water and other liquids.
- Do not attempt to disassemble or modify the devices. This will void the warranty.
- Use only specified power sources and batteries.
- Keep out of reach of children.
- Dispose of batteries properly according to local regulations.
Package Contents
Verify that all items are present in the package:
- Newentor Indoor Outdoor Thermometer Q8 (Main Unit)
- Newentor CO2 Detector C1
- Outdoor Sensor (for Thermometer Q8)
- User Manual (this document)
- USB Power Cable (for C1)
Product Overview
Newentor CO2 Detector C1
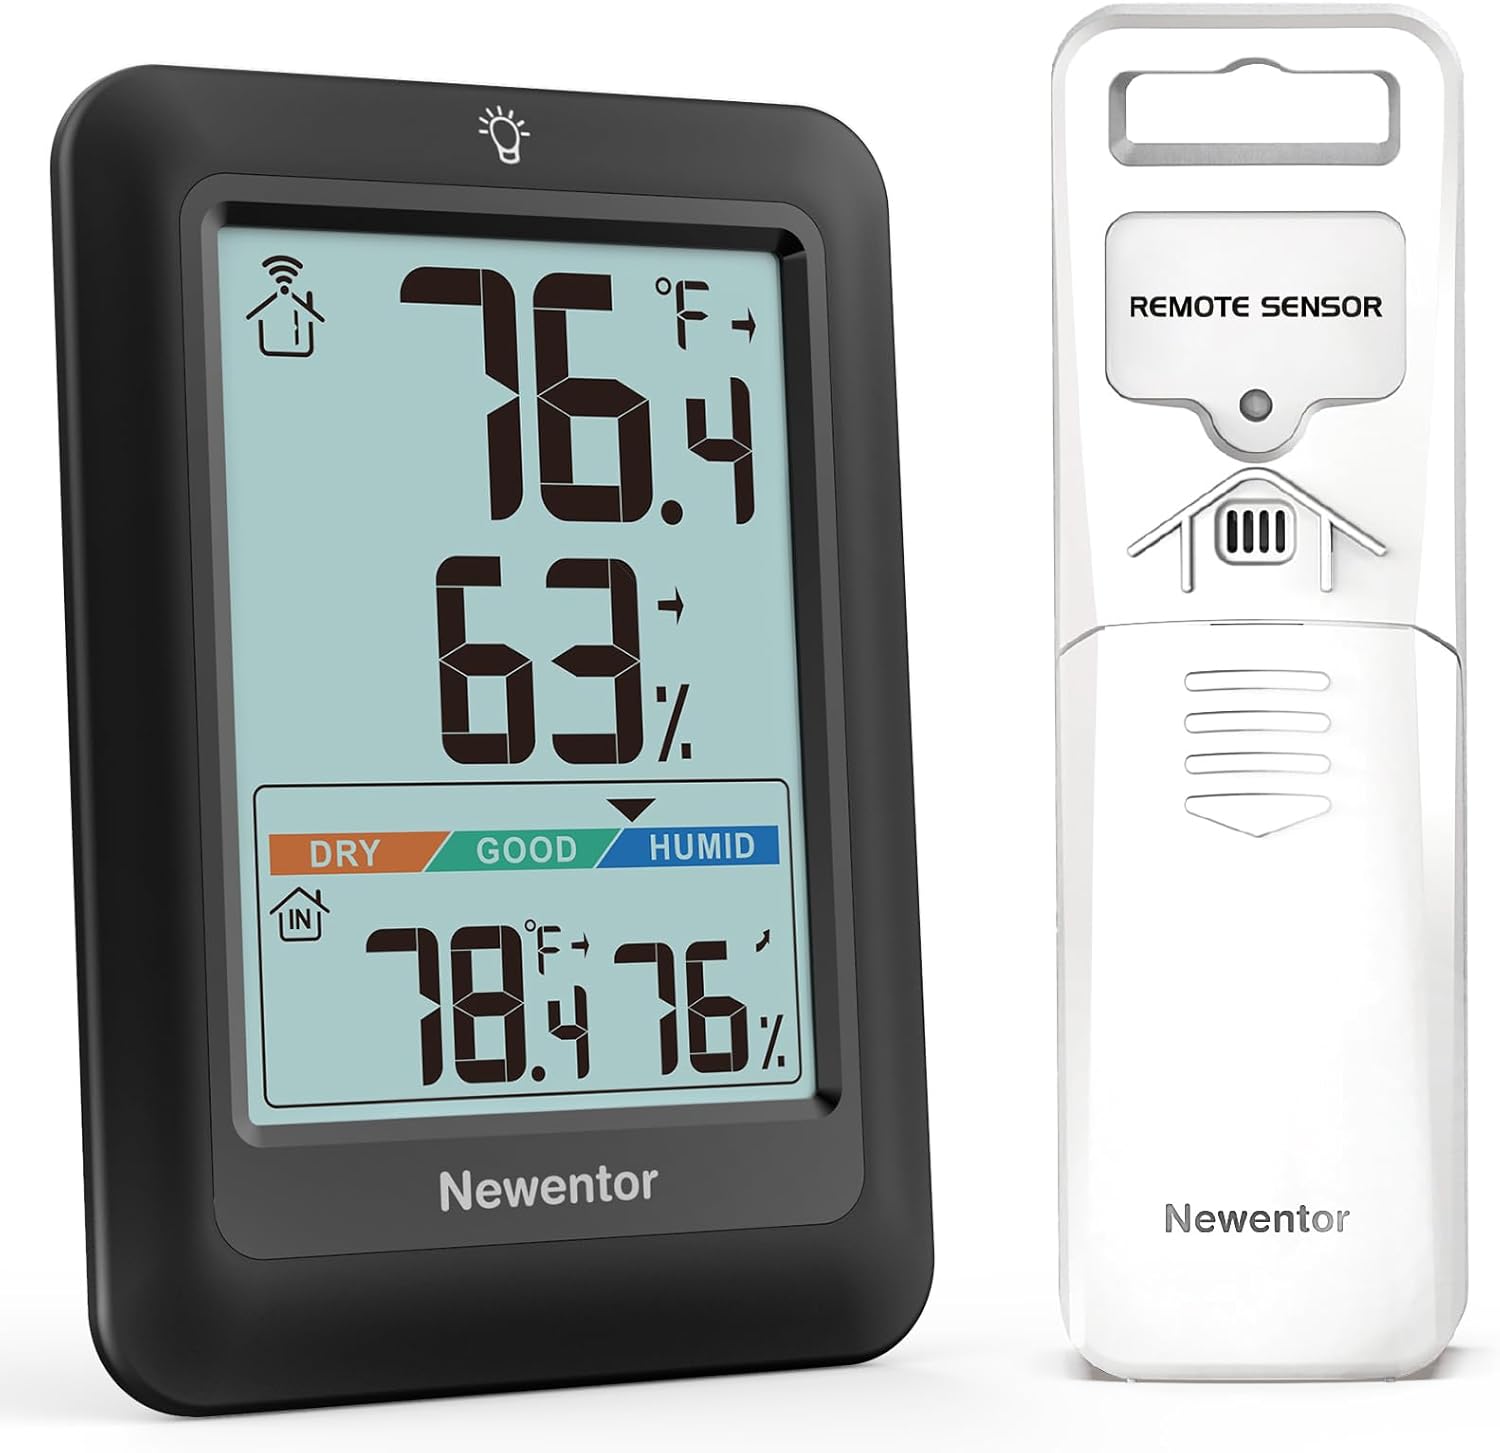
Image: Front view of the Newentor CO2 Detector C1, displaying CO2 levels in PPM, indoor temperature in Fahrenheit, indoor humidity percentage, and the current time and date. The device has a black frame and a bright digital display.
The CO2 Detector C1 is designed to monitor indoor air quality by measuring carbon dioxide concentration, temperature, and humidity. It features a clear digital display and can be powered via USB or batteries.

Image: A close-up view of the Sensirion SCD41 Swiss High-precision Sensor, highlighting its compact design and indicating a measuring range of 400-5000ppm and an accuracy of ±40ppm. This sensor is integral to the CO2 Detector C1's accurate measurements.
The C1 utilizes a Sensirion SCD41 Swiss High-precision Sensor for accurate CO2 detection, offering a measuring range of 400-5000ppm with an accuracy of ±40ppm.
Newentor Indoor Outdoor Thermometer Q8

Image: The Newentor Indoor Outdoor Thermometer Q8 main unit (left) displaying indoor and outdoor temperature and humidity, alongside its white remote sensor (right). The main unit shows current indoor temperature, humidity, and outdoor temperature and humidity.
The Thermometer Q8 provides real-time indoor and outdoor temperature and humidity readings. It consists of a main display unit and a wireless remote sensor for outdoor measurements.

Image: The Newentor Q8 main unit placed on a nightstand indoors, and its remote sensor mounted on an exterior wall of a house, demonstrating the 328ft/100m wireless transmission range in open air between the two units.
The Q8 system supports up to 3 wireless connection channels, allowing for monitoring of different outdoor or remote locations with additional sensors (sold separately). It boasts a wireless transmission range of up to 328ft (100m) in open air.
Setup
Setting up the CO2 Detector C1
- Power On: Connect the provided USB power cable to the C1 device and a suitable USB power adapter (not included) or a USB port. Alternatively, insert 3 AAA batteries (not included) into the battery compartment.
- Initial Warm-up: Upon powering on, the device will undergo a brief warm-up period (approximately 30 seconds) before displaying readings.
- Calibration (Optional): For optimal accuracy, it is recommended to perform a calibration in a well-ventilated outdoor environment.
- Take the C1 device outdoors to an area with fresh air.
- Press and hold the "CAL" button (refer to device diagram for button location) for 3-5 seconds until the display shows "CAL".
- Allow the device to calibrate for approximately 5-10 minutes. The display will return to normal readings once calibration is complete.
- Time and Date Setting: Use the "TIME" and "SET" buttons to adjust the time and date as needed.
Setting up the Indoor Outdoor Thermometer Q8
- Main Unit Power: Insert 2 AAA batteries (not included) into the battery compartment of the Q8 main unit.
- Outdoor Sensor Power: Insert 2 AAA batteries (not included) into the battery compartment of the outdoor sensor.
- Pairing the Sensor:
- Place the main unit and the outdoor sensor close to each other.
- The main unit will automatically search for the outdoor sensor. The outdoor temperature/humidity display area will flash.
- If pairing is successful, the outdoor readings will appear on the main unit's display. If not, press the "CHANNEL" button on the main unit to manually search for the sensor.
- Channel Selection: The outdoor sensor has a channel switch (1, 2, or 3). Ensure the channel selected on the sensor matches the channel displayed on the main unit for proper communication. The Q8 main unit can connect to up to three sensors (only one sensor is included).
- Placement:
- Place the main unit indoors in a central location, away from direct sunlight or heat sources.
- Mount the outdoor sensor in a shaded, dry location outdoors, protected from direct rain and sunlight, to ensure accurate readings.
Operating Instructions
CO2 Detector C1 Operation
- Reading Display: The main screen displays CO2 concentration in PPM, indoor temperature (℉ or ℃), indoor humidity (%), and current time/date.
- CO2 Level Indicator: The display features a color-coded indicator (e.g., green for good, yellow for moderate, red for poor) to quickly assess air quality based on CO2 levels.
- Data Refresh:
- When powered by USB, data refreshes approximately every 6 seconds.
- When powered by batteries, data can be refreshed by pressing the "DETECT" button to conserve power.
Image: The Newentor CO2 Detector C1 illustrating its two data refresh methods. On the left, the device is shown connected via USB, indicating updates every 6 seconds. On the right, the device is shown battery-powered, with an inset showing the "DETECT" button for manual data refresh.
- Temperature Unit Switch: Press the "C/F" button to switch between Celsius (℃) and Fahrenheit (℉).
- Alarm Function: The C1 may feature an adjustable CO2 alarm. Refer to the specific button layout on your device for alarm setting instructions.
Indoor Outdoor Thermometer Q8 Operation
- Reading Display: The main unit displays indoor temperature (℉ or ℃), indoor humidity (%), outdoor temperature (℉ or ℃), and outdoor humidity (%).
- Temperature Unit Switch: Press the "C/F" button on the main unit to switch between Celsius (℃) and Fahrenheit (℉).
- Channel Switching: If you have multiple outdoor sensors, press the "CHANNEL" button on the main unit to cycle through the readings from different sensors (CH1, CH2, CH3).
- MAX/MIN Records: Press the "MAX/MIN" button to view the maximum and minimum temperature and humidity readings recorded since the last reset. Press again to clear the records.
- Humidity Level Indicator: The display may show comfort levels (DRY, GOOD, HUMID) based on indoor humidity.
Maintenance
- Cleaning: Wipe the devices with a soft, dry cloth. Do not use abrasive cleaners or solvents.
- Battery Replacement: Replace batteries in both the Q8 main unit and the outdoor sensor when the low battery indicator appears on the display. For the C1, replace batteries if using battery power and the display dims or stops functioning.
- Storage: If storing the devices for an extended period, remove all batteries to prevent leakage. Store in a cool, dry place.
Troubleshooting
| Problem | Possible Cause | Solution |
|---|---|---|
| No display on device. | Low or dead batteries; incorrect battery insertion; no power for C1. | Replace batteries, ensure correct polarity. For C1, check USB connection. |
| Outdoor readings not displayed on Q8. | Sensor out of range; sensor batteries low; incorrect channel; interference. | Move sensor closer to main unit; replace sensor batteries; ensure sensor and main unit are on the same channel; reduce interference sources. |
| Inaccurate CO2 readings on C1. | Needs calibration; sensor obstruction. | Perform outdoor calibration as described in the Setup section. Ensure sensor vents are clear. |
| Readings fluctuating excessively. | Device exposed to drafts, direct sunlight, or rapid temperature changes. | Relocate the device to a stable environment. |
Specifications
Newentor CO2 Detector C1
| CO2 Measuring Range | 400 - 5000 ppm |
| CO2 Accuracy | ±40 ppm |
| Temperature Range | 0°C to 50°C (32°F to 122°F) |
| Humidity Range | 0% to 99% RH |
| Power Source | USB Powered (DC 5V) or 3 x AAA Batteries |
| Display Type | Digital LCD |
Newentor Indoor Outdoor Thermometer Q8
| Indoor Temperature Range | 0°C to 50°C (32°F to 122°F) |
| Outdoor Temperature Range | -40°C to 60°C (-40°F to 140°F) |
| Temperature Accuracy | ±1°C |
| Humidity Range | 10% to 99% RH |
| Wireless Transmission Range | Up to 100m (328ft) in open air |
| Power Source (Main Unit) | 2 x AAA Batteries |
| Power Source (Outdoor Sensor) | 2 x AAA Batteries |
| Sensor Technology | Thermocouple/Thermistor, Infrared |
Warranty and Support
Newentor products are designed for reliability and performance. For warranty information, technical support, or customer service inquiries, please refer to the contact information provided on the Newentor official website or the product packaging. Please have your model number (Q8 and C1) and purchase date ready when contacting support.
Visit the Newentor Store on Amazon for more information and product updates.


