1. Introduction
The CRESTWAVE 1L 125PSI Pre-Pressurized Accumulator Tank is designed to optimize the performance of your RV, boat, travel trailer, caravan, or domestic water system. This tank helps to reduce water pump cycling, smooth water flow, and extend the lifespan of your water pump by absorbing pressure fluctuations.
Important Safety Warning:
The tank is pre-charged with 10 PSI (0.7 BAR) at the factory. DO NOT inflate it additionally beyond 10 PSI to prevent the pressure from exceeding the bladder's maximum capacity and causing it to burst. Always relieve air pressure prior to disassembly.

Figure 1: CRESTWAVE 1L Accumulator Tank (left) compared to a standard 0.75L tank (right). The 1L capacity provides superior water flow stability and pump protection.
2. Working Principle
The accumulator tank operates using a pre-charged air bladder that separates the air from the water. As water enters the tank from the pump, the air in the bladder compresses, storing pressure. When water is drawn from the system, the compressed air pushes the water out, maintaining a consistent flow and reducing the need for the pump to cycle on and off frequently.
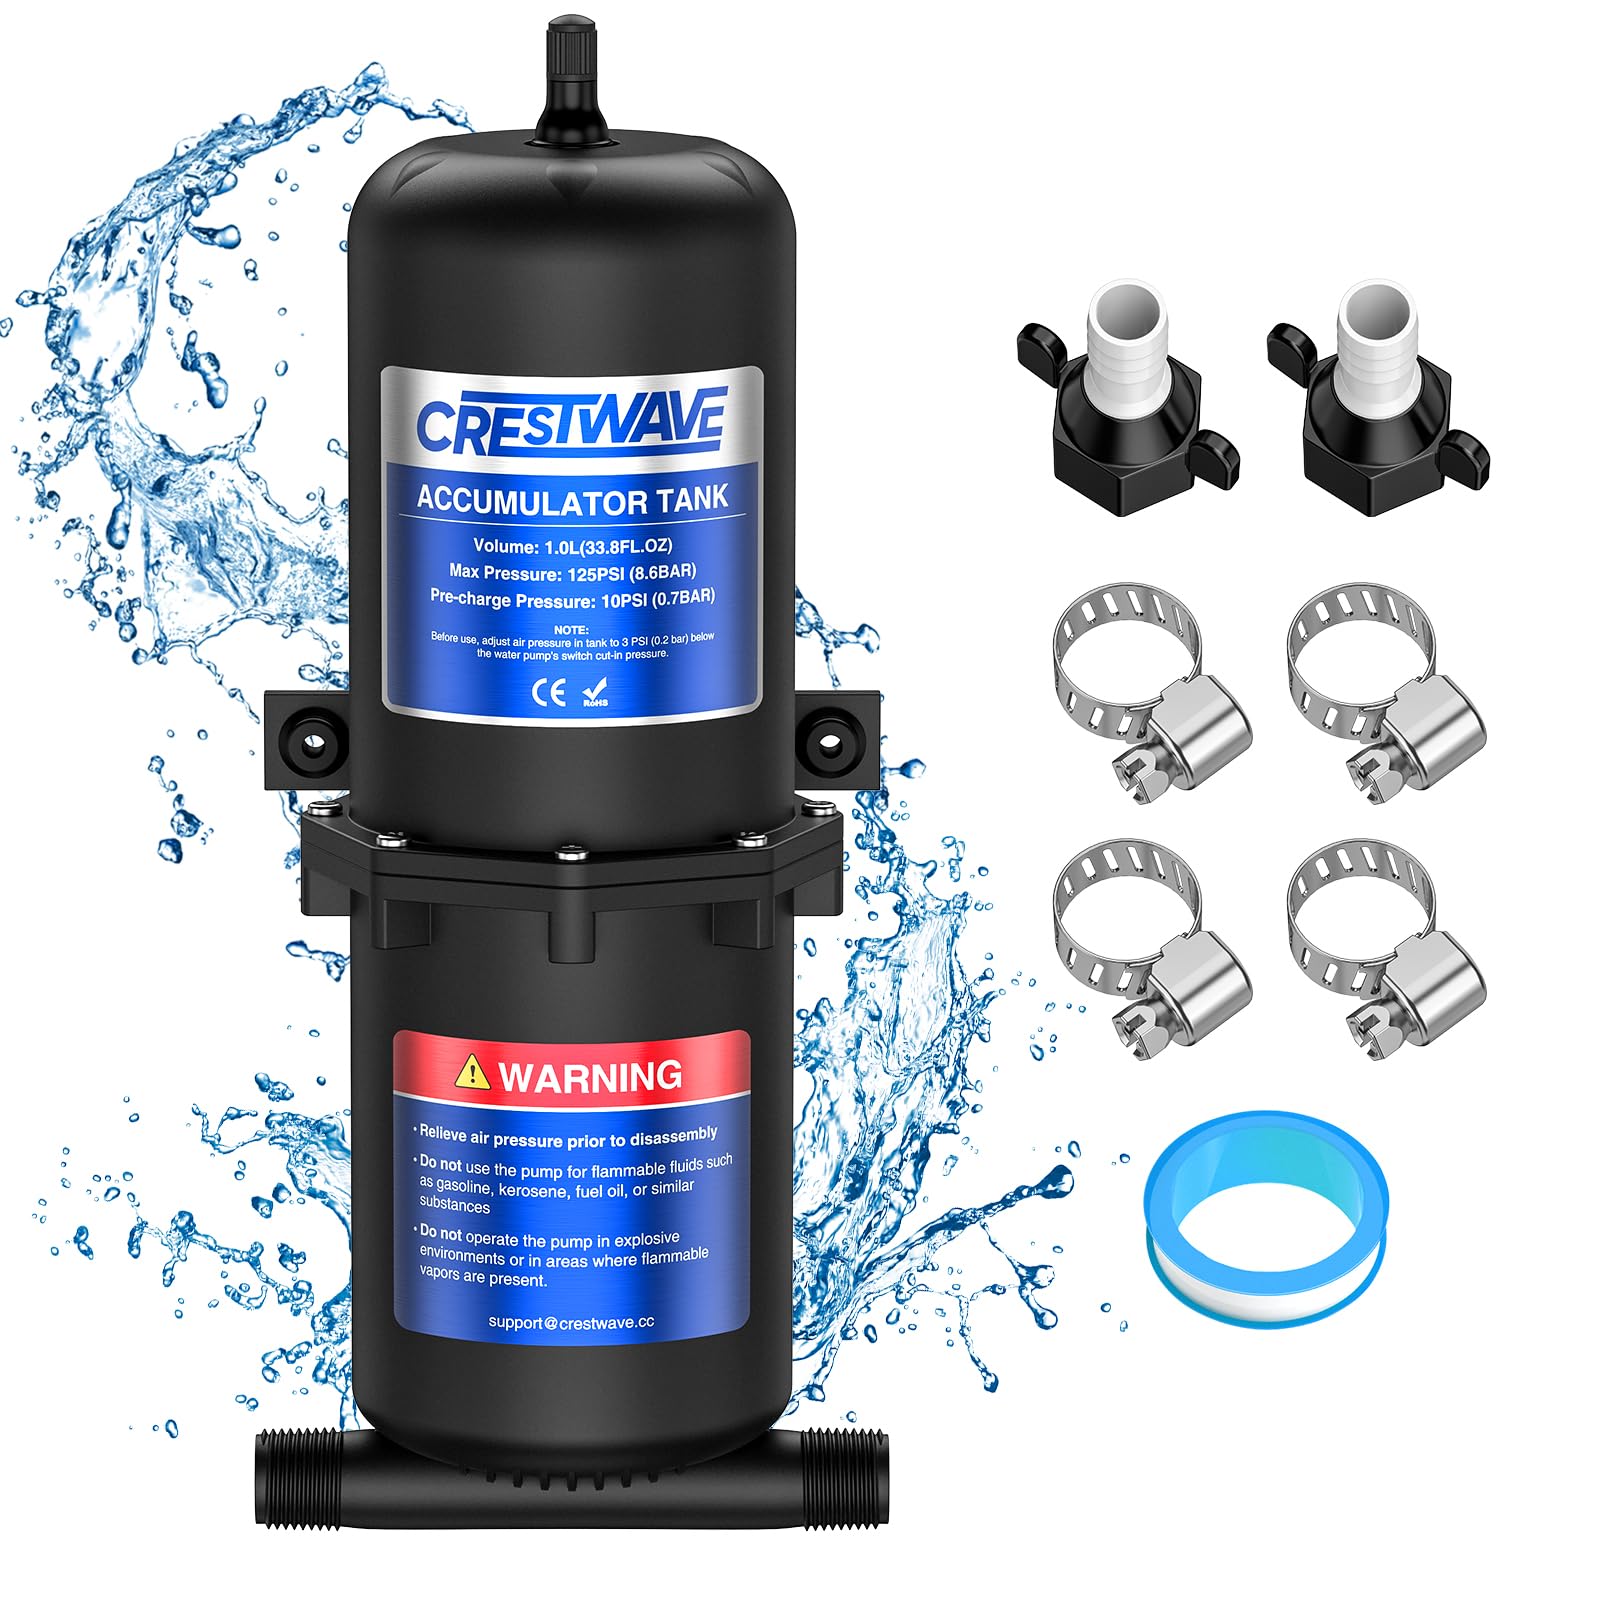
Figure 2: Working Principle of the Accumulator Tank. Compressed air above the bladder pushes water out, ensuring smooth flow.
3. Installation
The CRESTWAVE accumulator tank is designed for easy integration into most pressurized water systems. It features 1/2" MNPT inlet/outlet connections.
3.1. Included Components
- 1 x Pre-pressurized Accumulator Tank
- 2 x Wing Nut Fittings
- 4 x Clamps
- 1 x Waterproof Tape

Figure 3: Accumulator Tank Dimensions and Included Installation Components.
3.2. Installation Steps
- Choose Location: Select a suitable location for the tank, typically between the water pump and the first fixture. Ensure it is easily accessible for maintenance.
- Turn Off Water Supply: Shut off the water pump and drain the water system to relieve pressure.
- Connect Inlet/Outlet: Use the provided fittings and waterproof tape to connect the tank's 1/2" MNPT ports to your water lines. Ensure all connections are secure and watertight.
- Mount the Tank: Securely mount the tank using appropriate hardware (not included) to prevent movement and vibration. The tank is equipped with anti-vibration rubber feet.
- Restore Water Supply: Slowly turn on the water pump and check for any leaks.
- Verify Operation: Open a faucet to allow air to escape the system, then close it. Observe the pump cycling; it should be less frequent and water flow smoother.

Figure 4: Example of Easy Installation in a Water System.

Figure 5: Accumulator Tank Installed Under a Sink.
4. Operation and Applications
Once installed, the accumulator tank works automatically to provide a consistent water flow and reduce pump wear. It is suitable for various applications:
- RV and Travel Trailers: Enhances water pressure and reduces pump noise during showers or faucet use.
- Boats and Yachts: Provides stable water delivery for marine plumbing systems.
- Caravans: Improves overall water system efficiency.
- Domestic Water Systems: Can be used in small home systems to buffer pressure.

Figure 6: Accumulator Tank Integration in an RV Water System.

Figure 7: Multiple Applications of the CRESTWAVE Accumulator Tank.
5. Maintenance and Safety
Regular maintenance ensures optimal performance and longevity of your accumulator tank.
5.1. Pressure Check and Adjustment
The tank is factory pre-charged to 10 PSI (0.7 BAR). While it should not be inflated beyond this, it is good practice to periodically check the air pressure in the tank's air valve (similar to a tire valve) using a low-pressure gauge. If the pressure drops significantly below 10 PSI, it may indicate a leak or require a slight adjustment. Ensure the water system is depressurized before checking or adjusting air pressure.
5.2. General Safety Guidelines
- Always relieve air pressure from the tank before attempting any disassembly or service.
- Do not use this tank for flammable fluids such as gasoline, fuel oil, or similar substances.
- Do not operate the tank in explosive atmospheres or areas where flammable vapors are present.
- Inspect connections periodically for leaks and tighten as necessary.
6. Troubleshooting
| Problem | Possible Cause | Solution |
|---|---|---|
| Water pump cycles frequently. | Low air pressure in accumulator tank, or tank is waterlogged. | Depressurize water system, check air pressure in tank. If below 10 PSI, add air carefully using a hand pump, but do not exceed 10 PSI. If waterlogged, drain and re-pressurize. |
| Inconsistent or pulsating water flow. | Low air pressure in accumulator tank, or air in water lines. | Check and adjust tank air pressure (max 10 PSI). Open faucets to purge air from the water system. |
| Water leaks from connections. | Loose fittings or insufficient sealing. | Turn off pump, depressurize system. Tighten connections. Reapply waterproof tape if necessary. |
| Tank bladder burst. | Over-inflation of air bladder. | This is typically due to exceeding the pre-charge pressure. The tank is pre-charged to 10 PSI and should not be inflated further. Replace the unit. |
7. Specifications
| Brand | CRESTWAVE |
| Model Number | F91-102-125-100 |
| Internal Volume | 1 Liter (1L) |
| Pre-Charge Pressure | 10 PSI (0.7 BAR) |
| Maximum Pressure | 125 PSI (8.6 BAR) |
| Inlet/Outlet Diameter | 1/2" MNPT |
| Dimensions (L x W x H) | 12" x 4.13" x 4.49" (approx.) |
| Material | Metal |
| Item Weight | 0.75 Kilograms |
| Included Components | Pre-pressurized Tank, 2 Wing Nut Fittings, 4 Clamps, 1 Waterproof Tape |
8. Warranty and Support
This CRESTWAVE Accumulator Tank comes with a 1-Year Manufacturer Warranty.
For technical assistance, warranty claims, or any questions regarding your product, please contact CRESTWAVE support:
- Email: support@crestwave.co
Please have your model number (F91-102-125-100) and purchase information ready when contacting support.