Introduction
This manual provides comprehensive instructions for the installation, operation, and maintenance of your NANU SHOP LGA1155 Motherboard. Please read this guide carefully before proceeding with installation to ensure proper setup and optimal performance. This motherboard is designed to support Intel 2nd and 3rd Generation processors, offering robust performance for various computing needs.
Product Overview
Key Features
- High-Level Performance: Compatible with Intel 2nd and 3rd generation processors, ensuring powerful and stable performance for any task.
- Incredible Storage Speed: M.2 slot for NVMe SSDs offers ultra-fast read and write speeds, accelerating your system and applications.
- Memory Expansion and Power: Supports up to 16 GB of DDR3 memory, allowing for fluid multitasking and superior performance in games and applications.
- Premium Connectivity: USB 3.0, HDMI, VGA, and Ethernet ports ensure seamless integration with all your peripherals and devices, offering flexibility and high performance.
- Robust and Efficient Construction: Solid and efficient design with excellent ventilation and protection against failures, ideal for a reliable and durable PC base.
Specifications
| Brand | NANU SHOP |
| Processor Type | Intel Core i7 (Compatible with Intel 2nd and 3rd Gen processors) |
| Processor Socket Type | LGA 1155 |
| Memory Technology | DDR3 |
| Maximum Compatible Memory | 16 GB |
| Memory Clock Speed | 1600 MHz |
| Memory Slots | 2 |
| Video Card Interface | Integrated |
| HDMI Connections | 1 |
| Power Source | Electric power |
| Product Weight | 560 g |
| Dimensions | 25.8 x 20.2 x 4.9 cm |
| ASIN | B0DDVG6QTW |
| EAN | 7896163107648 |
Product Images

This image shows a top-down view of the NANU SHOP LGA1155 Motherboard, highlighting the CPU socket, RAM slots, and various connectors. The board features a black PCB with yellow DDR3 memory slots and a black LGA1155 CPU socket.
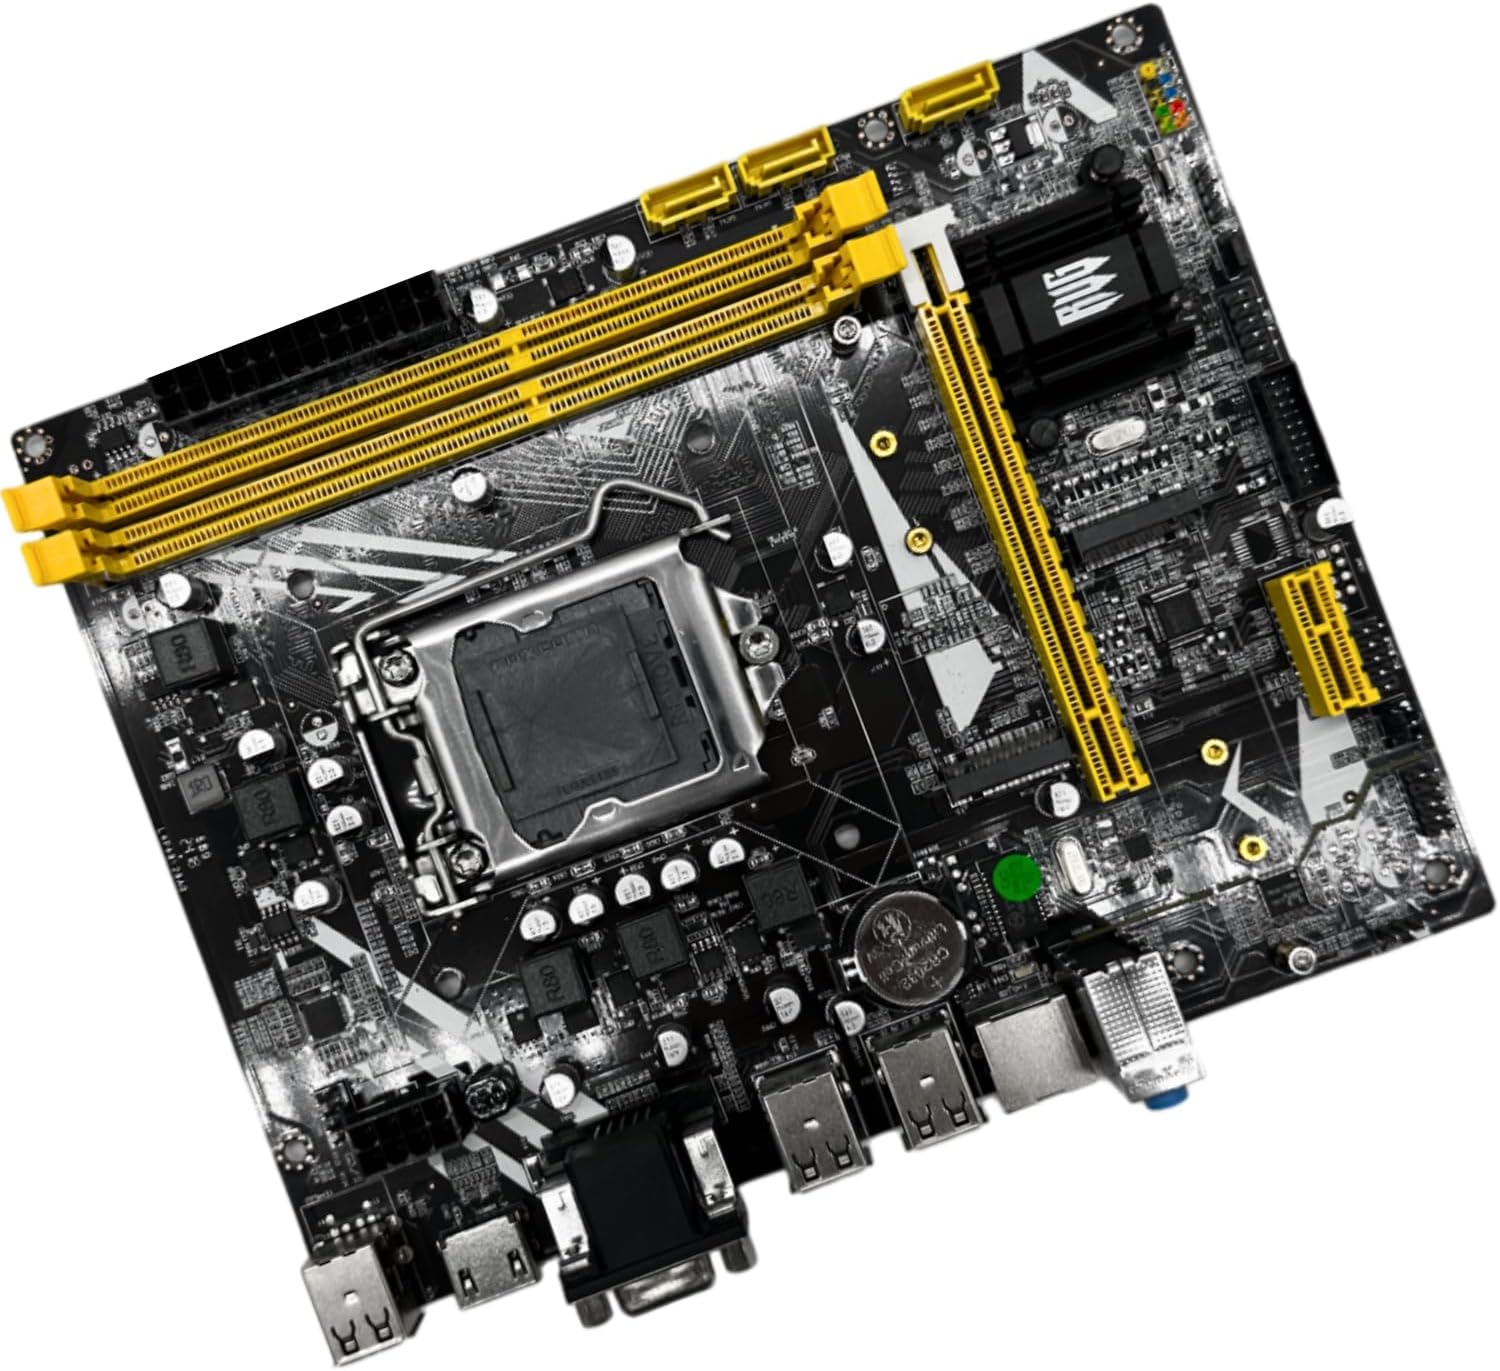
An angled perspective of the motherboard, providing a clearer view of the layout including the CPU socket, two DDR3 RAM slots, and the M.2 slot. The yellow accents on the RAM slots are prominent.

This image displays the rear input/output (I/O) panel of the motherboard, featuring multiple USB ports, HDMI, VGA, Ethernet, and audio jacks. This is where external devices connect to the system.
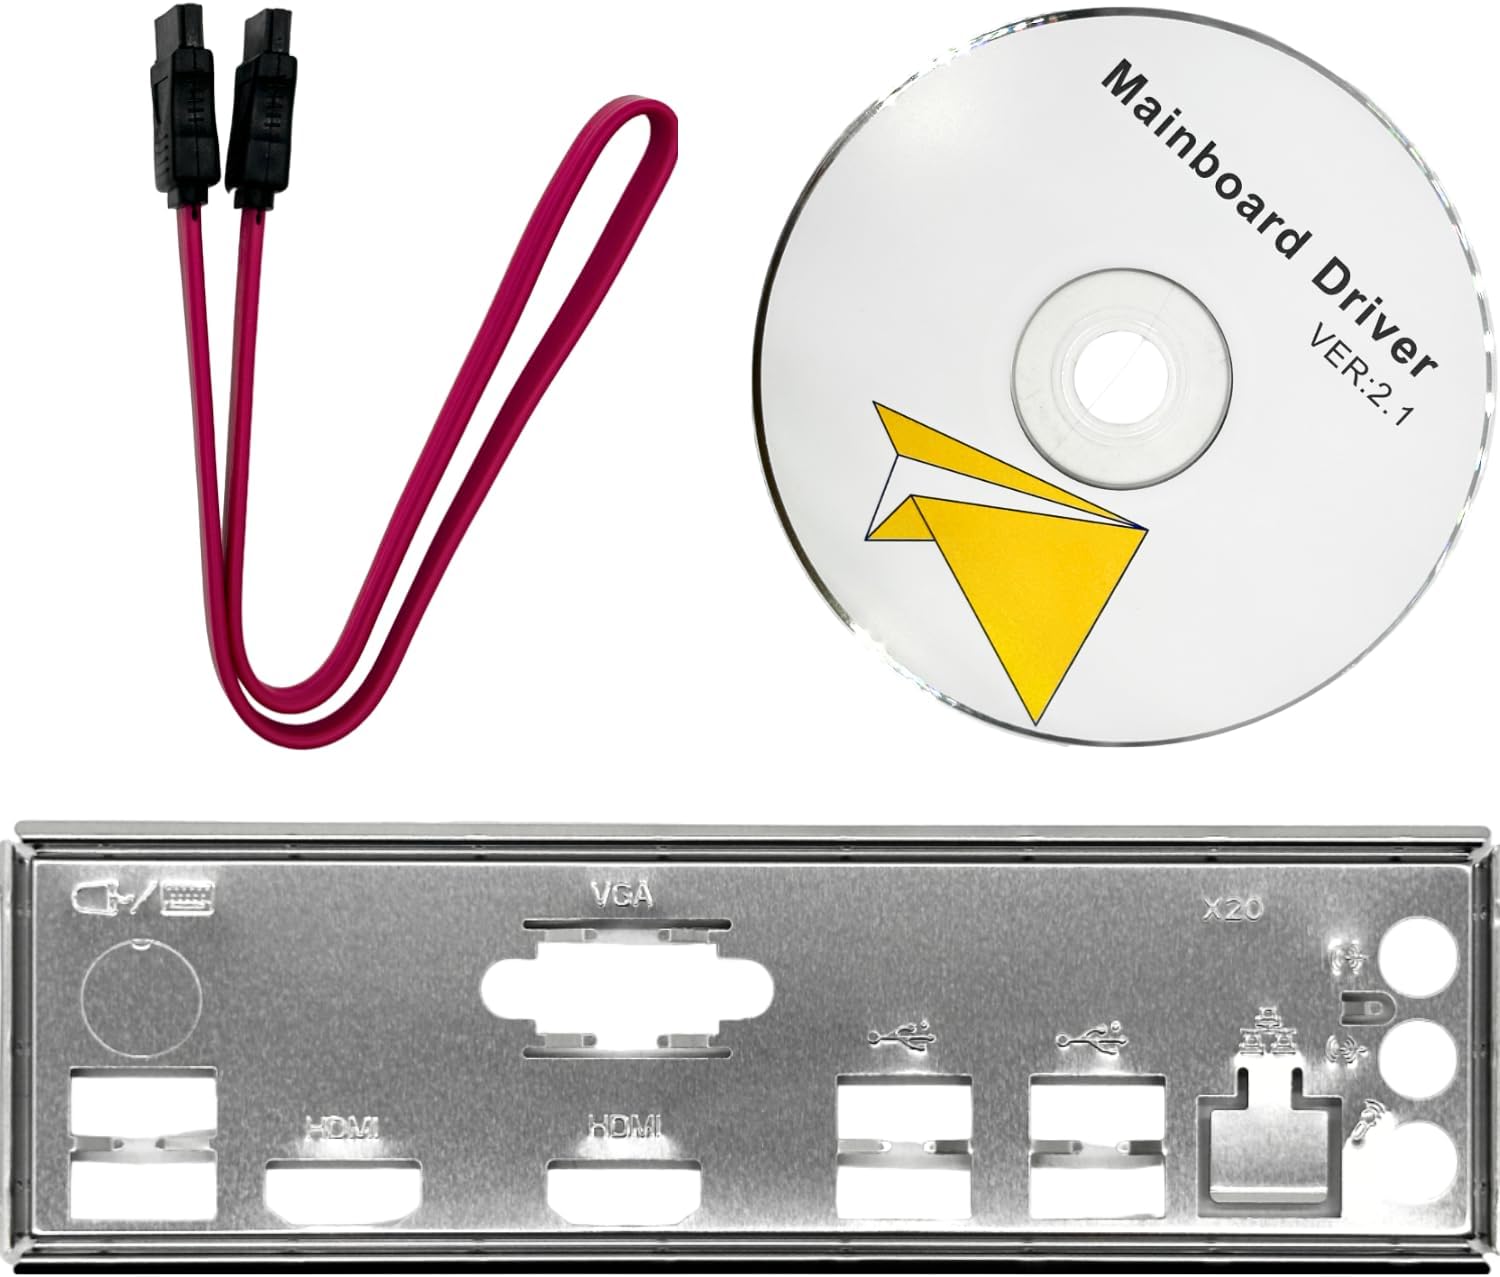
The accessories included with the motherboard are shown here: two red SATA data cables, a driver installation CD labeled "Mainboard Driver Ver: 2.1", and a metal I/O shield for the PC case.
Setup Guide
Follow these steps to properly install your NANU SHOP LGA1155 Motherboard into your PC case and connect essential components.
1. Motherboard Installation
- Prepare the Case: Ensure your PC case is clean and has standoffs installed in the correct positions for an ATX or Micro-ATX motherboard (depending on the specific board size, which is typically standard for LGA1155).
- Install I/O Shield: Snap the metal I/O shield (included, see accessories image) into the designated opening at the rear of your PC case. Ensure it is firmly seated.
- Mount Motherboard: Carefully align the motherboard with the standoffs and the I/O shield. Gently lower the motherboard into place. Secure it with screws, ensuring not to overtighten.
2. CPU Installation (LGA1155 Socket)
- Open CPU Socket: Locate the LGA1155 CPU socket on the motherboard. Push down the small lever on the side of the socket and pull it outwards to release the retention frame. Lift the metal load plate.
- Insert CPU: Carefully align your Intel 2nd or 3rd Generation processor with the socket. Look for the golden triangle or arrow on the CPU and match it with the corresponding mark on the socket. Gently place the CPU into the socket without forcing it.
- Secure CPU: Lower the metal load plate back down and push the lever back into its original position until it clicks, securing the CPU firmly.
- Install CPU Cooler: Apply thermal paste to the CPU (if not pre-applied on the cooler) and install your compatible CPU cooler according to its manufacturer's instructions. Connect the CPU fan cable to the "CPU_FAN" header on the motherboard.
3. Memory (RAM) Installation
- Open RAM Slots: Open the clips at both ends of the DDR3 memory slots (yellow slots).
- Insert RAM Modules: Align the notch on your DDR3 RAM module with the key in the memory slot. Press down firmly on both ends of the module until the clips snap into place, securing the RAM. For dual-channel performance, install modules in matching slots (refer to motherboard manual for specific slot pairing, usually alternating colors or specific numbered slots).
4. Storage Device Installation
- NVMe M.2 SSD: Locate the M.2 slot on the motherboard. Insert the NVMe M.2 SSD at an angle into the slot. Push it down and secure it with the small screw provided with the motherboard or SSD.
- SATA Drives: Connect your SATA hard drives or SSDs to the SATA ports on the motherboard using the provided SATA cables (red cables, see accessories image). Connect the other end of the SATA cable to your storage device. Ensure power cables from your power supply are also connected to these devices.
5. Power Connections
- 24-pin ATX Power: Connect the large 24-pin ATX power connector from your power supply to the corresponding port on the motherboard.
- 4/8-pin CPU Power: Connect the 4-pin or 8-pin CPU power connector from your power supply to the CPU power port near the CPU socket.
6. Front Panel Connections
Connect the small cables from your PC case (Power Button, Reset Button, HDD LED, Power LED, USB ports, Audio jacks) to the corresponding headers on the motherboard. Refer to the motherboard's silkscreen labels for correct pin alignment.
Operating Instructions
Once all components are installed and connected, you can proceed with the initial boot-up and operating system installation.
Initial Boot and BIOS Setup
- Power On: Connect your monitor, keyboard, and mouse. Plug in the power supply and turn on the PC.
- Access BIOS: During the initial boot screen, repeatedly press the DEL or F2 key (common keys, may vary) to enter the BIOS/UEFI setup utility.
- Configure Settings: In the BIOS, you can configure boot order, enable/disable integrated peripherals, set system time, and monitor hardware status. Ensure your storage devices are recognized. Save and Exit BIOS.
Operating System and Driver Installation
- Install OS: Insert your operating system installation media (USB drive or DVD) and follow the on-screen prompts to install your preferred OS (e.g., Windows 10, as reported compatible by users).
- Install Drivers: After OS installation, install the necessary drivers for your motherboard components. Use the included "Mainboard Driver Ver: 2.1" CD or download the latest drivers from the NANU SHOP official website (if available) for optimal performance and stability. Key drivers include chipset, audio, LAN, and integrated graphics drivers.
Maintenance
Regular maintenance helps ensure the longevity and stable operation of your motherboard and PC system.
- Dust Cleaning: Periodically (every 3-6 months) open your PC case and use compressed air to remove dust buildup from the motherboard, CPU cooler, and other components. Dust can impede airflow and cause overheating.
- Check Connections: Ensure all power cables, data cables (SATA, M.2), and front panel connectors are securely seated. Loose connections can lead to intermittent issues.
- BIOS Updates: Check the manufacturer's website for BIOS updates. BIOS updates can improve compatibility, stability, and performance. Follow the update instructions carefully to avoid damaging the motherboard.
- Software Updates: Keep your operating system and drivers updated to the latest versions to benefit from performance improvements and security patches.
Troubleshooting
This section provides solutions to common issues you might encounter.
No Power / No Boot
- Check Power Connections: Ensure the 24-pin ATX and 4/8-pin CPU power cables are firmly connected to the motherboard and power supply.
- Front Panel Connections: Verify that the power button cable from the case is correctly connected to the motherboard's front panel header.
- Power Supply: Test the power supply unit (PSU) to ensure it is functional.
No Display Output
- Monitor Connection: Ensure the monitor cable (HDMI or VGA) is securely connected to the motherboard's I/O panel and the monitor.
- RAM Seating: Reseat the RAM modules in their slots. Try booting with only one RAM module if you have multiple.
- CPU Seating: Ensure the CPU is correctly seated in its socket and the CPU cooler is properly installed.
Device Not Recognized (Storage, USB)
- Check Cables: For SATA devices, ensure both data and power cables are securely connected. For M.2 SSDs, ensure it is properly seated and screwed down.
- BIOS Settings: Enter BIOS and verify that the storage devices are detected. Check SATA mode settings (AHCI is generally recommended).
- Drivers: Ensure all necessary chipset and device drivers are installed for your operating system.
Warranty and Support
For warranty information and technical support, please refer to the documentation provided with your purchase or contact NANU SHOP directly through their official channels. You can often find support information on the retailer's product page or the brand's official website.
As a product from a small business, your support is greatly appreciated. For further assistance, please visit the NANU SHOP store on Amazon.


