1. Introduction
Welcome to the Ultimate Probiotic Yogurt Maker instruction manual. This appliance is designed to simplify the process of making homemade yogurt, allowing for precise control over fermentation time and temperature. Please read this manual thoroughly before first use to ensure proper operation and maintenance.
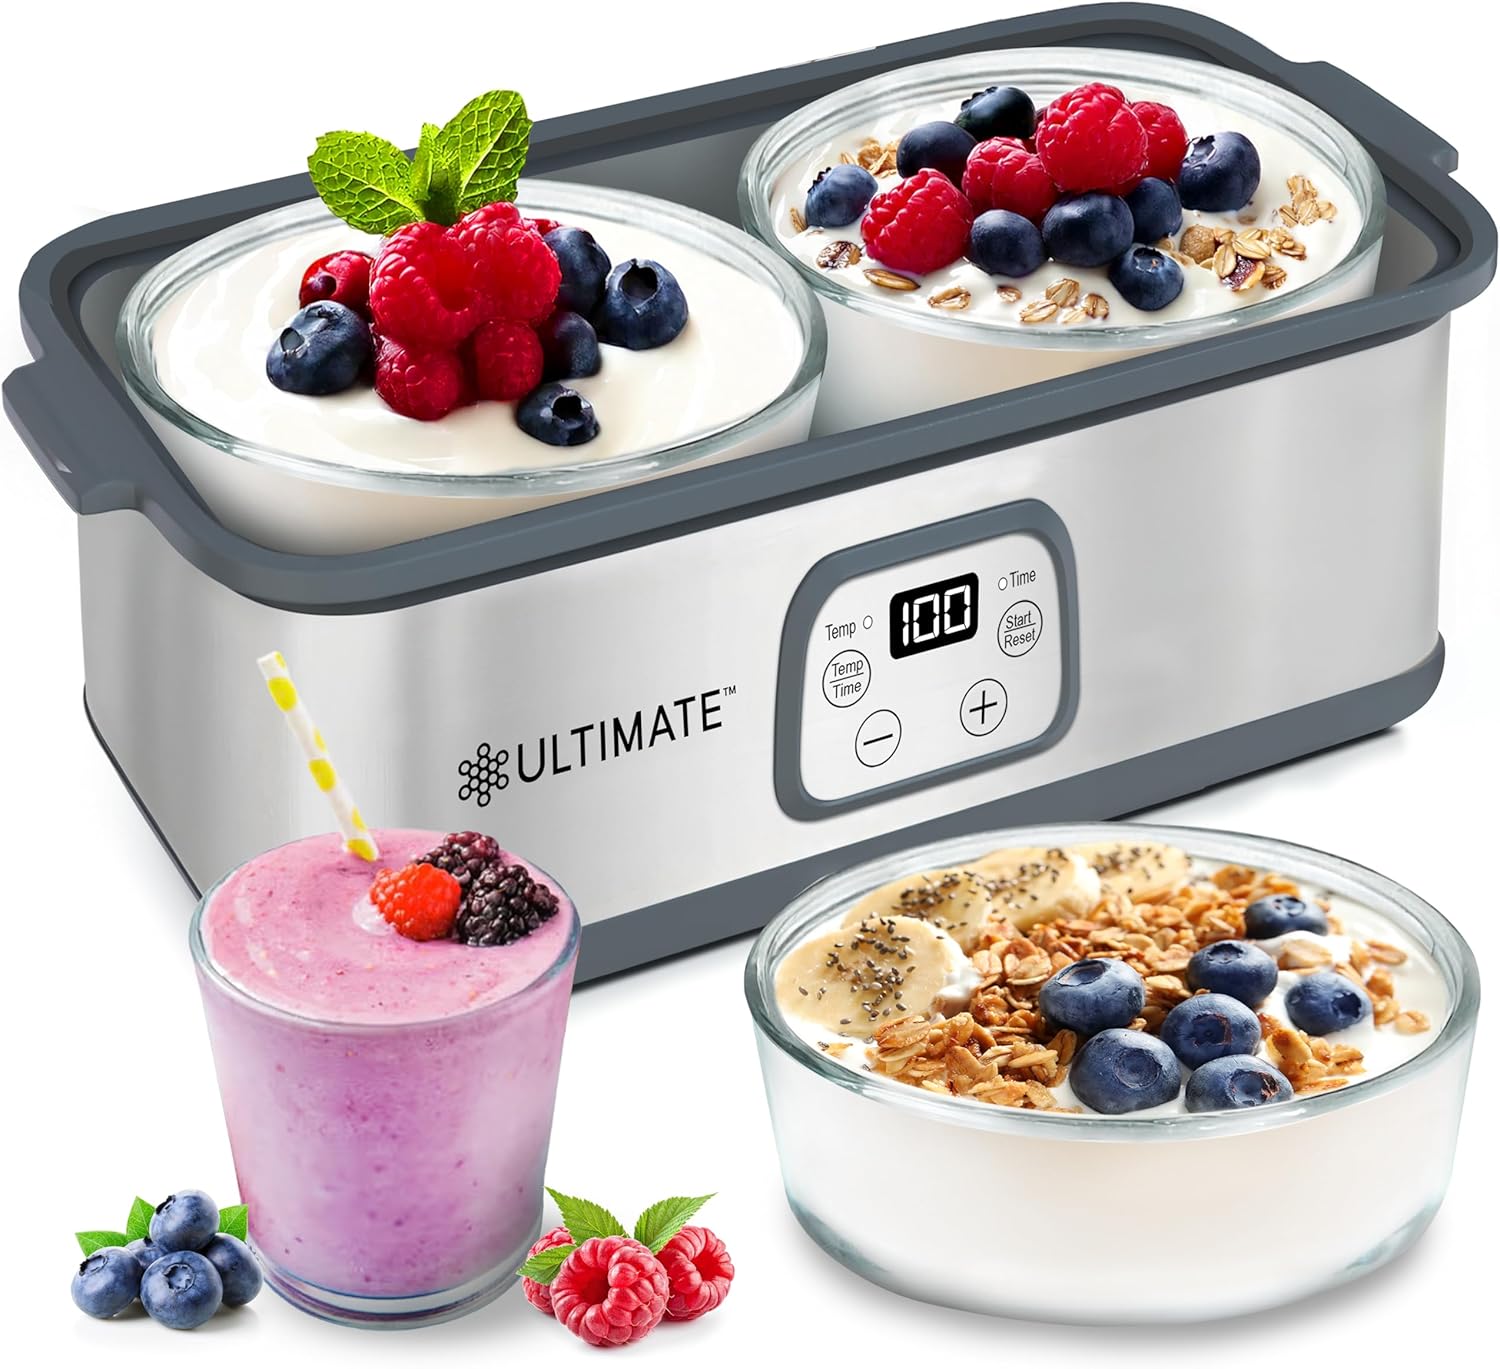
Image 1.1: The Ultimate Probiotic Yogurt Maker with two 1-quart glass containers, each filled with yogurt and topped with fresh berries. A smoothie and an additional bowl of yogurt are also shown.
2. Important Safety Instructions
To reduce the risk of fire, electric shock, or injury, basic safety precautions should always be followed, including:
- Read all instructions before using the appliance.
- Do not touch hot surfaces. Use handles or knobs.
- To protect against electrical hazards, do not immerse the cord, plugs, or the appliance body in water or other liquid.
- Close supervision is necessary when any appliance is used by or near children.
- Unplug from outlet when not in use and before cleaning. Allow to cool before putting on or taking off parts.
- Do not operate any appliance with a damaged cord or plug, or after the appliance malfunctions or has been damaged in any manner.
- The use of accessory attachments not recommended by the appliance manufacturer may cause injuries.
- Do not use outdoors.
- Do not let the cord hang over the edge of a table or counter, or touch hot surfaces.
- Do not place on or near a hot gas or electric burner, or in a heated oven.
- Always attach the plug to the appliance first, then plug the cord into the wall outlet. To disconnect, turn any control to 'off', then remove the plug from the wall outlet.
- Do not use the appliance for other than intended use.
3. Package Contents
Verify that all items are present in your package:
- Ultimate Probiotic Yogurt Maker unit
- Two (2) 1-Quart Glass Containers with BPA-free Lids
- Instruction Manual (this document)

Image 3.1: Two 1-quart glass containers with white BPA-free lids. One container holds yogurt with strawberries, and the other holds fresh strawberries. Icons indicate BPA-free, food-grade, and dishwasher-safe properties.
4. Product Features
The Ultimate Probiotic Yogurt Maker is equipped with features designed for optimal yogurt production:
- Adjustable Temperature Control: Set temperatures from 68°F to 131°F (20°C to 55°C) to accommodate various probiotic cultures.
- Digital Timer: Program fermentation time for up to 48 hours, allowing for extended culturing to increase probiotic count.
- BPA-Free Components: All parts that come into contact with food are 100% BPA-free, ensuring food safety.
- Large Capacity: Includes two 1-quart (approximately 0.95 liter) glass containers for preparing larger batches of yogurt.
- Even Heat Distribution: Designed for consistent and efficient heating throughout the fermentation process.

Image 4.1: The Ultimate Probiotic Yogurt Maker displaying its dimensions (14 inches length, 7.3 inches width, 5.9 inches height). A close-up of the digital control panel highlights the adjustable temperature and time settings.
5. Initial Setup
Before first use, follow these steps:
- Unpack all components and remove any packaging materials.
- Wash the glass containers and lids with warm, soapy water. Rinse thoroughly and dry.
- Wipe the exterior of the yogurt maker unit with a damp cloth. Do not immerse the unit in water.
- Place the yogurt maker on a stable, flat, and heat-resistant surface.
- Ensure the power cord is easily accessible and not obstructed.
6. Operating Instructions: How to Make Yogurt
Follow these steps to prepare homemade probiotic yogurt:
- Prepare the Mixture: Mix your chosen probiotic starter (e.g., a probiotic capsule, existing yogurt, or specific culture) with milk or cream in a separate bowl. Ensure the milk is at the appropriate temperature as specified by your starter culture instructions.
- Pour into Containers: Carefully pour the liquid mixture into the provided 1-quart glass containers. Do not overfill.
- Place in Maker: Place the filled glass containers into the yogurt maker. Fill the basin of the yogurt maker with water up to the indicated level (usually just below the rim of the containers) to ensure even heating. Secure the lid of the yogurt maker.
- Set Temperature and Time: Plug in the yogurt maker. Use the control panel to set your desired fermentation temperature (68-131°F) and time (up to 48 hours). Refer to your specific probiotic culture instructions for optimal settings.
- Start Fermentation: Press the 'Start' button to begin the fermentation process. The digital display will show the current temperature and remaining time.
- Cool and Enjoy: Once the timer ends, the unit will typically beep or turn off. Carefully remove the containers from the yogurt maker. Place the lids on the glass containers and refrigerate for several hours to chill and thicken the yogurt. After chilling, you can add toppings and serve.

Image 6.1: A visual representation of the six-step yogurt making process: 1. Mix probiotic capsule with milk/cream. 2. Pour mixture into containers. 3. Place containers in machine and fill basin with water. 4. Set temperature and timer. 5. Place containers in fridge after timer ends. 6. Add toppings and enjoy after chilling.
7. Cleaning and Maintenance
Regular cleaning ensures the longevity and hygiene of your yogurt maker:
- Always unplug the appliance and allow it to cool completely before cleaning.
- The glass containers and their lids are dishwasher safe. Alternatively, wash them by hand with warm, soapy water and rinse thoroughly.
- Wipe the interior and exterior of the yogurt maker unit with a soft, damp cloth. For stubborn stains, use a mild detergent.
- Do not use abrasive cleaners, scouring pads, or harsh chemicals, as these can damage the surface.
- Never immerse the main unit, power cord, or plug in water or any other liquid.
- Ensure all parts are completely dry before storing or next use.
8. Troubleshooting Guide
If you encounter issues with your yogurt maker, refer to the following table:
| Problem | Possible Cause | Solution |
|---|---|---|
| Yogurt is too runny/not setting | Incorrect temperature or fermentation time; insufficient starter culture; milk type not suitable; contamination. | Ensure correct temperature and time settings for your starter. Use fresh, active starter. Consider using whole milk or adding milk powder for thicker yogurt. Ensure all equipment is sterilized. |
| Yogurt is too sour | Fermented for too long or at too high a temperature. | Reduce fermentation time or lower the temperature slightly for future batches. |
| Yogurt has an unusual smell or appearance | Contamination; expired ingredients. | Discard the batch. Thoroughly clean and sterilize all equipment. Use fresh, high-quality milk and starter. |
| Unit does not turn on | Not plugged in; power outlet issue; unit malfunction. | Check if the power cord is securely plugged into a working outlet. If the problem persists, contact customer support. |
9. Product Specifications
| Specification | Detail |
|---|---|
| Model Number | NEWUYM2.2 |
| Product Dimensions | 14.37 x 7.6 x 5.71 inches |
| Item Weight | 4.45 pounds |
| Manufacturer | Ultimate |
| Temperature Range | 68-131°F (20-55°C) |
| Timer Range | Up to 48 hours |
| Container Capacity | Two (2) 1-Quart Glass Containers |
10. Warranty and Customer Support
The Ultimate Probiotic Yogurt Maker comes with a Free Lifetime Manufacturer’s Warranty. This warranty covers defects in materials and workmanship under normal use. For warranty claims or technical assistance, please contact Ultimate Health Solutions, the manufacturer, directly.
Please note: No official product videos could be embedded as the provided data did not include the necessary 'creator_type' or 'm3u8' format information for verification.


