1. Introduction
This manual provides detailed instructions for the installation, operation, and maintenance of your aMagisn Quick Release Metal Frame Cage and Lens Silicone Case for the Insta360 GO 3 Sports Camera. Please read this manual thoroughly before use to ensure proper handling and to maximize the product's functionality and lifespan.
2. What's in the Box
Carefully unpack the product and ensure all items listed below are present and in good condition.
- Metal Frame Cage x 1
- Silicone Protective Case x 1
- Hex Wrench x 1
- Mounting Claw x 1
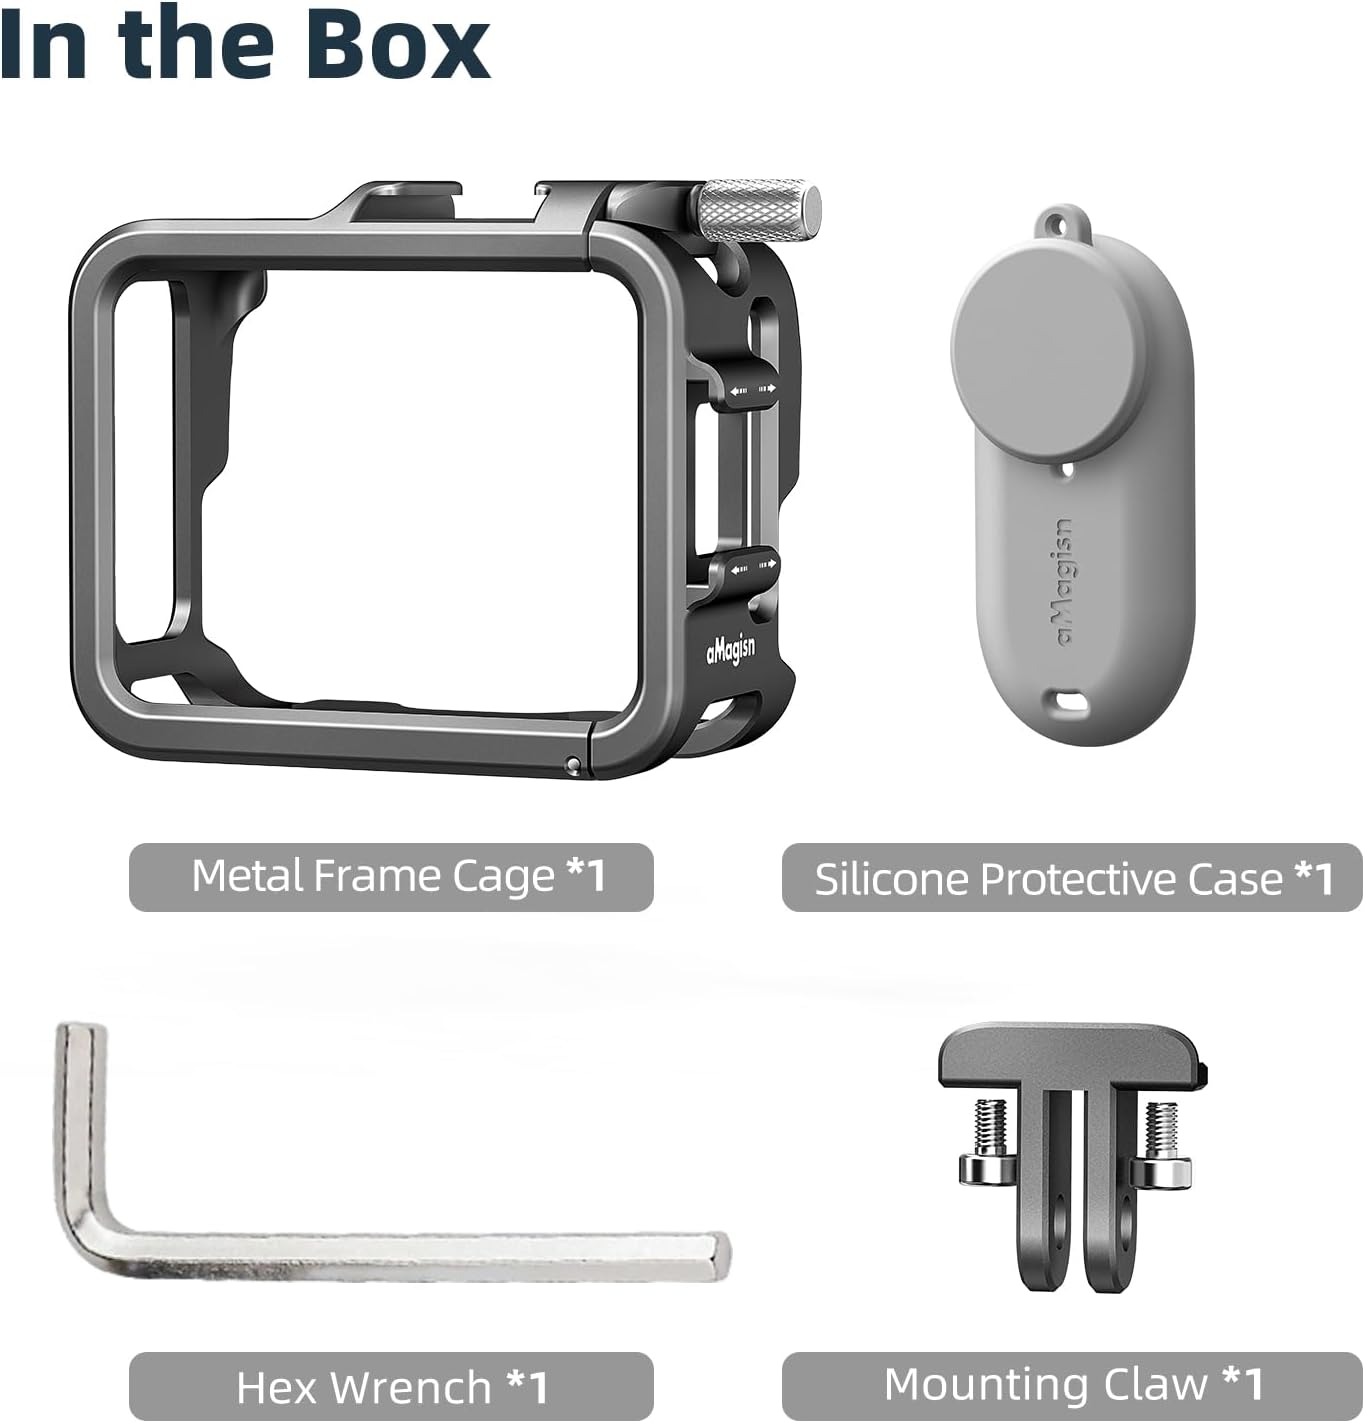
Figure 2.1: Package Contents
3. Key Features
-
Horizontal and Vertical Shooting Support: The metal quick release mount allows for both horizontal and vertical camera orientation, compatible with standard two-prong connections.
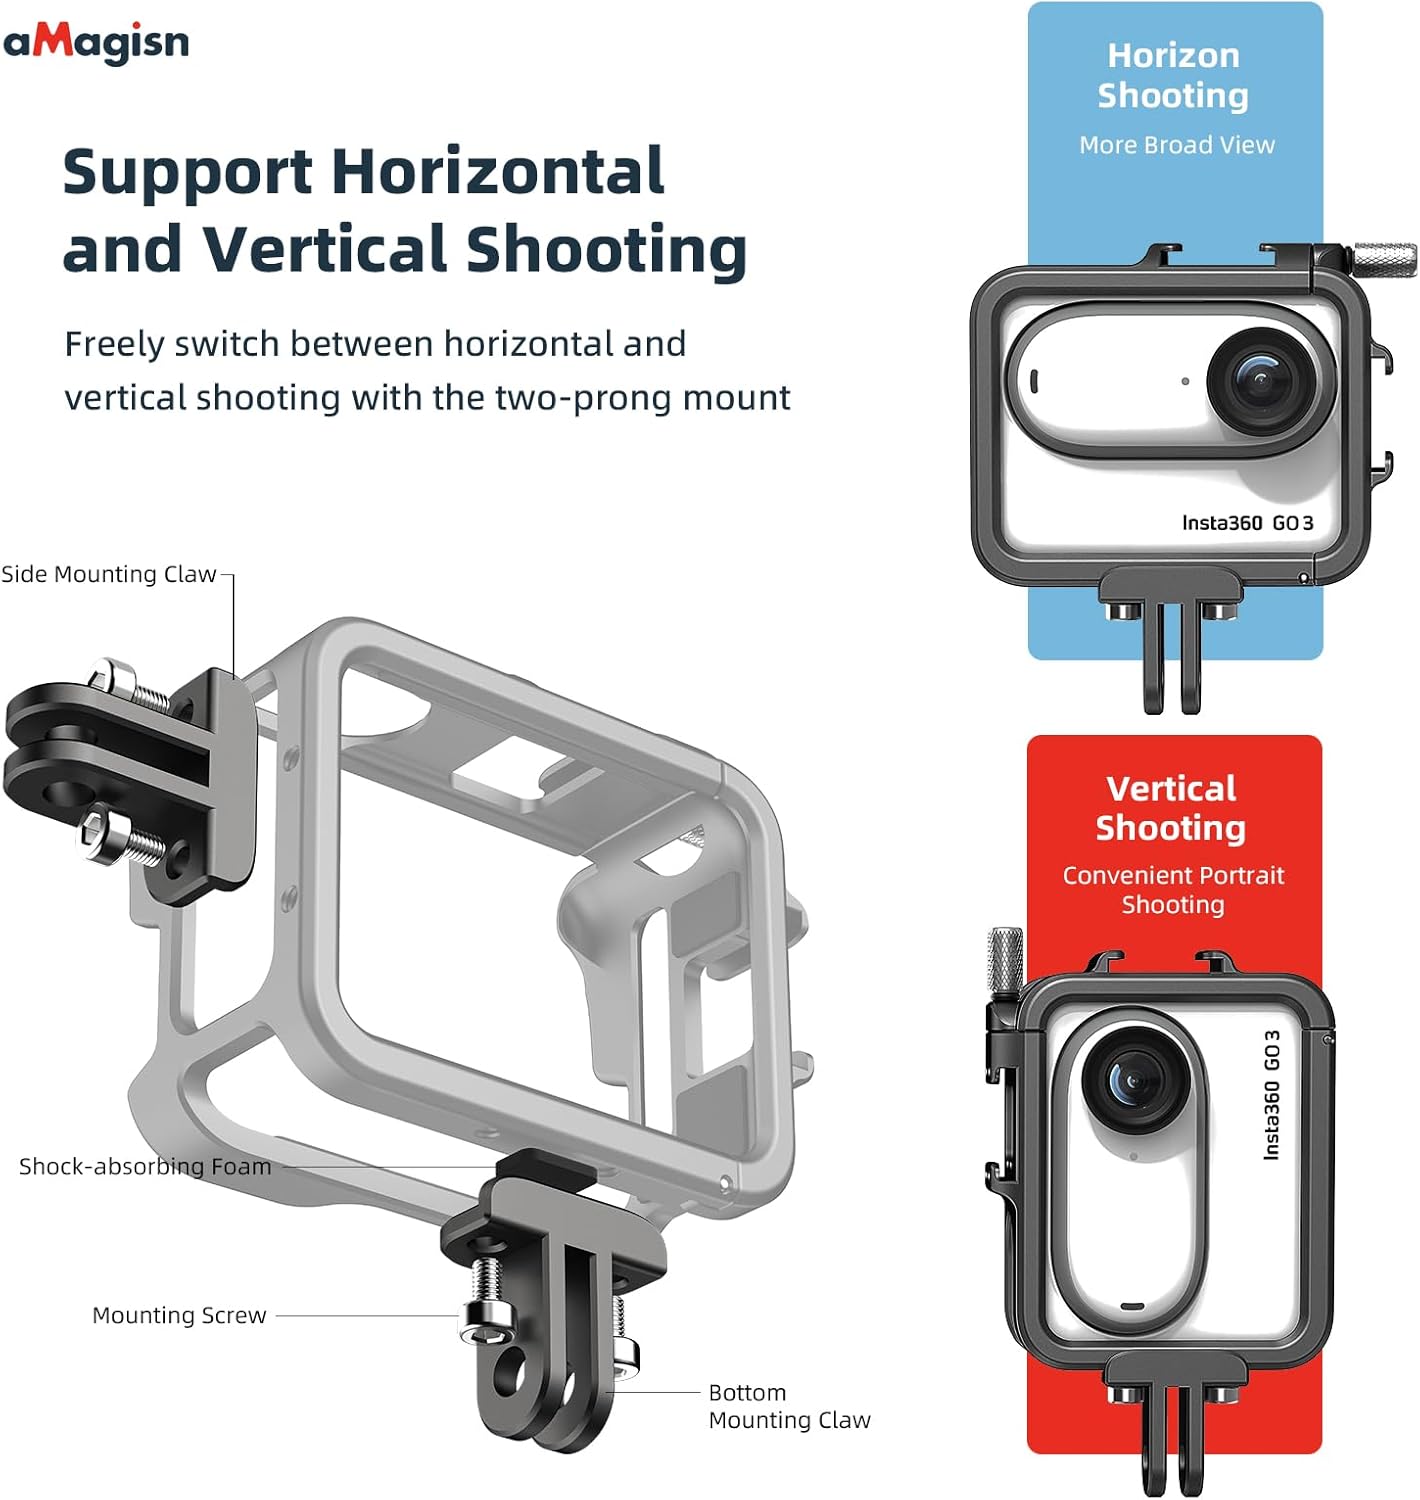
Figure 3.1: Horizontal and Vertical Shooting
-
Lens Silicone Protective Case: An included silicone case provides additional protection for the camera lens, guarding against bumps and scratches.

Figure 3.2: Lens Silicone Protective Case
- Seamless Front and Selfie Shot Switching: The cage's design allows for quick switching between front-facing and selfie shots by rotating the camera 180 degrees, without needing to reinstall the quick release mount.
- Flip-open Battery Replacement: The frame cage features a flip-open design for the battery cover area, enabling easy battery replacement without removing the camera from the cage.
- Secure and Scratch-Free Fit: Soft foam padding inside the protective frame case ensures the camera is firmly fixed and protected from scratches.
- Compatibility with Original Insta360 Accessories: Reserved openings for the USB cover and bottom of the case ensure full compatibility with original Insta360 GO 3 accessories such as the quick release mount, quick reader, and audio/charging adapter.
-
Multiple External Mounting Interfaces: Dual cold shoes allow for simultaneous attachment of external accessories like fill lights and microphones, enhancing creative possibilities.

Figure 3.3: Cold Shoe Mounts for External Accessories
-
Unobstructed Functionality: The design ensures that all buttons, sound pick-up areas, microphones, and the USB port remain accessible and unblocked.

Figure 3.4: Unobstructed Access to Camera Functions
-
Ultra-Light Design: Constructed from aviation aluminum alloy, the cage weighs only 34g, minimizing added bulk to your camera setup.

Figure 3.5: Ultra-Lightweight Construction
-
Vibration Resistance: A rubber joint washer secures the mounting screw, preventing loosening during activities like motorcycling or cycling, and ensuring the camera remains safely within the cage.
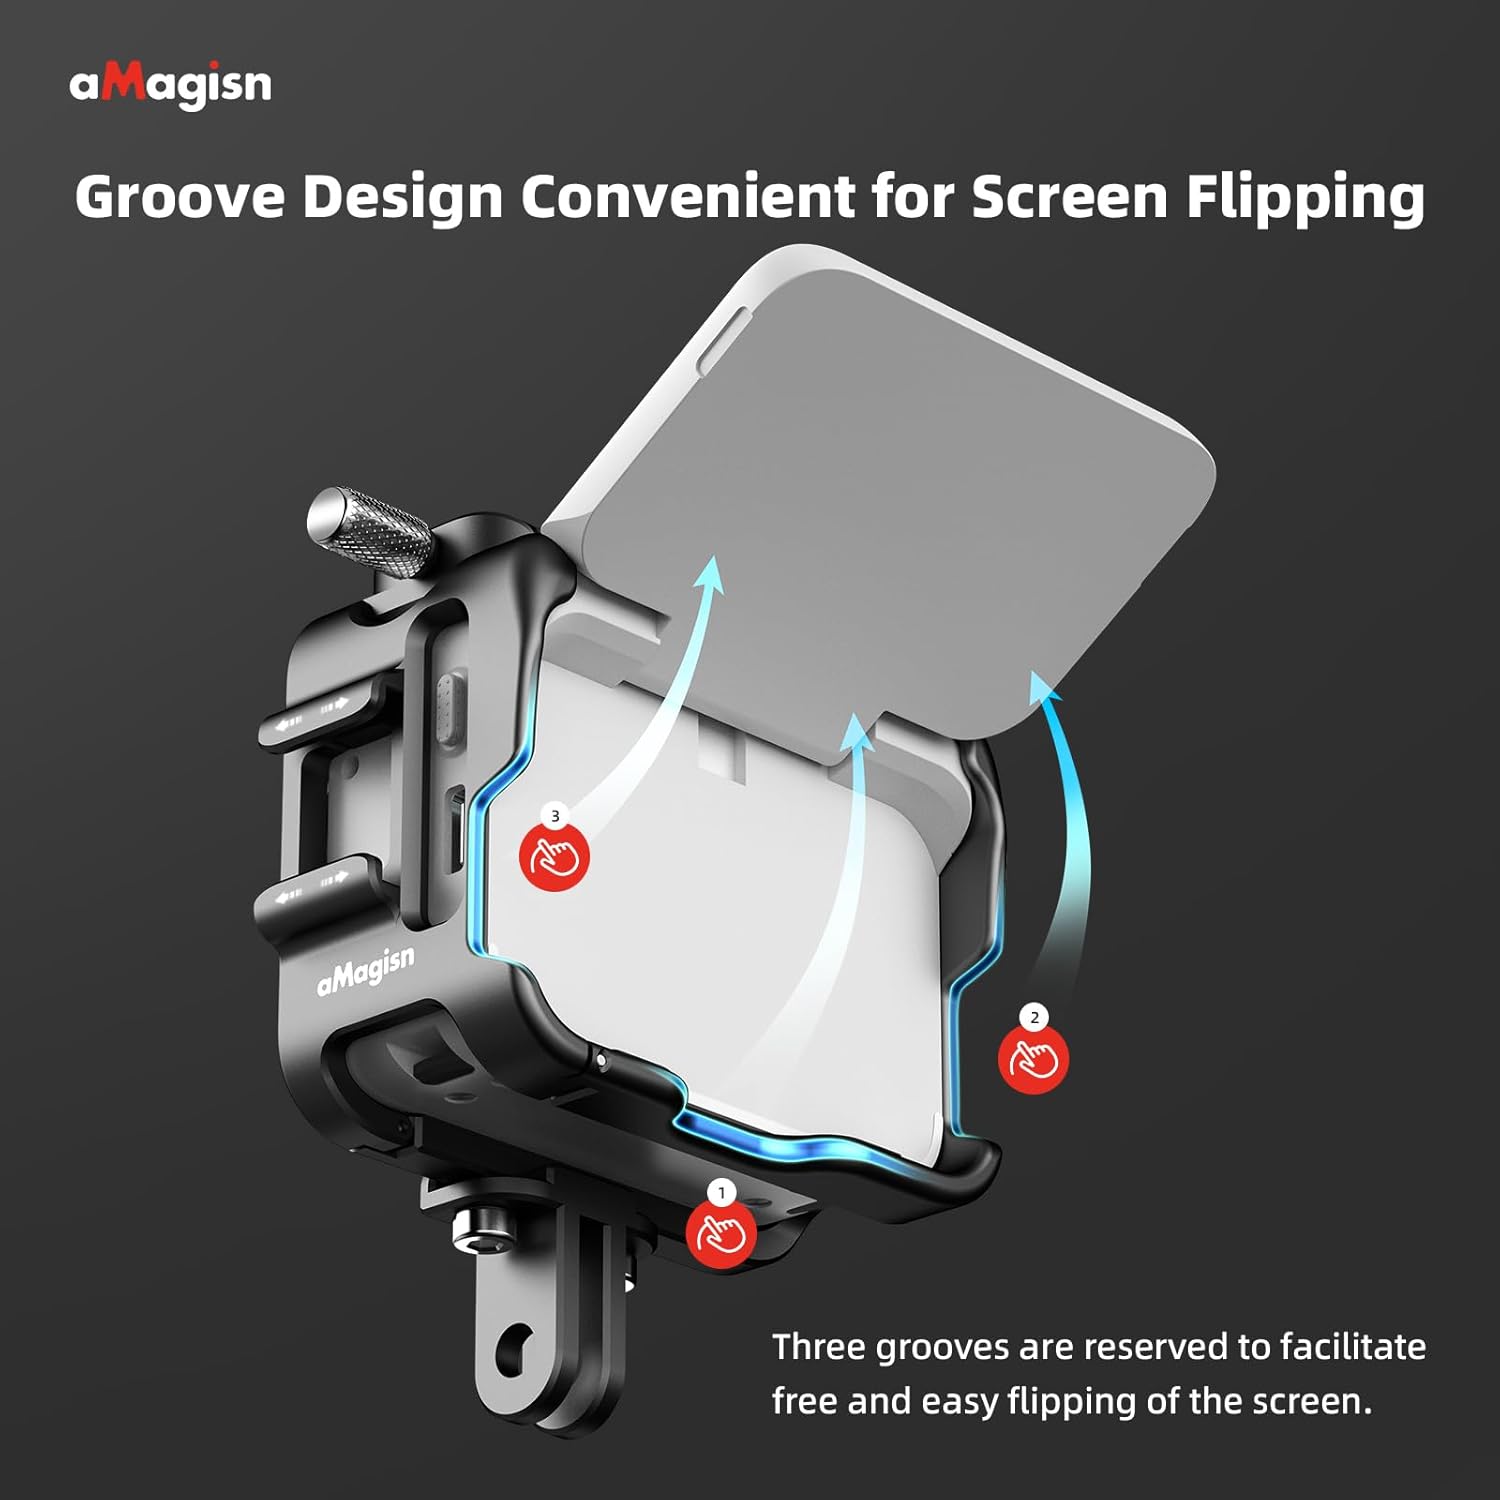
Figure 3.6: Vibration-Resistant Mounting
-
Groove Design for Screen Flipping: Three grooves are strategically reserved to facilitate easy and free flipping of the Insta360 GO 3's screen.

Figure 3.7: Screen Flipping Grooves
4. Setup Instructions
-
Insert the Insta360 GO 3 Camera: Gently slide your Insta360 GO 3 camera into the metal frame cage. Ensure the camera is aligned correctly with the cutouts for buttons, ports, and the lens.
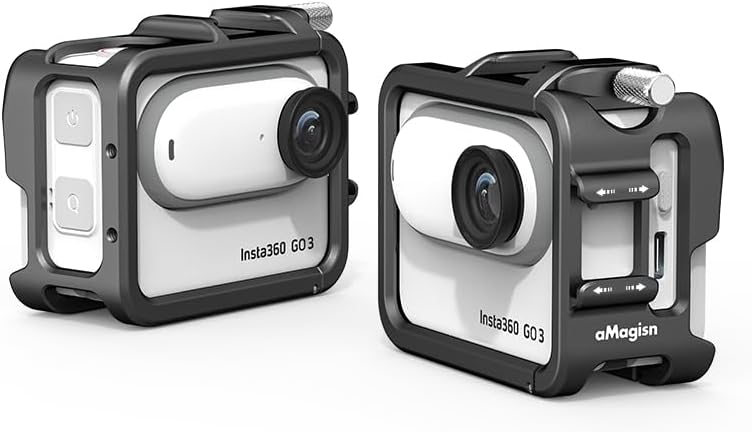
Figure 4.1: Camera Installed in Cage
- Secure the Camera: Close any latches or secure mechanisms on the cage to firmly hold the camera in place. The internal foam padding will help prevent movement and scratches.
- Attach the Lens Silicone Protective Case: If desired, place the silicone protective case over the camera lens for additional protection against impacts and scratches.
- Mounting the Cage: Attach the mounting claw to the bottom or side of the cage using the provided hex wrench. This allows connection to various accessories like tripods or selfie sticks.
5. Operating Instructions
- Switching Shooting Orientation: To switch between horizontal and vertical shooting, detach the cage from its mount, rotate it 90 degrees, and reattach it to the desired orientation. The two-prong mount supports both.
- Changing Camera View (Front/Selfie): The cage's design allows you to rotate the Insta360 GO 3 camera 180 degrees within the cage to switch between front-facing and selfie views without dismounting the cage.
- Accessing Battery: To replace the battery, locate the flip-open switch on the frame cage's battery cover area. Toggle the switch to open the cover and access the battery compartment.
- Using Cold Shoe Mounts: Attach external accessories such as LED lights or microphones to the dual cold shoe mounts located on the cage. Ensure accessories are securely fastened.
- Screen Flipping: Utilize the reserved grooves on the cage to freely flip the Insta360 GO 3's screen for optimal viewing during operation.
6. Maintenance
- Clean the metal frame cage with a soft, dry cloth. Avoid abrasive cleaners or solvents.
- The silicone protective case can be washed with mild soap and water if it becomes dirty. Ensure it is completely dry before reattaching to the camera.
- Regularly check all screws and mounting points for tightness, especially after vigorous activity. Use the provided hex wrench if adjustments are needed.
- Store the cage and case in a clean, dry environment when not in use.
7. Troubleshooting
- Camera not fitting correctly: Ensure the Insta360 GO 3 is oriented correctly and that no debris is obstructing its placement within the cage. Do not force the camera into the cage.
- Mounting screw loosening: Use the provided hex wrench to tighten the mounting screw. Ensure the rubber joint washer is in place to prevent future loosening.
- Accessories not attaching to cold shoes: Verify that the accessory's cold shoe mount is compatible and properly aligned before sliding it into the cage's cold shoe slot.
- Difficulty flipping screen: Ensure the camera is correctly seated within the cage and that the screen is not obstructed by any foreign objects. The grooves are designed to allow free movement.
8. Specifications
| Feature | Detail |
|---|---|
| Model Number | AC01-D |
| Material | Aviation Aluminum Alloy (Cage), Silicone (Case) |
| Item Weight | 2.12 ounces (approx. 60 grams) |
| Package Dimensions | 3.98 x 3.07 x 1.6 inches |
| Compatible Devices | Insta360 GO 3 Sports Camera |
| Color | Titanium Silver |
9. Warranty Information
This product is covered by a standard manufacturer's warranty. For specific details regarding warranty terms, duration, and claim procedures, please refer to the warranty card included with your purchase or contact the manufacturer directly. Please retain your proof of purchase for warranty service.
10. Customer Support
For technical assistance, product inquiries, or support, please contact aMagisn customer service through the retailer where the product was purchased or visit the official aMagisn website for contact information.