6.5L Smart LCD Fully Automatic Air Fryer
6.5L Smart LCD Fully Automatic Air Fryer User Manual
Model: 6.5L Smart LCD Fully Automatic Air Fryer
Brand: Generic
1. Introduction
Welcome to the world of healthier cooking with your new 6.5L Smart LCD Fully Automatic Air Fryer. This innovative appliance is designed to provide a convenient, efficient, and delicious way to prepare your favorite meals with less oil. Its large capacity, smart touch controls, and robust heating system make it a versatile addition to any kitchen.
Key Features:
- Large Capacity: A generous 6.5L capacity, ideal for preparing meals for the entire family.
- Smart Touch Control: Easy-to-use, intuitive touch controls for precise cooking.
- Efficient Heating: Powered by a 1500W motor and featuring heating pipe technology for even cooking.
- Safe and Secure: Equipped with overheat protection and power-off protection for your peace of mind.
- Versatile Use: Perfect for a range of settings from RVs to household kitchens.
2. Important Safety Instructions
When using electrical appliances, basic safety precautions should always be followed to reduce the risk of fire, electric shock, and injury to persons.
- Read all instructions before using the appliance.
- Do not touch hot surfaces. Use handles or knobs.
- To protect against electric shock, do not immerse cord, plugs, or main unit in water or other liquid.
- Close supervision is necessary when any appliance is used by or near children.
- Unplug from outlet when not in use and before cleaning. Allow to cool before putting on or taking off parts.
- Do not operate any appliance with a damaged cord or plug, or after the appliance malfunctions or has been damaged in any manner.
- The use of accessory attachments not recommended by the appliance manufacturer may cause injuries.
- Do not use outdoors.
- Do not let cord hang over edge of table or counter, or touch hot surfaces.
- Do not place on or near a hot gas or electric burner, or in a heated oven.
- Extreme caution must be used when moving an appliance containing hot oil or other hot liquids.
- Always attach plug to appliance first, then plug cord into the wall outlet. To disconnect, turn any control to "off", then remove plug from wall outlet.
- Do not use appliance for other than intended use.
- Ensure adequate ventilation around the appliance during use.
3. Product Components
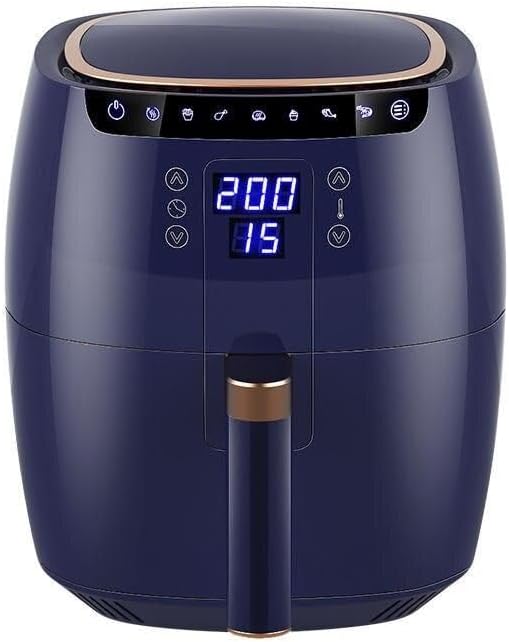
This image displays the front of the air fryer, highlighting its sleek blue design, gold accents, and the clear LCD touch control panel. The display shows '200' (temperature) and '15' (minutes), indicating its operational status.
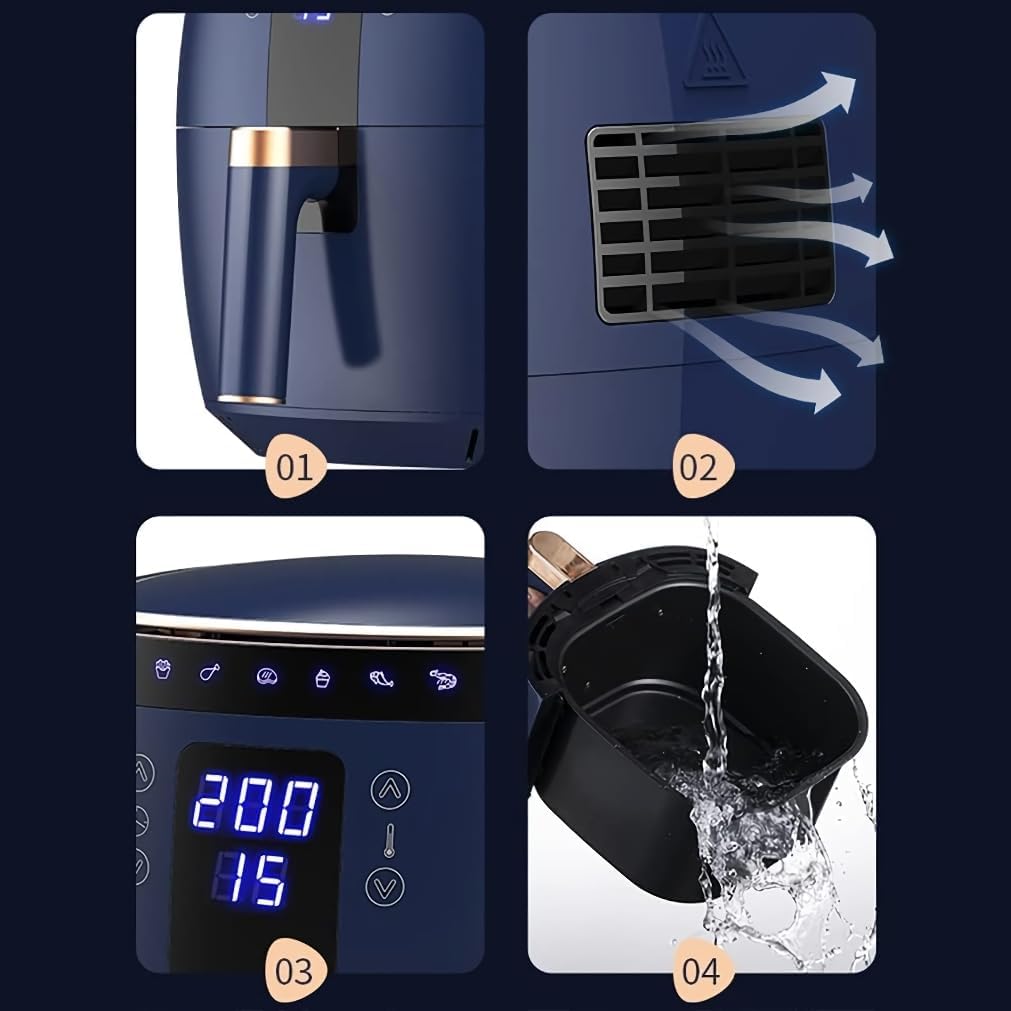
This composite image provides close-up details of the air fryer. Panel 01 shows the ergonomic handle and part of the main unit. Panel 02 illustrates the rear air vent for efficient heat dissipation. Panel 03 is a close-up of the LCD touch control panel, displaying temperature and time settings. Panel 04 demonstrates the ease of cleaning the non-stick cooking basket by rinsing it with water.
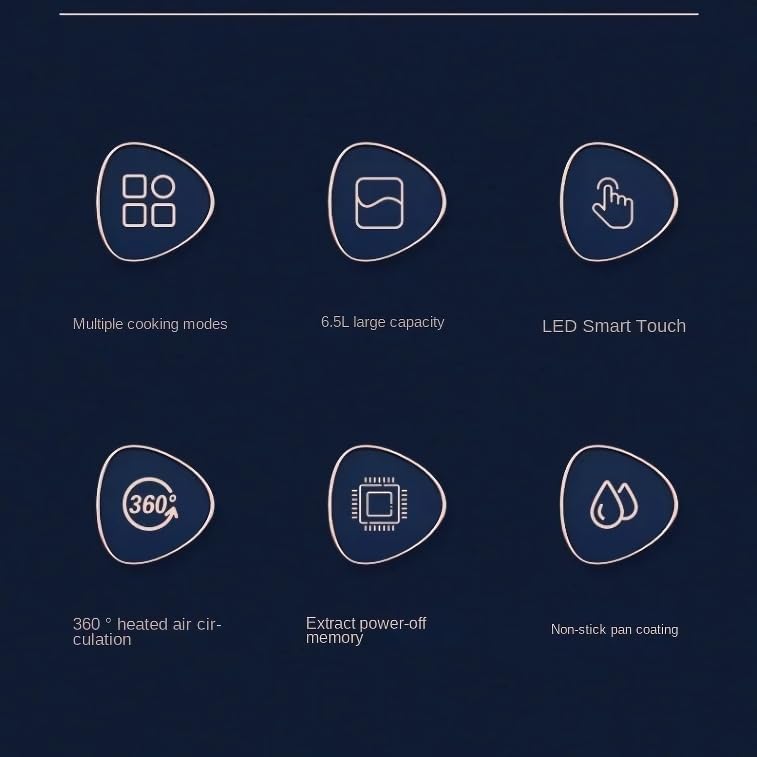
This graphic visually summarizes the key features of the air fryer through six distinct icons: multiple cooking modes, a large 6.5L capacity, LED Smart Touch control, 360-degree heated air circulation for even cooking, an extract power-off memory function for safety and convenience, and a non-stick pan coating for easy cleaning.
Main Parts:
- Main Unit: Houses the heating element and fan.
- Cooking Basket: Removable basket for holding food.
- Handle: For safely pulling out and inserting the cooking basket.
- LCD Touch Control Panel: Digital display for setting temperature, time, and selecting cooking modes.
- Air Vents: Located at the back for proper air circulation.
4. Setup
- Unpacking: Carefully remove all packaging materials and any promotional labels or stickers from the air fryer.
- Initial Cleaning: Before first use, wipe the exterior of the appliance with a damp cloth. Wash the cooking basket and any removable accessories with warm, soapy water. Rinse thoroughly and dry completely.
- Placement: Place the air fryer on a stable, heat-resistant surface, away from walls or other appliances to allow for proper air circulation (at least 4 inches of space on all sides). Ensure the power cord is not tangled or pinched.
- Power Connection: Plug the power cord into a grounded electrical outlet. Ensure the voltage matches the specifications of your appliance (120 Volts).
5. Operating Instructions
Getting Started:
- Power On: Plug the air fryer into a power outlet. The LCD display will illuminate briefly, then show standby mode.
- Preheating (Optional): For best results, preheat the air fryer for 3-5 minutes before adding food. Press the power button, then set your desired temperature and time. Press the start button to begin preheating.
Cooking with the Air Fryer:
- Prepare Food: Place your ingredients into the cooking basket. Do not overfill the basket to ensure even cooking. For crispier results, lightly coat food with oil.
- Insert Basket: Slide the cooking basket firmly back into the main unit until it clicks into place.
- Set Temperature and Time: Use the touch control panel to adjust the temperature (e.g., 200°C) and cooking time (e.g., 15 minutes) according to your recipe. The air fryer features intuitive up/down arrows for precise adjustments.
- Select Cooking Mode (if applicable): Your air fryer may have pre-set cooking modes for common foods. Refer to the icons on the control panel and select the appropriate mode if desired.
- Start Cooking: Press the start/pause button to begin the cooking process. The fan and heating element will activate.
- Shake/Flip Food: For even browning, some recipes require shaking or flipping food halfway through the cooking time. Carefully pull out the basket using the handle (the air fryer will pause automatically), shake or flip the food, then reinsert the basket. The cooking will resume.
- Cooking Completion: Once the set time has elapsed, the air fryer will beep, indicating that cooking is complete.
- Remove Food: Carefully pull out the cooking basket. Use heat-resistant tongs to remove the cooked food from the basket. Do not touch the hot basket directly.
- Power Off: Unplug the air fryer from the wall outlet after use.

The air fryer is shown with its cooking basket partially removed, revealing a batch of golden-brown fries and corn on the cob. This illustrates the appliance's capacity and ease of access to food during cooking. A hand is reaching towards the basket, demonstrating interaction.
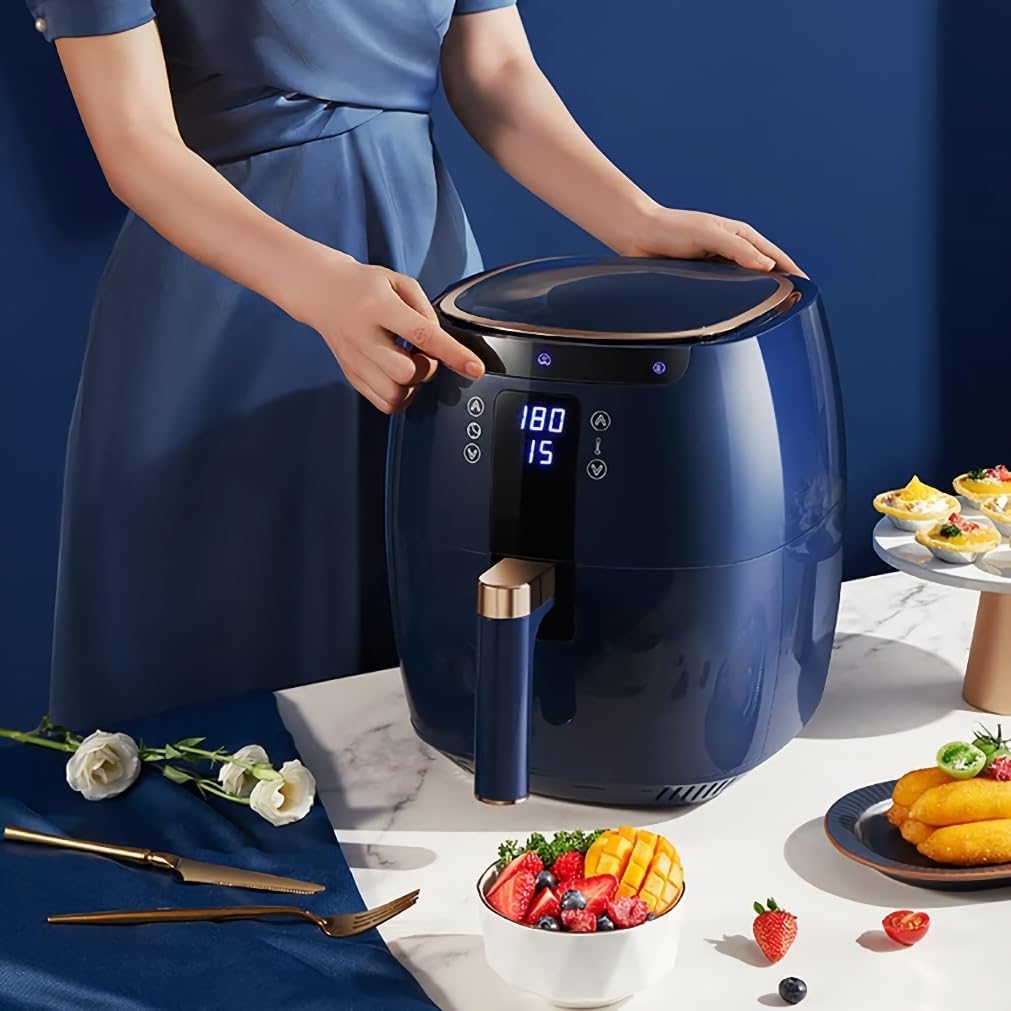
A person is shown gently touching the control panel of the air fryer, demonstrating the intuitive touch interface. The air fryer is set in a kitchen environment with fresh fruits and flowers, emphasizing its user-friendly design and integration into a healthy lifestyle.
6. Cleaning and Maintenance
Proper cleaning and maintenance will extend the life of your air fryer.
- Unplug and Cool: Always unplug the air fryer from the power outlet and allow it to cool completely before cleaning.
- Cleaning the Basket and Pan: The cooking basket and pan are NOT dishwasher safe. Wash them with warm, soapy water and a non-abrasive sponge. Rinse thoroughly and dry completely. Do not use metal utensils or abrasive cleaning materials, as this may damage the non-stick coating.
- Cleaning the Exterior: Wipe the exterior of the air fryer with a damp cloth. Do not immerse the main unit in water or any other liquid.
- Cleaning the Interior: For stubborn food residue inside the main unit, use a damp cloth and a mild detergent. Avoid harsh chemicals.
- Storage: Ensure all parts are clean and dry before storing. Store the air fryer in a cool, dry place.
7. Troubleshooting
If you encounter issues with your air fryer, refer to the following common problems and solutions:
| Problem | Possible Cause | Solution |
|---|---|---|
| Air fryer does not turn on. | Not plugged in; power outlet malfunction; basket not fully inserted. | Ensure the power cord is securely plugged into a working outlet. Push the cooking basket fully into the unit until it clicks. |
| Food is not cooked evenly. | Basket is overfilled; food not shaken/flipped. | Do not overfill the basket. Shake or flip food halfway through cooking. |
| White smoke coming from the appliance. | Grease residue from previous use; high-fat food cooking. | Clean the basket and pan thoroughly after each use. For high-fat foods, drain excess fat during cooking. |
| Food is not crispy. | Not enough oil; temperature too low; cooking time too short. | Lightly coat food with oil. Increase temperature or cooking time as needed. |
8. Specifications
| Feature | Specification |
|---|---|
| Special Feature | Touch Control |
| Product Dimensions | 11.29"D x 12.95"W x 15.39"H |
| Color | Blue |
| Capacity | 6.5 Liters (approx. 1.7 Pounds) |
| Material | Plastic |
| Recommended Uses | Air Frying |
| Output Wattage | 1500 Watts |
| Item Weight | 11 Pounds |
| Brand | Generic |
| Voltage | 120 Volts |
| Control Method | Touch |
| Nonstick Coating | No |
| Dishwasher Safe | No |
| Manufacturer | Sellvia |
| Date First Available | August 20, 2024 |
9. Warranty and Support
Specific warranty information and detailed customer support contacts are not provided in the available product data. For warranty claims, technical assistance, or replacement parts, please refer to the packaging or contact the retailer/manufacturer directly using the contact information provided at the point of purchase.
Ask a question about this manual
Ask about setup, troubleshooting, compatibility, parts, safety, or missing instructions. Manuals+ will review the question and use this page’s manual context to help answer it.