
1. Introduction
The SUNFUCAN Star Projector SA206G transforms any room into a captivating celestial display. It projects dynamic aurora effects and green stars onto ceilings and walls, creating a relaxing and immersive atmosphere. This projector features adjustable colors, brightness levels, and movement speeds, all controllable via a remote. It is designed for various settings, including bedrooms, living rooms, game rooms, and for special occasions.
2. Package Contents
Verify that all items listed below are included in your package:
- Projector Light: 1 unit
- Remote Control: 1 unit
- USB Cable: 1 unit (Power plug not included)
- User Manual: 1 unit
- Base: 2 units

Image: Overview of the projector's packaging and included accessories, detailing each component.
3. Product Overview
The projector features intuitive controls on the unit itself and a comprehensive remote control for convenient operation.
Projector Unit Controls
- Power On/Off Button: Activates or deactivates the projector.
- Select Scene Effect Button: Cycles through different light effects.
- Select Aurora Color Button: Changes the color of the aurora projection.
- Sound Mode/Auto Mode Button: Toggles between sound-activated and automatic modes.
- Aurora Brightness Adjustment Button: Adjusts the intensity of the aurora light.
- Assisted Sleep Mode Button: Activates the sleep mode.
- Indicator Light: Provides status feedback.
- Power Input (USB Type-C): For connecting the power cable.
Remote Control Functions
The remote control provides full functionality for adjusting the projector settings.

Image: Detailed diagram illustrating the buttons and functions of the remote control for the projector.
- Power On/Off: Turns the projector on or off.
- Autorun Mode / Switching Work Mode: Cycles through different operational modes.
- Select Scene Effect: Changes the visual effect of the projection.
- Select Aurora Color: Adjusts the color of the aurora.
- Reduce/Increase Brightness of Aurora: Controls the light intensity.
- Decrease/Increase Aurora Speed: Adjusts the movement speed of the aurora.
- Sound Mode: Activates sound-responsive lighting.
- Assisted Sleep Mode: Engages a gentle, timed sleep setting.
- Breath Mode: Creates a fading in and out light effect.
- Timer Shutdown Setting (0.5H, 1H, 2H, 3H, 4H, Cancel): Sets an automatic shutdown timer.
- Battery Insulators: Remove before first use.
4. Setup Instructions
- Unpack: Carefully remove all components from the packaging.
- Positioning: Place the projector on a stable, flat surface. Use the included bases to adjust the projection angle as desired. For optimal effect, position the projector to project onto a ceiling or wall.
- Power Connection: Connect the provided USB cable to the projector's USB Type-C input. Plug the other end into a compatible 5V/1A USB power adapter (not included).
- Remote Battery: Before using the remote control, remove the battery insulator tab.
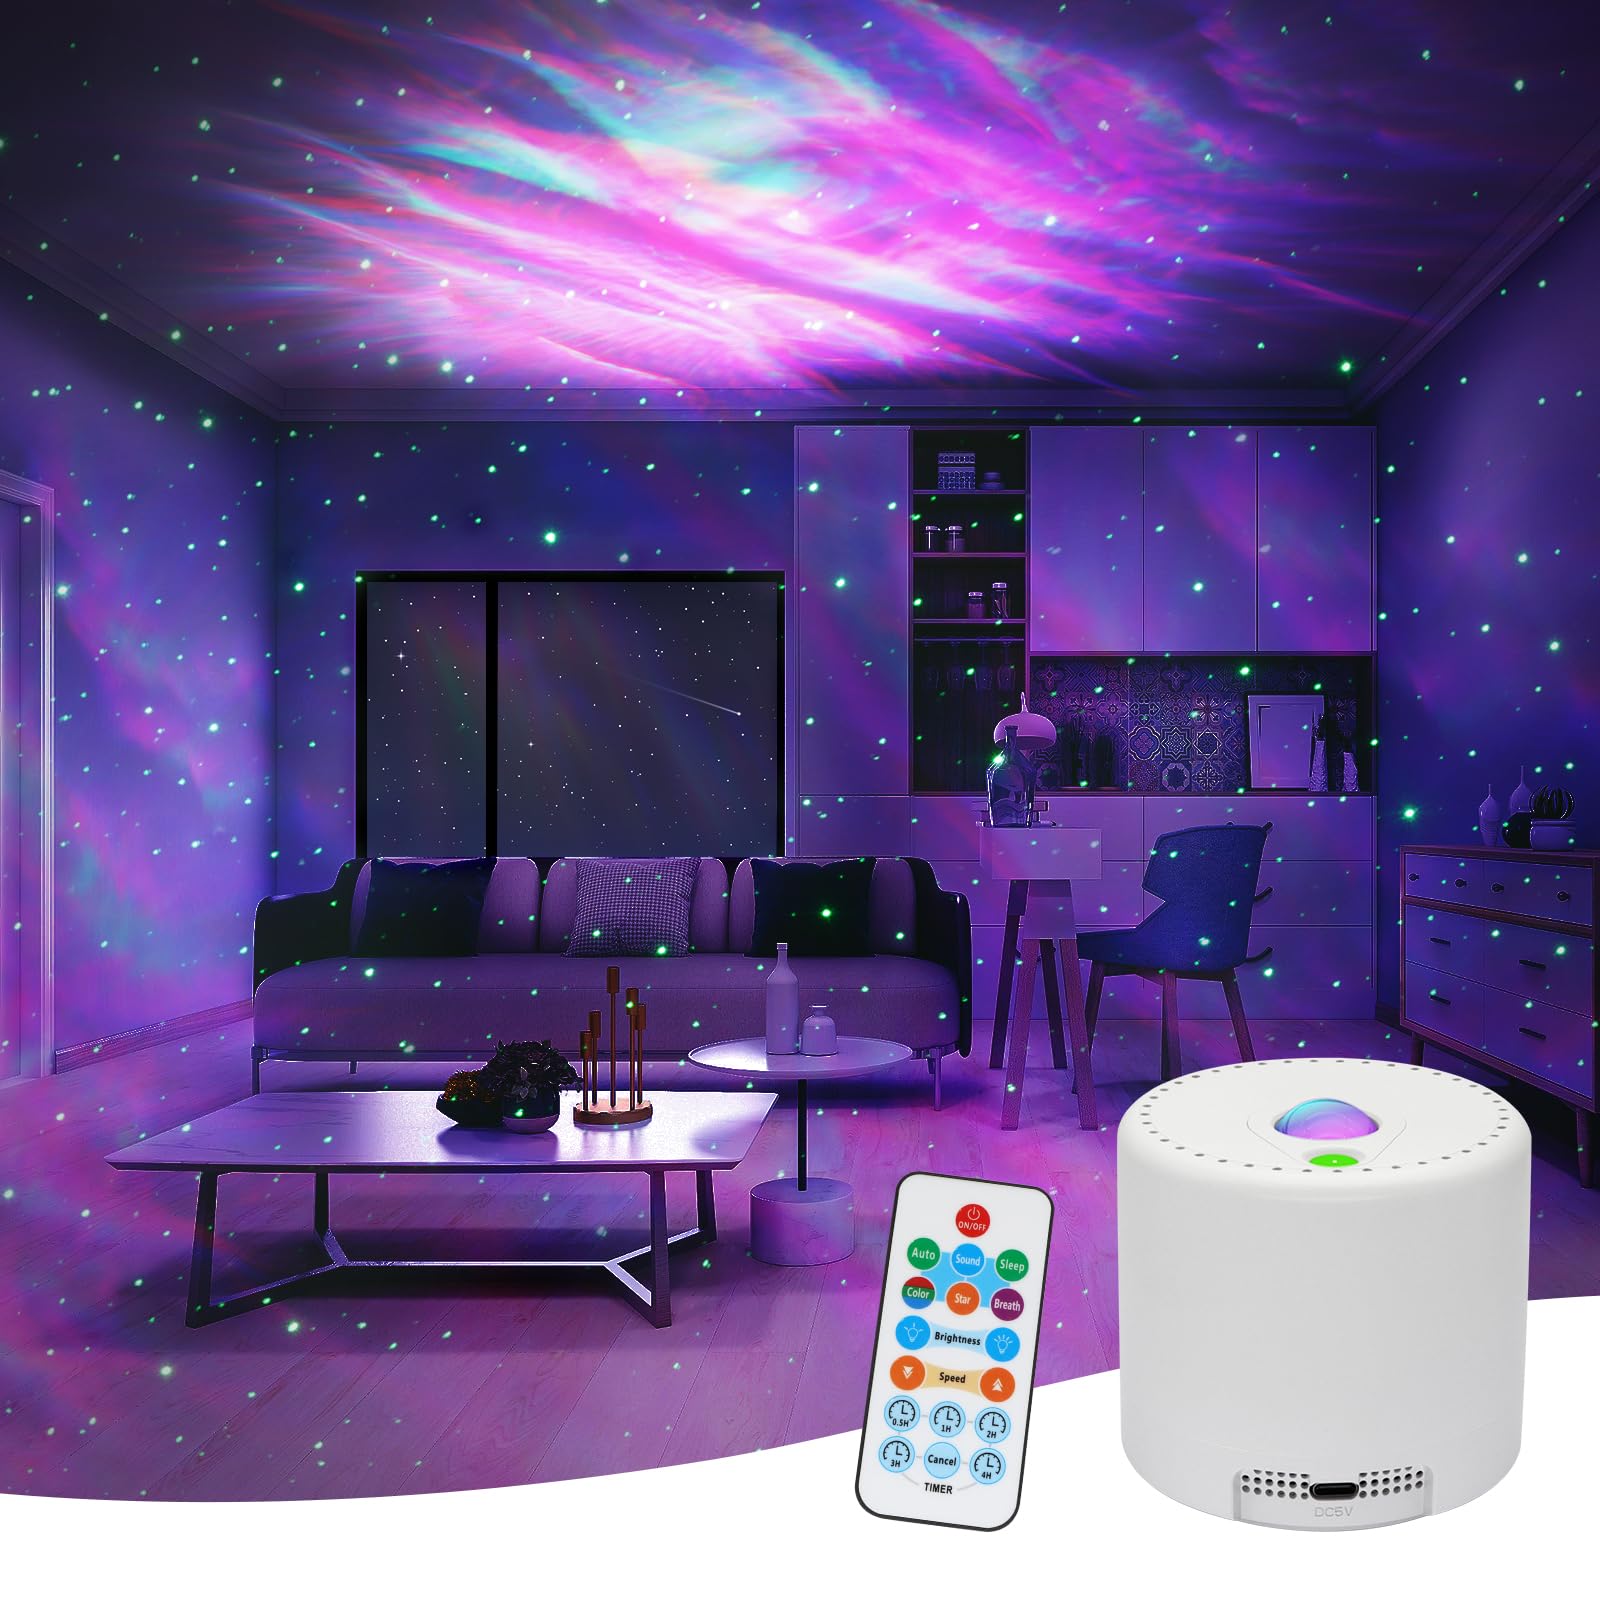
Image: The SUNFUCAN Star Projector in a room setting, demonstrating its projection capabilities.
5. Operating Instructions
Power On/Off
Press the Power On/Off button on the projector unit or the remote control to turn the device on or off.
Selecting Modes
The projector offers four distinct modes:

Image: Visual representation of the projector's multi-functional capabilities, including various modes and controls.
- Automatic Mode: The projector automatically cycles through different light colors, maintaining constant brightness and speed.
- Breathing Mode: The light gently fades in and out, creating a calming effect.
- Sound Activated Mode: The lights flicker and change with the rhythm of ambient sound or music. If no sound is detected, the lights will remain off. This mode is suitable for parties.
- Sleep Mode: Provides a soothing star projection to aid relaxation and sleep.
Adjusting Colors and Effects
Use the 'Color' button on the remote or the 'Select Aurora Color' button on the unit to cycle through various single and mixed aurora colors. The 'Select Scene Effect' button allows you to change the overall visual pattern.

Image: Examples of the multiple aurora color options available, including single and mixed colors.
Brightness Control
Adjust the brightness of the aurora projection using the 'Brightness' buttons on the remote control. There are 4 levels of brightness available: 100%, 75%, 50%, and 25%.

Image: Visual guide to the four adjustable brightness levels of the projector.
Movement Speed Adjustment
Use the 'Speed' buttons on the remote to increase or decrease the movement speed of the aurora effects.
Timer Function
Set the projector to automatically turn off after a specified duration using the timer buttons on the remote control. Options include 0.5 hours, 1 hour, 2 hours, 3 hours, or 4 hours. Select 'Cancel' to disable the timer.

Image: The timer function is shown with options for automatic shutdown after 0.5, 1, 2, 3, or 4 hours.
6. Maintenance
- Cleaning: Use a soft, dry cloth to clean the exterior of the projector. Do not use liquid cleaners or abrasive materials.
- Storage: When not in use, store the projector in a cool, dry place, away from direct sunlight and moisture.
- Lens Care: Avoid touching the projection lens directly. If cleaning is necessary, use a lens cleaning cloth designed for optics.
7. Troubleshooting
| Problem | Possible Cause | Solution |
|---|---|---|
| Projector does not turn on. | No power supply or loose connection. | Ensure the USB cable is securely connected to both the projector and a working power adapter. Verify the power adapter is plugged into a live outlet. |
| Remote control is not working. | Battery insulator still in place or dead battery. | Remove the battery insulator tab. Replace the CR5 battery in the remote control if it is depleted. Ensure you are pointing the remote directly at the projector. |
| Lights freeze or stop moving. | Temporary software glitch or power fluctuation. | Turn the projector off and then on again. Disconnect and reconnect the power cable. |
| Projector makes a winding sound. | Normal operation sound or internal component. | A slight winding sound may be normal during operation, especially after extended use. If the sound becomes excessively loud or disruptive, contact customer support. |
| Projection is dim or unclear. | Brightness setting is low or lens is dirty. | Increase the brightness using the remote control. Clean the projection lens with a soft, dry cloth. Ensure the room is sufficiently dark for optimal projection. |
8. Specifications
| Feature | Detail |
|---|---|
| Model Number | SA206G |
| Color | Star Projector |
| Shape | Round |
| Material | Plastic |
| Light Source Type | LED |
| Power Source | Corded Electric |
| Power Input | DC 5V/1A |
| Wattage | 5 watts |
| Product Dimensions | 3.3"L x 3"W x 3.3"H |
| Item Weight | 9.6 ounces |
| Remote Battery Type | 1 CR5 battery (included) |
| Mounting Type | Table Mount |
| Special Features | Remote Control, Color Changing, Switching Modes, Sound Activation, Timer Function |
9. Safety Information
- Eye Safety: Do not stare directly into the light source.
- Water Exposure: Keep the device away from water or any liquids. Do not operate with wet hands.
- Ventilation: Ensure proper ventilation around the projector. Do not cover ventilation openings.
- Children: This device is not a toy. Keep out of reach of small children.
- Disassembly: Do not attempt to disassemble or modify the projector. This may void the warranty and pose safety risks.
- Power Supply: Use only the specified power input (DC 5V/1A).
10. Warranty and Support
For warranty information or technical support, please contact SUNFUCAN customer service. Refer to the contact details provided on the product packaging or the official SUNFUCAN website. Please have your model number (SA206G) and purchase date available when contacting support.