1. Introduction
This manual provides essential information for the safe and efficient operation of your CANPUMP Wall-Mount Pressure Washer Frame with Built-in Hose Reel. Please read these instructions thoroughly before installation and use. This unit is designed to provide a stable mounting solution for your pressure washer and convenient hose management.
2. Safety Information
Always observe basic safety precautions when using electrical equipment and high-pressure systems to reduce the risk of fire, electric shock, and personal injury.
- Ensure the mounting surface is structurally sound and capable of supporting the weight of the frame, pressure washer, and full hose.
- Disconnect power to the pressure washer before performing any maintenance or adjustments.
- Do not operate the unit if any parts are damaged.
- Keep children and pets away from the work area.
- Wear appropriate personal protective equipment (PPE) such as safety glasses and gloves.
- The main power plug for the pressure washer is not included with this frame. Ensure proper electrical connections are made by a qualified professional if necessary.
3. Package Contents
Verify that all components are present and undamaged upon unpacking:
- Wall-mounted frame
- Built-in hose reel
- Auto start/stop module
- Hand rewinding crank
- High-pressure jumper hose (internal to reel)
- Mounting hardware (may vary, refer to included hardware pack)
4. Specifications
| Feature | Detail |
|---|---|
| Product Dimensions | 12"L x 24"W x 12"H (30.48 cm L x 60.96 cm W x 30.48 cm H) |
| Item Weight | 30 Pounds (13.6 kg) |
| Brand | CANPUMP |
| Power Source | Electric (for connected pressure washer) |
| Color | Black |
| Hose Length (Retracts up to) | 5/16" x 100 ft |
| Hose Reel Pressure Rating | 4000 psi (275 bar) |
| Hose Reel Inlet | 3/8" Male |
| Hose Reel Outlet | 3/8" Female |
| Hose Reel Temperature | 140 °F (60 °C) |
| Motor Compatibility | NEMA 56C frame motors |
| Voltage | 220 Volts (for connected pressure washer) |
5. Setup
5.1 Wall Mounting
The frame is designed for wall-mounting. Select a sturdy wall location capable of supporting the combined weight of the frame, your pressure washer, and a full hose. Use appropriate fasteners (not always included) for your wall type (e.g., concrete anchors, wood studs). Ensure the frame is level before tightening all mounting bolts.

Image: Overview of the CANPUMP wall-mount pressure washer frame with integrated hose reel.
5.2 Pressure Washer Installation
- Place your NEMA 56C frame motor compatible pressure washer onto the mounting plate of the frame.
- Secure the pressure washer to the frame using appropriate bolts and nuts (not included with the frame). Ensure it is firmly attached to prevent movement during operation.
5.3 Hose and Electrical Connections
- Connect the pressure washer's high-pressure outlet to the 3/8" Male inlet of the hose reel.
- Connect your high-pressure hose (not included) to the 3/8" Female outlet of the hose reel.
- Connect the auto start/stop module to your pressure washer's control system according to your pressure washer's manual. The main power plug for the pressure washer is not included with this frame.
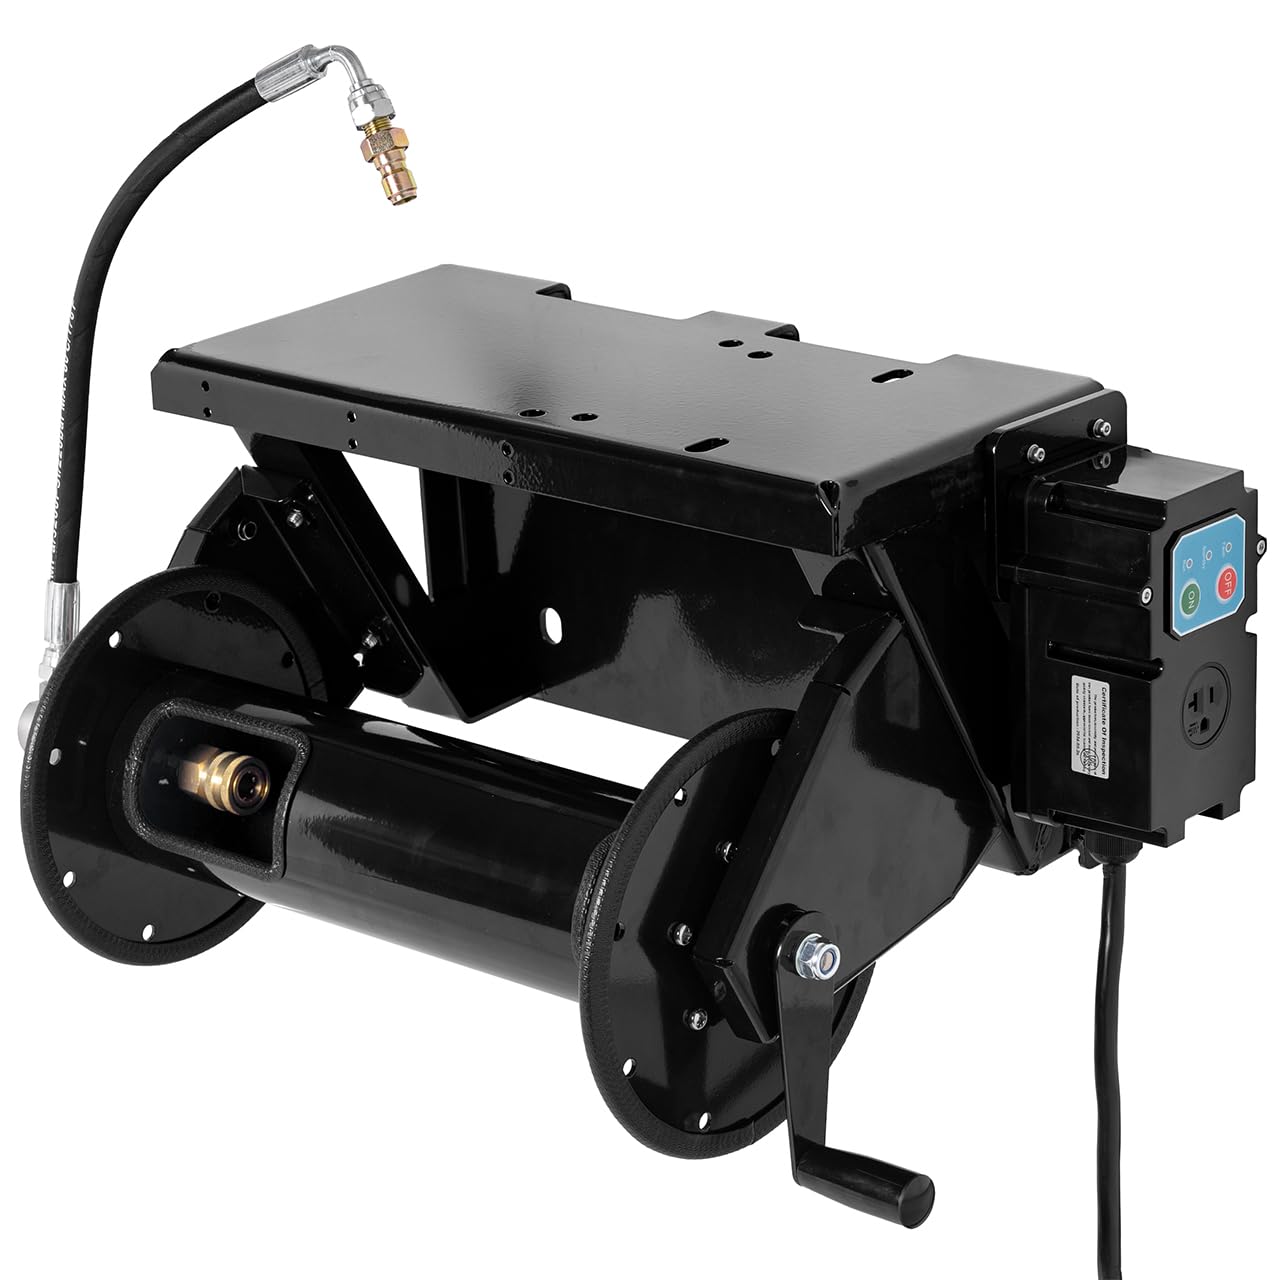
Image: Close-up of the auto start/stop control panel and manual hose reel crank.

Image: View of the internal high-pressure quick-connect fitting within the hose reel.
6. Operating Instructions
6.1 Hose Reel Operation
- Unreeling: Pull the hose gently from the reel to the desired length. The reel features a locking mechanism to hold the hose in place.
- Rewinding: To rewind the hose, disengage the locking mechanism (if engaged) and use the hand crank to manually retract the hose onto the reel. Guide the hose evenly to prevent tangling.

Image: Detail of the hose reel's locking mechanism.
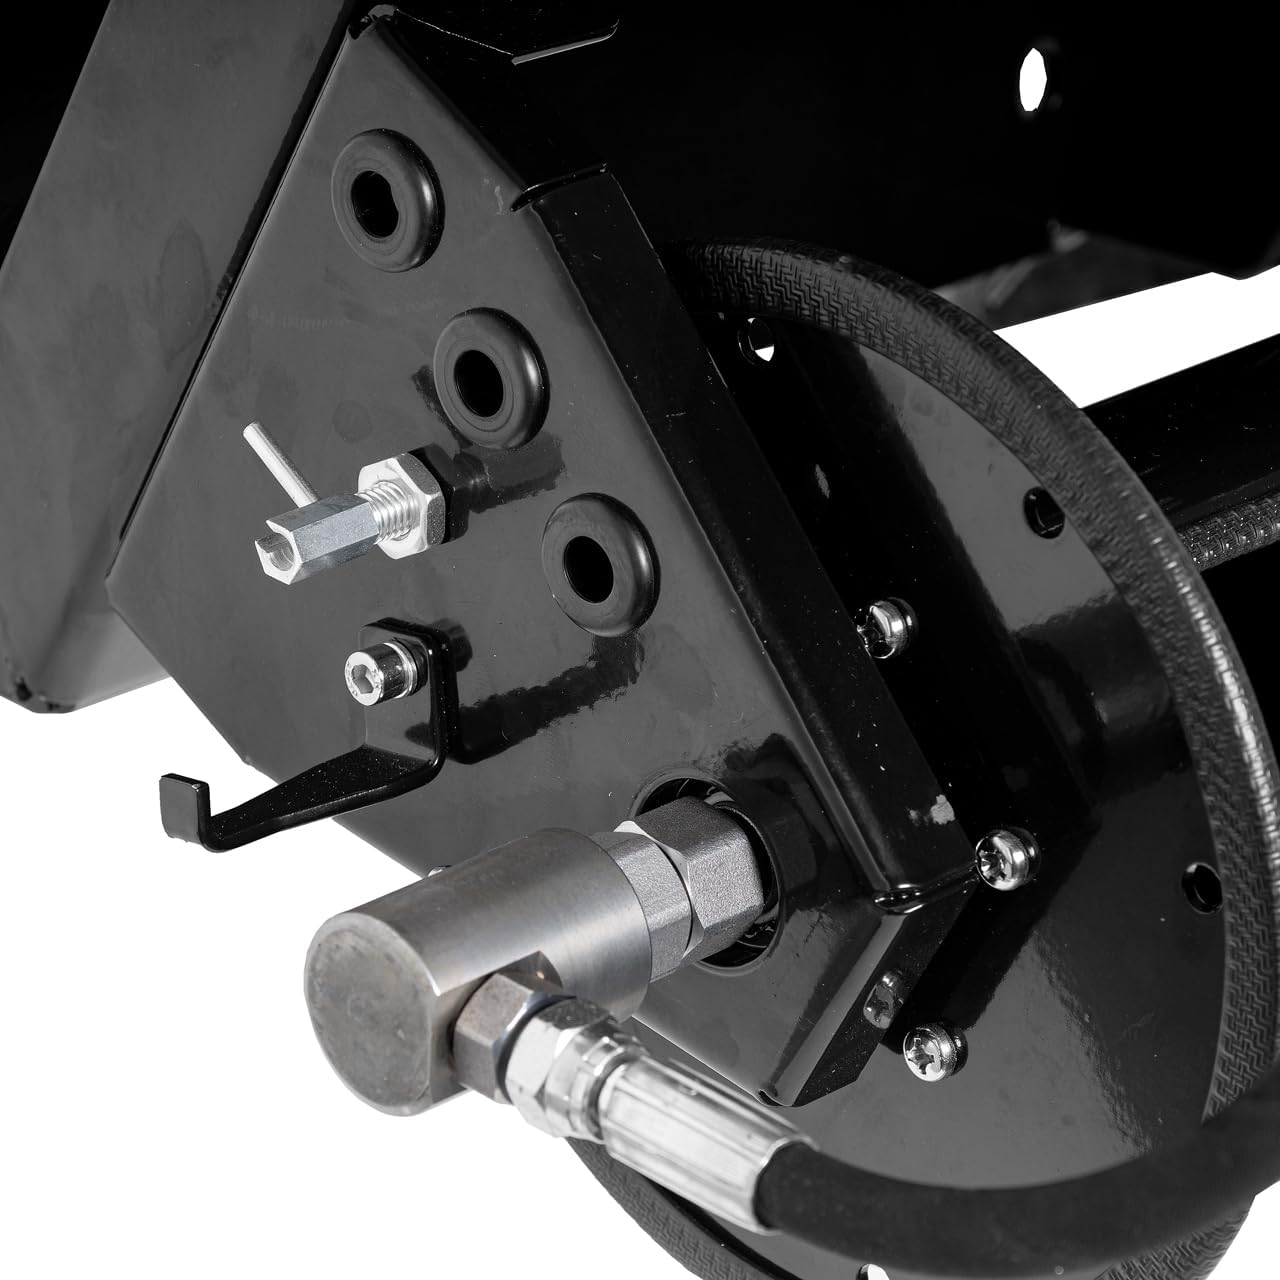
Image: Close-up of the locking pin for the hose reel.
6.2 Auto Start/Stop Module
The integrated auto start/stop module is designed to control your pressure washer. Refer to your pressure washer's specific instructions for how this module interacts with its operation. Generally, it will start the pressure washer when the spray gun trigger is pulled and stop it when released, conserving energy and reducing wear.
7. Maintenance
- General Cleaning: Keep the frame and hose reel clean from dirt and debris. Wipe down with a damp cloth as needed.
- Hose Reel Inspection: Periodically inspect the hose reel for any signs of wear or damage. The internal high-pressure jumper hose design helps prevent corrosion by keeping the arm dry.
- Connection Checks: Regularly check all hose and electrical connections for leaks or loose fittings. Tighten as necessary.
- Storage: When not in use for extended periods, ensure the hose is fully rewound and the unit is stored in a dry, protected area.
8. Troubleshooting
| Problem | Possible Cause | Solution |
|---|---|---|
| Hose reel not unwinding/rewinding smoothly | Hose tangled; locking mechanism engaged; debris in reel mechanism. | Ensure hose is not tangled; disengage locking mechanism; clear any debris. |
| Water leak from hose connections | Loose connections; worn O-rings or seals. | Tighten all connections; inspect and replace O-rings/seals if damaged. |
| Auto start/stop module not functioning | Incorrect wiring; module malfunction; pressure washer issue. | Verify all electrical connections are correct; consult pressure washer manual for compatibility; contact support if module is faulty. |
9. Warranty and Support
For warranty information or technical support, please refer to the documentation provided with your original purchase or contact CANPUMP customer service directly. Keep your purchase receipt for warranty claims.
Contact Information: Visit the CANPUMP Store on Amazon